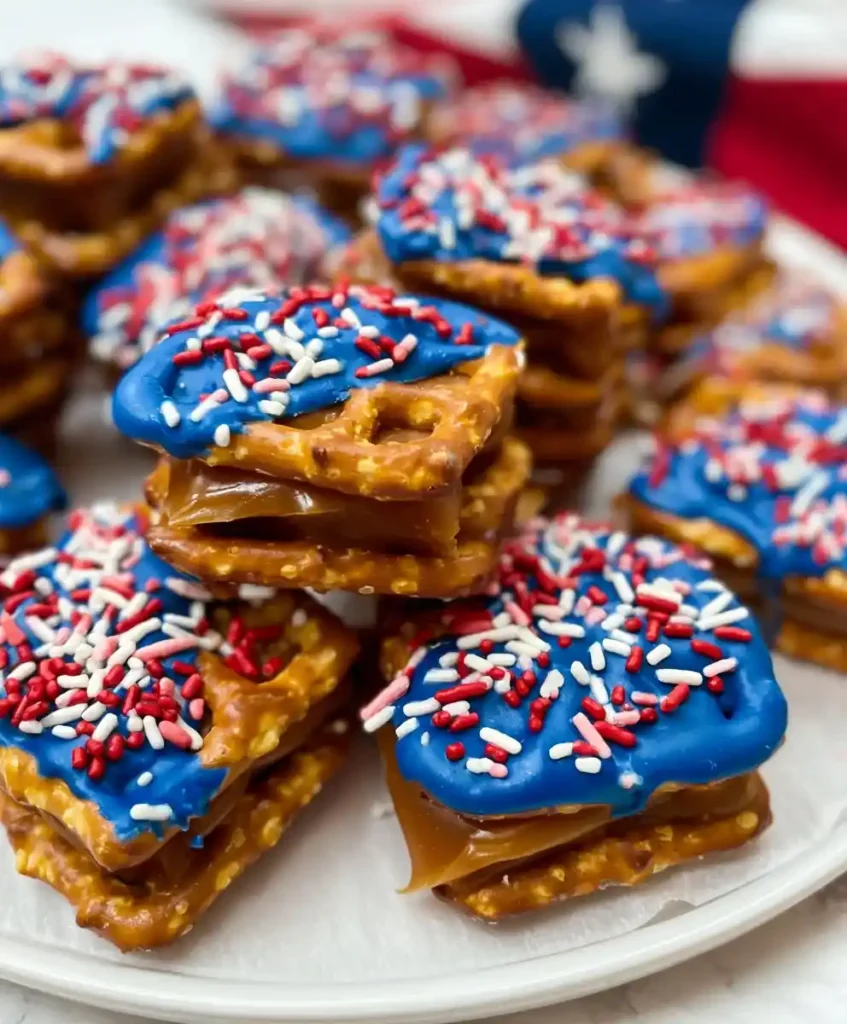
Want a dessert that’s sweet, salty, and done before your burgers finish grilling? 4th Of July Caramel Pretzel Sandwiches deliver exactly that. I first made these for a backyard cookout, and they disappeared faster than the potato salad.
No oven, no fuss, just a handful of ingredients and some patience while they set. FYI, that patience part is the hardest step.
Servings: 12 sandwiches Prep time: 15 minutes Setting time: 20 minutes Total time: About 35 minutes
Why This Caramel Pretzel Sandwich Recipe Just Works
Have you ever wondered why sweet and salty combinations taste so addictive together? Something about caramel against a crunchy pretzel just hits differently. It’s simple science, but it works every single time.
These sandwiches come together fast, without turning your kitchen into a mess. They’re customizable too, so you can match any color scheme or celebration you’ve got going on.
I’ve tried plenty of no-bake desserts that promise “quick and easy” but somehow eat up an hour. This one actually delivers on that promise, clocking in at just over thirty minutes total.
Ingredients for 4th Of July Caramel Pretzel Sandwiches
Here’s your complete ingredient list. Short, simple, and easy to grab in one grocery run.
- 24 square pretzels (Snaps-style)
- 8 soft sea salt caramels
- 1 cup blue candy melts
- 2 tablespoons patriotic sprinkles
Feel free to swap the blue candy melts for red, white, or even classic chocolate. The base recipe stays exactly the same no matter which color you pick.
How to Make 4th Of July Caramel Pretzel Sandwiches
I’m going to break every step down in detail here. No skipping ahead, no vague instructions, just a clear path from pretzel to finished sandwich.
Step 1: Prep Your Baking Sheet and Pretzels
Grab a large, rimmed baking sheet and line it completely with parchment paper. This keeps your sandwiches from sticking once the candy coating hardens, saving you a serious cleanup headache later.
Lay half of your square pretzels out in a single, evenly spaced layer across the sheet. These will act as the bottom half of each sandwich, so keep them steady and flat.
Set your remaining pretzels aside for now. You’ll use those as the top layer once the caramel goes on.
Step 2: Cut and Place Your Caramels
Take your soft sea salt caramels and use a sharp knife to slice each one into thirds. Working with soft, room-temperature caramel makes this so much easier than fighting with a cold, stiff piece.
Place one caramel piece directly on top of each bottom pretzel. Press down gently so the caramel sits flat and centered, ready to hold everything together.
Step 3: Press the Sandwiches Together
Take a second pretzel and press it firmly on top of the caramel piece, sandwiching it snugly between the two layers. Press with just enough pressure to flatten the caramel slightly without cracking your pretzels.
Repeat this process for every remaining pretzel pair. By the end, you should have a full tray of caramel-filled pretzel sandwiches, ready for their candy coating.
Step 4: Melt Your Candy Coating
Pour your blue candy melts into a microwave-safe bowl. Heat them on half power for about 2 minutes, then stop and stir thoroughly before continuing.
If the candy isn’t fully melted yet, continue heating in 1-minute intervals, stirring between each round. Slower melting on lower power keeps the candy from scorching or turning grainy.
You’ll know it’s ready once the mixture looks smooth, glossy, and pours easily off a spoon. That texture matters more than you’d think, since a thick, clumpy coating won’t cover your sandwiches evenly.
Step 5: Dip Each Sandwich Halfway
Pick up one pretzel sandwich and dip roughly half of it into the melted candy coating. A fork works great here, helping you dunk it fully without burning your fingers on warm candy.
Lift the sandwich out and let any excess coating drip back into the bowl for a few seconds. This keeps your coating layer thin and even instead of clumpy and uneven.
Place the dipped sandwich back onto your parchment-lined tray. Repeat this dipping process with every remaining sandwich before moving on.
Step 6: Add Sprinkles While Wet
Working quickly, sprinkle your patriotic sprinkles generously over the wet candy coating on each sandwich. The coating only stays sticky for a short window, so don’t dawdle on this part.
Cover the coated portion completely for the most festive look. Have you ever noticed how much better desserts taste when they actually look exciting? This step is exactly why.
Step 7: Let Them Set Completely
Leave your finished sandwiches undisturbed on the parchment paper until the candy coating hardens fully. This typically takes 15 to 20 minutes at normal room temperature.
If you’re short on time, slide the tray into the refrigerator instead. It’ll speed things up considerably, cutting your wait down to roughly ten minutes.
Once fully set, transfer your sandwiches into an airtight container. This keeps them fresh, chewy, and ready whenever a craving strikes.
Tips for Getting These Sandwiches Right
A few small habits make a noticeable difference here. None of them require extra time, just a little extra attention.
- Keep caramels at room temperature for easier cutting and pressing
- Melt candy coating slowly on half power to avoid burning it
- Use a fork for dipping to keep your fingers clean and coating even
- Apply sprinkles immediately after dipping, before the coating firms up
- Store finished sandwiches in an airtight container for maximum freshness
Fun Variations to Try
Once you’ve nailed the basic method, there’s plenty of room to experiment. Why stick to just one version when so many great options exist?
- Swap blue candy melts for milk or dark chocolate for a richer flavor
- Add crushed pecans or peanuts on top for extra crunch
- Spread a thin layer of peanut butter alongside the caramel
- Use gluten-free pretzels for anyone avoiding gluten in your group
- Try dark chocolate with reduced-sugar caramels for a lighter version
How to Serve These Sandwiches
These treats pair beautifully with a few simple additions. Here’s how I like setting mine out for guests.
- Serve alongside fresh strawberries or a colorful fruit salad
- Pair with ice-cold lemonade or a sparkling berry punch
- Arrange on a red, white, and blue platter for a striking display
- Add a small bowl of extra sprinkles for guests to customize their own
Storing Your Caramel Pretzel Sandwiches
Store finished sandwiches in an airtight container at room temperature. They’ll stay fresh and chewy for up to a week, though I genuinely doubt they’ll last that long once people find them.
Skip the refrigerator for long-term storage, since condensation can soften that crisp candy coating. Room temperature really is the better call here.
FAQs About 4th Of July Caramel Pretzel Sandwiches
Can I make these ahead of time? Yes, these hold up well made a day in advance. Store them in an airtight container to keep everything fresh until party time.
What if I can’t find blue candy melts? No problem at all. Any color candy melt works, or you can stick with classic white or milk chocolate instead.
How long do these sandwiches actually last? Stored properly in an airtight container, they’ll stay good for about a week. Realistically though, they rarely make it past day two.
Can I use different pretzel shapes? Sure, though square pretzels hold the caramel most securely. Round or twisted pretzels work too, just expect a slightly different bite.
Are these safe for kids to help make? Definitely, kids love the dipping and sprinkling parts especially. Just watch them closely around the melted candy, since it stays hot for a few minutes.
Final Thoughts on 4th Of July Caramel Pretzel Sandwiches
4th Of July Caramel Pretzel Sandwiches prove that festive desserts don’t need hours of prep or complicated techniques. A few simple ingredients and a little patience get you a genuinely impressive treat.
Get the whole family involved this year and make a batch together. Just don’t blink, because these sandwiches vanish faster than anything else on the dessert table



