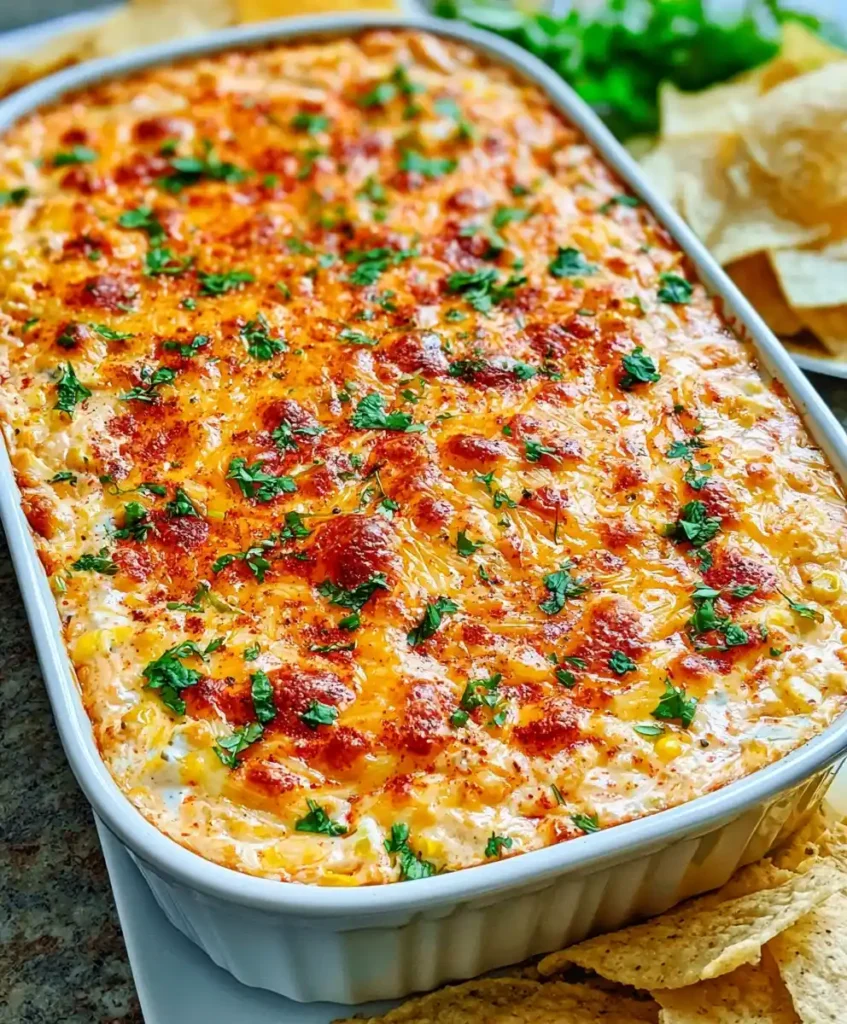
Picture this: a bubbling dish of gooey cheese, sweet corn, and just enough spice to make your taste buds sit up. That’s Cheesy Baked Mexican Corn Dip, and yes, it’s as good as it sounds.
I first made this for a random Tuesday snack craving, and now it shows up at literally every gathering I host. My friends have started requesting it by name. IMO that’s the highest compliment a dip can get 🙂
Servings: 8 as an appetizer Prep time: 10 minutes Cook time: 20–25 minutes Total time: about 35 minutes
Why This Corn Dip Deserves a Spot on Your Table
This isn’t your average bowl of chips-and-dip boredom. It’s warm, cheesy, and loaded with real Mexican-inspired flavor. Have you ever had a dip disappear in five minutes flat? This one does that.
The best part? You don’t need fancy skills or equipment. Mix, pour, bake. That’s basically the whole job.
It also scales beautifully. Doubling it for a bigger crowd works without any drama, and leftovers (if you get any) reheat like a dream.
What You’ll Need for Cheesy Baked Mexican Corn Dip
Here’s everything the recipe calls for. Nothing exotic, nothing you’ll need to hunt down at three specialty stores.
- Corn: two 15-ounce cans, drained and rinsed
- Mexican crema or sour cream: 1/2 cup
- Mayonnaise: 1/4 cup
- Shredded cheese: 4 cups total, split between the mix and the topping (a cheddar and Monterey Jack combo works great)
- Serrano or jalapeño pepper: 1, finely diced
- Lime juice: 2 to 3 tablespoons
- Chili powder: 1 teaspoon
- Smoked paprika: 1/2 teaspoon
- Salt and pepper: to taste
- Fresh cilantro: 2 to 3 tablespoons, chopped, for topping
Quick honesty moment: mayonnaise sounds like a weird choice here. I thought so too the first time. But it melts into the mix and adds a richness you can’t quite place—and no, you will not taste “mayo” in the final dish.
How to Make Cheesy Baked Mexican Corn Dip
Step 1: Get Your Oven and Dish Ready
Start by turning your oven on to 400°F so it has plenty of time to reach full heat while you prep everything else. A hot oven from the start is what gives you that deeply golden, bubbly cheese layer on top instead of a pale, half-melted one.
While that’s warming up, pull out a 3-quart baking dish, or a 9-inch pie plate if that’s what you’ve got in the cupboard. Coat the inside with a light layer of cooking spray, or brush it with a bit of oil if you’d rather skip the spray. This little step saves you from scrubbing baked-on cheese later, and honestly, that alone makes it worth doing.
Step 2: Build the Corn Mixture
Grab a large mixing bowl, because you’ll want the extra room for stirring. Add in your drained corn, the Mexican crema or sour cream, the mayonnaise, and 2 of your 4 cups of shredded cheese. Stir it all together until the cheese is evenly distributed and the mixture looks creamy rather than clumpy.
Now toss in your diced serrano or jalapeño, along with the lime juice, chili powder, smoked paprika, salt, and pepper. Mix again until every bit of corn is coated in that seasoned, creamy blend. Give it a taste right here—this is your only chance to adjust the seasoning before it hits the oven.
Step 3: Transfer Everything to the Baking Dish
Pour the mixture into your prepared baking dish and use a spatula to spread it into an even layer. Don’t rush this part; an even layer means every scoop bakes the same way, so nobody ends up with a soggy corner or a burnt edge.
Press it down gently so there are no big air pockets hiding underneath. A flat, even surface also gives the cheese topping something solid to melt onto in the next step.
Step 4: Add the Cheese Topping
Scatter the remaining 2 cups of shredded cheese over the top, covering the corn mixture completely. Don’t be shy here—more cheese means more of that stretchy, golden crust everyone fights over. If you have a cheese blend you love, this is the moment to use it.
Step 5: Bake Until Golden and Bubbly
Slide the dish into your preheated oven and let it bake for 20 to 25 minutes. Start checking around the 15-minute mark, since ovens vary and you don’t want to walk away and forget about it.
You’re looking for a top that’s fully melted, slightly browned in spots, and bubbling around the edges. That visual cue matters more than the clock—trust what you see over the timer.
Step 6: Garnish and Serve While Hot
Once it’s done, pull the dish out and let it rest for two or three minutes. This short pause keeps you from burning your tongue and lets the dip firm up just slightly so it scoops cleanly.
Sprinkle the chopped cilantro over the top for a pop of color and a fresh, herby finish. Serve it immediately with tortilla chips, because this dip is at its absolute best while it’s still warm.
Tips for Getting It Right Every Time
- Use full-fat Mexican crema for the richest flavor, though sour cream is a completely fine substitute.
- Don’t skip the mayonnaise—it’s doing more work than you’d expect.
- Leave out the pepper entirely if you’re serving kids or heat-sensitive guests.
- Mix two or three cheese varieties instead of just one for a more complex flavor.
- Always serve warm; this dip loses its charm once it cools down.
Equipment You’ll Actually Need
- A 3-quart baking dish or a 9-inch pie plate
- A large mixing bowl
- A spatula or sturdy spoon
- Cooking spray or oil for greasing
Nothing fancy, nothing you need to buy specially for this one recipe.
Fun Variations Worth Trying
Spicy version: Stir in diced green chilies or a pinch of crushed red pepper for extra heat.
Protein-packed version: Add cooked, crumbled chorizo or shredded rotisserie chicken to turn it into more of a meal.
Chili-cheese version: Mix in a can of chili for a heartier, stick-to-your-ribs take on the dip.
Veggie-forward version: Add diced bell peppers or black beans for color, crunch, and extra nutrition.
Lighter version: Swap in reduced-fat cheese, crema, and mayo without losing much of that original flavor.
What to Serve With Cheesy Baked Mexican Corn Dip
- Sturdy tortilla chips, round or triangular, for scooping
- Fresh veggie sticks like celery, carrots, or bell pepper strips
- A cold Mexican beer or a classic margarita on the side
- Extra lime wedges and cilantro for garnish
- A colorful serving dish, because presentation matters at a party
Frequently Asked Questions
Can I make this dip ahead of time? Yes. Mix everything, cover it, and refrigerate it a day in advance. When you’re ready, just bake it straight from the fridge, adding a few extra minutes to the bake time.
Can I freeze this corn dip? You can freeze the unbaked mixture for up to a month, though texture is best when it’s fresh. Thaw it overnight in the fridge, then bake as directed.
How do I control the spice level? Adjust the amount of serrano or jalapeño you use, or leave the pepper out entirely for a mild version. Diced bell pepper adds flavor without any heat if you want a middle ground.
What goes well with this dip besides chips? Fresh vegetables, pita chips, or even crusty bread slices all work nicely. It also fits right into a taco night spread as a side dish.
Can I use a different cheese? Absolutely. Pepper Jack adds extra heat, while a pre-shredded Mexican blend keeps things simple and authentic.
Is this dip very spicy? Not by default—the heat comes entirely from the amount of pepper you add. Start small, taste, and add more if you want a bigger kick.
Final Thoughts
Cheesy Baked Mexican Corn Dip earns its spot at every gathering because it’s fast, forgiving, and genuinely delicious. It bakes in under half an hour and disappears even faster once it hits the table.
So next time you need something warm, cheesy, and crowd-approved, you already know what to make. Go grab those cans of corn—your next favorite appetizer is 35 minutes away.



