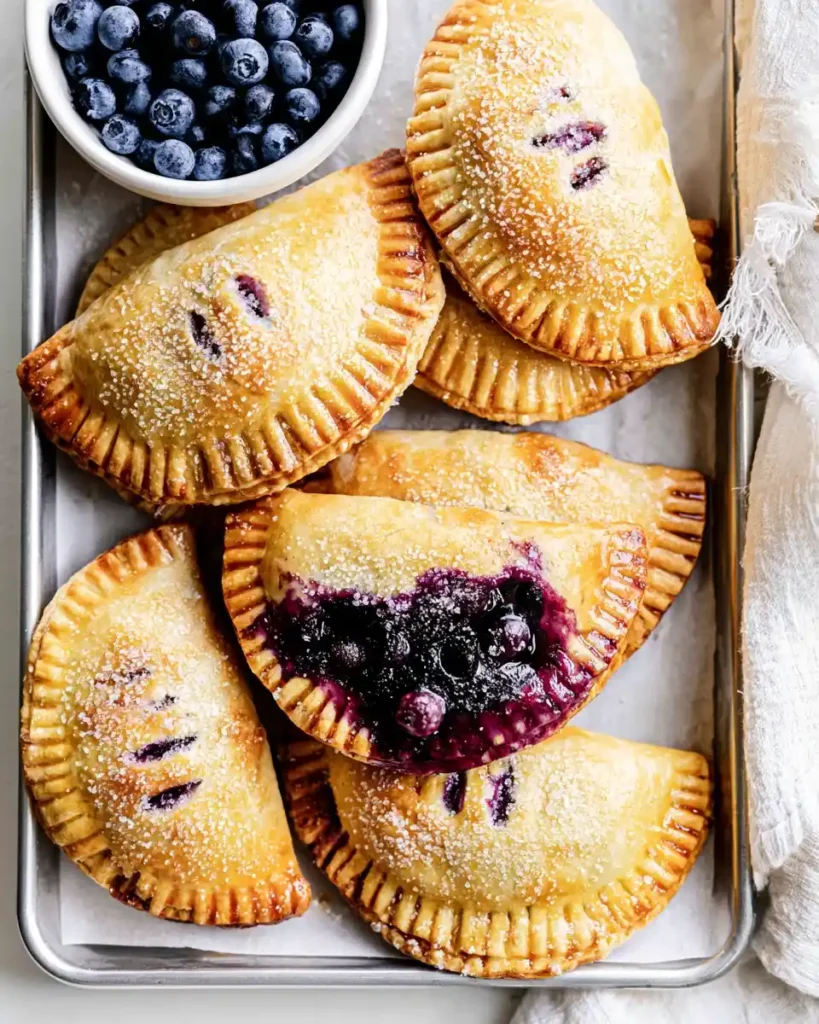
Want a dessert you can actually eat with one hand while chasing a toddler? Blueberry Hand Pies solve that exact problem. I started making these during a summer when my freezer was overflowing with berries. They’ve been my go-to ever since.
Prep time: 25 minutes Bake time: 18 minutes Total time: 45 minutes Servings: 8 hand pies
Why Blueberry Hand Pies Deserve a Spot in Your Baking Rotation
Have you ever wanted pie without dealing with a messy slice? These hand pies give you all that flaky, fruity goodness in a portable package. No fork required, no plate necessary.
I love how forgiving this recipe is for beginner bakers. IMO, if you can use a rolling pin and a fork, you can pull this off without stress. The filling comes together in one bowl.
These also freeze beautifully for later. Bake a double batch, stash half in the freezer, and future you gets a warm dessert without any extra work 🙂
What You’ll Need for Blueberry Hand Pies
Let’s run through the ingredients before we start rolling dough. Nothing here requires a special trip to a specialty store.
For the Pies
- Refrigerated pie crusts
- Blueberries, fresh or frozen
- Granulated sugar
- Lemon juice
- Lemon zest
- Cornstarch
For the Finishing Touch
- Egg
- Milk
- Coarse sugar
Exact measurements sit in the recipe summary near the bottom of this article. Screenshot it or print it, whatever keeps things simple for you.
How to Make Blueberry Hand Pies, Step by Step
Ready to get your hands a little floury? Let’s slow down and walk through each stage properly, since rushing pie dough never ends well.
Step One: Preheat the Oven and Set Up Your Station
Turn your oven to 400°F and let it fully heat while you prep everything else. Line a large baking sheet with parchment paper. This small step keeps the pies from sticking and makes cleanup painless afterward.
A properly preheated oven matters more than people realize. Sliding pies into a lukewarm oven leads to soggy, unevenly baked crusts. Give it the full time to reach temperature before baking anything.
Step Two: Roll Out the Pie Crust
Lightly flour your work surface before unrolling the refrigerated pie crusts. Use a rolling pin to smooth out any fold lines, aiming for an even thickness across the whole sheet. Rolling it thinner than the packaged crust helps it bake up crisp instead of doughy.
Grab a round cutter, roughly three inches wide, and flour the edges so it doesn’t stick. Cut as many circles as you can from each crust. Gather the scraps and reroll them once, but stop there; overworked dough turns tough instead of flaky.
Step Three: Mix the Blueberry Filling
In a medium bowl, combine your blueberries, granulated sugar, lemon juice, lemon zest, and cornstarch. Stir gently with a spoon, just enough to coat every berry without crushing them. The cornstarch is doing important work here, thickening the juices so your filling doesn’t turn into a soggy mess during baking.
Let the mixture sit for five minutes before using it. This gives the cornstarch time to start absorbing the berry juices. Skipping this step often leaves you with runnier filling than you want.
Step Four: Fill and Seal Each Pie
Lay half of your dough circles flat on your work surface. Spoon a small amount of blueberry filling into the center of each one, leaving a clear border around the edge. Overfilling is the number one reason hand pies leak during baking, so resist the urge to pile it high.
Whisk your egg and milk together in a small bowl to make an egg wash. Brush this mixture around the border of each filled circle. Place a second dough circle on top and press the edges together firmly with your fingers first.
Once the edges are pressed together, crimp them with a fork for a secure seal. Go around the entire edge, pressing down firmly each time. Cut two or three small slits into the top of each pie so steam can escape while baking.
Step Five: Bake Until Golden
Arrange the assembled hand pies on your prepared baking sheet, leaving space between each one. Brush the tops generously with the remaining egg wash for that glossy, golden finish. Sprinkle coarse sugar over the top of each pie for extra crunch and sparkle.
Bake for 15 to 18 minutes, watching closely toward the end. You’re looking for a deep golden-brown color across the top and visible bubbling filling through the slits. Pull them out once they hit that color, since overbaking dries out the crust.
Step Six: Cool and Serve
Let the hand pies rest on the baking sheet for at least ten minutes before touching them. The filling stays scorching hot right out of the oven, and biting in too early leads to regret. Once slightly cooled, they’re ready to enjoy warm or at room temperature.
Tips That Actually Make a Difference
- Keep your dough cold before rolling; warm dough tears and turns greasy fast.
- Don’t skip the cornstarch; it’s the difference between neat filling and a soupy mess.
- Crimp firmly with a fork to prevent leaks during baking.
- Cut steam vents in every pie so pressure doesn’t burst the seams.
- Freeze unbaked pies on a tray, then bag them for a ready-to-bake treat later.
Easy Variations to Try
Bored of the classic version? Try one of these swaps without changing the overall method.
- Mix in raspberries or blackberries alongside the blueberries for a berry medley.
- Add a pinch of cinnamon to the sugar mixture for warmth.
- Use gluten-free pie crusts for an easy dietary swap.
- Replace the egg wash with a flaxseed and water mixture for a vegan version.
- Add a thin layer of cream cheese inside before the filling for richness.
What to Serve Alongside Blueberry Hand Pies
These pies taste incredible fresh out of the oven, but a few pairings take them further. Try serving them warm with a scoop of vanilla ice cream melting on the side.
A drizzle of simple lemon glaze adds a nice tangy finish. Iced tea or fresh lemonade rounds out the experience for a summery spread.
Frequently Asked Questions
Can I use frozen blueberries for this recipe? Yes, and you don’t even need to thaw them first. Toss them straight into the filling mixture; they’ll bake perfectly fine straight from frozen.
How do I store leftover hand pies? Keep them in an airtight container at room temperature for up to two days. For longer storage, freeze them and reheat in the oven when you’re ready to eat.
Can I prep the filling ahead of time? Absolutely. Make the blueberry filling up to two days in advance and store it covered in the fridge until you’re ready to assemble the pies.
Why did my hand pies leak during baking? This usually means the edges weren’t crimped tightly enough or the filling was overloaded. Use less filling and press firmly along every edge.
Can I make these without a round cutter? Sure, a wide-mouth glass or jar lid works just as well. Anything with a clean, round edge gets the job done.
Do I have to use store-bought pie crust? Not at all. A homemade crust works great here too; just make sure it’s rolled thin enough to fold and crimp easily.
Final Thoughts on Blueberry Hand Pies
These little pies pack all the flavor of a classic blueberry pie into a handheld treat. The flaky crust, juicy filling, and golden top make them impossible to resist. Have you ever had a dessert disappear from the counter within minutes of coming out of the oven?
Give this recipe a shot this weekend and see for yourself. Save it, share it, and let me know how your batch turns out. This one earns a permanent spot in your dessert lineup.
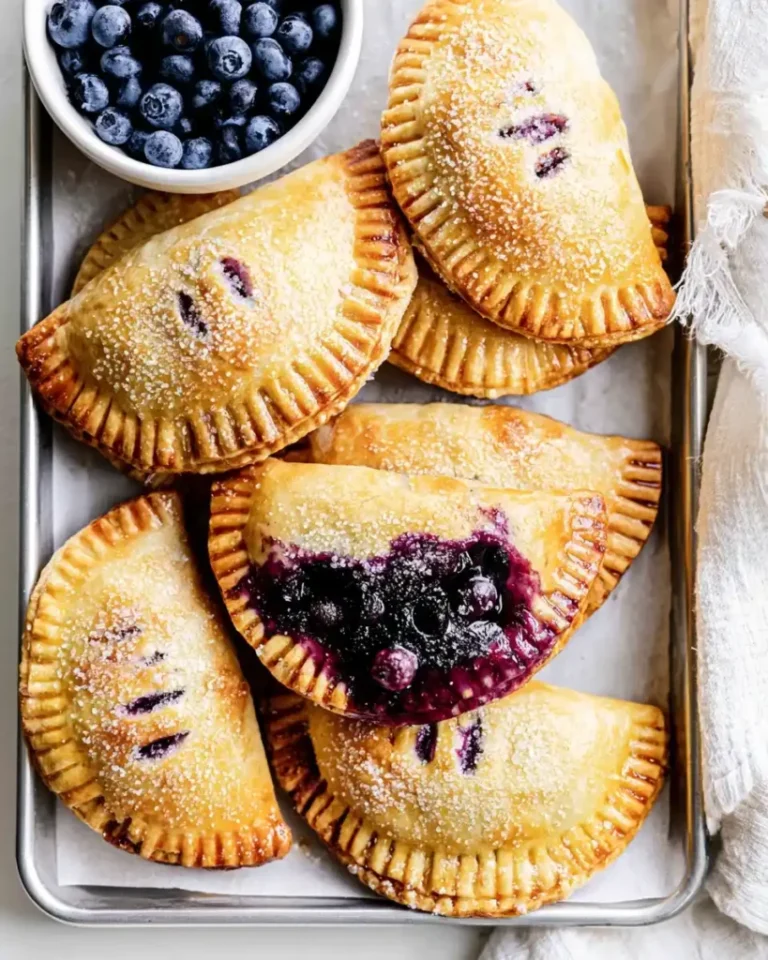
Blueberry Hand Pies
Ingredients
Method
- Preheat the oven to 400°F and line a baking sheet with parchment paper.
- Lightly flour your work surface and roll out the refrigerated pie crusts until thin.
- Use a round cutter to cut out circles from the crust and reroll scraps as needed.
- In a medium bowl, mix blueberries, granulated sugar, lemon juice, lemon zest, and cornstarch. Let sit for 5 minutes.
- Lay half of the dough circles flat. Spoon blueberry filling into the center of each, leaving a border.
- Whisk egg and milk together. Brush around the edges of the filling. Place a second dough circle on top and press edges together.
- Crimp edges with a fork and cut small slits on top for steam to escape.
- Place the assembled pies on the parchment-lined baking sheet and brush tops with the egg wash. Sprinkle coarse sugar on top.
- Bake for 15 to 18 minutes until golden brown and filling is bubbling.
- Let the pies cool on the baking sheet for 10 minutes before serving.
- Enjoy warm or at room temperature.



