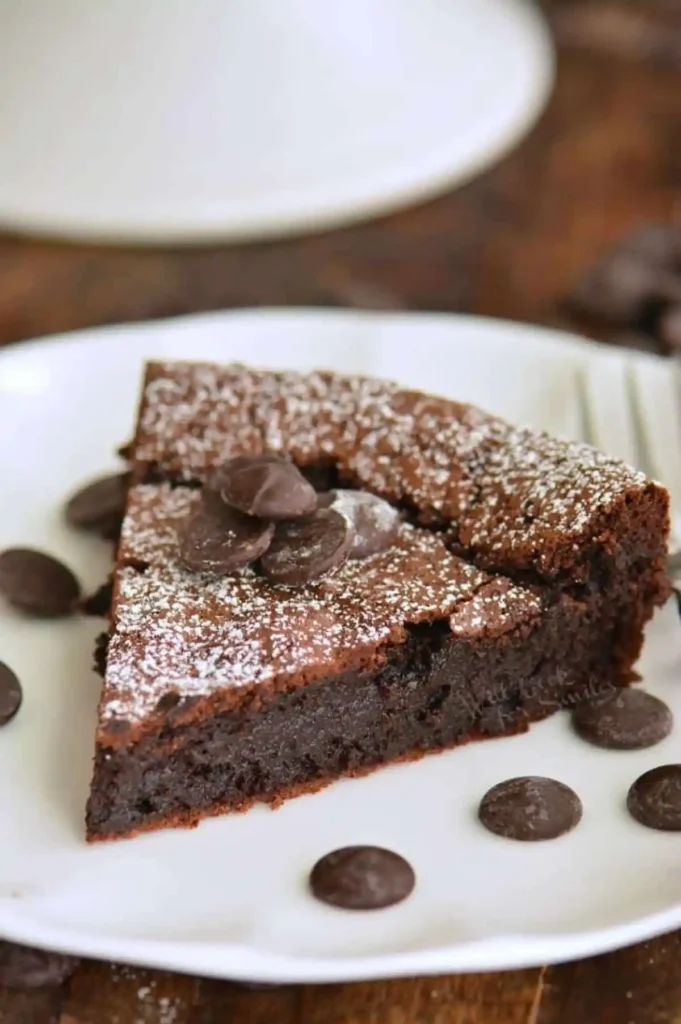
Craving a chocolate cake so rich it feels borderline illegal? This Flourless Chocolate Cake recipe delivers exactly that, and it happens to be gluten-free without even trying. I make this when I want dessert to feel like an event.
Servings: 8 slices Prep time: 15 minutes Bake time: 30 minutes Total time: 45 minutes, plus cooling
Why This Cake Deserves a Permanent Spot in Your Recipe Box
Have you ever assumed gluten-free desserts taste like a compromise? This cake proves that theory wrong completely. It skips flour entirely and somehow ends up richer because of it.
The texture here is unlike a regular cake. A crackly top layer gives way to a dense, fudgy center that almost melts on your tongue.
FYI, this is the kind of dessert that works for birthdays, holidays, or a random Tuesday when you just need chocolate. No judgment here.
What You’ll Need
Here’s everything this Flourless Chocolate Cake recipe requires. Short list, big payoff.
For the Cake
- 1/2 cup unsalted butter
- 8 ounces semi-sweet chocolate chips
- 3/4 cup granulated sugar
- 1 teaspoon vanilla extract
- 4 large eggs
- 1/3 cup unsweetened cocoa powder
- 1/2 teaspoon baking powder
- 1/4 teaspoon salt
- 1/2 teaspoon espresso powder (optional)
- Coarse sea salt, for topping
For the Chocolate Ganache
- 4 ounces baking chocolate bar
- 1/4 cup heavy whipping cream
Why Skipping the Flour Actually Improves This Cake
Sounds backwards, right? Removing an ingredient usually weakens a recipe, not strengthens it. So what’s going on here?
Flour typically holds a cake’s structure together. Without it, this cake relies entirely on eggs and melted chocolate for structure, which creates that dense, brownie-like texture people go crazy for.
How to Make Flourless Chocolate Cake, Step by Step
Let’s slow down and walk through this whole process. Every step here is simple, but a couple of small details really matter.
Step 1: Prep Your Baking Pan
Preheat your oven to 375°F. Grease an 8-inch round baking pan thoroughly, covering the bottom and all the way up the sides.
Trace the bottom of the pan onto parchment paper, cutting the circle slightly larger than the pan itself. Line the bottom of the pan with this parchment circle to guarantee an easy release later.
Step 2: Melt the Butter and Chocolate
Melt the butter first in a small saucepan over low heat. Once it’s fully melted, add the chocolate chips and stir continuously as they begin to soften.
When the chips are about halfway melted, remove the pot from the heat entirely. Keep stirring off the heat until the mixture turns completely smooth and glossy.
Step 3: Try the Microwave Method Instead
Prefer skipping the stovetop? Place the butter and chocolate chips together in a microwave-safe bowl. Heat at half power in 30-second bursts, stirring after each round.
Why bother with half power? Full power scorches chocolate fast, and burnt chocolate turns bitter and grainy. Slow and steady wins this particular race.
Step 4: Beat in the Sugar and Vanilla
Transfer your melted chocolate mixture into the bowl of an electric mixer. Add the sugar and vanilla extract, then beat everything together for just a few seconds until fully combined.
Don’t overbeat at this stage. You’re simply blending ingredients here, not trying to whip air into the mixture like you would with a fluffy cake batter.
Step 5: Add the Eggs One at a Time
Beat in the eggs individually, letting each one fully incorporate before adding the next. This gradual approach keeps the batter smooth and prevents it from looking curdled or separated.
Have you ever dumped all your eggs in at once and ended up with a lumpy mess? Adding them slowly avoids that headache entirely.
Step 6: Mix in the Dry Ingredients
Lower your mixer speed and add the cocoa powder, baking powder, and salt. If you’re using espresso powder to deepen the chocolate flavor, add it now as well.
Beat just until everything looks evenly incorporated. Overmixing at this stage can actually cause unnecessary deflation later, so stop the moment the batter looks uniform.
Step 7: Bake to Your Preferred Texture
Spread the batter evenly into your prepared pan, then sprinkle a bit of coarse sea salt across the top. Bake for 30 minutes for a firmer center, or pull it at 25 minutes if you want a gooier middle.
Why does salt on top matter so much? It cuts through the richness and makes each bite taste even more intensely chocolatey. Trust me, it’s not just for looks.
Step 8: Cool the Cake Completely
Let the cake cool to room temperature directly in the pan before attempting to remove it. Rushing this step risks tearing the delicate crust or collapsing the fudgy center.
Don’t panic if the cake sinks slightly as it cools. That’s completely normal for a flourless cake and part of what gives it that dense, fudgy interior.
Making the Chocolate Ganache Topping
A cake this rich deserves an equally decadent topping. Here’s how to pull off a smooth, glossy chocolate ganache without any fuss.
Step 1: Chop the Chocolate Finely
Finely chop your baking chocolate bar and place the pieces into a small heatproof bowl. Smaller pieces melt faster and more evenly once the hot cream hits them.
Step 2: Heat the Cream Carefully
Warm the heavy whipping cream until it’s scalding hot, but never let it reach a full boil. A microwave works fine here too, heated in short bursts to avoid overheating.
Step 3: Combine and Stir
Pour the hot cream directly over your chopped chocolate and let it sit for a minute. Stir slowly until the mixture turns completely smooth and glossy.
Still seeing stubborn chunks? Pop the bowl back in the microwave for a few seconds at half power, then stir again until everything melts together.
Why Your Cake Might Deflate, and Why That’s Fine
Noticed your cake sinking a bit as it cools? Don’t stress. This is completely normal behavior for a flourless dessert like this one.
Without flour to provide structure, the cake relies on eggs alone to hold its shape while baking. As it cools, some settling is simply unavoidable, and it actually contributes to that fudgy texture everyone loves.
Storing and Freezing Tips
Wondering how long this cake actually lasts, or if it freezes well? Here’s the rundown.
- Room temperature: Store covered for up to 2 days
- Refrigerator: Keeps well in an airtight container for about a week
- Freezer: Wrap the whole cake, or individual slices, tightly in plastic wrap and freeze for up to 4 months
- Thawing: Always thaw slowly in the refrigerator rather than at room temperature
Frequently Asked Questions
Why did my flourless chocolate cake deflate after baking? This is completely normal. Without flour providing structure, the cake settles slightly as it cools, especially if you baked it for a shorter time for a gooier center.
Can I make this cake ahead of time? Yes, this cake actually tastes great the next day. Make it a day in advance, store it covered, and add the ganache right before serving.
What can I use instead of espresso powder? Espresso powder simply deepens the chocolate flavor, so it’s entirely optional. Skip it if you don’t have any, and the cake still turns out rich and delicious.
Can I freeze flourless chocolate cake? Absolutely. Wrap the cooled cake or individual slices tightly in plastic wrap, then freeze for up to four months. Thaw slowly in the refrigerator before serving.
Why does my cake batter look curdled after adding the eggs? This usually happens from adding eggs too quickly. Add them one at a time, beating fully between each addition, to keep the batter smooth.
Can I use dark chocolate instead of semi-sweet chocolate chips? Yes, dark chocolate works well and creates a slightly more intense, less sweet flavor. Just keep the quantity the same for consistent texture.
Final Thoughts on This Flourless Chocolate Cake Recipe
This Flourless Chocolate Cake recipe proves that rich, decadent dessert doesn’t need flour, extra steps, or hours of effort. A crackly top, fudgy center, and glossy ganache come together in under an hour.
So, what’s holding you back? Grab your chocolate, preheat that oven, and treat yourself to a cake that tastes far more impressive than the effort it actually takes.
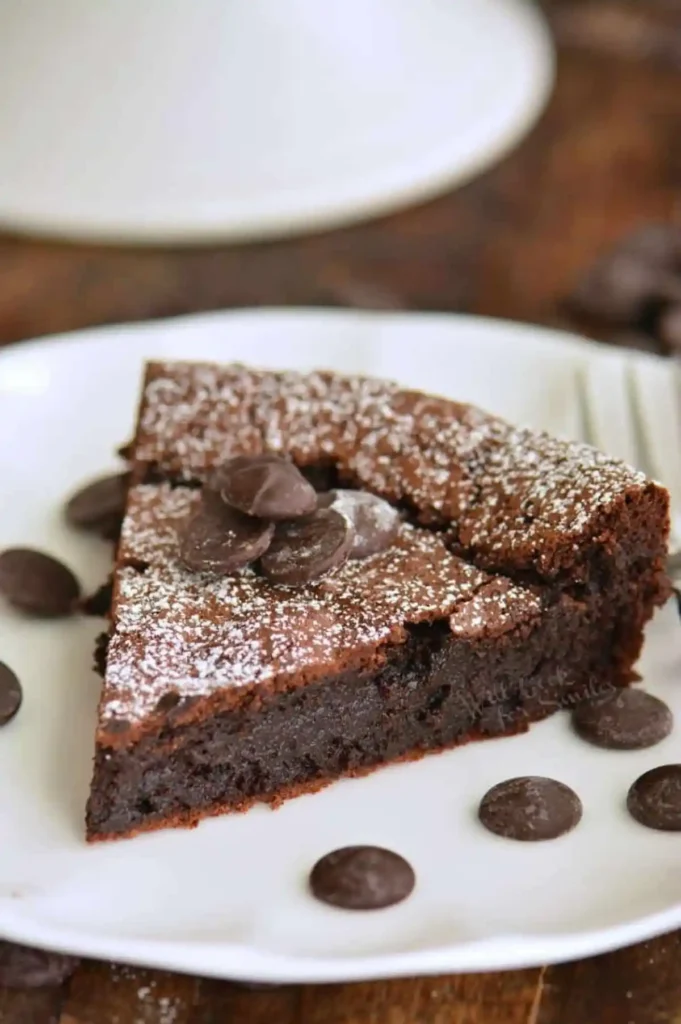
Flourless Chocolate Cake
Ingredients
Method
- Preheat your oven to 375°F. Grease an 8-inch round baking pan thoroughly, covering the bottom and all the way up the sides.
- Trace the bottom of the pan onto parchment paper, cutting the circle slightly larger than the pan itself. Line the bottom of the pan with this parchment circle.
- Melt the butter in a small saucepan over low heat. Once melted, add the chocolate chips and stir continuously as they begin to soften.
- When the chips are about halfway melted, remove the pot from the heat and keep stirring until smooth and glossy.
- Alternatively, place the butter and chocolate chips in a microwave-safe bowl and heat at half power in 30-second bursts, stirring after each round.
- Transfer the melted chocolate mixture into an electric mixer bowl. Add sugar and vanilla extract, then mix for a few seconds until combined.
- Beat in the eggs one at a time, letting each fully incorporate before adding the next.
- Add cocoa powder, baking powder, and salt. If using, add espresso powder now. Mix until just incorporated.
- Spread the batter into the prepared pan and sprinkle coarse sea salt on top.
- Bake for 25-30 minutes depending on your texture preference.
- Let the cake cool to room temperature in the pan before removing it.
- Finely chop the baking chocolate and place it in a heatproof bowl.
- Heat the cream until scalding hot but not boiling. Pour over chopped chocolate and let it sit for a minute, then stir until smooth.



