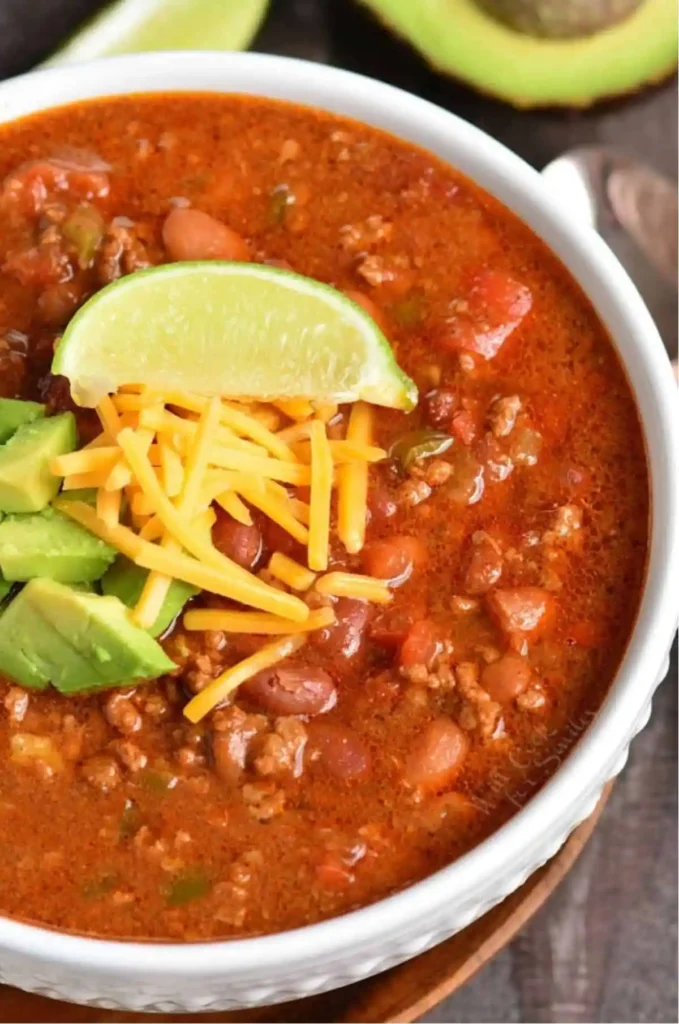
Chili usually means hours of simmering, but what if I told you that’s not actually required? Instant Pot Chili gets you hearty, deeply flavored chili in under an hour, no all-day babysitting a pot required.
I used to make chili on the stovetop for a couple of hours, letting the meat stew low and slow. Once I switched to the Instant Pot, I got the same tender, flavorful result in a fraction of the time.
This recipe serves 6 generously and takes about 50 minutes total, including prep and pressure release. That’s a full pot of chili faster than most delivery orders show up.
Why Instant Pot Chili Beats the Stovetop Version
Have you ever wondered why pressure-cooked chili tastes just as rich as chili that simmered for hours? The sealed environment locks in moisture and flavor, cooking everything fast without sacrificing depth.
I make chili in the Instant Pot now instead of the stovetop, and IMO the time saved is a total game-changer. Here’s why it wins:
- Ready in under an hour — no multi-hour simmer required
- Tender meat every time — pressure cooking breaks it down fast
- Deep, developed flavor — sealed cooking traps everything inside
- One-pot convenience — sauté and pressure cook in the same pot, less cleanup
What You’ll Need for Instant Pot Chili
This ingredient list covers your veggies, protein, beans, and seasonings. Here’s exactly what to gather before you start.
Servings: 6 Prep time: 15 minutes Cook time: 35 minutes (includes pressure build and release) Total time: 50 minutes
Ingredients
- neutral oil, such as avocado or olive (1 tablespoon)
- yellow onion, diced (1 medium)
- bell pepper, diced (1)
- garlic cloves, minced (3)
- jalapeño, diced (1)
- fresh tomatoes, diced (2 medium)
- ground beef, 85/15 (1.5 pounds)
- canned fire-roasted diced tomatoes (14 ounces)
- tomato sauce (8 ounces)
- beef stock (1/2 cup)
- pinto beans, drained (15 ounces)
- kidney beans, drained (15 ounces)
- salt (1 teaspoon)
- ground cumin (2 teaspoons)
- dried oregano (1 teaspoon)
- smoked paprika (1 teaspoon)
- ancho chili powder (1 tablespoon)
Let’s Actually Make This Chili
This recipe moves through a few distinct stages, but nothing here is complicated. Grab your Instant Pot and let’s get cooking.
Step 1: Prep All Your Ingredients First
Dice your onion, bell pepper, jalapeño, and fresh tomatoes before you turn anything on. Mince the garlic and drain the liquid from your canned beans.
Having everything prepped ahead of time keeps this recipe moving smoothly once the sautéing starts. Chili with this many ingredients goes a lot faster when you’re not chopping mid-cook.
Step 2: Sauté the Onion and Bell Pepper
Set your Instant Pot to the sauté function and let it heat for a couple of minutes. Add the oil, then toss in the diced onion and bell pepper, stirring occasionally until they soften.
This usually takes about 3-4 minutes. Softening these vegetables first builds a flavor base that carries through the entire pot of chili.
Step 3: Add the Garlic, Tomatoes, and Jalapeño
Stir in the minced garlic and let it cook until fragrant, which only takes about 30 seconds. Add your fresh diced tomatoes and jalapeño next, stirring everything together.
Let this mixture sauté for a few more minutes until the fresh tomatoes start breaking down slightly. The smell at this point genuinely gets people wandering into the kitchen asking what’s cooking.
Step 4: Brown the Ground Beef
Add your ground beef directly to the pot and break it apart with a wooden spoon as it cooks. Keep stirring and breaking up clumps until the meat is mostly browned throughout.
This step takes several minutes, and you want to work through most of the lumps here. Smaller, evenly browned pieces of beef distribute better throughout the finished chili.
Step 5: Add Everything Else
Once your beef is mostly browned, add the pinto beans, kidney beans, canned fire-roasted tomatoes, tomato sauce, beef stock, salt, cumin, oregano, smoked paprika, and ancho chili powder. Stir thoroughly until everything combines evenly.
Have you ever wondered why some chili tastes flat despite having plenty of ingredients? Under-seasoning and uneven mixing are usually the culprits, so take an extra minute to stir this thoroughly.
Step 6: Seal and Pressure Cook
Close the Instant Pot lid and make sure it locks into place. Turn the valve to the sealing position, then select the “beans/chili” setting, or set it to cook on high pressure for 30 minutes if your model doesn’t have that option.
The pot will take several minutes to build pressure before the actual cooking countdown starts. This is completely normal, so don’t panic if nothing seems to be happening at first.
Step 7: Release the Pressure
Once the cooking cycle finishes, let the pot sit undisturbed for a natural pressure release of about 10 minutes. After that, carefully switch the valve to release any remaining pressure.
Keep your hands and face away from the steam vent during this quick release. It’s hot, it’s loud, and it’s completely normal for chili made in a pressure cooker.
Step 8: Stir and Serve
Open the lid once the pressure has fully released and give the chili a good stir. Taste it and adjust the seasoning if needed, since flavors sometimes mellow slightly under pressure.
Ladle the hot chili into bowls and top with whatever you love. This is the part where all that prep work finally pays off 🙂
My Honest Tips for the Best Instant Pot Chili
I’ve made this recipe more times than I can count during colder months. Here’s what genuinely matters.
- Don’t skip the liquid minimum — a pressure cooker needs at least 1 cup of thin liquid to build pressure properly
- Expect a slightly soupier chili — liquid doesn’t evaporate under pressure the way it does on the stovetop
- Always scrape the bottom before sealing — this helps avoid a burn notice from stuck-on food
- Adjust jalapeño heat by removing seeds — leave them in for spicier chili, remove them for a milder bite
- Use 85/15 ground beef — this fat ratio gives the best flavor and texture without becoming greasy
Understanding the Burn Notice
If you’ve used an Instant Pot before, you’ve probably seen the dreaded burn notice at some point. It means the pot detects food stuck to the bottom or insufficient liquid to build pressure properly.
To avoid it, always scrape the bottom of the pot thoroughly after sautéing, especially after browning meat. Make sure there’s enough liquid in the pot before sealing the lid, since that’s the most common cause of this frustrating message.
What to Serve with Instant Pot Chili
Chili practically begs for toppings and sides. Here’s what I usually set out alongside a big pot.
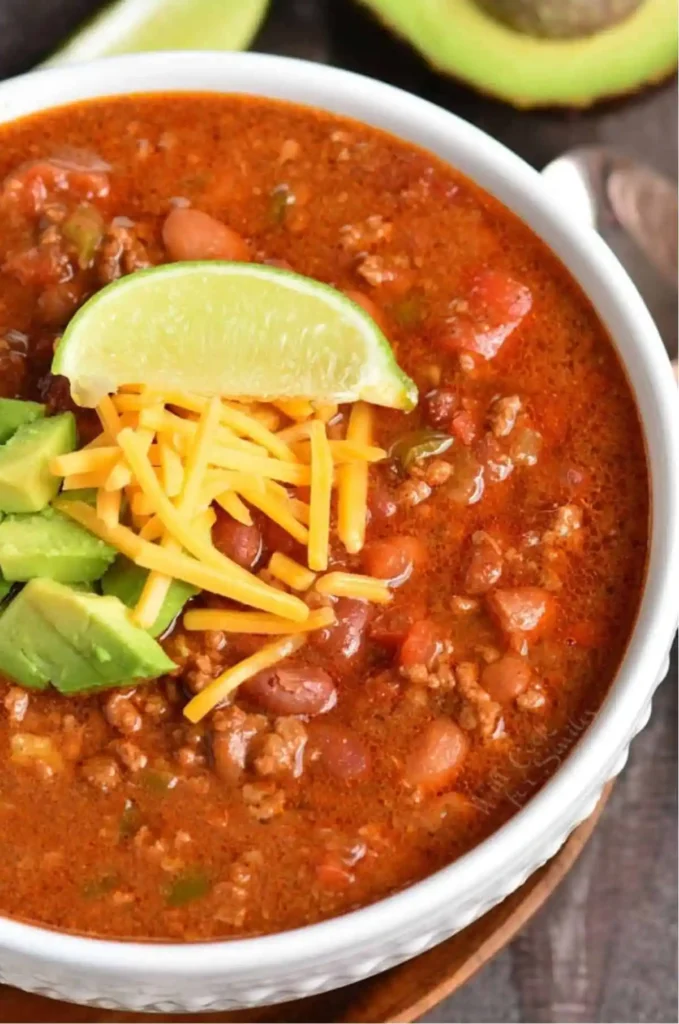
- shredded cheddar cheese and diced avocado
- a squeeze of fresh lime
- sour cream and chopped green onions
- cornbread or tortilla chips on the side
Storing and Freezing Chili
Got leftovers? Cool the chili to room temperature before storing it in an airtight container in the fridge for 4-5 days. It actually tastes even better the next day once the flavors settle.
To freeze, cool the chili quickly by placing the pot in a larger container filled with ice, stirring occasionally. Portion it into freezer bags, remove excess air, and freeze for up to 3 months, then thaw overnight in the fridge before reheating.
Frequently Asked Questions
What Instant Pot setting should I use for chili?
Use the “beans/chili” setting if your model has it, or set it to cook on high pressure for 30 minutes. Either option delivers tender meat and well-developed flavor.
Why is my Instant Pot chili soupier than stovetop chili?
Liquid doesn’t evaporate under pressure the way it does in an open pot on the stovetop. This recipe already accounts for that by using less added liquid than a traditional stovetop version.
Can I use different beans in this chili?
Absolutely, swap in black beans, cannellini beans, or navy beans based on your preference. Just make sure to drain them before adding them to the pot.
What causes a burn notice in the Instant Pot?
It usually means there’s stuck-on food on the bottom of the pot or not enough liquid to build pressure. Scraping the bottom thoroughly after sautéing helps prevent this issue.
Can I make this chili ahead of time?
Yes, chili often tastes even better the next day after the flavors have had time to meld. Store it in the fridge for up to 4-5 days or freeze it for longer storage.
Final Thoughts
Instant Pot Chili proves that rich, hearty flavor doesn’t require hours of simmering on the stove. Between the fast pressure cooking and that loaded blend of beef, beans, and spices, this chili delivers big comfort in under an hour.
Make a pot this week when the temperature drops even a little. Once you taste how fast and flavorful this version comes together, the all-day stovetop method might just become a distant memory.
Instant Pot Chili
Ingredients
Method
- Dice your onion, bell pepper, jalapeño, and fresh tomatoes before you turn anything on. Mince the garlic and drain the liquid from your canned beans.
- Set your Instant Pot to the sauté function and let it heat for a couple of minutes. Add the oil, then toss in the diced onion and bell pepper, stirring occasionally until they soften (about 3-4 minutes).
- Stir in the minced garlic and let it cook until fragrant, approximately 30 seconds. Add your fresh diced tomatoes and jalapeño next, stirring everything together. Let this mixture sauté for a few more minutes.
- Add your ground beef directly to the pot and break it apart with a wooden spoon as it cooks. Stir until the meat is mostly browned.
- Once the beef is mostly browned, add the pinto beans, kidney beans, canned fire-roasted tomatoes, tomato sauce, beef stock, salt, cumin, oregano, smoked paprika, and ancho chili powder. Stir thoroughly.
- Close the Instant Pot lid and lock it into place. Turn the valve to the sealing position, then select the 'beans/chili' setting or cook on high pressure for 30 minutes.
- Let the pot sit undisturbed for a natural pressure release of about 10 minutes. Carefully switch the valve to release any remaining pressure.
- Open the lid once the pressure has fully released and give the chili a good stir. Adjust the seasoning if needed.
- Ladle the hot chili into bowls and top with desired toppings such as shredded cheddar cheese, diced avocado, fresh lime, sour cream, and chopped green onions.