Servings: 1 large loaf (about 10 slices) | Prep Time: 20 minutes | Rise Time: 1 hour | Bake Time: 25-30 minutes | Total Time: Around 1 hour 50 minutes
You know that sound a good loaf makes when you tear into it? That crackly, almost violent crunch? That’s what we’re making today, and honestly, it’s easier than you think.
I used to believe crusty bread required some ancient family secret or a wood-fired oven in my backyard. Turns out, I just needed flour, patience, and a little garlic. Ready to change your weeknight dinners forever?
This garlic-herb crusty bread recipe is my go-to whenever I want to impress people without actually working that hard. IMO, that’s the best kind of recipe.
Why This Garlic-Herb Crusty Bread Deserves a Spot in Your Kitchen
Let’s be honest, the internet is drowning in bread recipes. So why should you trust this one? Because it’s foolproof, forgiving, and doesn’t demand a culinary degree.
You don’t need a stand mixer, a bread machine, or any fancy gadgets. Your hands do all the heavy lifting here, and there’s something oddly satisfying about that. Kneading dough is basically free therapy.
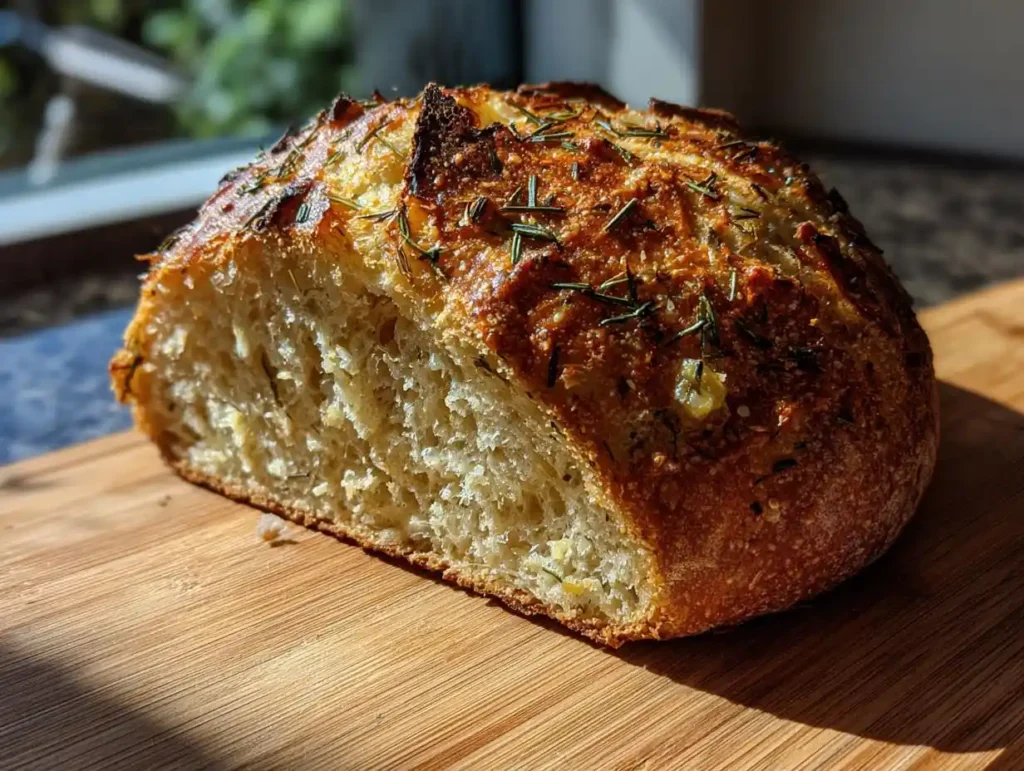
The garlic and herbs aren’t just an afterthought either. They get pressed right into the crust, roasting into these little pockets of flavor that make each bite unpredictable in the best way.
What You’ll Need: Garlic-Herb Crusty Bread Ingredients
Here’s the good news: this ingredient list is short. No obscure flours, no specialty yeast strains, nothing you’ll have to order online and wait a week for.
- 3 cups all-purpose flour
- 1 teaspoon salt
- 1 teaspoon sugar
- 1 packet (2¼ teaspoons) active dry yeast
- 1¼ cups warm water (about 110°F)
- 3 tablespoons olive oil
- 4 cloves garlic, minced
- 1 tablespoon dried rosemary
- 1 tablespoon dried thyme
That’s it. Nine ingredients standing between you and a loaf that smells like an Italian bakery decided to move into your kitchen.
How to Make Garlic-Herb Crusty Bread, Step by Step
Alright, let’s actually make this thing. Grab a big bowl, roll up your sleeves, and don’t stress about perfection. Rustic bread is supposed to look a little imperfect, and that’s exactly the charm.
Step One: Mix Your Dry Ingredients First
Start by whisking the flour, salt, sugar, and yeast together in a large bowl. Whisking matters here because it distributes the yeast evenly, so you don’t end up with weird dense spots later.
Make a small well in the center of that flour mixture before adding anything wet. This little trick helps the water soak in gradually instead of turning half your bowl into a sticky mess immediately.
Step Two: Add the Wet Ingredients Slowly
Pour the warm water and olive oil into that well you just made. Stir everything together with a wooden spoon or your hand until a shaggy, rough dough starts forming. It won’t look pretty yet, and that’s completely normal.
Have you ever stared at a bowl of shaggy dough and wondered how it becomes bread? Give it time. Every smooth, bouncy loaf started exactly this messy.
Step Three: Knead Until It Feels Right
Turn the dough out onto a lightly floured counter. Knead it for about eight to ten minutes, pushing with the heel of your hand, folding it over, and rotating a quarter turn each time.
You’re looking for a dough that feels smooth, slightly tacky, and springs back when poked. If it clings stubbornly to your fingers, sprinkle in a touch more flour, just a tablespoon at a time. Don’t dump in extra flour all at once, or you’ll end up with a dense, sad loaf instead of something light and airy.
Step Four: Let It Rise Somewhere Warm
Shape the kneaded dough into a smooth ball and place it in a lightly oiled bowl. Cover it with a damp kitchen towel or plastic wrap, then tuck it somewhere warm and draft-free for about an hour.
A turned-off oven with the light on works great for this. So does the top of your refrigerator, honestly. The dough should roughly double in size, and when you press two fingers into it, the indent should stay put.
Step Five: Shape the Loaf
Once risen, gently punch down the dough to release the air bubbles. Punching down dough is oddly one of life’s small pleasures, ranking somewhere between popping bubble wrap and cracking your knuckles.
Shape it into a round or oval loaf, tucking the edges underneath to build surface tension. That tension is what gives your bread a nice, even rise instead of collapsing sideways in the oven.
Step Six: Add the Garlic-Herb Topping
Mix your minced garlic with the dried rosemary and thyme in a small bowl. Crush the herbs gently between your fingers first, since this releases their oils and wakes up their flavor considerably.
Press this garlic-herb mixture generously across the top of your shaped loaf. Don’t be timid about it. The garlic will mellow and caramelize slightly in the oven, so more is genuinely more here.
Step Seven: Bake to Golden Perfection
Slide the loaf onto a parchment-lined baking sheet and into a preheated 400°F oven. Bake for 25 to 30 minutes, resisting every urge to open that oven door early.
You’ll know it’s ready when the crust turns deep golden brown and the bottom sounds hollow when tapped. If it still sounds dull or dense, give it another five minutes and check again.
Step Eight: Let It Cool Before Slicing
This is the hardest step, no contest. Let your garlic-herb crusty bread cool completely on a wire rack, which takes roughly 30 minutes.
Slicing too early releases steam that should be setting the crumb structure. I know the smell is torture. Wait anyway, because gummy bread is a genuine tragedy nobody deserves.
Tips for Nailing This Garlic-Herb Crusty Bread Every Time
A few small details separate decent bread from bread that gets requested at every family gathering. Keep these in mind and you’re basically set.
- Check your water temperature. Too hot kills the yeast, too cold puts it to sleep. Warm bath water, around 110°F, is the sweet spot.
- Use fresh garlic, not the jarred stuff. The flavor difference is honestly night and day, and it’s worth the extra thirty seconds of mincing.
- Don’t rush the kneading. Those eight to ten minutes build gluten structure, which is exactly what gives you that satisfying chew.
- Score the top before baking if you want an extra rustic, bakery-style look. A simple X with a sharp knife does the trick.
Fun Variations to Try Once You’ve Mastered the Basics
Once this recipe becomes second nature, start experimenting. Bread dough is surprisingly forgiving, and small swaps can completely change the personality of your loaf.
- Cheesy version: Fold ½ cup grated parmesan into the dough and sprinkle more on top before baking.
- Whole wheat twist: Replace one cup of all-purpose flour with whole wheat for a nuttier, heartier bite.
- Roasted garlic upgrade: Swap raw garlic for roasted cloves for a sweeter, mellower flavor throughout.
- Everything bagel spin: Sprinkle everything bagel seasoning on top alongside the garlic-herb mix for extra crunch.
Storing and Reheating Your Loaf
If your bread somehow survives the day, here’s how to keep it tasting fresh. Wrap the cooled loaf in a clean kitchen towel and store it in a paper bag at room temperature for up to two days.
Need it to last longer? Slice it first, wrap portions in foil, then freeze in a zip-top bag for up to three months. Reheat straight from frozen in a 350°F oven for about ten minutes.
Whatever you do, skip the microwave. It turns that gorgeous crust into something rubbery and honestly kind of sad 🙁
Garlic-Herb Crusty Bread FAQs
Can I use fresh yeast instead of dry yeast? Yes, absolutely. Swap the packet of active dry yeast for about a half-ounce cake of fresh yeast, crumbling it directly into the flour mixture instead of proofing it separately.
Why did my bread turn out dense instead of airy? This usually points to yeast trouble or an underdeveloped rise. Double-check your water temperature, avoid adding excess flour while kneading, and make sure the dough actually doubles before shaping.
Can I freeze this garlic-herb crusty bread? Definitely. Slice the cooled loaf first, since slicing frozen bread is genuinely miserable. Wrap portions individually and freeze for up to three months without losing quality.
Can I substitute fresh herbs for dried ones? Yes, and many bakers actually prefer it. Use roughly double the amount of fresh herbs compared to dried, since fresh herbs carry less concentrated flavor per teaspoon.
How do I know for sure the bread is fully baked? Tap the bottom of the loaf. A hollow sound means it’s done. If you want certainty, check the internal temperature, which should land somewhere between 190°F and 200°F.
Do I need any special equipment to make this bread? Not at all. A mixing bowl, a baking sheet, and your own two hands handle everything here. A stand mixer helps but isn’t required in the slightest.
Final Thoughts on This Garlic-Herb Crusty Bread
This garlic-herb crusty bread recipe proves that incredible bread doesn’t require professional training or expensive equipment. Nine simple ingredients, a bit of patience, and your own hands get the job done beautifully.
Have you ever made something this simple that impressed people this much? That’s the magic of homemade crusty bread, and honestly, it never gets old.
Go make a loaf this weekend. Your kitchen will smell incredible, your house will feel like an actual home, and FYI, you’ll probably never buy store-bought bread again.