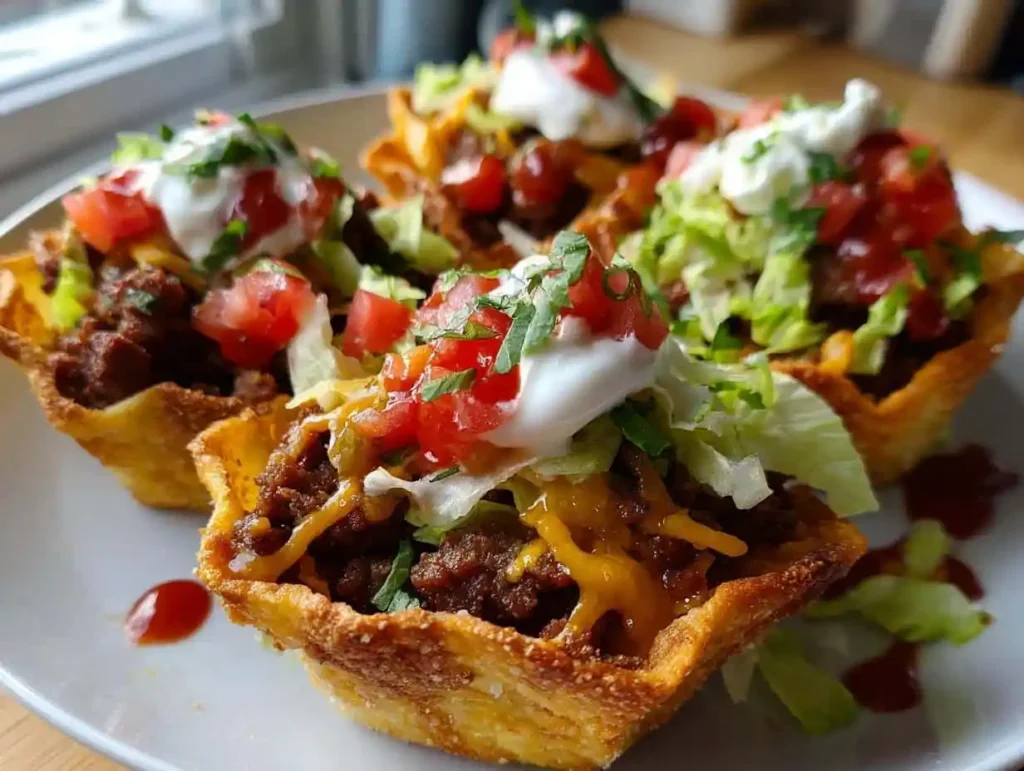
Tacos taste amazing, but let’s be honest, the shells crack and everything spills everywhere. Crispy Taco Cups fix that entire problem while keeping every bit of flavor you actually crave.
I started making these after one too many taco nights ended with toppings scattered across the table. One batch of these little cups later, my family never asked for regular taco shells again. That’s a real win in my book.
Servings: 12 cups (about 4 servings) | Prep time: 15 minutes | Cook time: 20 minutes | Total time: 35 minutes
Why Crispy Taco Cups Deserve a Spot in Your Rotation
Have you ever noticed how taco shells crumble the second you take a bite? These cups solve that by baking sturdy little tortilla bowls that actually hold their shape. That structural upgrade alone makes them worth trying.
I’ve served these at birthday parties, casual game nights, and one very last-minute potluck where I had exactly thirty minutes to pull something together. Every time, they disappear faster than I can refill the platter. That kind of track record speaks for itself.
Here’s the honest part: a lot of taco cup recipes skip the oiling step and end up with chewy, floppy shells instead of crisp ones. This version treats that step as essential, because a soggy cup defeats the entire purpose of making these in the first place.
What You’ll Need for Crispy Taco Cups
Round up these ingredients before you start cooking. Nothing here requires a specialty grocery run, just straightforward staples that come together fast.
- 1 pound ground beef, 85 percent lean
- 1 packet taco seasoning (1 ounce)
- 1/4 cup water
- 12 small flour tortillas, 6-inch diameter
- 2 tablespoons olive oil
- 1 1/4 cups shredded cheddar cheese
- 1/2 cup diced tomatoes, well drained
- 1/3 cup shredded lettuce
- 1/4 cup sour cream
- 1/4 cup salsa
IMO, using half the water your seasoning packet calls for makes a real difference here. It keeps the filling thick, which means less liquid seeping into your crispy shells later.
How to Make Crispy Taco Cups
This process breaks into three manageable stages. None of them require special skills, so let’s walk through each one in detail to guarantee a crispy, sturdy result every time.
Step 1: Brown the Beef and Build the Filling
Heat a medium skillet over medium heat and add the ground beef. Break it apart with a wooden spoon as it cooks, aiming for small, even crumbles rather than large chunks. This takes about six to eight minutes until no pink remains.
Once browned, tilt the pan and carefully spoon off the excess grease, since leftover fat makes your filling greasy instead of flavorful. Stir in the taco seasoning along with the quarter cup of water, then let everything simmer together for about four minutes. The filling should look thick and glossy, not soupy.
Step 2: Shape and Pre-Bake the Tortilla Cups
While the beef simmers, preheat your oven to 375°F and lightly grease a standard 12-cup muffin tin. Brush both sides of each tortilla lightly with olive oil, since this single step is what actually creates that shattering crispiness everyone loves.
Gently press each oiled tortilla down into a muffin cup, folding the edges naturally to form a small bowl shape. Don’t stress over minor tears here; they’ll still crisp up beautifully and hold the filling just fine. Bake the empty shells for eight to ten minutes, watching for a light golden color around the edges.
Step 3: Fill, Top, and Bake Again
Pull the tray from the oven once the shells look golden and sturdy. Working quickly while they’re still warm, spoon roughly two tablespoons of the seasoned beef filling into each cup. Sprinkle shredded cheddar generously over the top of every single one.
Return the filled cups to the oven for another three to five minutes, just long enough for the cheese to melt completely and turn slightly bubbly. Remove the tray and let everything cool for one minute before adding your cold toppings, since piling lettuce and sour cream on immediately can wilt them from residual heat.
Step 4: Top and Serve Immediately
Add diced tomatoes, shredded lettuce, a small dollop of sour cream, and a spoonful of salsa to each finished cup. Work quickly here, since these taste absolute best served warm, right when the cheese is still slightly gooey and the shells are at peak crispiness.
Arrange the finished cups on a serving platter and watch how fast they disappear. Trust me, setting these out at any gathering guarantees you’ll be fielding recipe requests before the tray even empties.
Tips for Perfectly Crispy Taco Cups
A handful of small details separate a decent batch from a genuinely crave-worthy one. I picked these up through plenty of trial runs in my own kitchen.
- Drain your tomatoes thoroughly before adding them, since excess moisture is the single biggest enemy of a crispy shell.
- Double up the tortillas for sturdier cups if you’re planning heartier fillings like extra beef or beans.
- Prep toppings ahead of time so assembly moves quickly once the shells come out of the oven, since timing really matters here.
- Keep the oven on low while guests arrive, giving you the option for a quick two-minute reheat right before serving.
Fun Variations Worth Trying
Once the classic version feels easy, start experimenting with different fillings. This recipe adapts well across a wide range of flavor directions.
Swap the ground beef for shredded rotisserie chicken tossed with taco seasoning for a lighter, juicier version. Try black beans and sautéed bell peppers for a satisfying vegetarian take that still packs plenty of flavor. For a breakfast twist, fill the shells with scrambled eggs, cheese, and crumbled bacon instead of beef.
Serving Suggestions
These taco cups work wonderfully as a standalone appetizer, but pairing them with a few sides turns them into a full spread. Cilantro-lime rice and a simple black bean salad round out the meal nicely. Plan on roughly two to three cups per person as an appetizer, or four to five if serving them as the main course.
Storing and Reheating Leftovers
Store any leftover cups in an airtight container in the fridge for up to two days. Skip the microwave when reheating, since it turns the shells soft and chewy almost instantly. Instead, warm them in a 350°F oven for about five minutes to bring back that satisfying crunch.
Frequently Asked Questions
Can I make Crispy Taco Cups ahead of time? You can prep the filling and chop toppings up to two days in advance, storing everything separately in the fridge. Bake the tortilla shells fresh right before serving, since pre-baked shells lose their crispness after sitting too long.
How do I keep the shells from getting soggy? Drain your tomatoes well and go light on saucy toppings like salsa. Serve the cups immediately after assembling, and if you’re transporting them somewhere, pack the toppings separately and assemble once you arrive.
Can I use corn tortillas instead of flour? Absolutely, and corn tortillas make a great gluten-free option. Warm them slightly first so they bend without cracking, and expect an even crispier finished texture compared to flour tortillas.
What’s the best way to reheat leftover taco cups? Avoid the microwave, since it makes the shells rubbery instead of crisp. A 350°F oven for about five minutes revives the crunch nicely, and adding fresh toppings afterward keeps everything tasting bright.
Can I freeze assembled taco cups? Assembled cups don’t freeze well, since the texture suffers once thawed. You can freeze the baked, empty tortilla shells for up to a month, then thaw and re-crisp them in the oven before filling.
Final Thoughts on Crispy Taco Cups
This recipe solves the messiest part of taco night while keeping every bit of the flavor everyone loves. The combination of crispy tortilla shells, seasoned beef, and melted cheese creates something that feels both familiar and genuinely exciting.
Give these a try at your next gathering, even if it’s just a random weeknight craving. Trust me, you’ll be scraping the tray clean and already planning your next batch before the last cup disappears.



