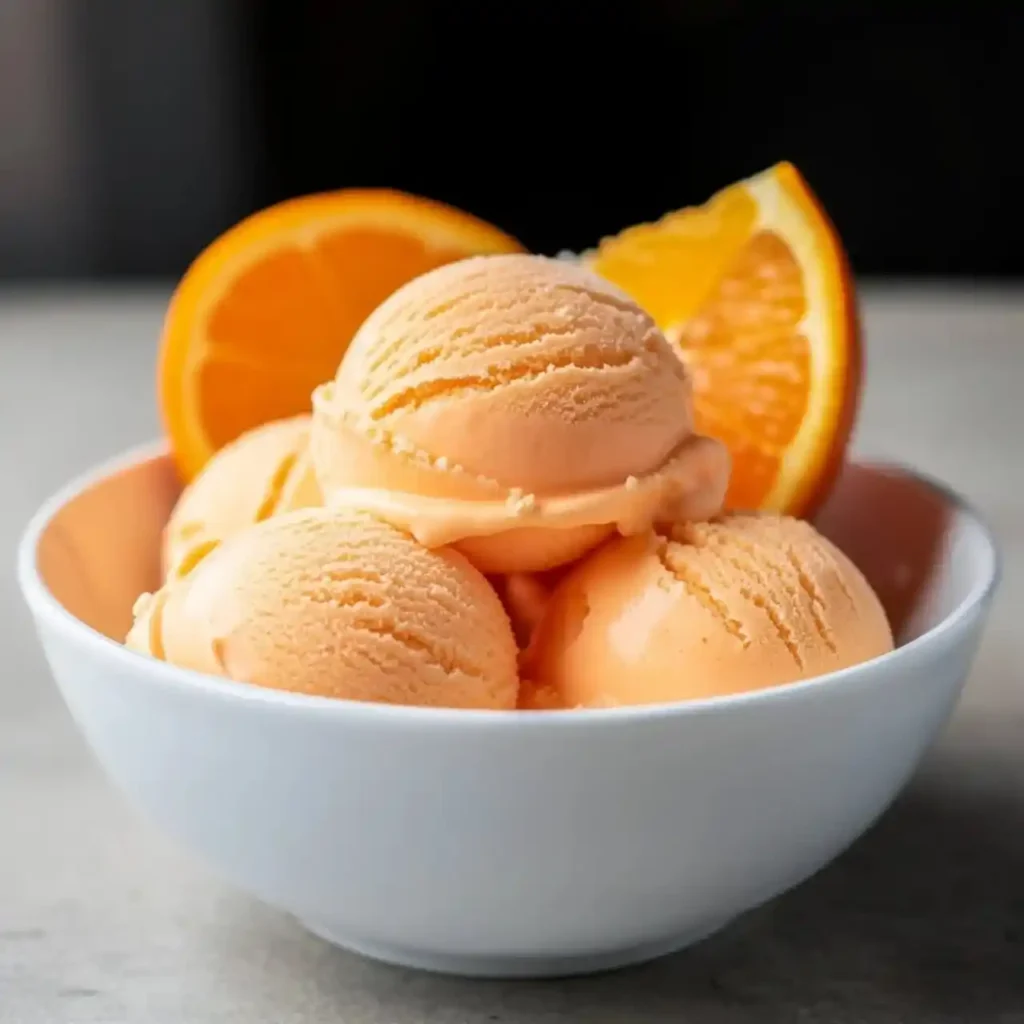
Servings: 6 servings (about 1 quart) Prep Time: 15 minutes Total Time: 6 hours 15 minutes (includes churning and freezing)
Nothing beats a bowl of homemade Orange Ice Cream on a scorching afternoon. It’s creamy, it’s citrusy, and it tastes like sunshine decided to become dessert. Have you ever had one bite of something and immediately known you’d be making it every summer? That’s this recipe for me.
I first made this on a whim with leftover oranges sitting on my counter. One taste later, it became a permanent fixture in my freezer. Let’s get into how you can make it too.
Why Orange Ice Cream Deserves a Spot in Your Freezer
Store-bought orange sherbet just can’t compete here. It’s usually icy, artificial-tasting, and honestly kind of sad. This homemade version is rich, creamy, and packed with real citrus flavor you can actually taste.
IMO, once you make ice cream from scratch, you stop settling for the tub in the grocery store freezer aisle. The texture alone makes the extra effort worth it.
What You’ll Need
Here’s the full ingredient lineup. Nothing exotic, just simple staples that come together into something way better than the sum of its parts.
- Heavy whipping cream – 2 cups
- Whole milk – 1.5 cups
- Freshly squeezed orange juice – 1 cup (about 3 oranges)
- Granulated sugar – 1 cup
- Orange extract – 1 tablespoon
- Vanilla extract – 2 teaspoons
- Salt – 1 pinch
Seven ingredients, one incredible payoff. You probably already have half of this in your kitchen right now.
Let’s Make This Ice Cream, Step by Step
Step One: Squeeze Your Oranges Fresh
Start by squeezing your oranges to get a full cup of fresh juice. Bottled juice works in a pinch, but fresh juice gives you way brighter, truer orange flavor. Roll the oranges on the counter first, pressing down firmly, to get more juice out of each one.
Strain out any seeds or big chunks of pulp if you want a smoother finish. A little pulp is fine if you like texture, so this step really comes down to personal preference.
Step Two: Combine the Cream and Milk
Grab a large mixing bowl and pour in your heavy whipping cream and whole milk. Whisk them together gently until they’re fully combined. This creamy base is what gives the final ice cream its rich, scoopable texture.
Take a second here to enjoy the smell. Fresh dairy and citrus together already smell like summer, and you haven’t even started churning yet.
Step Three: Add the Sugar and Juice
Pour in your sugar and freshly squeezed orange juice, then whisk again until the sugar fully dissolves. This usually takes about a minute of steady whisking. You’ll notice the mixture turning a soft, pale orange color almost immediately.
Don’t rush this part. Undissolved sugar leads to a gritty texture later, and nobody wants crunchy ice cream.
Step Four: Mix in the Extracts and Salt
Add your orange extract, vanilla extract, and that small pinch of salt. Whisk everything together until it’s fully blended. The salt might sound unnecessary, but it actually sharpens all the other flavors and keeps the sweetness balanced.
Taste the mixture at this stage if you’re curious. It should taste like a slightly sweeter, creamier version of fresh orange juice.
Step Five: Chill the Mixture
Cover your bowl and pop it in the fridge for at least 30 minutes before churning. Cold mixture churns faster and produces a smoother final texture. Skipping this step isn’t the end of the world, but it does slow down the churning process.
If you’re short on time, 15 minutes in the freezer works as a quicker substitute. Just don’t forget it in there, or you’ll end up with orange-flavored ice cubes.
Step Six: Churn It in Your Ice Cream Maker
Pour the chilled mixture into your ice cream maker and churn according to the manufacturer’s instructions. This usually takes around 20 to 25 minutes. You’ll know it’s ready when the mixture thickens to a soft-serve consistency.
Have you ever watched liquid slowly transform into ice cream right in front of you? It’s oddly satisfying, and honestly a little addictive to watch.
Step Seven: Freeze Until Firm
Transfer the churned ice cream into a freezer-safe container. Press a piece of plastic wrap directly onto the surface before sealing the lid. This little trick prevents ice crystals from forming and keeps everything smooth.
Freeze for 4 to 6 hours, or overnight if your patience allows it. FYI, overnight really does make a noticeable difference in firmness and scoopability.
Step Eight: Scoop and Serve
Let the ice cream sit at room temperature for a few minutes before scooping. This softens it just enough for easy scooping without turning it soupy. Serve it in a bowl, a waffle cone, or straight from the container if nobody’s watching 🙂
Getting the Texture Just Right
Texture makes or breaks homemade ice cream, and this recipe is no exception. If your mixture isn’t cold enough before churning, you’ll end up with a softer, less structured final product. Always chill before you churn.
Overchurning is another common mistake. Once the mixture hits soft-serve consistency, stop the machine. Continuing past that point can cause the texture to turn grainy instead of smooth and creamy.
A Few Fun Variations to Try
This recipe is a great base for experimenting once you’ve nailed the basic version. Here are a few twists worth trying in your own kitchen.
- Add orange zest for extra texture and a stronger citrus punch
- Swirl in raspberry or strawberry puree for a marbled effect
- Fold in mini chocolate chips for a chocolate-orange combo
- Swap orange extract for a splash of Grand Marnier for an adult version
Each variation takes the same base recipe somewhere completely different. That’s the beauty of starting with a solid foundation.
Storing Leftovers
If you somehow have leftovers, and that’s a big if, transfer them into an airtight container right away. This keeps ice crystals from forming and preserves that creamy texture you worked hard to achieve.
Stored properly, this ice cream keeps well in the freezer for up to two weeks. Let it sit out for a few minutes before scooping if it’s been frozen solid for a while.
Frequently Asked Questions
Can I make Orange Ice Cream without an ice cream maker? Yes, pour the mixture into a shallow container and freeze it, stirring every 30 minutes for about 3 hours. This breaks up ice crystals and mimics the churning process by hand.
Why does my ice cream taste icy instead of creamy? This usually happens when the mixture wasn’t cold enough before churning or the ice cream wasn’t stored in an airtight container. Both issues let ice crystals form and ruin that smooth texture.
Can I use bottled orange juice instead of fresh? Bottled juice works if you’re in a hurry, but fresh juice gives you noticeably brighter, more natural orange flavor. I’d recommend fresh whenever you have the time to squeeze it.
How long does homemade Orange Ice Cream last in the freezer? It stays good for up to two weeks when stored in an airtight container. After that, the texture starts to decline even though it’s still safe to eat.
Can I make this recipe dairy-free? Yes, swap the heavy cream and whole milk for full-fat coconut milk. The texture stays creamy, though you’ll get a subtle coconut flavor alongside the orange.
Do I need orange extract if I’m already using fresh orange juice? The extract intensifies the citrus flavor without adding extra liquid, which keeps the texture from getting too thin. It’s optional, but it makes a noticeable difference.
Wrapping It Up
Orange Ice Cream turns a handful of simple ingredients into a rich, citrusy dessert that beats anything from the store. From squeezing fresh oranges to that first creamy scoop, every step actually earns its place in the process. Give this one a try, and don’t blame me when it becomes your new summer obsession.



