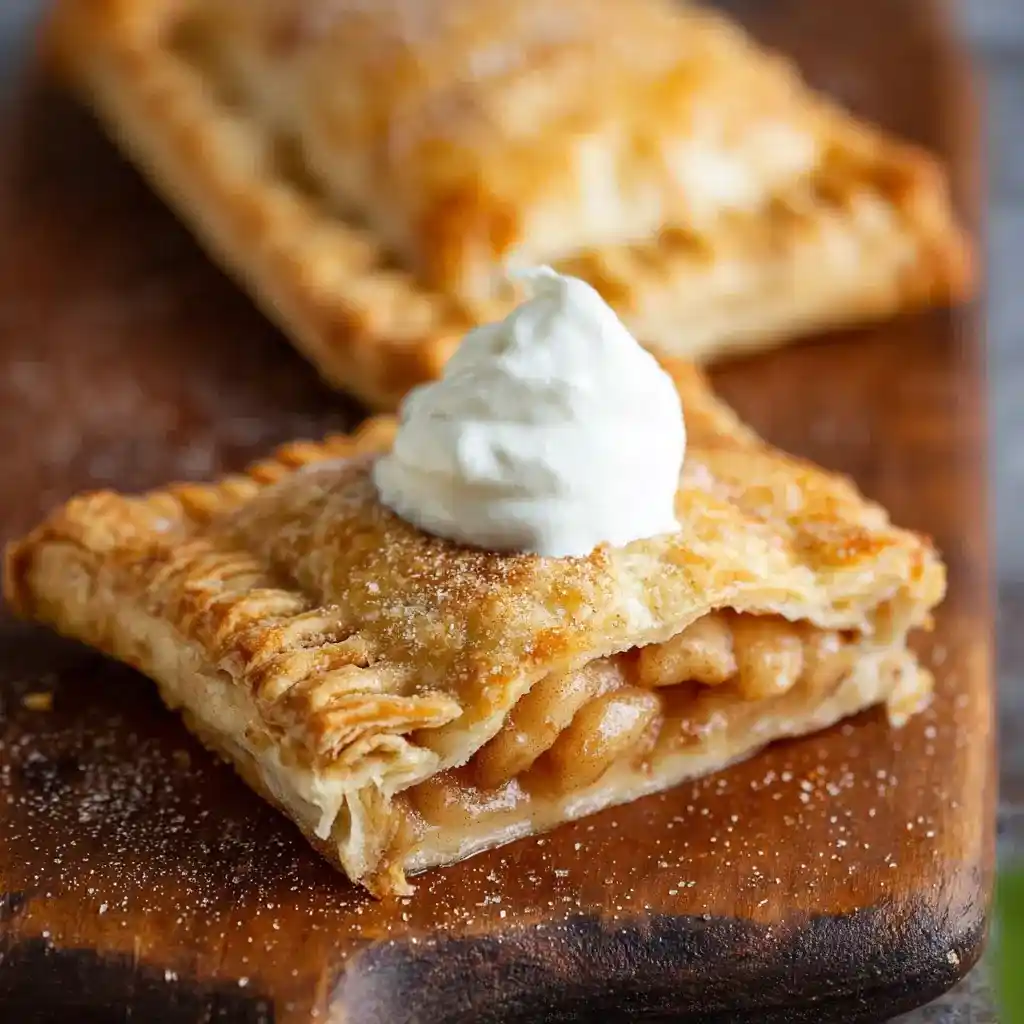
Remember biting into a hot McDonald’s apple pie and burning your tongue because you just couldn’t wait? This McDonald’s Apple Pie copycat recipe brings back that crispy, cinnamon-apple magic, minus the tongue burns.
Why This Homemade Version Beats the Original
Have you ever wondered why fast food apple pies taste so oddly satisfying despite being, well, fast food? It’s that flaky pastry paired with warm, spiced apple filling. This homemade version nails that exact combo, but fresher.
I grew up ordering these after school more times than I’d like to admit. IMO, making them at home actually tastes better, since you control the sweetness instead of getting hit with a sugar bomb.
Baking these yourself means real apples, real cinnamon, and pastry that crisps up beautifully in your own oven. These hand pies work as dessert, snacks, or that “I need something sweet right now” emergency fix.
Recipe Quick Facts
Here’s what you need to know before starting. This recipe takes a bit of prep, but the process itself moves along quickly.
- Prep time: 30 minutes
- Cook time: 25 to 30 minutes
- Total time: Roughly 1 hour
- Servings: Makes 8 hand pies
What You’ll Need for These Apple Pies
Gather these ingredients before you start cooking. Most of this comes straight from a regular grocery run.
- 1/4 cup butter
- 4 apples, peeled, cored, and finely diced
- 2/3 cup brown sugar
- 2 teaspoons cinnamon
- 1/2 teaspoon salt
- Juice of 1 lemon
- 3 teaspoons cornflour
- 1 tablespoon water
- 2 batches puff pastry, homemade or store-bought
- Egg wash, 1 egg beaten with a little water or milk
- Cinnamon sugar, for dusting
How to Make McDonald’s Apple Pies, Step by Step
Ready to get started? Here’s the full process broken down into simple, manageable steps.
Step 1: Prep Your Oven and Baking Sheets
Preheat your oven to 400°F and line your baking sheets with parchment paper. This higher temperature is exactly what gives these pies that signature crispy, golden shell. Set your prepped sheets aside while you work on the filling.
Step 2: Melt the Butter and Start the Filling
In a saucepan over medium heat, melt the butter, then add your diced apples, brown sugar, cinnamon, salt, and lemon juice. Stir everything together so the apples get evenly coated in that cinnamon-sugar mixture. The lemon juice here isn’t just for flavor, it also keeps the apples from browning too fast.
Step 3: Cook Until the Apples Soften
Keep cooking the apple mixture over medium heat, stirring occasionally, until the apples soften and the liquid starts reducing down. This usually takes about 8 to 10 minutes, depending on how finely you diced your apples. Have you ever rushed this step? The filling turns watery instead of jammy if you do.
Step 4: Make the Cornflour Slurry
In a small bowl, mix your cornflour with the water until it forms a smooth, lump-free slurry. This thickening trick is what keeps your filling from leaking out of the pastry later. Set this slurry aside until your apples have softened properly.
Step 5: Thicken the Filling
Stir the cornflour slurry into your softened apple mixture and continue cooking for about 2 minutes. You’ll notice the filling thickening up into something that looks glossy and jam-like. Remove the saucepan from the heat once it reaches that thick, spoonable consistency.
Step 6: Cool the Filling Completely
Transfer your apple filling into a bowl and let it cool completely before using it. Warm filling melts the pastry before it even hits the oven, which nobody wants. This cooling step usually takes about 20 to 30 minutes, so use that time to prep your pastry.
Step 7: Roll Out the Puff Pastry
On a lightly floured surface, roll your puff pastry out to about 1/8 inch thickness. Rolling it too thick makes the pies heavy, while rolling too thin risks tearing during folding. Aim for an even, consistent thickness across the whole sheet.
Step 8: Cut Into Rectangles
Cut your rolled pastry into 8 rectangles, each roughly 4.5 by 6 inches. A pizza cutter works great here if you have one, since it gives you clean, straight edges without dragging the dough. Keep any pastry scraps in the fridge in case you need patches later.
Step 9: Fill Each Rectangle
Place 1 to 2 teaspoons of your cooled apple filling in the center of each pastry rectangle. Resist the urge to overfill, since too much filling makes sealing the edges nearly impossible. A modest amount here actually creates a better final pie.
Step 10: Seal the Pies
Brush the edges of each rectangle with egg wash or milk, then fold the pastry over to enclose the filling. Press the edges together firmly, then crimp them with a fork for that classic sealed look. This crimping step also helps prevent any filling from leaking out during baking.
Step 11: Add Ventilation Slits
Using a small knife, cut a few small slits across the top of each sealed pie. These slits let steam escape while baking, which keeps the pastry from puffing up unevenly or bursting open. Skip this step and you risk a messy, exploded pie.
Step 12: Brush and Sprinkle the Tops
Brush the tops of each pie generously with egg wash, then sprinkle cinnamon sugar evenly across the surface. This combination is what creates that golden, slightly crackly finish everyone loves. Don’t be shy with the cinnamon sugar here.
Step 13: Bake Until Golden and Crisp
Bake your pies for 25 to 30 minutes, watching for a deep golden color across the tops. Every oven behaves a little differently, so start checking closer to the 25-minute mark. Pull them out once the pastry looks crisp and flaky throughout.
Step 14: Serve Warm
Let the pies cool for just a few minutes before serving, since the filling stays extremely hot right out of the oven. Serve them warm for the best texture and flavor experience. This is the moment you’ve been waiting for, so enjoy it.
Serving and Storage Tips
Wondering how to store leftovers or serve these for a crowd? Here’s what actually works based on repeated baking.
- Serve warm with vanilla ice cream, whipped cream, or caramel sauce for extra indulgence
- Pair with coffee or tea for a cozy treat
- Store leftovers in an airtight container in the refrigerator for up to 2 days
- Reheat in a 300°F oven for 10 minutes to restore crispiness
- Freeze unbaked pies for up to 2 months and bake directly from frozen, adding extra time
Fun Variations Worth Trying
Once you’ve nailed the classic version, why not experiment a little? These variations keep things interesting without much extra effort.
- Caramel Apple Pies: add caramel sauce into the filling for a richer flavor
- Apple Berry Pies: mix in blueberries or raspberries for a fruity twist
- Spiced Apple Pies: include nutmeg, cloves, or allspice for deeper flavor
- Fried Apple Pies: fry instead of baking for that classic fast-food texture
- Apple Nut Pies: add chopped walnuts or pecans for extra crunch
Frequently Asked Questions
What apples work best for this recipe? Firm, slightly tart apples like Granny Smith or Honeycrisp hold up best during cooking and baking.
Can I use store-bought apple pie filling instead? Yes, though homemade filling delivers noticeably better flavor and a more balanced texture.
Can these pies be frozen for later? Both baked and unbaked pies freeze well, making them a great make-ahead treat.
How do I keep the pastry crispy after storing it? Reheat leftover pies in the oven rather than the microwave, since microwaving softens the crust.
Can I air fry these apple pies instead of baking? Yes, cook them at 350°F for about 10 to 15 minutes for a similarly crispy result.
Why does my filling turn out runny? The filling likely needs more thickening time or a slightly larger cornflour slurry.
Can I skip the egg wash entirely? Yes, milk or cream works as a substitute and still gives the pastry a nice golden finish.
Final Thoughts
This McDonald’s Apple Pie copycat recipe brings that nostalgic, crispy, cinnamon-apple flavor right into your own kitchen. Between the flaky pastry and warm spiced filling, these hand pies genuinely rival the drive-thru version. FYI, they disappear fast once they hit the table, so maybe make a double batch.
Give this recipe a try the next time that apple pie craving hits, and don’t hesitate to experiment with the variations. Once you taste that crisp, golden pastry paired with warm apple filling, you might just forget the drive-thru exists.
McDonald’s Apple Pie
Ingredients
Method
- Preheat your oven to 400°F and line your baking sheets with parchment paper.
- In a saucepan over medium heat, melt the butter, then add your diced apples, brown sugar, cinnamon, salt, and lemon juice. Stir everything together.
- Keep cooking the apple mixture over medium heat, stirring occasionally, until the apples soften and the liquid starts reducing down, about 8 to 10 minutes.
- In a small bowl, mix your cornflour with the water until it forms a smooth, lump-free slurry.
- Stir the cornflour slurry into your softened apple mixture and continue cooking for about 2 minutes until the filling thickens to a glossy, jam-like consistency.
- Transfer your apple filling into a bowl and let it cool completely before using.
- On a lightly floured surface, roll your puff pastry out to about 1/8 inch thickness.
- Cut your rolled pastry into 8 rectangles, each roughly 4.5 by 6 inches.
- Place 1 to 2 teaspoons of your cooled apple filling in the center of each pastry rectangle.
- Brush the edges of each rectangle with egg wash or milk, then fold the pastry over to enclose the filling. Press the edges together firmly and crimp with a fork.
- Using a small knife, cut a few small slits across the top of each sealed pie.
- Brush the tops of each pie with egg wash, then sprinkle cinnamon sugar evenly across the surface.
- Bake your pies for 25 to 30 minutes, watching for a deep golden color across the tops.
- Let the pies cool for a few minutes before serving warm.




