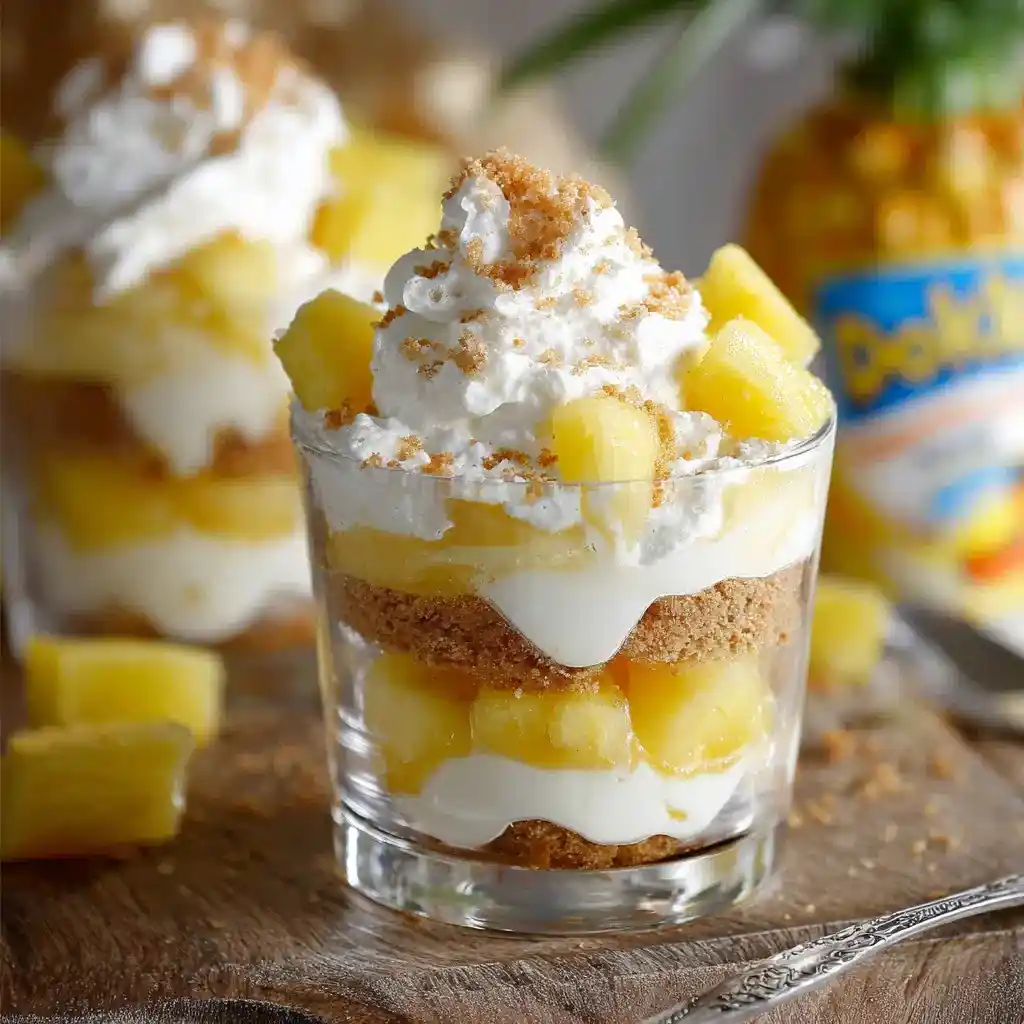
Layers of creamy cheesecake, sweet pineapple, and crunchy vanilla wafers, all stacked in a cute little jar. No oven, no fuss, no waiting around.
I started making these for potlucks because they travel well and look impressive with almost zero effort. People always ask how long they took, and the real answer kind of embarrasses me.
Servings: 4 to 6 Prep time: 15 minutes Chill time: 30 minutes minimum Total time: Around 45 minutes
Why This Trifle Works So Well
Regular cheesecake takes hours between baking and cooling. This trifle skips all of that and still delivers that same creamy, tangy flavor everyone loves.
Have you ever wanted cheesecake flavor without committing to an entire pie? IMO, that’s exactly the gap this recipe fills perfectly.
Layering the ingredients in individual jars also makes portioning effortless. No slicing, no serving spoon fights, just grab a cup and dig in.
What You’ll Need
Here’s everything going into this trifle:
- Cream cheese, softened
- Pineapple chunks, drained (juice reserved)
- Whipped topping or heavy whipped cream
- Crushed vanilla wafers
- Reserved pineapple juice
Five ingredients, one bowl, and a handful of small cups. That’s the entire shopping list.
A Quick Note on Draining Pineapple
Properly draining your pineapple matters more than you’d think. Excess juice left in the mixture turns your cheesecake filling watery instead of thick and creamy.
Reserve a couple tablespoons of that juice on purpose, though. You’ll use it to flavor the cream cheese mixture in just a bit.
How to Make Mini Pineapple Cheesecake Trifle
This recipe comes together fast, but a little extra care in each step makes a real difference. Let’s break it down slowly so nothing feels rushed.
Step 1: Prep Your Pineapple
Drain your pineapple chunks over a bowl or measuring cup to catch the juice. Set that juice aside since you’ll need a couple tablespoons of it later.
Chop the drained pineapple chunks into smaller pieces. Smaller pieces layer more easily in small cups and give you a better bite-to-bite consistency.
Step 2: Beat the Cream Cheese
In a mixing bowl, beat your softened cream cheese until it turns smooth and fluffy. Use a hand mixer here if you have one, since a whisk alone takes forever.
Scrape down the sides partway through beating. This keeps any stubborn clumps from hiding at the edges of the bowl.
Step 3: Add Pineapple Juice
Pour in your reserved pineapple juice and mix it into the cream cheese until fully combined. This step adds a subtle tropical flavor that ties the whole dessert together.
The mixture should look smooth and slightly loosened compared to before. If it still feels stiff, that’s completely fine at this stage.
Step 4: Fold in the Pineapple Chunks
Gently fold about half a cup of your chopped pineapple into the cream cheese mixture. Use a spatula and fold rather than stir, so you don’t break down the fruit too much.
Folding keeps the texture light instead of mushy. Take your time here, since rushing tends to overmix everything.
Step 5: Fold in the Whipped Topping
Add your whipped topping or whipped cream into the bowl and fold it in gently. The mixture should turn light, airy, and noticeably fluffier than before.
Stop folding once everything looks evenly combined. Overmixing at this stage deflates all that lovely airiness you just created.
Step 6: Start Layering
Grab your small jars or cups and begin layering. Start with a spoonful of crushed vanilla wafers at the bottom of each cup.
Add a layer of the cheesecake mixture next, followed by a layer of chopped pineapple chunks. This order keeps the crunch at the bottom instead of getting soggy too fast.
Step 7: Repeat the Layers
Keep repeating the wafer, cheesecake, and pineapple layers until each cup fills up close to the top. Try to keep your layers roughly even for a cleaner presentation.
Have you ever made a dessert that looks fancier than the effort it actually took? This is one of those moments.
Step 8: Add the Final Topping
Finish each cup with a sprinkle of crushed wafers and a few extra pineapple pieces on top. This gives every serving a nice pop of texture and color.
Keep the toppings light so they don’t sink into the layers below. A little goes a long way here.
Step 9: Chill Before Serving
Place your trifles in the refrigerator and let them chill for at least 30 minutes. This helps the layers firm up slightly and lets the flavors meld together.
Chilling longer, up to a couple hours, gives you an even better texture. Patience pays off here, even if the smell coming from the fridge makes waiting difficult.
Serving Suggestions Worth Trying
These trifles look great served a few different ways. A few of my favorites:
- Serve in clear glass jars for a beautiful layered presentation
- Add a mint leaf on top for a fresh pop of color
- Pair with iced tea or lemonade for a summery spread
- Serve alongside other mini desserts for a dessert table
Bring these to your next gathering and watch how fast they disappear. FYI, individual portions somehow make people go back for seconds more often.
Storing and Reheating Leftovers
Refrigerator storage keeps these fresh for 24 to 48 hours when covered properly. Store them in the fridge right after serving to keep the texture intact.
Freezing isn’t recommended here, since the texture tends to separate once thawed. Add any final toppings just before serving to keep that crunch factor alive.
Leftovers taste best within the first two days. After that, the wafers soften more than you’d probably like :/
Fun Variations to Try
Once you’ve nailed the base recipe, feel free to experiment a little. A few variations worth trying:
- Strawberry pineapple version with fresh strawberries added between layers
- Coconut version with shredded coconut mixed into the cream
- Mango pineapple version with diced mango for extra tropical flavor
- Oreo version swapping vanilla wafers for crushed Oreo cookies
Why stick to one combination when there’s room to mix and match? Pick whichever fruit or crunch element sounds best to you this week.
Frequently Asked Questions
Can I use fresh pineapple instead of canned? Yes, just make sure it’s ripe and juicy enough to match the sweetness of canned pineapple.
Can I make this ahead of time? Yes, this trifle holds up well for up to a day or two in the fridge, making it a great make-ahead option.
Can I freeze this pineapple cheesecake trifle? It’s not recommended. Freezing changes the texture of both the cream cheese layer and the fruit.
Can I use homemade whipped cream instead of store-bought? Absolutely. Freshly whipped cream actually gives you an even better texture than store-bought topping.
What can I use instead of vanilla wafers? Graham crackers, digestive biscuits, or crushed Oreos all work as great substitutes.
Final Thoughts
Mini Pineapple Cheesecake Trifle proves that dessert doesn’t need an oven or hours of effort to look and taste impressive. Creamy layers, sweet pineapple, and a little crunch come together in under an hour.
Make a batch of these for your next get-together and watch them disappear before the main course even hits the table. Just don’t be surprised when people ask for the recipe on the spot
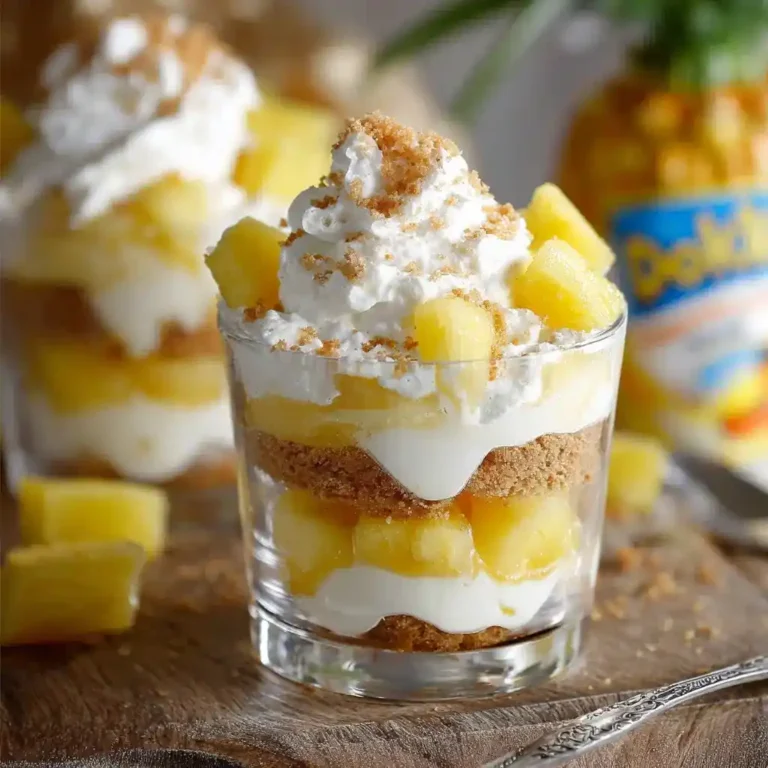
Mini Pineapple Cheesecake Trifle
Ingredients
Method
- Drain your pineapple chunks over a bowl or measuring cup to catch the juice. Set that juice aside.
- Chop the drained pineapple chunks into smaller pieces.
- In a mixing bowl, beat the softened cream cheese until smooth and fluffy.
- Pour in the reserved pineapple juice and mix until fully combined.
- Gently fold in half a cup of chopped pineapple chunks.
- Add the whipped topping and fold until evenly combined.
- Begin layering in small jars or cups: start with a spoonful of crushed vanilla wafers at the bottom.
- Add a layer of the cheesecake mixture followed by a layer of chopped pineapple chunks.
- Repeat the layers until the jars are filled, finishing with a sprinkle of crushed wafers and a few pineapple pieces on top.
- Place the trifles in the refrigerator and let chill for at least 30 minutes before serving.




