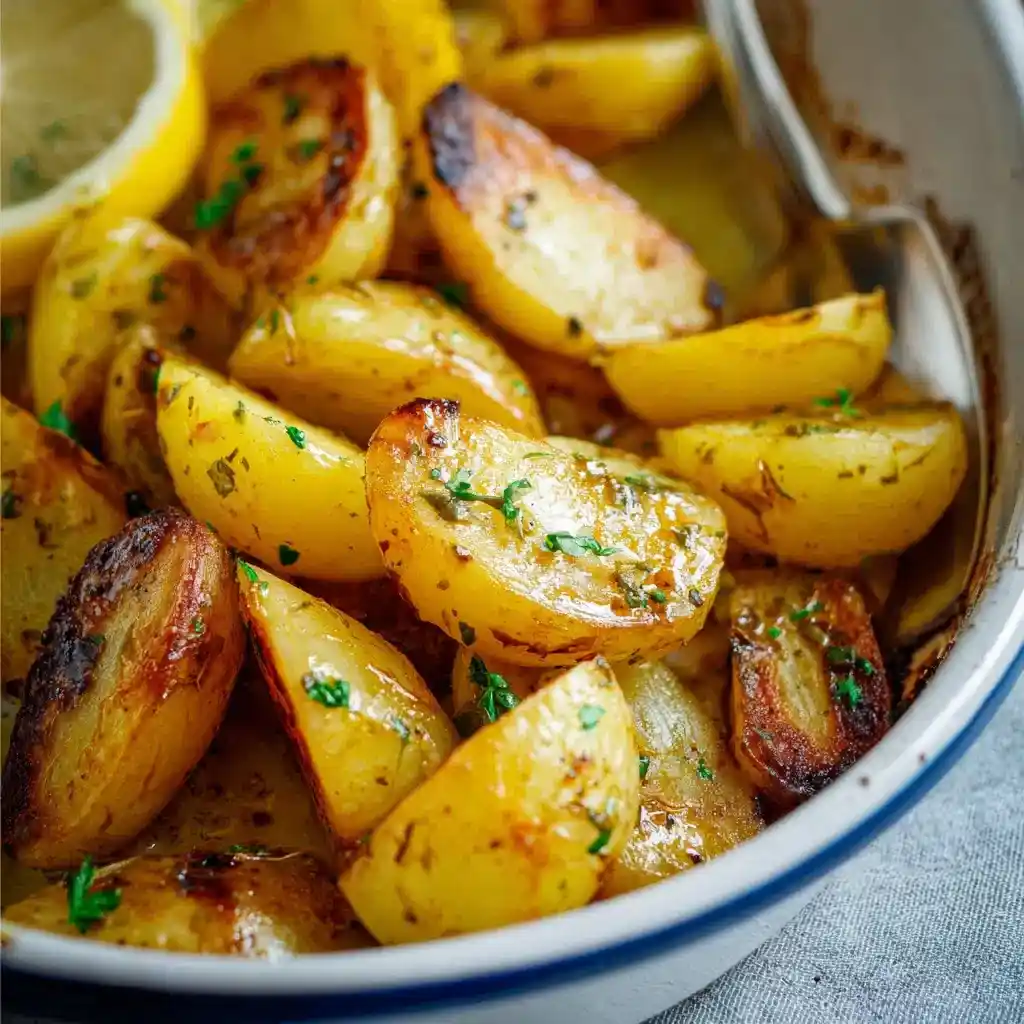
Servings: 6 Prep Time: 15 minutes Cook Time: 80 minutes Total Time: 95 minutes
Tired of boring side dishes that nobody remembers by dessert? Greek Lemon Potatoes fix that instantly, and I say that as someone who used to think potatoes were just filler on a plate.
I first had these at a Greek restaurant and spent the entire drive home trying to recreate them from memory. A few failed attempts later, this version finally nailed that tangy, garlicky flavor I couldn’t stop thinking about.
This recipe slow-roasts potatoes in a lemon, garlic, and oregano broth until they turn tender inside and golden on the edges. Ever had a side dish that somehow steals the spotlight from the main course? This is exactly that kind of dish.
Why Greek Lemon Potatoes Work So Well
Regular roasted potatoes are fine, but let’s be honest, they can taste a little one-note. Slow roasting potatoes in a lemon and broth mixture lets them actually absorb flavor instead of just sitting on top of it.
The combination of olive oil, garlic, and oregano creates that unmistakable Mediterranean flavor profile. IMO, that trio is non-negotiable if you want these potatoes to taste authentically Greek instead of just lemony.
Long, slow baking time matters here too. It gives the potatoes enough time to soak up all that citrusy broth while still developing crisp, golden edges on the outside.
What You’ll Need for Greek Lemon Potatoes
Here’s your complete ingredient list. Simple, mostly pantry-friendly items with a few fresh essentials.
- 1 cup chicken stock
- ½ cup extra virgin olive oil
- ¼ cup fresh lemon juice
- 4 garlic cloves, minced
- 2 teaspoons dried oregano
- 2 teaspoons fine sea salt
- 2 tablespoons unsalted butter, for topping
- 3 pounds Yukon gold potatoes, cut into wedges or chunks, peeled or unpeeled
- 1 tablespoon fresh parsley, chopped, for garnish
Nine ingredients, and most of them are probably already sitting in your kitchen right now.
How to Make Greek Lemon Potatoes
Step 1: Preheat the Oven
Set your oven to 400°F and let it fully preheat before you start assembling anything. A properly heated oven from the start ensures even cooking throughout that long roasting time ahead.
Grab a 9×13 baking dish while the oven heats up. You’ll need it ready to go once your flavorful liquid mixture comes together.
Step 2: Build the Flavor Base
In your baking dish, combine the chicken stock, olive oil, fresh lemon juice, minced garlic, dried oregano, and sea salt. Whisk or stir everything together right in the dish, no need for a separate bowl.
This liquid mixture is essentially the heart of the entire recipe. Have you ever wondered why some roasted potatoes taste flat while others taste incredible? It usually comes down to what they’re actually cooked in.
Step 3: Add the Potatoes
Add your cut potato wedges or chunks directly into the baking dish with the liquid mixture. Toss everything together thoroughly, making sure every piece gets coated in that lemony, garlicky broth.
Spread the potatoes out evenly across the dish afterward. They should sit partially submerged in the liquid, not floating on top or completely dry on one side.
Step 4: Add the Butter
Cut your butter into small pieces and dot them across the top of the potato mixture. This adds an extra layer of richness that balances out the bright acidity from the lemon juice.
Don’t skip this step just because it seems minor. That little bit of butter genuinely rounds out the flavor and helps the tops turn a beautiful golden color.
Step 5: Bake Low and Slow
Slide the baking dish into your preheated oven and bake for 70 to 80 minutes. This might feel like a long time for potatoes, but that extended cooking period is exactly what makes them so tender and flavorful.
Stir the potatoes two to three times throughout the baking process. FYI, this step matters more than it seems, since it redistributes the liquid and helps every piece absorb flavor evenly instead of just the potatoes on the bottom.
Step 6: Check for Tenderness and Color
Keep baking until the potatoes turn tender all the way through and develop a golden color with slightly crisp edges. A fork should slide in easily without much resistance when they’re properly done.
If the edges still look pale and soft at the 80-minute mark, give them another five to ten minutes. Every oven runs a little differently, so trust the texture over the clock.
Step 7: Broil for Extra Crispiness
Want extra crispy edges? Switch your oven to broil and let the potatoes cook for an additional three to four minutes. Keep a close eye on them during this step, since broiling works fast and can go from golden to burnt quickly.
This step is completely optional, but IMO, it’s worth the extra few minutes if you love that crispy potato edge. Skip it if you prefer a softer, more traditional texture throughout.
Step 8: Toss and Garnish
Remove the potatoes from the oven and toss them gently in the remaining pan juices. This coats everything one final time in all that concentrated lemon and garlic flavor sitting at the bottom of the dish.
Sprinkle chopped fresh parsley over the top right before serving. That fresh green garnish adds color and a slightly herbal brightness that ties the whole dish together.
Tips for the Best Results
- Don’t rush the baking time, slow roasting is what makes these potatoes tender and flavorful.
- Stir a few times during baking to help potatoes absorb the sauce evenly.
- Use fresh lemon juice whenever possible for the brightest flavor.
- Try the broil step if you want extra crispy, golden edges.
Storage and Reheating Tips
Leftovers store nicely in an airtight container in the refrigerator for up to four days. The flavors actually deepen a bit overnight, so day-two potatoes taste pretty fantastic too.
Reheat them in the oven at 375°F for the best texture, rather than the microwave. Ovens help maintain those crispy edges, while microwaves tend to leave everything a bit soft and soggy.
Freezing is possible for up to two months, though the texture may soften slightly once thawed. Thaw in the refrigerator overnight before reheating for the best results.
Fun Variations to Try
Want to switch things up next time? Try one of these:
- Herb-forward version: Add rosemary and thyme along with extra garlic for deeper flavor.
- Spicy kick: Stir in red pepper flakes or a pinch of cayenne pepper.
- Cheesy finish: Sprinkle grated parmesan over the potatoes during the last ten minutes of baking.
- Sweet twist: Add a teaspoon or two of honey for a subtle citrus glaze.
- Mediterranean mix: Toss in olives and cherry tomatoes partway through baking.
Frequently Asked Questions
Can I use other types of potatoes? Yes, red potatoes or russet potatoes both work well as substitutes in this recipe.
Do I need to peel the potatoes first? No, peeling is entirely optional, and Yukon gold skins actually add nice texture and flavor.
Why aren’t my potatoes turning crispy? They likely need more baking time, or a quick final broil to crisp up the edges.
Can I prepare this dish ahead of time? Yes, you can prep everything and refrigerate it before baking whenever you’re ready.
Can I use bottled lemon juice instead of fresh? Fresh lemon juice gives better flavor, though bottled works fine in a pinch.
What proteins pair best with Greek Lemon Potatoes? Chicken, lamb, beef, and fish all complement this dish nicely as a side.
Final Thoughts
Greek Lemon Potatoes turn a humble side dish into something people genuinely ask for by name. Tangy, garlicky, and roasted low and slow, they bring restaurant-quality flavor straight to your own kitchen.
Make a batch alongside your next roast chicken and watch them disappear before the main course even hits the table 🙂 Just be prepared for someone to request “those lemon potatoes” at every future dinner from here on out.



