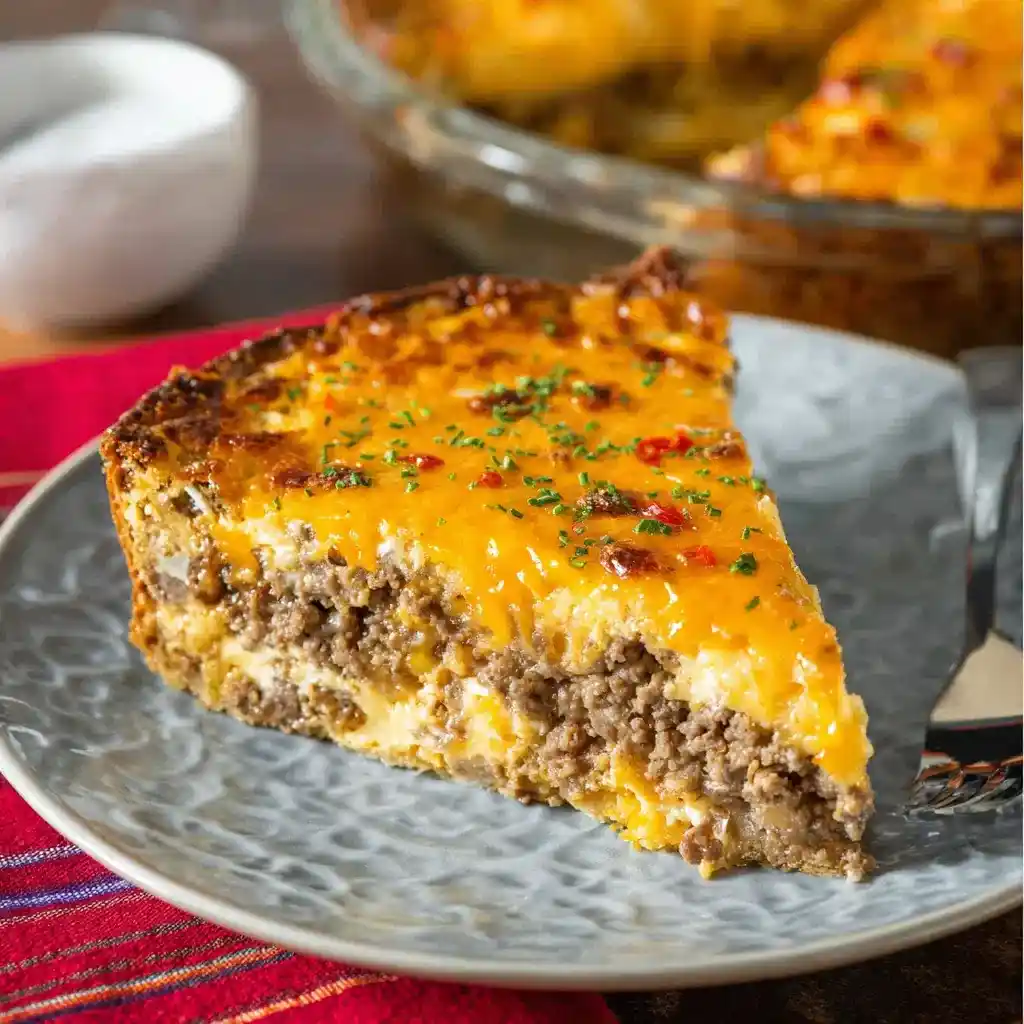
Servings: 6 Prep Time: 10 minutes Cook Time: 25 minutes Total Time: 35 minutes
Craving cheeseburger flavor without the whole burger assembly process? Impossible Cheeseburger Pie solves that, and I’ve leaned on this recipe more times than I’d care to admit on nights when cooking felt like too much effort.
I stumbled onto this one during a particularly lazy week, mostly because I wanted cheeseburger flavor without standing over a grill. It’s stuck around in my rotation ever since, mostly out of pure convenience.
This recipe layers seasoned ground beef and cheddar cheese, then pours a simple batter over the top that bakes into its own crust. Ever notice how the best weeknight dinners require almost zero actual skill? This is exactly that kind of recipe.
Why Impossible Cheeseburger Pie Works So Well
Regular cheeseburgers require buns, patty flipping, and a decent amount of hands-on effort. This pie skips all of that by baking everything together in one pan, no grill flipping required.
The Bisquick batter is doing more work than you’d expect here. IMO, that simple mixture is what transforms into a soft, self-forming crust without you needing to roll out any dough.
Cheddar cheese melted between the meat and batter layers ties everything together into something that genuinely tastes like a cheeseburger in pie form. That’s a pretty clever trick for a recipe requiring minimal effort.
What You’ll Need for Impossible Cheeseburger Pie
Here’s your complete ingredient list. Short, simple, and mostly pantry or fridge staples.
- 1 pound lean ground beef
- 1 cup sweet onion, chopped
- 1 cup cheddar cheese, shredded
- 1 cup milk
- 2 tablespoons onion soup mix
- ½ cup Bisquick
- 2 large eggs
Seven ingredients standing between you and a genuinely satisfying dinner.
How to Make Impossible Cheeseburger Pie
Step 1: Preheat the Oven and Prep Your Pan
Set your oven to 400°F and let it fully preheat before you get started. A properly heated oven ensures your pie bakes evenly instead of ending up undercooked in the center.
Grease a 9-inch pie pan thoroughly and set it aside. This small step saves you from wrestling a stuck pie out of the pan later, which is never a fun way to end dinner prep.
Step 2: Brown the Ground Beef and Onion
Heat a large skillet over medium heat and add your ground beef along with the chopped sweet onion. Cook everything together, breaking up the meat as it browns, until no pink remains and the onion turns soft.
This should take roughly six to eight minutes total. Have you ever rushed browning meat and ended up with a gray, flavorless result? Taking the extra few minutes here genuinely pays off in flavor.
Step 3: Drain the Excess Grease
Once the beef is fully browned, drain off any excess grease from the skillet. Skipping this step leaves your pie greasy instead of firm, and nobody wants soggy cheeseburger pie.
Carefully tilt the skillet to pour off the fat, or use a spoon to remove it if that feels safer. Either method works fine, just make sure you’re not leaving a puddle behind.
Step 4: Spread the Meat Mixture
Transfer the drained beef and onion mixture into your prepared pie pan. Spread it out evenly across the bottom, making sure it reaches all the edges of the pan.
An even layer here matters for consistent baking later. Uneven clumps can lead to some bites being meat-heavy while others taste mostly like crust.
Step 5: Layer the Cheese
Sprinkle the shredded cheddar cheese evenly over the top of the meat layer. Try to cover the entire surface so every slice gets a good amount of melted cheese running through it.
FYI, this cheese layer is doing double duty here, adding flavor and helping bind the meat mixture together once everything bakes. Don’t skimp on it.
Step 6: Whisk the Batter
In a medium bowl, whisk together the milk, onion soup mix, Bisquick, and eggs. Keep whisking until the mixture looks smooth and fully combined, with no dry clumps of Bisquick floating around.
This batter is what transforms into that soft, self-forming crust once baked. Getting it properly mixed now ensures an even texture across the entire pie later.
Step 7: Pour the Batter Over the Cheese
Slowly pour the milk and egg mixture directly over the cheese layer in the pie pan. Make sure it spreads out and covers the entire surface, reaching all the way to the edges.
Give the pan a gentle shake or tilt if needed to help the batter settle evenly. You want full coverage, not patches of exposed cheese peeking through in random spots.
Step 8: Bake Until Golden
Place the pie pan into your preheated oven and bake for about 25 minutes. You’re watching for a golden brown top and a center that looks fully set rather than jiggly or wet.
IMO, checking with a knife is the easiest way to confirm doneness. Insert it into the center, and if it comes out clean, your pie is ready to come out of the oven.
Step 9: Cool and Slice
Let the pie cool for a few minutes once it’s out of the oven before attempting to slice it. That brief resting period helps everything set properly, making for cleaner slices instead of a messy scoop.
Serve slices with your favorite cheeseburger toppings like ketchup, mustard, pickles, or lettuce. That final touch brings the whole cheeseburger experience full circle.
Tips for the Best Results
- Drain the grease thoroughly, this keeps the pie from turning soggy.
- Spread layers evenly for consistent flavor in every slice.
- Whisk the batter well to avoid dry Bisquick clumps.
- Let it cool briefly before slicing for cleaner cuts.
Storage and Reheating Tips
Leftovers store well in an airtight container in the refrigerator for up to three to four days. This makes it a solid option for meal prepping ahead of a busy week.
Reheat individual slices in the microwave for a quick, convenient meal. It heats through fast without much fuss, which is honestly half the appeal of this recipe in the first place.
Freezing works too if you want to stock up. Wrap slices tightly in plastic wrap and foil, then store in a freezer-safe bag or container. Reheat straight from frozen in the oven whenever you need it.
Fun Variations to Try
Want to switch things up? Here are a few solid options:
- Turkey swap: Use lean ground turkey instead of beef for a lighter version.
- Spicy kick: Add diced jalapeños or a dash of hot sauce to the meat mixture.
- Tex-Mex style: Season the beef with taco seasoning and top with a Mexican cheese blend.
- Garlic lover’s version: Mix minced garlic into the meat or sprinkle garlic powder on top.
- Cheese lover’s dream: Swap cheddar for pepper jack, Swiss, or Monterey Jack.
Frequently Asked Questions
Can I use ground turkey instead of ground beef? Yes, ground turkey substitutes easily and gives you a lighter version of this pie.
Can I make this ahead of time and reheat it later? Absolutely, it reheats well in either the microwave or oven for convenient meal prep.
Can I freeze leftovers of this pie? Yes, wrap slices tightly in plastic wrap and foil before freezing for longer storage.
How do I prevent the bottom from getting soggy? Drain any excess grease from the cooked beef thoroughly before assembling the pie.
Can I use different types of cheese? Definitely, pepper jack, Swiss, or Monterey Jack all work great as substitutes for cheddar.
How do I know when the pie is fully cooked? It’s done when the top turns golden brown and a knife inserted in the center comes out clean.
Final Thoughts
Impossible Cheeseburger Pie delivers all the flavor of a classic cheeseburger without any of the usual assembly hassle. Savory beef, melted cheddar, and a soft baked crust come together in one simple dish.
Give it a try on your next busy weeknight and watch how fast it disappears from the table 🙂 You might just find yourself adding this one to your permanent dinner rotation without even meaning to.



