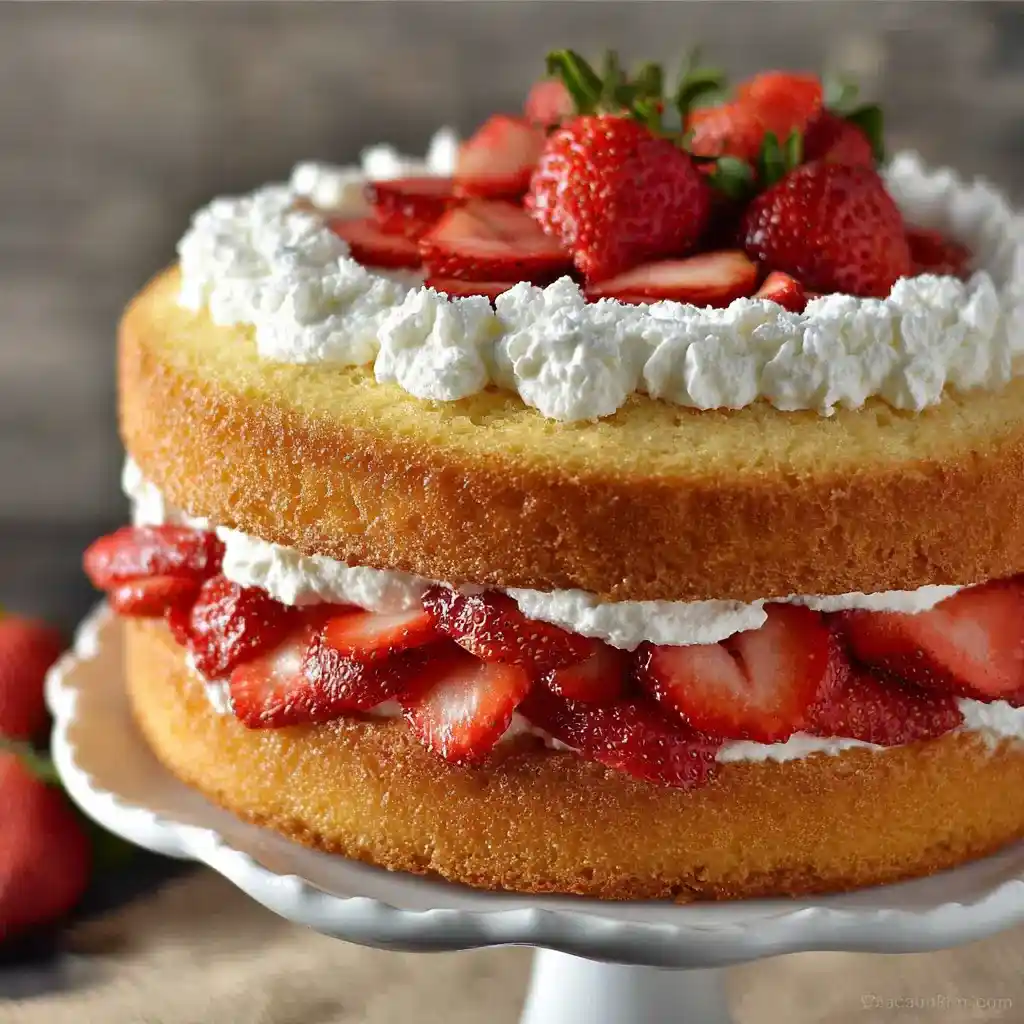
Want a dessert that looks like it came from a fancy bakery but actually starts with a box mix? This Strawberry Shortcake Cake is exactly that trick, and I’ve been leaning on it for birthdays and potlucks for years now.
Prep time: 25 minutes | Cook time: 30 minutes | Assembly time: 15 minutes | Servings: 12 slices
Why This Strawberry Shortcake Cake Works So Well
I used to think layer cakes were way too fussy for a regular weekend baking session. This one completely changed my mind. The whipped cream cheese frosting does something magical, staying light and airy instead of heavy or overly sweet.
Have you ever bitten into a strawberry dessert where the fruit tasted like an afterthought? That’s not happening here. Fresh strawberries get layered generously throughout, so every single slice actually delivers real fruit flavor, not just decoration on top.
IMO the trick to this cake’s success is genuinely the frosting technique. Nobody at your next gathering will guess this started with a box of French Vanilla mix 🙂 That’s our little secret.
What You’ll Need: Ingredients List
Nothing here requires a special trip to a specialty baking store.
For the Cake
- 15.25 ounce box French Vanilla cake mix
- 3 large eggs
- 1 ¼ cups water
- ½ cup unsalted butter, at room temperature
For the Frosting and Filling
- 8 ounces cream cheese, at room temperature
- ½ cup granulated white sugar
- ½ teaspoon vanilla extract
- 1 pint heavy whipping cream
- 1 quart fresh strawberries, rinsed and sliced
Quick note: room-temperature butter and cream cheese matter more than people expect. Cold ingredients just don’t blend smoothly, and that shows up in the final texture.
How to Make Strawberry Shortcake Cake
Let’s slow this down and go step by step, since a couple of small missteps here can turn a beautiful layer cake into a lopsided mess.
Step 1: Prep Your Cake Pans
Preheat your oven to 350°F while you get everything ready. Grease two 9-inch round cake pans thoroughly, line the bottoms with parchment paper, and sprinkle sugar over the bottom and sides. That sugar coating helps create a slightly crisp edge and makes removal so much easier later.
Step 2: Combine the Cake Batter
In a large mixing bowl, combine the cake mix, eggs, water, and softened butter. Beat everything on low speed first just until moistened, which prevents a flour cloud from taking over your kitchen. Then bump the speed up to medium and beat for a full 2 minutes until fully combined.
Step 3: Divide and Bake the Batter
Pour your batter evenly between the two prepared cake pans, using a scale or eyeballing it as closely as you can. Even distribution here matters for two layers that bake up the same height. Bake for 30 minutes, checking with a toothpick inserted into the center of each layer.
Step 4: Cool the Cakes Properly
Let your cakes cool in their pans for about 10 minutes before flipping them onto cooling racks. This short resting period keeps the layers from breaking apart during the flip. Let them cool completely on the racks before doing anything else with them.
Step 5: Level the Cake Layers
Once your cakes have cooled fully, check the tops for any doming or unevenness. Trim them flat with a serrated knife if needed, working in a slow, gentle sawing motion. Level layers stack much more evenly and look far more polished once assembled.
Step 6: Make the Cream Cheese Base
In a mixing bowl, beat the softened cream cheese, sugar, and vanilla extract together until completely smooth. Scrape down the sides as needed to make sure there are no lumps left behind. This smooth base is what the whipped cream will fold into next.
Step 7: Whip the Heavy Cream
In a separate, well-chilled bowl, whip your heavy cream on high speed until stiff peaks form. A chilled bowl genuinely helps the cream whip up faster and hold its structure better. Watch closely toward the end, since overwhipped cream turns grainy fast.
Step 8: Fold the Two Mixtures Together
Gently fold your whipped cream into the cream cheese mixture using a spatula, working in slow, careful strokes. Folding rather than stirring keeps all that airy volume you just built into the whipped cream. Stop as soon as everything looks evenly combined.
Step 9: Prep the Frosting for Piping
Transfer your finished frosting into a large zip-top bag and snip off a small corner for piping. This simple trick gives you much more control than trying to spread frosting with a spatula alone. It also makes the top layer look noticeably more polished.
Step 10: Assemble the First Layer
Place your first cake layer on a serving plate or cake stand. Spread half of your frosting evenly over the top using an offset spatula or the back of a spoon. Arrange half of your sliced strawberries evenly over that frosting layer.
Step 11: Stack and Finish the Cake
Place your second cake layer directly on top of the strawberry layer, pressing down gently to help it settle. Pipe the remaining frosting over the top layer in whatever pattern you like. Arrange the rest of your sliced strawberries on top for that classic, eye-catching finish.
Tips for the Best Strawberry Shortcake Cake Every Time
A handful of small habits genuinely separate a great layer cake from an average one.
- Use room-temperature ingredients. Cold butter and cream cheese don’t blend smoothly and it shows in the final texture.
- Level your cake layers. Even layers stack straighter and look far more professional once assembled.
- Chill your bowl before whipping cream. It whips up faster and holds its structure much better.
- Fold, don’t stir, the whipped cream in. Stirring deflates all the air you just worked to build up.
- Add strawberries close to serving time. They release moisture that can make the frosting slide if it sits too long.
Storage and Reheating
This cake looks impressive, but it’s genuinely low-maintenance to store too.
- Serve immediately after assembling for the best freshness and texture
- Refrigerate if not serving right away, since the whipped cream frosting needs to stay cool
- Store in an airtight container in the refrigerator for up to 3 days
- Freeze unfrosted layers or the fully assembled cake for up to 1 month, thawing in the fridge before serving
FYI, adding the strawberries right before serving keeps them from releasing extra moisture into your frosting. That little timing trick keeps the whole cake looking fresh longer.
Fun Variations to Try
Once you’ve made the classic version, there’s plenty of room to switch things up.
- Chocolate Strawberry Shortcake – swap in chocolate cake mix instead of French Vanilla
- Lemon Strawberry Shortcake – add lemon zest to both the batter and the frosting
- Strawberry Shortcake Cupcakes – bake the same batter in cupcake liners for individual servings
- Almond Strawberry Cake – add almond extract to the frosting for a deeper flavor note
- Strawberry Shortcake Trifle – layer cake cubes, frosting, and strawberries in a trifle dish instead
- Mixed Berry Cake – combine strawberries with blueberries or raspberries for variety
- Coconut Strawberry Cake – sprinkle toasted coconut over the top for extra texture
- Strawberry Shortcake Ice Cream Cake – layer in softened ice cream for a frozen twist
Have you ever swapped one cake mix flavor for another and ended up liking the new version even more? That’s basically the chocolate swap experience here. Same method, completely different personality.
Frequently Asked Questions
Can I use frozen strawberries instead of fresh? Yes, just thaw and drain them thoroughly to avoid excess moisture in the cake.
Can I make this cake ahead of time? Yes, bake the cake layers ahead and assemble the frosting and strawberries right before serving.
Can I make this cake dairy-free? Yes, substitute the cream cheese and heavy cream with dairy-free alternatives.
Can I use a different cake mix flavor? Absolutely, vanilla, chocolate, or lemon cake mixes all work beautifully here.
How long does this cake stay fresh? Up to 3 days when refrigerated in an airtight container.
Can I use whipped topping instead of whipped cream? Yes, a stabilized whipped topping works well and handles a bit more easily.
Can I freeze this cake? Yes, wrap it tightly and freeze for up to 1 month, thawing overnight in the fridge before serving.
Final Thoughts
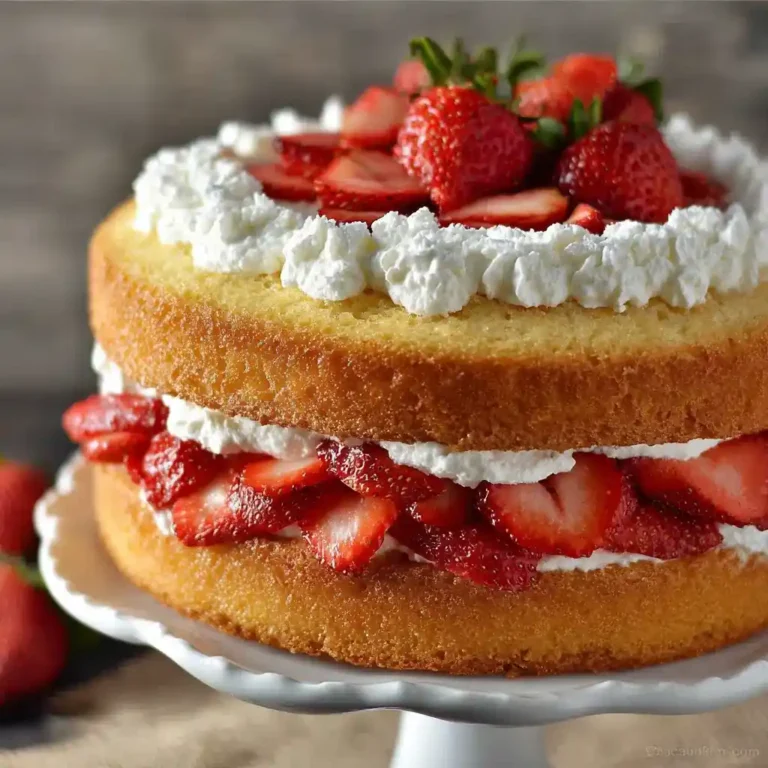
This Strawberry Shortcake Cake proves that a box mix and a few smart techniques can produce something genuinely showstopping. The moist vanilla layers, airy whipped cream cheese frosting, and fresh strawberries all work together for a reason. Once you make this, plain frosted cake might start feeling a little uninspired.
Give this recipe a try for your next birthday or celebration, and don’t be shocked when it becomes the dessert everyone requests by name. If you try one of the variations, I’d genuinely love to hear which one wins over your kitchen.
Strawberry Shortcake Cake
Ingredients
Method
- Preheat your oven to 350°F and prepare two 9-inch round cake pans by greasing them, lining the bottoms with parchment paper, and sprinkling sugar over the surfaces.
- In a large mixing bowl, combine the cake mix, eggs, water, and softened butter. Beat on low speed until moistened, then switch to medium speed and beat for 2 minutes until fully combined.
- Pour the batter evenly between the two prepared cake pans. Bake for 30 minutes, checking for doneness with a toothpick.
- Let the cakes cool in their pans for 10 minutes before transferring to cooling racks to cool completely.
- Level the tops of the cooled cake layers with a serrated knife if needed.
- In a mixing bowl, beat the softened cream cheese, sugar, and vanilla extract until smooth.
- In a separate well-chilled bowl, whip the heavy cream on high until stiff peaks form.
- Fold the whipped cream into the cream cheese mixture gently until fully combined.
- Transfer the frosting into a large zip-top bag for easy piping.
- Place the first cake layer on a serving plate and spread half of the frosting on top, then layer half of the sliced strawberries.
- Place the second cake layer on top and pipe the remaining frosting over it. Decorate with the remaining sliced strawberries.