Some desserts demand hours in the kitchen. Cherry pecan cheesecake lush demands a mixing bowl and about fifteen minutes of your attention. I first made this for a potluck, and it disappeared before the main dish even hit the table.
No oven, no fuss, just layer after layer of creamy, crunchy, fruity goodness. IMO, this is exactly the kind of recipe every busy home cook needs on standby.
Why Cherry Pecan Cheesecake Lush Deserves a Spot on Your Table
Ever notice how the best desserts often require the least effort? This one proves that theory completely. Every layer builds on the last, creating something that looks fancy but takes almost no real skill.
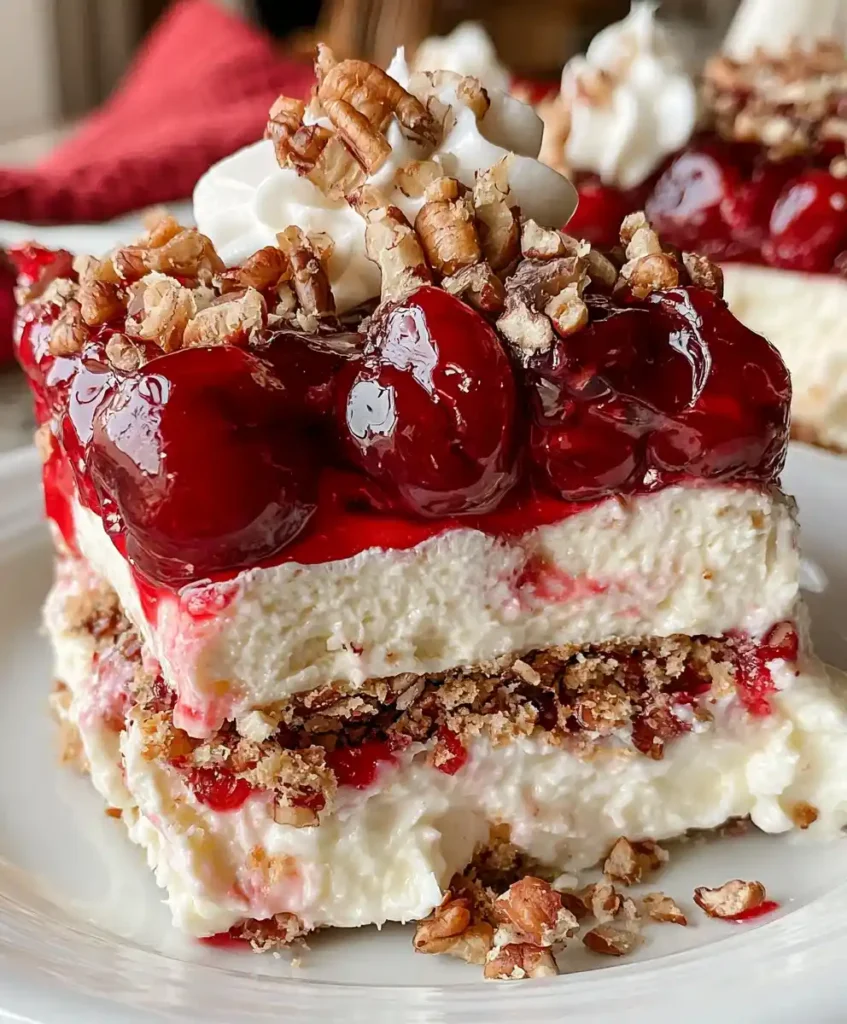
You get a buttery pecan crust, a fluffy cheesecake layer, a rich pudding center, and a sweet cherry topping. Each bite hits a different texture, so nobody gets bored halfway through their slice. That’s the magic here.
Servings and Time
This recipe makes 12 generous servings, ideal for potlucks, holidays, or a dessert that actually lasts through the week. Active prep takes about 20 minutes total. Chilling time runs at least 2 hours, so plan for roughly 2 hours and 20 minutes from start to first bite.
Ingredients for Cherry Pecan Cheesecake Lush
Nothing here requires a special trip to a fancy grocery store. Here’s the full lineup:
- Graham cracker crumbs, 1½ cups
- Pecans, finely chopped, ½ cup, plus extra for garnish
- Melted butter, ½ cup
- Cream cheese, softened, 8 ounces
- Powdered sugar, 1 cup
- Vanilla extract, 1 teaspoon
- Whipped topping, 8 ounces, divided
- Instant cheesecake pudding mix, two 3.4-ounce boxes
- Cold milk, 3 cups
- Cherry pie filling, 21 ounces
Exact measurements repeat again below for easy printing. Let’s get into the fun part now.
How to Make Cherry Pecan Cheesecake Lush
I’ll break every layer down step by step, so nothing feels rushed or confusing.
Step 1: Build the Pecan Crust
Grab a mixing bowl and combine the graham cracker crumbs, finely chopped pecans, and melted butter. Stir with a fork until every crumb looks coated and slightly damp. This coating is what creates that satisfying crunch underneath the creamy layers above.
Press the mixture firmly into a 9×13-inch pan, using the back of a spoon or your hands to pack it down evenly. Don’t rush this part, since a loose crust falls apart when you slice it later. Chill the pan in the fridge for 15 minutes so the crust firms up before you build on top of it.
Step 2: Whip Up the Cheesecake Layer
While the crust chills, beat the softened cream cheese, powdered sugar, and vanilla extract together in a bowl using an electric mixer. Run it on medium speed until the mixture turns completely smooth, with no lumps hiding anywhere. This usually takes about two to three minutes.
Once it’s smooth, gently fold in half of the whipped topping using a spatula. Fold instead of stir here, since stirring too hard knocks all the air out and leaves you with a dense layer. Spread this cheesecake mixture evenly over your chilled crust, smoothing it out to the edges of the pan.
Step 3: Make the Pudding Layer
In a separate bowl, whisk together both boxes of instant cheesecake pudding mix with the cold milk. Keep whisking steadily for about two minutes, until the mixture thickens into a smooth, spoonable consistency. Have you ever rushed this step? The pudding stays runny and ruins the layers underneath it.
Once it thickens properly, spoon the pudding evenly over your cheesecake layer. Use a spatula to smooth the surface flat, creating a clean line before you add the next layer. This pudding layer is what gives the whole dessert its rich, indulgent depth.
Step 4: Add the Cherry Topping
Open your can of cherry pie filling and spoon it carefully over the pudding layer. Spread it out gently so the cherries reach every corner of the pan, rather than piling up in the middle. This bright red layer is honestly the best part to look at.
Sprinkle the remaining chopped pecans across the top for extra crunch and visual appeal. Add dollops of the remaining whipped topping if you want an even richer finish. This is your dessert, so decorate it however makes you happiest.
Step 5: Chill and Serve
Cover the entire pan tightly with plastic wrap before it goes back into the fridge. Let it chill for at least two hours, though overnight really lets those flavors meld together beautifully. Patience pays off here, even if waiting feels impossible once it smells this good.
When you’re ready to serve, slice into clean squares and watch those gorgeous layers show themselves off. Each piece delivers creamy, crunchy, and fruity in one single bite. Serve chilled for the best texture every time.
Tips for Success
A handful of small habits keeps this dessert turning out perfectly:
- Soften your cream cheese fully before mixing, or you’ll end up with stubborn lumps.
- Chill the crust for the full 15 minutes so it holds together when sliced.
- Toast your pecans lightly beforehand for a deeper, richer nutty flavor.
- Whisk the pudding just until thick, since overmixing can make it gummy.
- Never skip the chilling time. It’s the difference between sloppy layers and clean slices.
Variations Worth Trying
This dessert bends easily to whatever you’re craving that week.
- Berry bliss: swap the cherry pie filling for blueberry or raspberry filling instead.
- Chocolate twist: use chocolate pudding mix in place of cheesecake pudding for a richer flavor.
- Lighter option: substitute Greek yogurt for the cream cheese for a tangier, leaner layer.
- Nut-free: skip the pecans entirely or replace them with sunflower seeds.
- Vegan adaptation: use coconut cream and dairy-free whipped topping throughout the recipe.
What to Serve With Cherry Pecan Cheesecake Lush
Fresh strawberries or blueberries make a lovely, bright side next to each slice. A rich cup of coffee balances out the sweetness nicely if you’re serving this after dinner. Garnish plates with mint leaves for a touch that looks far fancier than the effort required.
FAQs About Cherry Pecan Cheesecake Lush
Can I make this dessert ahead of time? Yes, and honestly, making it a day early actually improves the flavor. Cover it tightly and keep it refrigerated until you’re ready to serve.
What can I use instead of cream cheese? Greek yogurt works well as a lighter substitute. It keeps that creamy texture while trimming down the fat and calories a bit.
How long does cherry pecan cheesecake lush last in the fridge? This dessert stays fresh for about 3 to 4 days when covered tightly. Just keep it chilled the entire time to preserve those clean layers.
Can I use homemade whipped cream instead of whipped topping? Absolutely. Homemade whipped cream adds a richer flavor and holds up beautifully in every layer of this recipe.
Can I freeze this dessert? Freezing isn’t ideal here, since the pudding and whipped layers can separate once thawed. This one really shines fresh from the fridge.
Why did my layers turn out runny instead of firm? This usually means the pudding didn’t thicken enough before layering, or the dessert didn’t chill long enough overall. Give it the full two hours minimum.
Final Thoughts
Cherry pecan cheesecake lush proves that showstopping desserts don’t require a hot oven or hours of effort. Layer by layer, this recipe delivers crunch, cream, and fruity sweetness in every single bite. It’s the kind of dessert that gets requested again and again.
Make a batch this weekend, and don’t be shocked when the pan comes back completely empty
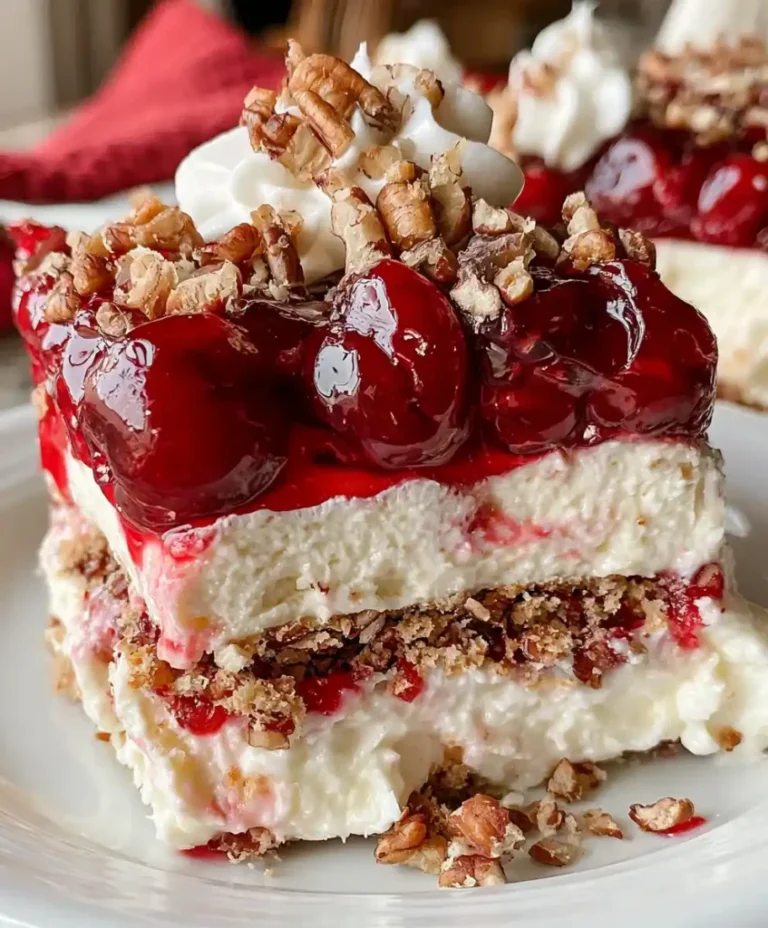
Cherry Pecan Cheesecake Lush
Ingredients
Method
- Combine graham cracker crumbs, finely chopped pecans, and melted butter in a mixing bowl. Stir until coated.
- Press the mixture firmly into a 9x13-inch pan. Chill in the fridge for 15 minutes.
- Beat cream cheese, powdered sugar, and vanilla extract in a bowl until smooth.
- Fold in half of the whipped topping and spread the mixture evenly over the crust.
- Whisk both boxes of instant cheesecake pudding mix with cold milk until thickened.
- Spoon the pudding over the cheesecake layer and smooth the surface.
- Spoon cherry pie filling over the pudding layer, spreading it evenly.
- Sprinkle remaining chopped pecans and add dollops of remaining whipped topping.
- Cover tightly with plastic wrap and chill for at least 2 hours.
- Slice into squares and serve chilled.