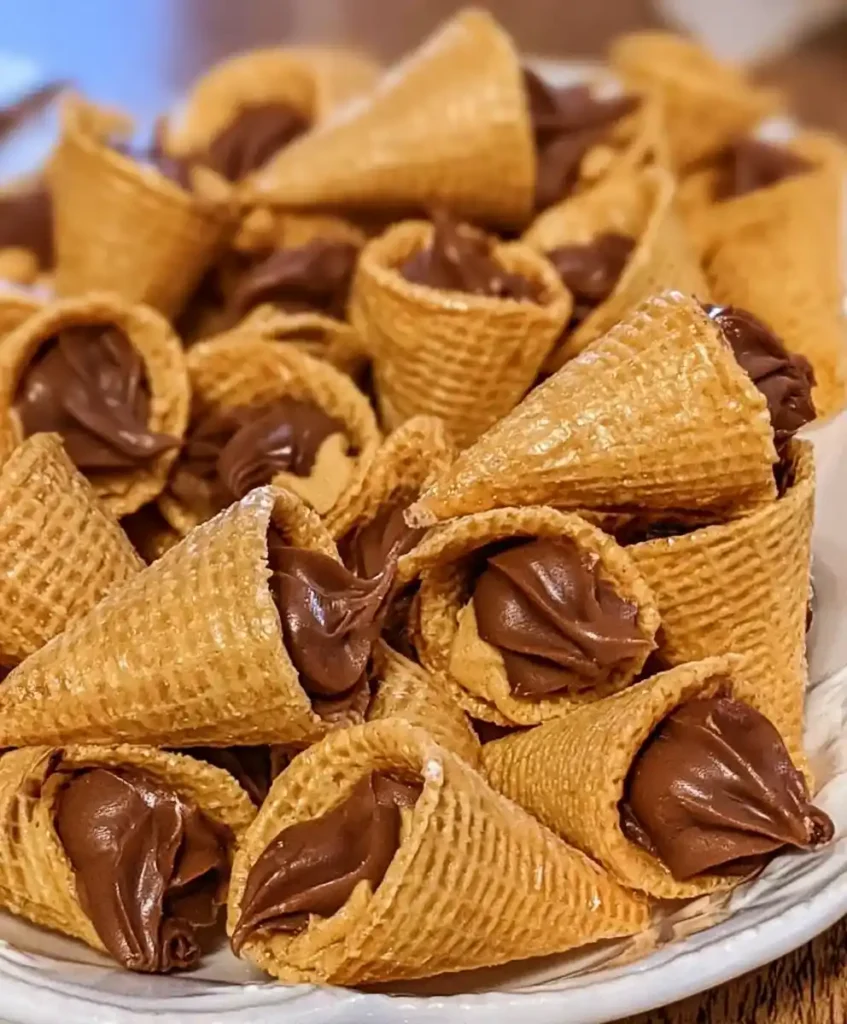
Let’s skip the small talk: if you’ve never dipped a Bugle in chocolate, you’re missing out. Peanut butter bugle bites take one weird, wonderful snack chip and turn it into something people fight over at parties. No oven, no fuss, just pure snack magic.
Why Peanut Butter Bugle Bites Work So Well
Something about the combo of salty, crunchy, creamy, and chocolatey just clicks. Peanut butter bugle bites hit every craving at once, which is probably why they vanish off the plate so fast.
This isn’t a recipe that demands baking skills or fancy equipment. You melt, you pipe, you dip, you chill. Have you ever made a treat that looks impressive but takes almost zero effort? This is exactly that.
I make these whenever I need a crowd-pleaser fast, whether it’s a school event or a random Tuesday craving. IMO, they beat store-bought candy every single time, and nobody ever guesses how easy they were to pull off.
Recipe at a Glance
Here’s what you’re working with before you start:
- Servings: About 40 bites, serving roughly 8 to 10 people
- Prep time: 20 minutes
- Chill time: 30 minutes
- Total time: 50 minutes
Fifty minutes, most of it hands-off chill time, gets you a full tray of crunchy, chocolatey bites. That’s a pretty solid return on effort.
What You’ll Need for Peanut Butter Bugle Bites
Here’s the full ingredient list with quantities so you can shop once and get cooking:
- Original Bugles corn snacks: one 8-ounce bag, about 40 to 50 pieces
- Creamy peanut butter: 1 cup
- Unsalted butter, softened: 2 tablespoons
- Powdered sugar: 1/2 cup
- Vanilla extract: 1/2 teaspoon
- Salt: a pinch (optional)
- Milk chocolate chips: 1 1/2 cups
- Coconut oil or vegetable shortening: 1 tablespoon (optional)
- Crushed roasted peanuts: for topping (optional)
- Chocolate sprinkles: for topping (optional)
- Holiday sprinkles: for topping (optional)
- Flaky sea salt: for topping (optional)
Skip the fancy peanut butter here; a basic creamy jar works perfectly. FYI, natural peanut butter can turn out too oily for piping, so stick with a classic shelf-stable brand.
How to Make Peanut Butter Bugle Bites
Let’s break this down properly so every batch turns out crunchy, not soggy.
Step 1: Mix the Peanut Butter Filling
In a medium mixing bowl, combine the peanut butter and softened butter using a spoon or hand mixer. Add the powdered sugar and vanilla extract, then stir until everything turns smooth and thick. The mixture should hold its shape without sliding off a spoon.
If it feels too soft or loose to work with, pop the bowl in the fridge for about fifteen minutes. This short chill firms things up just enough for easy piping. Skipping this step usually means a messier filling process later.
Step 2: Load Up Your Piping Bag
Transfer the peanut butter mixture into a piping bag, or use a zip-top bag with one corner snipped off. Either option works fine, so don’t stress over fancy equipment. A spoon can technically work too, though it’s slower and messier.
Snip a small opening, not a huge one, so you control the flow. A tiny hole gives you cleaner, more precise fills. Trust me, a giant hole here leads to peanut butter everywhere except inside the Bugles.
Step 3: Fill Each Bugle Carefully
Hold each Bugle upright and pipe the peanut butter mixture into the wide opening. Fill it almost to the top, leaving a small gap for the chocolate coating later. Work in batches so the filling doesn’t dry out while you go.
Set each filled Bugle onto a parchment-lined tray as you go. Keep them upright so the filling doesn’t shift or spill out. This step takes patience, but it’s honestly kind of satisfying once you get a rhythm going.
Step 4: Melt the Chocolate Properly
Place the milk chocolate chips in a microwave-safe bowl, adding the coconut oil if you’re using it. Microwave in twenty-second bursts, stirring thoroughly between each round. This slow approach prevents scorching, which ruins the whole batch instantly.
Keep going until the chocolate turns smooth, glossy, and pourable. It should look like melted candy, not a grainy mess. If it seizes up, a tiny splash of oil can sometimes help bring it back.
Step 5: Dip Each Filled Bugle
Pick up each filled Bugle by the pointed end and dip the open side into the melted chocolate. Twist gently to coat the top evenly, then lift it back out. A little dripping is normal, so don’t panic over a bit of mess.
Place each dipped Bugle back onto the parchment-lined tray, chocolate side facing up. Work quickly here, since chocolate firms up faster than you’d expect. Add any toppings right away, before that chocolate has a chance to set.
Step 6: Add Toppings While Wet
Sprinkle on crushed peanuts, chocolate sprinkles, holiday sprinkles, or flaky sea salt immediately after dipping. The chocolate needs to still be wet for toppings to actually stick. Waiting even a minute too long means toppings just roll right off.
Feel free to mix and match toppings across the batch for variety. Some plain, some nutty, some salty; it keeps things interesting on the tray. This is also the fun part to hand off to kids if they’re helping out.
Step 7: Chill Until Set
Transfer the whole tray into the fridge and let the bites chill for twenty to thirty minutes. This firms the chocolate completely, locking in that satisfying snap when you bite down. Don’t rush this step by eating them warm; the texture just isn’t the same.
Once set, they’re ready to serve straight from the tray. Store any extras in an airtight container in the fridge. These little bites hold their crunch surprisingly well for days.
Tips for Getting This Recipe Right
A few small habits make a noticeable difference here.
- Chill the filling before piping for cleaner, less messy results.
- Melt chocolate slowly in short bursts to avoid burning or seizing.
- Add toppings immediately after dipping while the chocolate is still wet.
- Work in small batches so filling and chocolate don’t dry out or harden.
- Store bites cold so the chocolate coating stays firm and snappy.
Easy Variations Worth Trying
Once you’ve mastered the basic version, these twists keep things fresh.
- Dark chocolate swap: Use dark chocolate chips for a richer, less sweet finish.
- Nut butter switch: Try almond or cashew butter instead of peanut butter.
- Low-sugar option: Replace powdered sugar with a monk fruit or erythritol blend.
- Spiced version: Stir a pinch of cinnamon into the peanut butter filling.
- Gluten-free check: Confirm your Bugles bag is labeled gluten-free before buying.
What to Serve With Peanut Butter Bugle Bites
These bites pair nicely with a few simple additions.
- A cold glass of milk for that classic peanut-butter-and-chocolate combo.
- Sliced apples or strawberries for a fresher, balanced snack plate.
- A colorful platter setup for parties, garnished with fresh mint.
- Other no-bake treats alongside them for a full dessert table spread.
- Coffee or hot cocoa if you’re serving these as an evening treat.
FAQs About Peanut Butter Bugle Bites
Can I use crunchy peanut butter instead of creamy? Yes, crunchy peanut butter adds nice texture to the filling. It may pipe slightly less smoothly, but the flavor still works beautifully.
How long do these bites last? Stored in an airtight container in the fridge, they last up to a week. Keep them cool so the chocolate coating stays firm.
Can I freeze peanut butter bugle bites? Absolutely. Freeze them in a single layer in a freezer-safe container for up to three months. Let them thaw briefly before serving.
What can I use if I don’t have Bugles? Waffle cone pieces or sturdy pretzel rods make good substitutes. You just need something crunchy that can hold the filling.
Can I customize the toppings? Definitely. Crushed nuts, caramel drizzle, or crushed cookies all work great. Toppings are the easiest way to make each batch feel different.
Final Thoughts
Peanut butter bugle bites prove that no-bake snacks don’t have to feel like an afterthought. Between the salty crunch, creamy filling, and glossy chocolate shell, every bite pulls its weight. Fifty minutes gets you a tray that disappears faster than you can refill it.
Make a batch this weekend, and don’t be surprised when everyone asks for the recipe. Get the kids involved with toppings, and turn snack time into an actual event. Fair warning, though: once people know you make these, there’s no going back
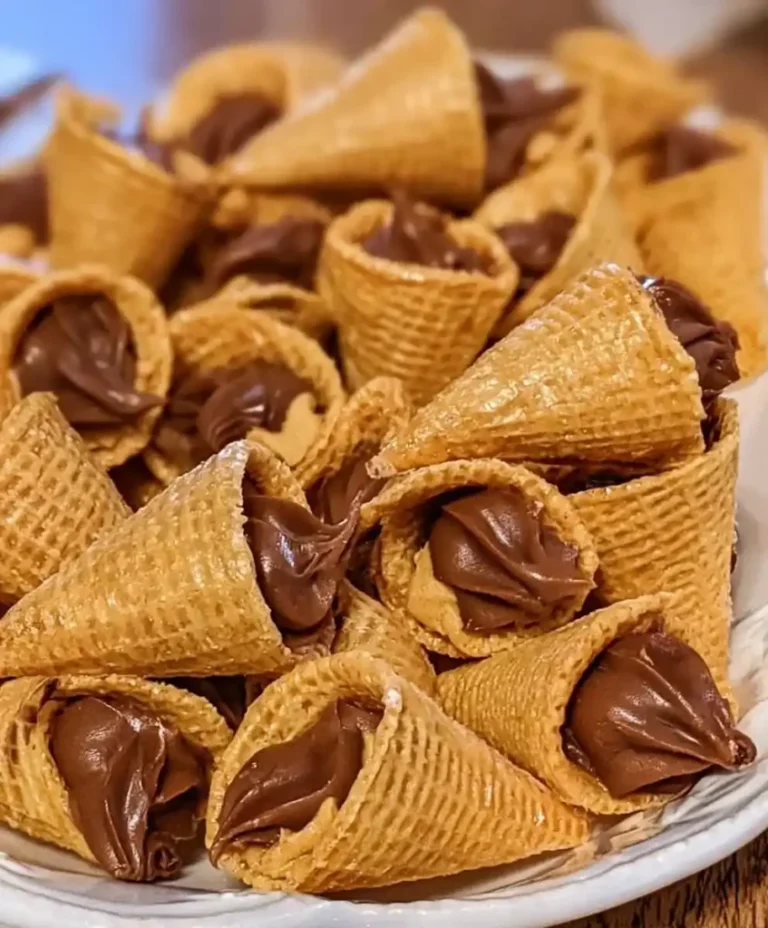
Peanut Butter Bugle Bites
Ingredients
Method
- In a medium mixing bowl, combine the peanut butter and softened butter using a spoon or hand mixer. Add the powdered sugar and vanilla extract, then stir until everything turns smooth and thick.
- If it feels too soft or loose to work with, chill in the fridge for about 15 minutes to firm it up.
- Transfer the peanut butter mixture into a piping bag or a zip-top bag with one corner snipped off.
- Fill each Bugle carefully with the peanut butter mixture, leaving a small gap at the top for coating.
- Place the milk chocolate chips in a microwave-safe bowl and add coconut oil if using. Microwave in 20-second bursts, stirring thoroughly until smooth and pourable.
- Dip the filled Bugle into the melted chocolate by the pointed end, then place it back on a parchment-lined tray.
- Immediately sprinkle on any desired toppings before the chocolate sets.
- Transfer the tray to the fridge and let the bites chill for 20 to 30 minutes until the chocolate is firm.




