Takeout Thai green curry is expensive and never quite hits right. This homemade version? It’s cheaper, tastier, and honestly not that hard to make. I perfected it after burning through way too many jars of store-bought paste.
Prep Time: 15 minutes
Cook Time: 25 minutes
Total Time: 40 minutes
Servings: 4-6 people
This authentic Thai green curry recipe delivers creamy, spicy perfection that rivals any restaurant. Ready to transform your weeknight dinner game completely?
Why Homemade Green Curry Wins
Have you ever noticed how restaurant Thai curry costs $15 but tastes different every time you order? Making it yourself solves both problems. You control flavor, spice level, and your wallet stays happy.
I’ve ordered countless green curry dishes over the years. Some were amazing. Others were disappointingly bland or swimming in coconut milk. This recipe consistently delivers that perfect balance everyone craves.
The secret lies in building layers of flavor properly. Toast the paste. Bloom the aromatics. Add coconut milk gradually. These small steps create depth that jarred sauces simply cannot replicate no matter what.
Plus, you can customize everything. More vegetables? Done. Extra protein? Easy. Adjust spice to your tolerance. That flexibility makes this recipe invaluable for various dietary preferences and tastes.
Essential Ingredients
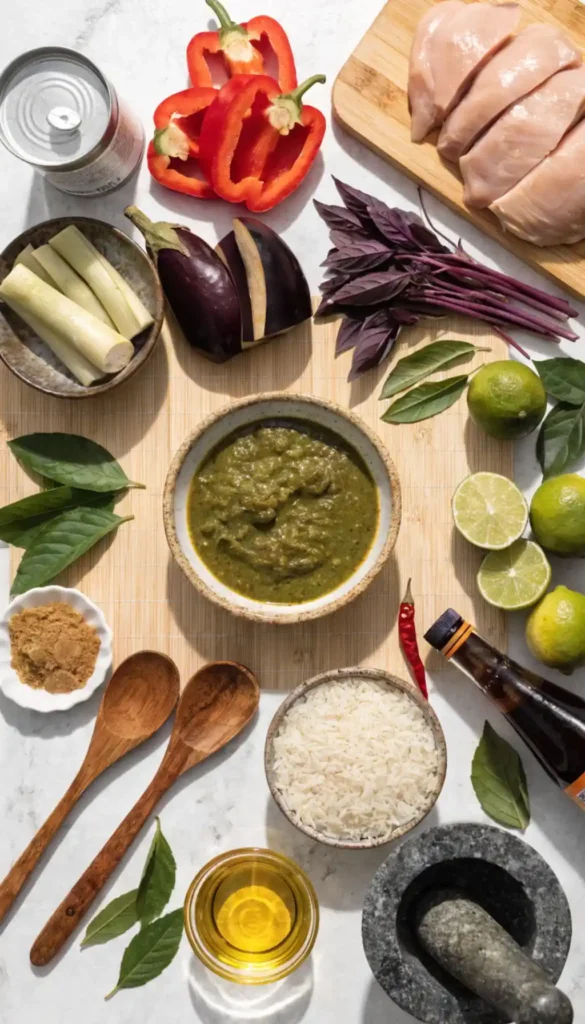
Let’s break down what you need for this easy Thai green curry. Nothing too exotic if you have access to Asian markets. Most items are becoming mainstream grocery staples now.
For the Curry:
- 3 tablespoons Thai green curry paste
- 1 (14-ounce) can coconut milk
- 1 cup chicken or vegetable broth
- 1 tablespoon fish sauce
- 1 tablespoon brown sugar
- 2 tablespoons vegetable oil
- 3-4 kaffir lime leaves (optional but recommended)
- 1 tablespoon fresh lime juice
For the Protein:
- 1 pound chicken breast or thighs, sliced thin
- Or 1 pound firm tofu, cubed (for vegan version)
- Or 1 pound shrimp, peeled and deveined
Now For the Vegetables:
- 1 red bell pepper, sliced
- 1 cup bamboo shoots
- 1 cup Thai eggplant or regular eggplant, cubed
- 1/2 cup fresh basil leaves (Thai basil preferred)
- 2 Thai chilies, sliced (optional for heat)
Quality green curry paste makes all the difference here. Mae Ploy or Thai Kitchen brands work great. Homemade paste tastes better but requires more ingredients and effort.
Understanding Green Curry Paste
Store-bought Thai green curry paste saves time without sacrificing much flavor. It contains lemongrass, galangal, green chilies, garlic, shallots, and spices already blended perfectly together.
Making green curry paste recipe from scratch requires specialty ingredients. Fresh galangal, coriander root, and Thai basil aren’t always available. Store-bought is perfectly acceptable for excellent results, honestly.
If making paste yourself, use a mortar and pestle traditionally. Food processors work but create different texture. The pounding releases oils and creates smoother consistency than chopping ever could.
Store homemade paste in the fridge for two weeks or freeze for three months. Make large batches to save time. Future-you will appreciate having authentic paste ready whenever curry cravings hit.
Preparing Your Ingredients
Slice chicken into thin, bite-sized strips against the grain. Thin pieces cook faster and absorb sauce better. Uniform sizing ensures even cooking throughout. Nobody wants raw chicken in their curry.
If using tofu for vegan Thai green curry, press it first. Wrap in towels and place something heavy on top for 20 minutes. This removes excess moisture so tofu absorbs flavors instead of diluting them.
Cut vegetables into similar-sized pieces. Bell peppers in strips. Eggplant in cubes. Consistency creates even cooking and professional appearance. Mismatched sizes cook unevenly and look sloppy on the plate.
Have everything prepped before you start cooking. Thai cooking moves quickly once you begin. Running around looking for ingredients while your curry burns? Not fun. Organization prevents disasters completely.
Building the Flavor Base
Heat oil in a large pot or wok over medium-high heat. Let it get properly hot before adding anything. Cold oil creates greasy, sad curry. Hot oil blooms flavors properly.
Add green curry paste and stir constantly for 1-2 minutes. This toasting step is crucial. It releases aromatic oils and deepens flavors significantly. Your kitchen should smell incredible right now.
The paste should darken slightly and become very fragrant. If it starts sticking or burning, reduce heat immediately. Burned paste tastes bitter and ruins everything. Watch it carefully here.
This toasting technique applies to all Thai curry recipes. Red, yellow, green—they all benefit from proper paste preparation. Small step, massive flavor impact. Never skip it ever.
Adding Coconut Milk Properly
Shake your coconut milk can thoroughly before opening. The cream separates and sits on top. Shaking redistributes it evenly throughout the liquid for consistent texture.
Add half the coconut milk to the toasted paste. Stir vigorously to combine completely. The paste should dissolve into the coconut milk, creating smooth green coconut curry sauce without lumps.
Let this mixture simmer for 3-4 minutes. The oil from coconut milk will start separating and pooling on top. This is good—it means flavors are concentrating properly. Don’t skim it off.
Add remaining coconut milk along with broth. This thins the curry to proper consistency. Too thick and it’s more like paste than sauce. Too thin and it’s soup. Balance matters here.
Seasoning the Curry
Stir in fish sauce and brown sugar. These create the sweet-salty balance Thai food is famous for. Fish sauce adds umami depth. Sugar rounds out heat and acidity beautifully.
Add kaffir lime leaves if you have them. Tear them slightly to release oils. They add citrusy, floral notes that make curry taste authentically Thai. Skip them if unavailable—still good without.
Taste the green curry sauce at this point. It should be flavorful but not overwhelming. Remember, it’ll intensify as it reduces. Err on the slightly milder side initially. You can always add more later.
This base works for any protein or vegetable combination. Master it once and you’ve unlocked endless curry variations. That’s the power of understanding fundamental cooking techniques, FYI.

Cooking the Protein
Add sliced chicken to the simmering curry. Stir gently to coat all pieces. Let it cook for 8-10 minutes until chicken reaches 165°F internal temperature throughout.
For this green curry chicken version, thighs work better than breasts. They stay juicier and have more flavor. Breasts dry out easily if overcooked. Choose wisely based on preference.
If using shrimp, add them last since they cook in 3-4 minutes. Overcooked shrimp turn rubbery and tough. Add vegetables first, then shrimp at the very end. Timing matters tremendously.
For tofu, add it with the vegetables. It just needs to heat through and absorb flavors. It won’t overcook like animal proteins. This makes vegan versions actually easier to execute successfully.
Adding Vegetables
Once protein is nearly cooked, add bell peppers, bamboo shoots, and eggplant. Stir gently to combine. Let everything simmer together for 5-7 minutes until vegetables are tender-crisp.
Don’t overcook vegetables. They should retain some bite and vibrant color. Mushy vegetables make sad curry. Nobody wants that texture situation happening on their plate.
Thai eggplant works best but regular eggplant substitutes fine. Cut it smaller since it’s denser. It should be soft but not falling apart. That perfect texture comes from proper timing.
You can add green peas curry style in the last minute. Frozen peas need minimal cooking. They add color and sweetness. Fresh peas work too but require slightly longer cooking time.
Final Touches
Turn off heat and stir in fresh lime juice. This brightens all the flavors instantly. Curry without acid tastes flat and one-dimensional. That squeeze of lime changes everything completely.
Tear fresh basil leaves and stir them in. Thai basil has different flavor than Italian basil—more anise-like and pungent. If you can’t find it, Italian basil works in a pinch.
Taste and adjust seasoning. Need more salt? Add fish sauce. Too spicy? Stir in more coconut milk or sugar. Not spicy enough? Add sliced Thai chilies. Make it perfect for you.
Let the curry rest for 5 minutes before serving. Flavors continue melding and developing. The sauce thickens slightly. Resting improves almost every dish you cook, honestly.
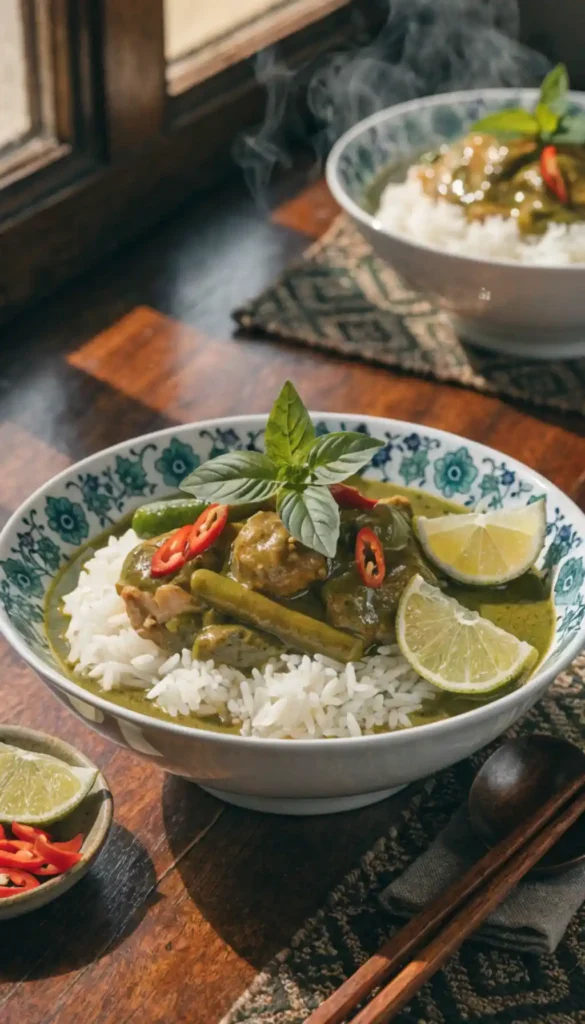
Serving Suggestions
Serve this Thai green curry soup consistency over jasmine rice. The fluffy rice soaks up sauce beautifully. Sticky rice works too but jasmine is traditional. Rice is non-negotiable here.
Rice noodles make a great alternative. Pad thai noodles or rice vermicelli both work well. Cook noodles separately, drain, then add to curry. Mix everything together before serving.
Garnish with extra basil leaves and sliced red chilies. Lime wedges on the side let people adjust acidity. These small touches elevate presentation from home-cooking to restaurant-quality instantly.
Serve with Thai iced tea or cold beer. Something refreshing balances the spice and richness. Hot curry plus cold drink creates perfect temperature and flavor contrast throughout the meal.
Variations to Try
Master the basic recipe first, then experiment freely. I’ve tried countless variations of these curry chicken recipes. Some became regular rotation staples. Others taught valuable lessons.
Slow Cooker Thai Green Curry
Brown curry paste in a skillet first. Transfer everything to slow cooker. Cook on low for 4-6 hours. Add vegetables and coconut milk in the last hour. Easy hands-off dinner.
This slow cooker Thai green curry method works great for meal prep. Make it Sunday, eat all week. The flavors actually improve over time as everything marinates together longer.
Thai Chicken Curry with Pineapple
Add fresh pineapple chunks in the last 5 minutes. The sweetness complements spice perfectly. It adds tropical flair and textural variety. Sounds weird but tastes absolutely incredible together.
Cherry tomatoes work similarly. Their acidity and sweetness balance rich coconut milk. Add them with other vegetables. They break down slightly, enriching the sauce naturally.
Extra Vegetable Version
Load it with broccoli, snap peas, carrots, and mushrooms. This creates healthier, more filling curry. Perfect for stretching protein further or making heart healthy recipes that satisfy completely.
Add vegetables in stages based on cooking time. Carrots first, then broccoli, finally snap peas. Everything finishes perfectly without anything getting overcooked or undercooked throughout.
Make-Ahead and Storage
Make curry up to 3 days ahead. Store in airtight containers refrigerated. Reheat gently on the stove. Flavors improve as they meld overnight. Next-day curry often tastes even better.
Freeze curry for up to 3 months. Let it cool completely first. Portion into individual servings for easy defrosting. Thaw overnight in fridge before reheating on the stove.
Store curry and rice separately. Combined storage makes rice mushy and gross. Keep them apart and assemble fresh when eating. Small organizational step, much better results.
Basil wilts and darkens during storage. Add fresh basil when reheating instead. This keeps that bright, fresh flavor intact. Stored basil loses its punch and appeal completely.
Adjusting Spice Levels
Too spicy? Add more coconut milk or a spoonful of sugar. Both temper heat effectively. You can also serve with cucumber slices—they cool the palate between bites naturally.
Not spicy enough? Add more curry paste or fresh chilies. Start with small amounts. You can always add more but can’t remove spice once it’s in. Go gradually here.
Remove seeds from Thai chilies for less heat but same flavor. The seeds contain most capsaicin. Deseeded chilies give flavor without mouth-burning intensity. Smart compromise for sensitive palates.
Different curry paste brands vary in heat levels. Mae Ploy is moderate. Some Thai brands are nuclear. Start with less paste than recipe calls for. Taste and adjust accordingly.
Common Mistakes to Avoid
Don’t skip toasting the curry paste. This crucial step develops flavors properly. Adding paste directly to coconut milk creates flat, one-dimensional taste. Toast it first always.
Avoid boiling coconut milk aggressively. Gentle simmer maintains creamy texture. Hard boiling makes it separate and look curdled. Low and slow wins this race every time.
Don’t add all vegetables at once. Different vegetables need different cooking times. Stagger additions based on density. This prevents some being mush while others stay raw.
Never substitute regular basil early in cooking. It loses flavor when heated too long. Thai basil withstands heat better. Add regular basil only at the very end off heat.
Cost Comparison
Homemade curry costs roughly $12-15 for 4-6 servings. That’s about $2.50 per person maximum. Restaurant curry runs $12-15 per person typically. You’re saving serious money here.
Curry paste lasts months in the fridge. One jar makes multiple batches. That $5 jar might produce eight curries. The per-meal cost becomes negligible over time.
Coconut milk is the most expensive ingredient per use. Buy it on sale and stock up. It keeps for years unopened. Strategic shopping cuts costs significantly.
Making green curry recipes at home also means larger portions. Restaurant servings are tiny for the price. Your homemade curry feeds more people better for less money. Simple math wins.
Why This Recipe Works
This authentic Thai green curry succeeds through proper technique and ingredient balance. The paste toasting. The gradual coconut milk addition. The staging of ingredients. Every step has purpose.
The ratio of curry paste to coconut milk creates that perfect creamy-spicy balance. Too much paste overwhelms. Too little tastes bland. This recipe nails it consistently every time.
Adding vegetables at the right moment ensures perfect texture throughout. Nothing mushy, nothing raw. That consistency creates restaurant-quality results home cooks can actually achieve reliably.
The recipe adapts easily to dietary needs and preferences. Swap proteins, change vegetables, adjust spice. The foundational technique works regardless of modifications made. True versatility here, IMO.
Final Thoughts
You now know how to make incredible Thai green curry at home. It’s simpler than you imagined, right? No culinary school or special equipment required whatsoever.
This curry has become my weekly staple. I make it constantly with different proteins and vegetables. It never gets boring because I keep changing it up constantly.
Stop ordering expensive takeout and start making this. Your kitchen will smell amazing and your taste buds will celebrate. Your wallet will thank you. Everybody wins completely here.
Remember, curry is forgiving. Don’t stress about perfection. Just follow the basic steps and adjust to your taste. Make it, eat it, and make it again better next time.
Frequently Asked Questions
Can I make this without fish sauce?
Yes, use soy sauce or coconut aminos instead. The flavor differs slightly but still tastes good. Add a squeeze of lime juice to replace some umami depth fish sauce provides.
How do I make this less spicy for kids?
Use only 1-2 tablespoons of curry paste instead of 3. Remove seeds from any chilies. Add extra coconut milk and sugar. Serve with plain rice and let kids adjust their own bowls.
What can I substitute for Thai eggplant?
Regular eggplant works fine—just cut it smaller. Zucchini, green beans, or broccoli also work well. Choose vegetables that hold up to simmering without turning mushy too quickly.
Can I use light coconut milk?
You can, but the curry will be thinner and less creamy. Full-fat coconut milk creates that authentic rich texture. If watching calories, use half light and half regular for compromise.
How long does green curry last in the fridge?
Properly stored in an airtight container, curry lasts 3-4 days refrigerated. The flavors actually improve overnight. Reheat gently on the stove, adding a splash of water if it’s too thick.
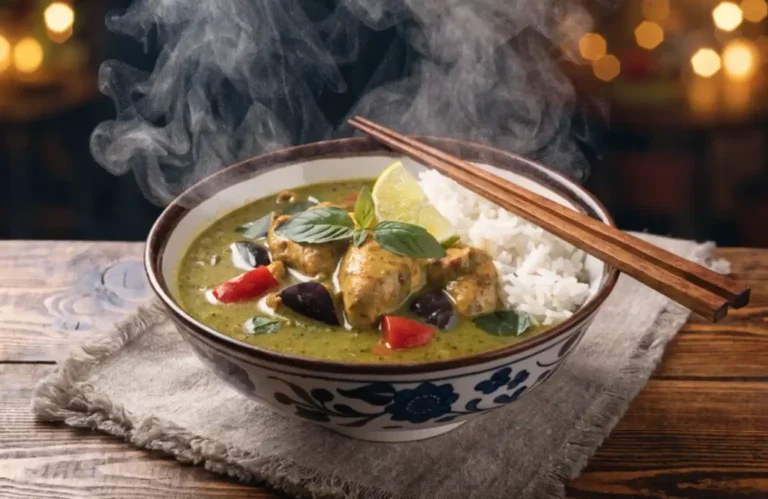
Homemade Thai Green Curry
Ingredients
Method
- Slice chicken into thin, bite-sized strips.
- If using tofu, press it first to remove excess moisture.
- Cut vegetables into uniform sizes for even cooking.
- Have all ingredients prepped before starting to cook.
- Heat vegetable oil in a large pot or wok over medium-high heat.
- Add Thai green curry paste and stir constantly for 1-2 minutes until fragrant.
- Add half of the coconut milk and stir until the paste dissolves completely.
- Simmer for 3-4 minutes until oil starts separating.
- Add remaining coconut milk and broth, and adjust the consistency.
- Stir in fish sauce and brown sugar, along with kaffir lime leaves.
- Taste and adjust seasoning.
- Add sliced chicken to the curry and cook for 8-10 minutes until fully cooked.
- For shrimp, add in the last 3-4 minutes of cooking.
- Add tofu with the vegetables.
- Once protein is nearly cooked, add bell peppers, bamboo shoots, and eggplant.
- Simmer together for 5-7 minutes until vegetables are tender-crisp.
- Optionally add green peas in the last minute of cooking.
- Turn off heat and stir in fresh lime juice and basil.
- Let the curry rest for 5 minutes before serving.