Servings: 10-12 slices | Prep Time: 30 minutes | Chill Time: 4-6 hours (or overnight) | Total Time: 5-7 hours
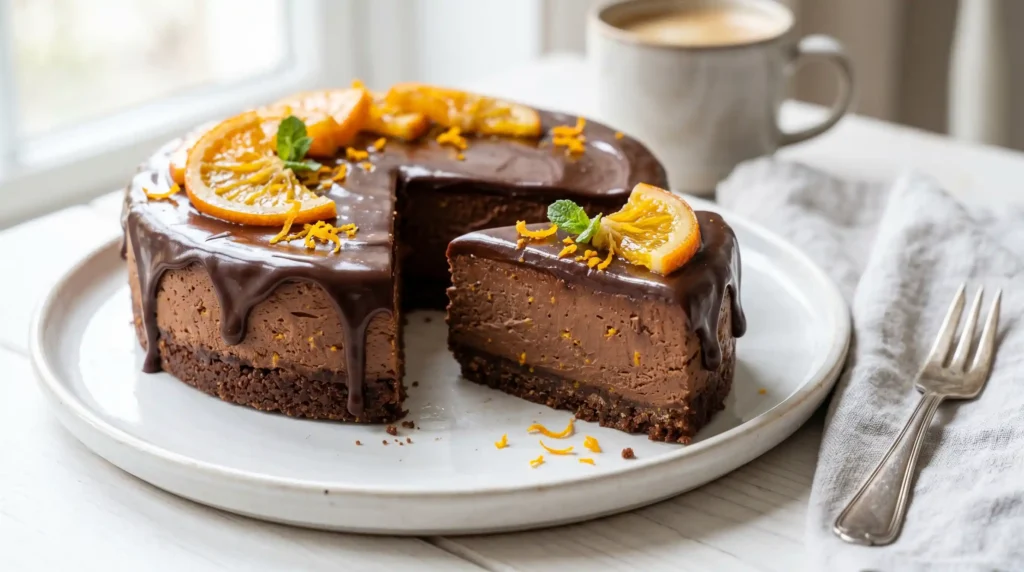
Okay, let’s be real for a second. If there’s one dessert that makes you forget every other dessert you’ve ever eaten, it’s a Chocolate Orange Cheesecake. We’re talking rich, velvety chocolate meets zingy, citrusy orange — all sitting on a buttery biscuit base. This is the kind of thing you bring to a dinner party and suddenly everyone thinks you’re a professional pastry chef.
I first made this on a lazy Sunday when I had leftover oranges and a half-eaten pack of chocolate digestives. One experiment later, and this recipe became my most-requested dessert ever. No baking required, minimal fuss, and absolutely stunning results. Sound good? Let’s get into it.
Ingredients You Will Need
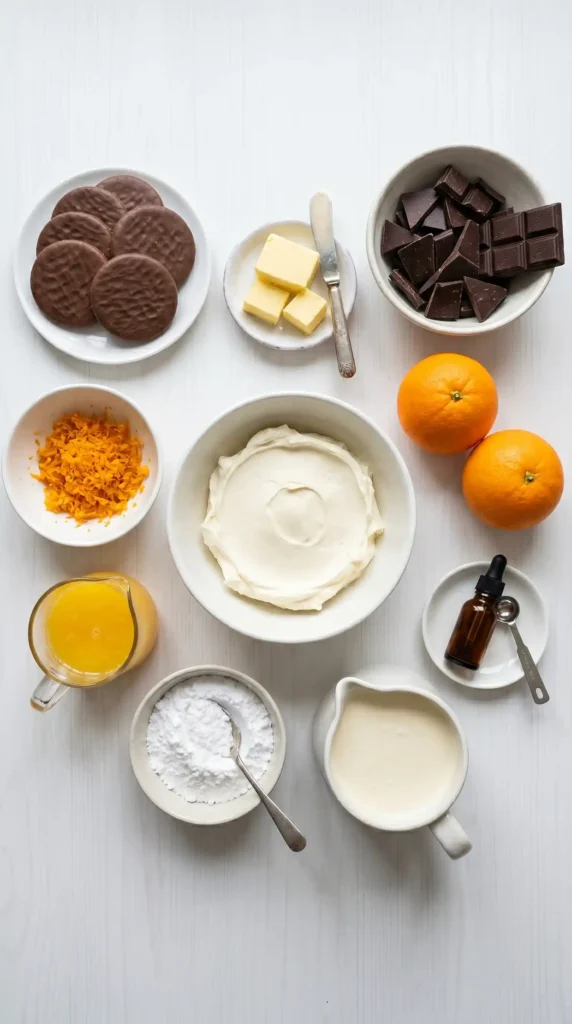
Before you start, make sure everything is at room temperature — especially the cream cheese. Cold cream cheese makes a lumpy filling, and nobody wants that
For the Biscuit Base
- 300g chocolate digestive biscuits
- 120g unsalted butter, melted
For the Chocolate Orange Filling
- 600g full-fat cream cheese, softened
- 150g icing sugar, sifted
- 300ml double cream
- 200g dark chocolate (70% cocoa), melted and cooled
- Zest of 2 large oranges
- 3 tablespoons fresh orange juice
- 1 teaspoon vanilla extract
For the Topping
- 100g dark chocolate, melted
- 50ml double cream (for ganache)
- Zest of 1 orange
- Candied orange slices (optional but highly recommended)
Step-By-Step: How to Make Chocolate Orange Cheesecake
Here’s where the magic happens. Follow these steps closely and you’ll end up with a showstopper of a dessert every single time.
Step 1: Make the Biscuit Base
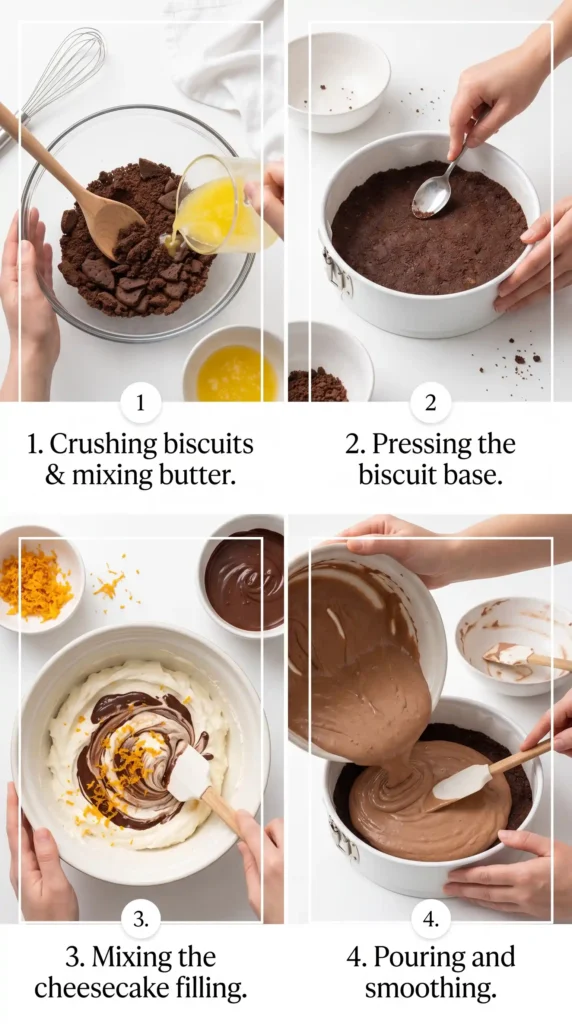
Start by crushing your chocolate digestive biscuits. You can do this by placing them in a ziplock bag and bashing them with a rolling pin — honestly, one of the most satisfying parts of this whole recipe. You want fine crumbs, not chunky bits.
Pour the crushed biscuits into a bowl and add your 120g of melted unsalted butter. Stir everything together until every crumb is coated and the mixture looks like wet sand. Tip it into a 23cm springform tin and press it down firmly using the back of a spoon or the flat base of a glass.
Make sure you press the crumbs right to the edges and create an even layer. A thin, uneven base will crack when you slice the cheesecake.
Pop the tin into the fridge for at least 20 minutes to set while you work on the filling. This chilling time is important — it helps the base firm up so it doesn’t crumble when you pour in the creamy filling.
Step 2: Melt Your Chocolate
Break your 200g of dark chocolate into small pieces and melt it using a heatproof bowl set over a pan of gently simmering water. Stir it slowly and constantly. Do not let the bowl touch the water or your chocolate may seize up.
Alternatively, melt it in the microwave in 20-second bursts, stirring between each one. Once fully melted and silky smooth, set it aside to cool to room temperature. This step is crucial — if you add warm chocolate straight to your cream cheese mixture, it will melt the cream and you’ll end up with soup instead of cheesecake. Not ideal.
Step 3: Prepare the Cream Cheese Mixture
In a large mixing bowl, beat together your 600g of softened cream cheese and 150g of sifted icing sugar. Use a hand mixer or stand mixer on medium speed. Beat for about 2 minutes until the mixture is completely smooth and lump-free.
Now add the zest of your 2 oranges, 3 tablespoons of fresh orange juice, and 1 teaspoon of vanilla extract. Mix again on low speed until everything is fully combined. Take a little taste at this point — you should already get that gorgeous orange fragrance. FYI, this is one of those moments where you realize this Chocolate Orange Cheesecake is going to be seriously special.
Step 4: Whip the Double Cream
In a separate clean bowl, pour in your 300ml of double cream. Whip it using a hand mixer on medium-high speed until it forms soft peaks. You’re looking for the cream to hold its shape but still have a gentle, pillowy softness to it — not stiff or grainy.
Softly whipped cream gives your cheesecake that light, mousse-like texture that makes each bite feel airy rather than dense. Over-whipping the cream can make the final cheesecake grainy, so stop as soon as it holds its shape.
Step 5: Fold Everything Together
Now gently fold the whipped cream into your cream cheese mixture. Use a large spatula and fold with slow, sweeping motions. This technique keeps all those lovely air bubbles intact so your cheesecake stays light and fluffy rather than heavy.
Once the cream is fully incorporated, pour in your cooled melted chocolate. Fold it in slowly in the same way, making sure there are no white streaks running through the filling. The mixture should turn a deep, gorgeous chocolate brown with flecks of orange zest throughout.
Take your time with this folding step. Rushing it and stirring too vigorously will knock all the air out of your beautiful filling. Gentle, patient folding is key.
Step 6: Assemble the Cheesecake
Take your chilled biscuit base out of the fridge. Pour the chocolate orange filling on top and use a spatula to spread it evenly right to the edges. Give the tin a little shake from side to side to help it settle into a smooth, flat layer.
Cover the tin loosely with cling film and place it in the fridge. You need to leave it to chill for at least 4 to 6 hours, but overnight is honestly better. The longer it chills, the firmer and more sliceable it becomes. Patience is your best friend here.
Step 7: Make the Chocolate Ganache Topping
When you’re ready to serve, make your ganache. Heat 50ml of double cream in a small saucepan over low heat until it just begins to simmer. Remove from the heat immediately and pour it over your 100g of chopped dark chocolate in a heatproof bowl.
Let it sit for 30 seconds, then stir slowly from the centre outward until you have a glossy, smooth ganache. Let it cool slightly for about 5 minutes — you want it pourable but not piping hot.
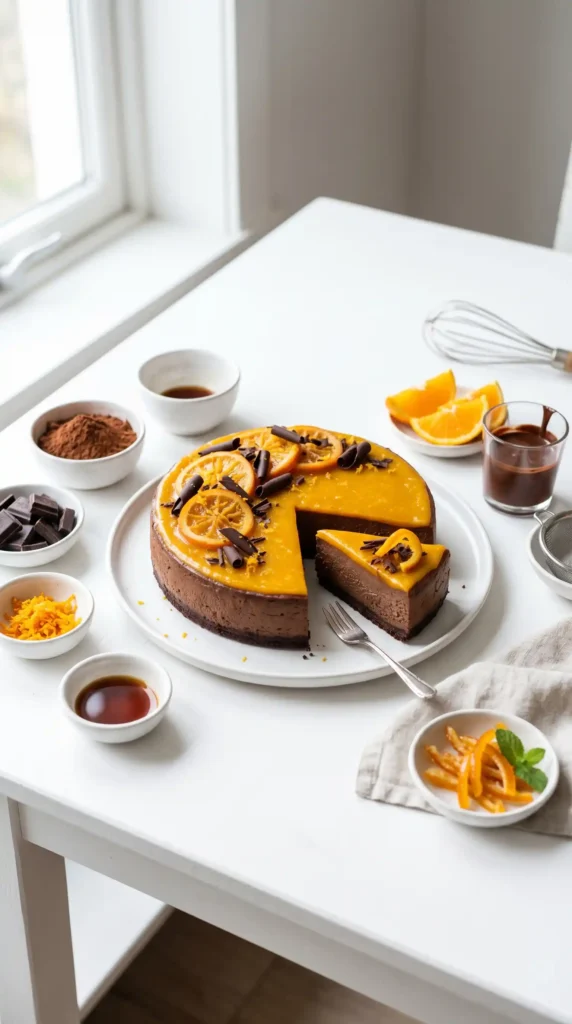
Remove your cheesecake from the fridge and carefully unlock the springform tin. Pour the ganache over the top and let it drizzle slightly over the edges for that dramatic, professional look. Scatter orange zest on top and add candied orange slices if you have them. IMO, the garnish takes this from a great dessert to a truly stunning one
Tips for the Perfect Chocolate Orange Cheesecake
Want to make sure yours turns out flawlessly? Keep these tips in mind:
- Use full-fat cream cheese: Low-fat versions contain more water and will give you a runny, unstable filling.
- Room temperature ingredients: Cold cream cheese won’t beat smoothly. Take it out of the fridge an hour before you start.
- Cool your chocolate properly: Warm chocolate melts the cream. Always let it cool to room temperature first.
- Don’t rush the chilling: The longer the cheesecake sets in the fridge, the better the texture and the cleaner the slices.
- Use fresh oranges: Bottled orange juice just doesn’t give the same vibrant, zesty flavour as freshly squeezed.
How to Store Your Cheesecake
Cover any leftovers with cling film and keep them in the fridge. Your Chocolate Orange Cheesecake will stay fresh for up to 3 days in the fridge, though it rarely lasts that long once people have had their first slice.
You can also freeze individual slices. Wrap each slice tightly in cling film, place in a freezer bag, and freeze for up to 1 month. Thaw overnight in the fridge before serving.
Why This Recipe Works So Well
Have you ever wondered why chocolate and orange are such a classic combination? The bitterness of dark chocolate perfectly balances the bright, sharp citrus notes of orange. One without the other is good. Together, they’re unforgettable.
This no-bake cheesecake also gets the texture spot-on because of the combination of whipped cream and cream cheese. The cream adds lightness while the cream cheese brings richness and structure. The result is a filling that slices cleanly but melts completely on your tongue.
Frequently Asked Questions
1. Can I use milk chocolate instead of dark chocolate?
You absolutely can. Milk chocolate will give you a sweeter, creamier result. Just note that the orange flavour may feel slightly less prominent since dark chocolate’s bitterness helps amplify those citrus notes. If you want a sweeter version, go for it — just reduce the icing sugar slightly to balance it out.
2. Can I make this cheesecake ahead of time?
Yes, and in fact, you should. This Chocolate Orange Cheesecake actually tastes better the day after you make it. The flavours develop and deepen overnight in the fridge. You can make it up to 2 days ahead — just add the ganache topping and garnish right before serving.
3. Why is my cheesecake filling not setting?
The most common culprit is the cream. If you under-whip it, the filling won’t have enough structure to set properly. Make sure you whip the double cream to soft peaks before folding it in. Also, check that you’re using full-fat cream cheese — reduced fat versions hold too much water and won’t firm up correctly.
4. Can I make this gluten-free?
Absolutely. Simply swap the chocolate digestive biscuits for a gluten-free alternative. Most supermarkets stock gluten-free chocolate biscuits that work perfectly as a base. The rest of the recipe is naturally gluten-free, so one simple substitution is all you need.
5. Can I add a gelatine to make it more firm?
If you want an extra-firm cheesecake that slices like a dream, you can add 2 teaspoons of powdered gelatine. Dissolve it in 2 tablespoons of warm water, let it cool slightly, then stir it into the cream cheese mixture before folding in the whipped cream. It gives the cheesecake a firmer, almost sliceable-straight-from-the-fridge texture.
Final Thoughts
There you have it — your complete guide to making the most irresistible Chocolate Orange Cheesecake from scratch. It’s rich without being heavy, indulgent without being over the top, and impressive without being complicated. What more could you ask for?
Whether you’re making this for a family gathering, a dinner party, or just because it’s Tuesday and you deserve something spectacular, this recipe delivers every single time. Once you try it, you’ll understand why it never lasts more than a few hours in my house.
Now go grab those oranges and get started. Your future self will absolutely thank you.

Chocolate Orange Cheesecake
Ingredients
Method
- Crush the chocolate digestive biscuits into fine crumbs.
- Combine the crumbs with melted butter until coated and resembling wet sand.
- Press the mixture into the bottom of a 23cm springform tin to form an even layer.
- Chill in the fridge for at least 20 minutes.
- Melt the dark chocolate in a heatproof bowl over simmering water, ensuring the bowl does not touch the water.
- Remove from heat and let cool.
- Beat together the softened cream cheese and icing sugar until smooth.
- Add the orange zest, fresh orange juice, and vanilla extract. Mix until combined.
- In a separate bowl, whip the double cream until it forms soft peaks.
- Gently fold the whipped cream into the cream cheese mixture and then fold in the cooled melted chocolate.
- Pour the filling over the chilled biscuit base and spread evenly.
- Cover and refrigerate for at least 4 to 6 hours, preferably overnight.
- Heat the double cream until simmering, then pour it over the chocolate and let sit.
- Stir until you have a smooth ganache, then let cool slightly before pouring over the cheesecake.
- Garnish with orange zest and candied orange slices if desired.