Hot summer days hit dogs just as hard as they hit us. Your pup is lying on the cool floor, panting, giving you those eyes. You know the look. These Frozen Freedom Paw Patriotic Yogurt Pops are exactly the answer you need, and honestly, they’re almost too easy to make.
I started making these for my dog, Biscuit, a couple of summers ago. He went absolutely wild for them. Now it’s basically a July tradition in our house, right alongside the barbecue and the backyard chaos. IMO, it’s one of the best dog treat ideas out there.
Why You’ll Love This Recipe
Let’s be honest. Most dog treat recipes are either boring or require ingredients that look like they belong in a chemistry lab. This one uses real, whole foods your dog already loves. Blueberries, strawberries, banana, Greek yogurt. Simple as that.
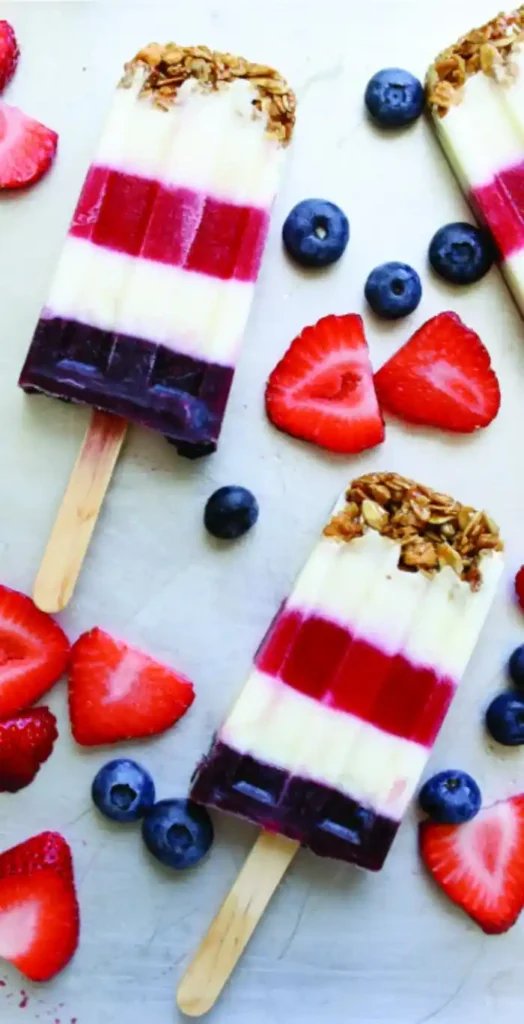
The patriotic red, white, and blue layers also make these pops a perfect treat to whip up around the Fourth of July. Have you ever seen anything cuter than a dog happily licking a star-spangled popsicle? I rest my case.
They take about 15 minutes of actual hands-on time. The rest is just freezer patience. Even total beginners in the kitchen can nail this recipe on their first try.
Ingredients for Frozen Freedom Paw Patriotic Yogurt Pops
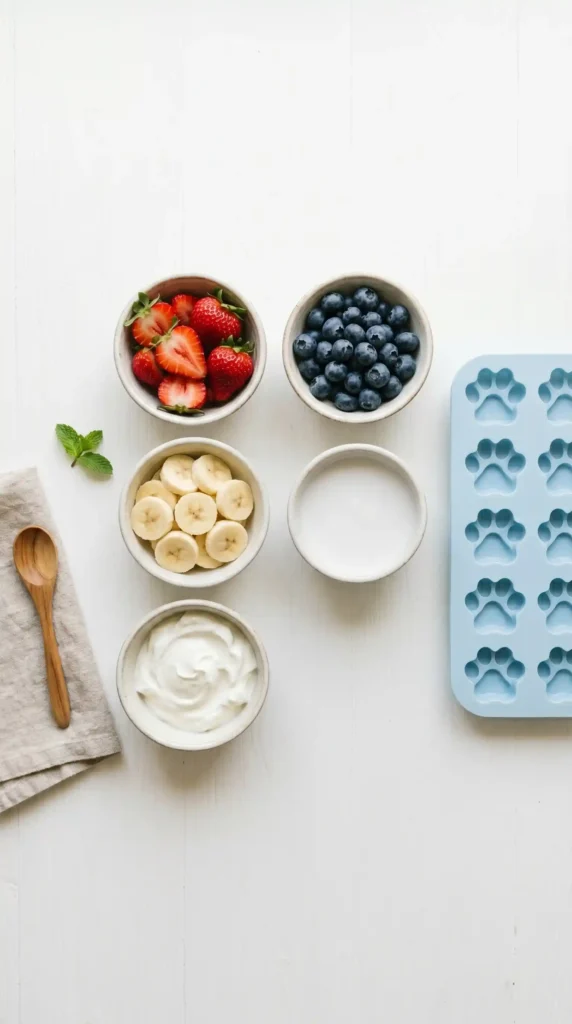
Everything you need is straightforward and dog-safe. Here’s your full shopping list with exact quantities so you’re not guessing at the store.
Ingredient List
- 1 cup plain, unsweetened Greek yogurt (divided into three portions)
- 1/2 cup full-fat coconut milk (divided)
- 1 ripe medium banana, mashed
- 1/2 cup fresh or frozen blueberries
- 1/2 cup fresh or frozen strawberries (hulled and chopped)
- 1 tablespoon chia seeds (optional, for extra nutrition)
- 2 tablespoons water (for blending, if needed)
FYI, always use plain, unsweetened yogurt. Flavored or sweetened yogurts can contain xylitol, which is toxic to dogs. Double-check the label every single time.
Equipment You’ll Need
You don’t need a professional kitchen to pull this off. Here’s what to grab before you start.
- Paw-shaped silicone mold — This creates the iconic shape. Any silicone ice cube tray works as a substitute.
- Blender or food processor — For smooth, lump-free layers.
- Two mixing bowls — One for the white layer, one to hold finished blends.
- Spoon or small spatula — For careful layering without mixing the colors.
- Freezer-safe tray or flat surface — To keep the mold level while it freezes.
How to Make Frozen Freedom Paw Patriotic Yogurt Pops
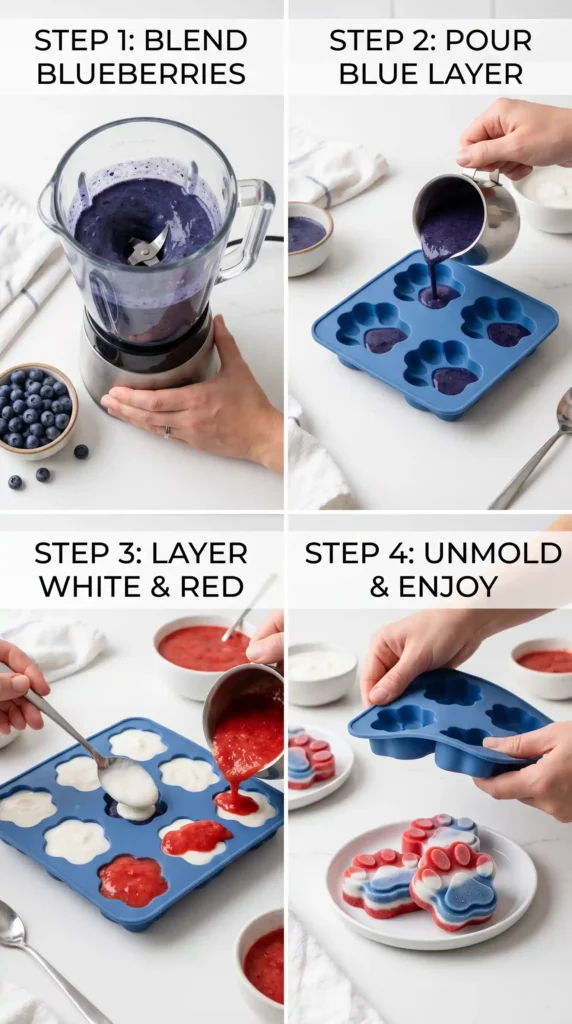
The whole process works in three layers, built one at a time. Each layer needs a short freeze before the next one goes on. Don’t rush it. That’s how you get those gorgeous, separated colors.
Build the Blue Layer (Blueberry Base)
Add your 1/2 cup of blueberries and about 3 tablespoons of the Greek yogurt into the blender. If your berries are frozen, let them thaw for 5 minutes first so your blender doesn’t struggle.
Blend on medium speed for 30 to 45 seconds until the mixture looks completely smooth. You want a consistent, deep purple-blue color with no visible berry chunks. Add 1 tablespoon of water if the mixture feels too thick to pour.
Now take your silicone paw mold and set it on a flat, level surface. Spoon the blueberry mixture into the bottom of each mold cavity, filling each one about one-third of the way up. Use the back of your spoon to smooth it down gently.
Slide the tray carefully into the freezer and let it sit for 25 to 30 minutes. You’re not looking for it to be rock solid — just firm enough that a spoon dropped on the surface doesn’t sink right through. This is the key step most people skip, and skipping it gives you swirled, muddy colors instead of clean layers.
Create the White Layer (Yogurt & Coconut Milk)
While the blue layer freezes, get your white layer ready. In a mixing bowl, combine 1/3 cup of Greek yogurt with 1/4 cup of coconut milk. Stir slowly with a spoon until the two are fully blended and creamy.
If you’re using chia seeds, stir in that tablespoon now. They’ll plump up slightly as the pop freezes, adding a little nutritional boost without changing the flavor. The mixture should look thick, smooth, and bright white.
Take the mold out of the freezer once the blue layer passes the “firm to touch” test. Hold it steady and carefully spoon the white mixture over the blue layer, filling each cavity another third of the way. Work slowly and deliberately. If you drop it in too fast, it will mix with the layer below and you’ll lose that clean separation.
Level the white layer gently with the back of your spoon. Return the mold to the freezer for another 20 to 25 minutes. Same deal as before — firm but not completely solid.
Make the Red Layer (Strawberry Banana Top)
For the final layer, add the hulled, chopped strawberries, mashed banana, remaining Greek yogurt (about 3 tablespoons), and remaining coconut milk (1/4 cup) into the blender. If your banana is very ripe, it will blend incredibly smooth and add natural sweetness your dog will go crazy for.
Blend for 30 to 40 seconds until you get a smooth, vibrant pink-red mixture. It should look like a thick fruit smoothie at this point. Taste it yourself if you’re curious — it’s actually pretty good, not gonna lie 🙂
Pull the mold from the freezer once the white layer is set. Spoon the strawberry blend carefully over the white layer to fill each cavity to the very top. Use your spoon to push the mixture into any gaps around the edges.
Now comes the real test of patience. Cover the mold loosely with plastic wrap and place it back in the freezer. Let it freeze for a minimum of 5 full hours, or overnight for best results. The longer it sits, the cleaner the layers and the firmer the pop.
Unmold and Serve
Once the pops are fully frozen, pull the mold out of the freezer. Here’s a tip that saves a lot of frustration: let the mold rest at room temperature for exactly 60 to 90 seconds before you try to pop them out. The silicone will flex much more easily and the pops slide right out without cracking.
Gently press up from the bottom of each mold cavity. The pop should release cleanly. If it still feels stuck, run the bottom of the mold briefly under cool (not warm) water for 5 seconds and try again.
Serve immediately to your dog on a hard floor or outside. These melt fast, just like regular popsicles. Watch your pup go to town on those patriotic layers. It’s genuinely one of the most wholesome things you’ll witness this summer.
Tips for Perfect Results Every Time
- Use a very ripe banana. The riper it is, the sweeter and smoother the red layer becomes.
- Lightly grease the mold with a thin swipe of coconut oil before filling. Makes unmolding effortless.
- Don’t fill the cavities to the absolute brim before the final layer. Leave a tiny gap so the mixture doesn’t overflow when it expands while freezing.
- If your dog is small, cut the pop in half lengthwise before serving to prevent gulping and choking.
- Make a double batch and store extras in a sealed zip-lock bag. They keep well for up to 8 weeks in the freezer.
Fun Variations Worth Trying
Once you nail the base recipe, the variations are endless. Have you thought about swapping ingredients based on what your dog already loves?
- Raspberry instead of strawberry for a slightly tangier red layer.
- Pumpkin puree as a third layer for an orange twist packed with fiber and vitamins.
- A spoonful of peanut butter (xylitol-free) stirred into the white layer for extra protein and a flavor dogs adore.
- Oat milk yogurt instead of Greek yogurt for a dairy-free version.
- Watermelon puree in place of strawberry for a super refreshing summer swap.
Serving Suggestions
Serve these Frozen Freedom Paw Patriotic Yogurt Pops right after pulling them from the mold. Set a bowl of fresh water nearby, because frozen treats make dogs thirsty — just like they do for us.
These pops work great as an outdoor treat. Serve them on the patio, by the pool, or during a backyard barbecue while you celebrate the Fourth of July. Let the kids hand them to the dog. It becomes a whole little moment that everyone in the family enjoys.
Frequently Asked Questions
What yogurt is safe to use for dog popsicles?
Always use plain, unsweetened Greek yogurt. It’s low in sugar, high in protein, and easy on a dog’s digestive system. Avoid any yogurt with artificial sweeteners, especially xylitol, which is seriously toxic to dogs. Check the label even on “natural” yogurts.
How long do these pops last in the freezer?
Once fully frozen and removed from the mold, store them in a sealed, freezer-safe container or zip-lock bag. They stay good for up to 8 weeks. Label the bag with the date so you’re not guessing later.
Are blueberries and strawberries safe for all dogs?
For most dogs, yes. Blueberries and strawberries are among the safest fruits you can give your pup. That said, if your dog has known allergies or a sensitive stomach, introduce new foods in small amounts first and check with your vet if you’re ever unsure.
Can I use a regular ice cube tray instead of a paw mold?
Absolutely. Any silicone mold or ice cube tray works fine. The paw shape is mostly for the “aww” factor :/ but the treat itself is just as delicious no matter what shape it comes in. Mini muffin silicone trays also work great for smaller dogs.
My layers mixed together. What went wrong?
The most common culprit is not giving each layer enough time to partially freeze before adding the next one. Each layer needs at least 20 to 30 minutes in the freezer to firm up. Also, spoon the next layer on gently rather than pouring it in all at once.
Can puppies eat these frozen treats?
Puppies can enjoy these in small amounts, but keep portions very small for young pups under six months. Their digestive systems are still developing and too much dairy at once can cause an upset stomach. Introduce any new treat gradually and watch for reactions.
Final Thoughts
Making Frozen Freedom Paw Patriotic Yogurt Pops is one of those rare kitchen projects that takes almost no time but delivers an outsized reward. Your dog gets a nutritious, cooling treat. You get the satisfaction of making something wholesome from scratch.
The patriotic layers also make these pops genuinely fun to look at. Whether you’re celebrating the Fourth of July or just surviving a brutal August afternoon, these treats do the job beautifully. Your dog doesn’t care about the aesthetics, of course. They just know it tastes amazing and makes them feel great.
Give the recipe a try this week. Make a double batch, throw them in the freezer, and never be caught off-guard by a hot afternoon again. Your furry best friend is going to love every single lick.
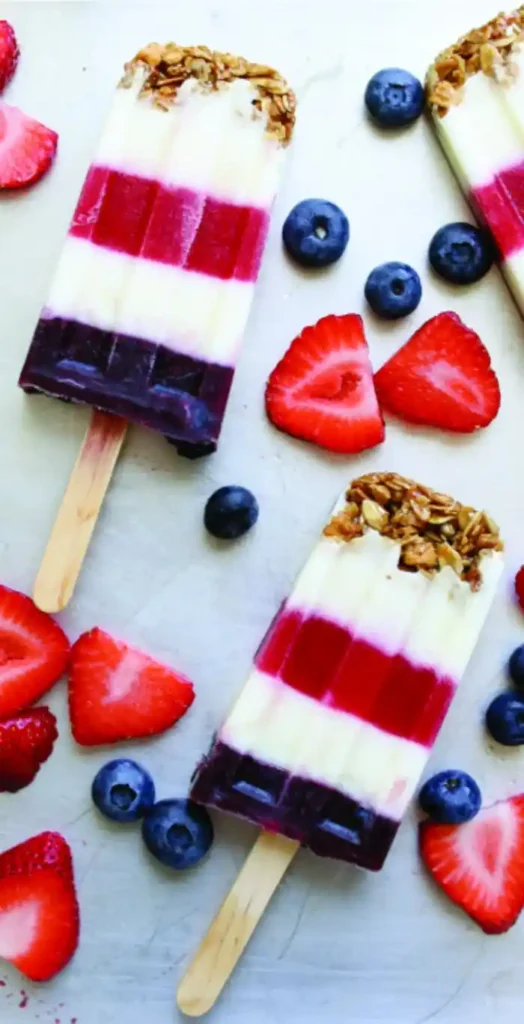
Frozen Freedom Paw Patriotic Yogurt Pops
Ingredients
Method
- Blend blueberries and 1/3 cup Greek yogurt on medium speed until smooth.
- Spoon the blueberry mixture into the paw mold, filling about one-third of each cavity.
- Freeze for 25 to 30 minutes until firm but not solid.
- Mix 1/3 cup Greek yogurt and 1/4 cup coconut milk in a bowl until creamy.
- Stir in chia seeds if using.
- Once the blue layer is firm, carefully spoon the white mixture on top until each cavity is filled two-thirds full.
- Freeze for another 20 to 25 minutes.
- Blend strawberries, mashed banana, remaining Greek yogurt, and coconut milk until smooth.
- Once the white layer is firm, spoon the red mixture on top to fill each cavity.
- Cover loosely with plastic wrap and freeze for at least 5 hours or overnight.
- Let the mold rest at room temperature for 60 to 90 seconds before removing.
- Press from the bottom to release the pops. If stuck, run under cool water briefly.
- Serve immediately and watch your dog enjoy!