Plain chips and salsa are boring. These chicken nachos? They’re the real MVP of snack foods. I made them for a Super Bowl party once and people literally ignored the actual game to devour these.
Prep Time: 15 minutes
Cook Time: 15 minutes
Total Time: 30 minutes
Servings: 6-8 people
This chicken nachos recipe easy approach delivers loaded, cheesy perfection that’ll have everyone fighting over the last chip. Ready to make the ultimate party food?
Why Chicken Nachos Win Every Time
Have you ever noticed how nachos disappear faster than any other party food? There’s a reason. They combine everything people crave—cheese, crunch, protein, and endless customization options. Pure genius, really.
I’ve tried countless nacho recipes chicken variations over the years. Plain cheese nachos are fine. Ground beef works okay. But shredded chicken nachos? They’re lighter, easier to prepare, and honestly taste better.
Chicken distributes more evenly across the chips than ground meat. Every bite gets protein. No dry chips or meat-heavy spots. That consistency creates a better eating experience from first chip to last.
Plus, chicken accepts flavors beautifully. Season it Mexican-style, make it buffalo, go BBQ—the possibilities are endless. Versatility makes this recipe invaluable for various occasions and taste preferences.
Essential Ingredients
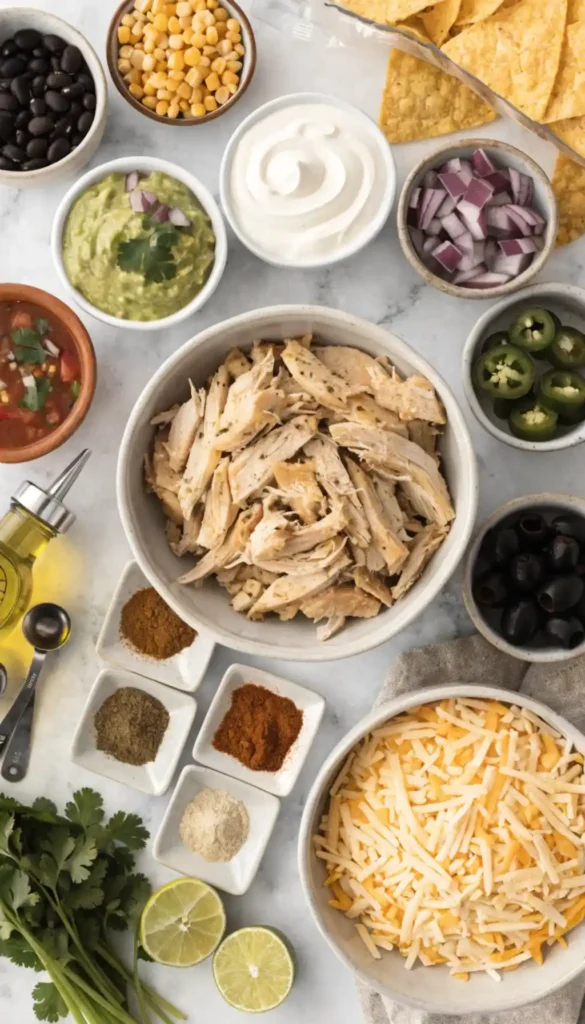
Let’s break down what you need for this loaded chicken nachos masterpiece. Nothing complicated or hard to source. Just solid ingredients that create restaurant-quality results at home.
For the Chicken:
- 2 cups cooked chicken breast, shredded
- 1 tablespoon olive oil
- 1 teaspoon chili powder
- 1 teaspoon cumin
- 1/2 teaspoon garlic powder
- 1/2 teaspoon paprika
- 1/2 teaspoon salt
- 1/4 teaspoon black pepper
For the Nachos:
- 1 (13-ounce) bag tortilla chips
- 3 cups shredded Mexican cheese blend
- 1 (15-ounce) can black beans, drained
- 1 cup corn kernels
- 1/2 cup diced red onion
- 1/2 cup sliced jalapeños
- 1/4 cup sliced black olives (optional)
Now For Toppings:
- 1 cup sour cream
- 1 cup salsa or pico de gallo
- 1 cup guacamole
- 1/4 cup fresh cilantro, chopped
- Lime wedges for serving
Simple stuff, right? The beauty is you probably have most of this already. The rotisserie chicken nachos hack uses store-bought chicken to save even more time.
Choosing Your Chicken
Chicken selection matters more than you’d think. Different preparation methods create different textures and flavors. Choose wisely based on your time and preference here.
Best Chicken Options:
- Rotisserie chicken (fastest, already seasoned)
- Poached chicken breasts (mild, easy to shred)
- Grilled chicken (smoky flavor bonus)
- Leftover chicken (ultimate meal prep move)
- Instant Pot chicken (hands-off cooking)
I prefer rotisserie chicken for weeknight cooking. It saves 30 minutes and tastes great. Remove the skin, shred the meat, season it up. Done in five minutes flat.
For meal prep warriors, cook chicken breasts in bulk on Sundays. Store shredded chicken portioned in the freezer. Defrost as needed for quick nacho nights. Efficiency at its finest.
Preparing the Chicken
If using raw chicken, cook it first obviously. Poach breasts in salted water for 15 minutes. They should reach 165°F internal temperature. Let them cool slightly before shredding.
Use two forks to shred the chicken into bite-sized pieces. Pull the meat apart following the natural grain. Smaller shreds distribute better. Huge chunks create uneven coverage across chips.
Toss shredded chicken with olive oil and all your spices. Mix thoroughly until every piece is coated. This seasoning step transforms plain chicken into flavor-packed protein. Don’t skip it.
Heat a skillet over medium heat. Warm the seasoned chicken for 3-4 minutes, stirring occasionally. This intensifies the spices and creates slightly crispy edges. Small detail, big impact.
Building the Perfect Nacho Base
Preheat your oven to 400°F while prepping ingredients. High heat melts cheese quickly without burning chips. Timing matters for achieving that perfect crispy-melty balance throughout.
Line a large baking sheet or sheet pan with parchment paper. This prevents sticking and makes cleanup infinitely easier. Nobody enjoys scraping burnt cheese off pans. Trust me on this.
Spread half your tortilla chips in an even layer on the pan. Don’t pile them too high yet. We’re building strategic layers here. Proper architecture creates better chip-to-topping ratio.
The chicken nachos sheet pan method ensures everyone gets good bites. Sheet pans provide surface area for even distribution. Cookie sheets work in a pinch but bigger is definitely better.
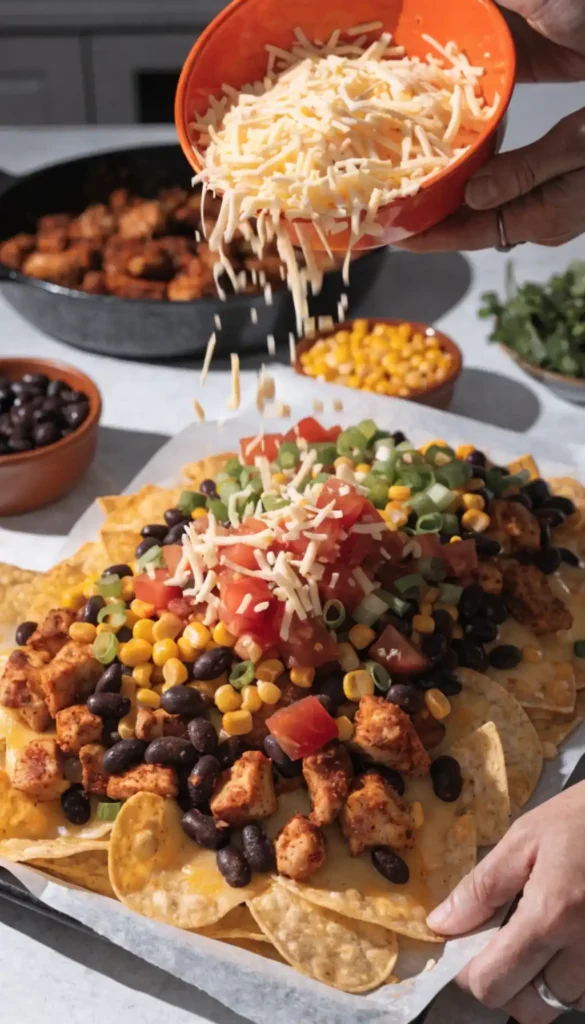
Layering Like a Pro
Sprinkle half the shredded cheese over the first chip layer. Coverage should be generous but not excessive. You need cheese to glue everything together without drowning the chips.
Add half the seasoned chicken, spreading it evenly. Follow with half the black beans and corn. Scatter some diced onions and jalapeños over everything. Even distribution is key here.
Add the second layer of chips directly on top. Repeat the cheese, chicken, beans, corn, and veggie process. This double-layer technique ensures every chip gets loaded. No sad, naked chips.
Save a handful of cheese for the very top. This creates that gorgeous golden, bubbly surface everyone loves. Visual appeal matters when you’re trying to impress people, honestly.
Baking to Perfection
Slide the pan into your preheated oven. Bake for 10-15 minutes total. Watch closely during the last few minutes. The line between perfect and burned is surprisingly thin.
The cheese should be completely melted and bubbling. Some edges might turn golden brown. That slight char adds flavor. Completely black means you waited too long. Stay vigilant.
Chips around the edges brown faster than center ones. Rotate the pan halfway through if you notice uneven browning. This creates consistent results across the entire pan.
Remove nachos when the cheese is melted and bubbly throughout. The chips should still have some structural integrity. Soggy nachos are sad nachos. Nobody wants that texture disaster.
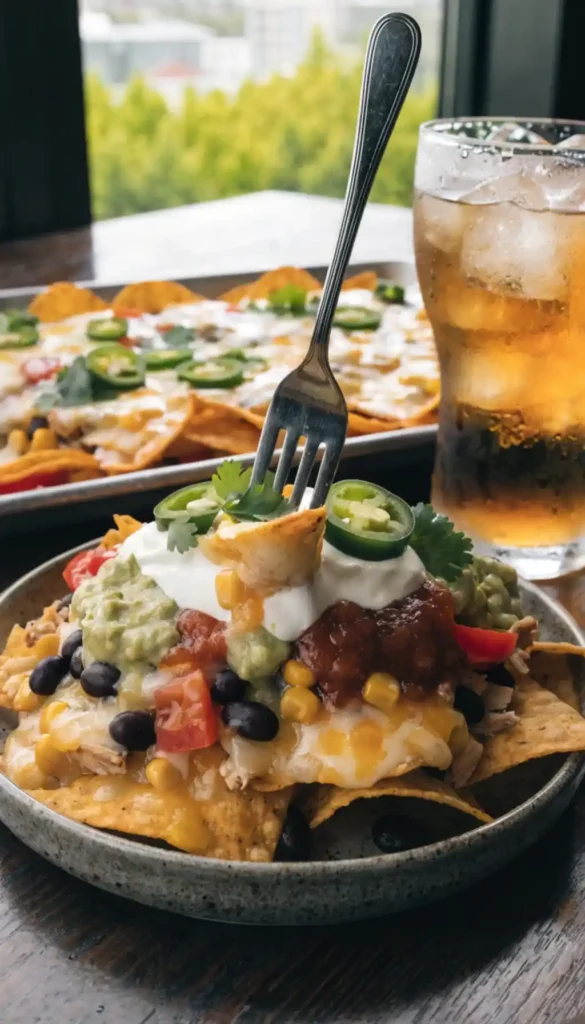
Adding Fresh Toppings
Let the nachos rest for 2 minutes after removing from the oven. This brief cooling prevents burning your mouth. It also allows everything to set slightly for easier serving.
Dollop sour cream randomly across the top. Add spoonfuls of salsa or pico de gallo. Drop chunks of guacamole in various spots. This creates pockets of different flavors throughout.
Sprinkle fresh cilantro over everything. The bright green color pops against the golden cheese. Visual contrast makes food more appealing. We eat with our eyes first, after all.
Serve with lime wedges on the side. Squeezing fresh lime over nachos adds brightness that cuts through richness. It’s a game-changer most people don’t think about, FYI.
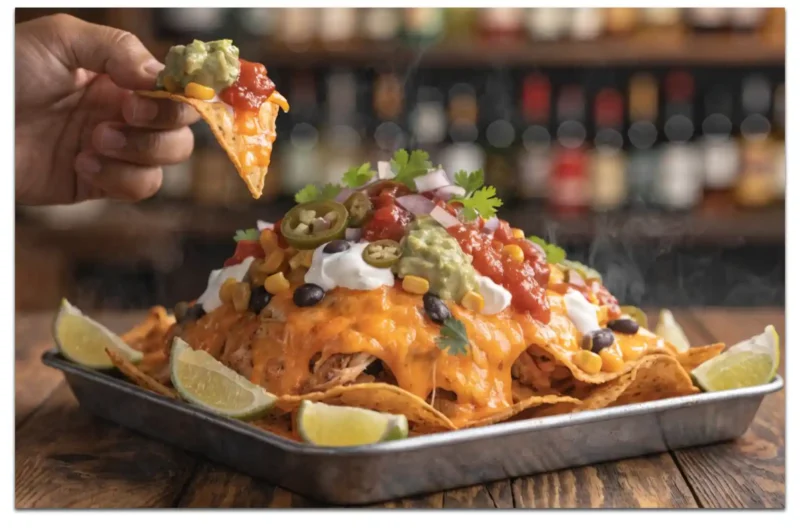
Serving Strategies
Serve these cheesy nachos immediately while hot. Nachos wait for no one. The cheese starts solidifying as it cools. Hot nachos are infinitely better than room-temperature ones.
Place the entire sheet pan on a trivet or cooling rack in the middle of the table. Let people dig in directly from the pan. Casual serving works perfectly for nachos.
Alternatively, divide into individual portions on plates. This works better for sit-down meals or when you have particular eaters. More civilized but less fun, honestly.
Provide extra toppings on the side. Some people want extra sour cream. Others need more salsa. Letting people customize their portion makes everyone happy. Smart hosting right there.
Flavor Variations
Master the basic recipe first, then experiment wildly. I’ve tried countless variations of these chicken nacho recipes. Some became regular rotations. Others remain interesting experiments.
BBQ Chicken Nachos
Toss shredded chicken with BBQ sauce instead of Mexican spices. Use cheddar cheese instead of Mexican blend. Top with coleslaw after baking. The sweet-tangy combination works surprisingly well.
This bbq chicken nachos version tastes like summer cookouts in chip form. Add crispy fried onions on top for extra crunch. The texture contrast creates addictive eating experience.
Buffalo Chicken Nachos
Mix chicken with buffalo sauce and ranch seasoning. Use pepper jack cheese for extra heat. Top with blue cheese crumbles and celery after baking. Spicy, tangy perfection.
These buffalo chicken nachos satisfy wing cravings without the mess. All the flavor, none of the sticky fingers. Perfect compromise for wing lovers who hate dealing with bones.
Chicken Fajita Nachos
Sauté chicken with bell peppers and onions in fajita seasoning. Layer everything on chips with queso instead of shredded cheese. Top with fresh pico de gallo. Restaurant-quality fajitas meet nachos.
This chicken fajita nachos fusion creates something special. The peppers add sweetness and crunch. Queso provides creamier texture than regular cheese. Different but equally delicious approach.
Make-Ahead Tips
Prep components ahead for stress-free entertaining. Cook and season chicken up to 3 days ahead. Store refrigerated in airtight containers. Reheat before assembling nachos.
Chop all vegetables the morning of your event. Store them separately in the fridge. Having everything ready makes assembly take five minutes. You’ll thank yourself later.
Don’t assemble nachos until ready to bake. Pre-assembled nachos get soggy from moisture in toppings. Build fresh right before baking for best texture and taste.
Make toppings like guacamole close to serving time. Avocado browns quickly when exposed to air. Fresh guac tastes infinitely better than day-old brown mush. Worth the extra effort.
Sheet Pan vs. Oven-Safe Dish
Sheet pans work great for parties and large groups. The shallow depth creates more crispy chip surface area. Everyone can reach the pan easily for self-service.
Oven-safe dishes or cast iron skillets work better for smaller servings. They hold heat longer and look nice for presentation. Choose based on your serving situation.
I prefer sheet pans for pulled chicken nachos or any large batch. The even heat distribution prevents soggy centers. Consistent texture matters when feeding multiple people.
For date night or small families, use a cast iron skillet. It goes straight from oven to table beautifully. The rustic presentation adds charm to casual dining.
Chip Selection Matters
Regular tortilla chips work perfectly fine. Buy quality brands that won’t break under weight. Cheap chips shatter and create mess. Invest in decent chips for better results.
Thick restaurant-style chips hold up better under heavy toppings. They maintain crunch longer. Thin chips get soggy faster. Consider thickness when buying chips for nacho projects.
Want something different? Try chicken nachos with Doritos. The flavored chips add extra seasoning. Nacho cheese Doritos create redundant but delicious double-cheese situation. Cool Ranch offers interesting twist.
Grain-free or veggie chips work for dietary restrictions. Just know they behave differently when heated. Test small batches first before committing to full recipe with alternative chips.
Leftover Management
Store leftover nachos? Don’t bother, honestly. They don’t reheat well. The chips get hopelessly soggy. Better to store components separately and rebuild fresh portions later.
Save leftover chicken, cheese, and toppings in separate containers. Use them for quesadillas, tacos, or burrito bowls. The components stay useful even when nachos themselves don’t reheat.
If you must reheat nachos, use the oven at 350°F for 5-7 minutes. Never microwave them. Microwaves create rubbery cheese and limp chips. Oven reheating at least tries.
Better strategy? Make smaller batches more frequently. Fresh nachos always beat reheated ones. Plus, it gives you excuses to make them multiple times per week.
Dietary Modifications
Need to accommodate dietary restrictions? These chicken taco nachos recipe elements adapt easily. Swap components while maintaining the core concept and flavors throughout.
Use dairy-free cheese for lactose-free versions. Many brands melt surprisingly well. Cashew-based cheese creates creamy texture similar to real cheese. Worth trying even for non-restricted diets.
Go gluten-free by using certified gluten-free tortilla chips. Most corn chips are naturally gluten-free anyway. Just verify the brand to be completely safe for celiac guests.
Make it lower-carb with cheese crisps or pork rinds instead of chips. Sounds weird but actually works. The concept translates even without traditional tortilla chip base.
Cost Analysis
Making homemade nachos recipe versions costs roughly $15-20 for 6-8 servings. That’s about $2.50 per person maximum. Restaurant nachos run $12-15 per person typically. Massive savings here.
Rotisserie chicken costs around $6. Use half for nachos, save half for other meals. Strategic ingredient usage stretches your budget even further without sacrificing quality.
Cheese represents the second biggest expense. Buy blocks and shred yourself—pre-shredded costs more and contains anti-caking agents. Those agents prevent smooth melting. Shred fresh for best results.
This feeds a crowd cheaper than ordering pizza or buying appetizers. Plus, homemade impresses people more. They appreciate the effort even though it’s actually pretty easy, IMO.
Why This Recipe Works
This shredded chicken nachos recipe easy approach succeeds through proper layering and balance. Every component complements others without overwhelming anything. That harmony creates addictive eating experience.
The double-layer technique ensures even distribution. Nobody gets shortchanged with plain chips. Every bite delivers cheese, chicken, and toppings. Consistency matters for crowd-pleasing results.
High heat and proper timing create that perfect crispy-melty texture. Chips stay crunchy while cheese melts completely. That textural contrast keeps people reaching for more continuously.
The recipe scales easily for different crowd sizes. Half it for two people or double for parties. The ratios maintain perfectly regardless of quantity adjustments made.
Final Thoughts
You now know how to make incredible chicken nachos at home. It’s simpler than you imagined, right? No restaurant kitchen or special skills required whatsoever here.
These nachos have become my go-to party food. They satisfy everyone from picky kids to sophisticated adults. Universal appeal with minimal effort. That’s winning the food game.
Stop ordering expensive appetizers and start making these. Your friends will think you’re a culinary genius. Your wallet will appreciate the savings. Everybody wins completely.
Remember, nachos are forgiving. Don’t stress about perfect chip placement or precise measurements. Just load them up, bake them, and enjoy the compliments that follow.
Frequently Asked Questions
Can I use ground chicken instead of shredded?
Absolutely! Brown ground chicken with the spices in a skillet. It distributes differently but tastes great. Some people actually prefer ground chicken for more even coverage across all chips.
How do I prevent soggy nachos?
Don’t overload with wet toppings before baking. Keep salsa, sour cream, and guacamole for after baking. Also, don’t stack chips too thick—proper layering allows heat circulation preventing sogginess.
Can I make these in an air fryer?
Yes, but in smaller batches. Layer chips, chicken, and cheese in the air fryer basket. Cook at 350°F for 5-7 minutes. You’ll need multiple batches for full recipe quantities.
What’s the best cheese for nachos?
Mexican cheese blend melts beautifully and provides authentic flavor. Cheddar works too but can get greasy. Monterey Jack melts smoothly. I recommend blending cheeses for optimal flavor and melt.
How long do assembled nachos last?
Don’t store assembled nachos—they get soggy. Store components separately and assemble fresh when ready. Cooked chicken lasts 3-4 days refrigerated. Shredded cheese keeps for a week sealed properly.
Chicken Nachos Recipe: Game Day Done Right
6
servings485
kcal30
minutesThese loaded chicken nachos layer seasoned shredded chicken, cheese, beans, and vegetables between crispy tortilla chips. Season and warm the chicken, build two layers on a sheet pan with cheese between and on top, bake until cheese melts, then add fresh toppings like sour cream, salsa, and guacamole.
Ingredients
- For the Chicken:
2 cups cooked chicken breast, shredded
1 tablespoon olive oil
1 teaspoon chili powder
1 teaspoon cumin
1/2 teaspoon garlic powder
1/2 teaspoon paprika
1/2 teaspoon salt
1/4 teaspoon black pepper
- For the Nachos:
1 (13-ounce) bag tortilla chips
3 cups shredded Mexican cheese blend
1 (15-ounce) can black beans, drained
1 cup corn kernels
1/2 cup diced red onion
1/2 cup sliced jalapeños
1/4 cup sliced black olives (optional)
- For Toppings:
1 cup sour cream
1 cup salsa or pico de gallo
1 cup guacamole
1/4 cup fresh cilantro, chopped
Lime wedges for serving
Directions
- Preheat oven to 400°F
- Line large baking sheet with parchment paper
- If using raw chicken, cook until internal temperature reaches 165°F
- Shred cooked chicken into bite-sized pieces with two forks
- Toss chicken with olive oil and all spices until coated
- Heat skillet over medium heat
- Warm seasoned chicken for 3-4 minutes, stirring occasionally
- Spread half the tortilla chips in even layer on prepared pan
- Sprinkle half the shredded cheese over chips
- Add half the seasoned chicken evenly across cheese
- Distribute half the black beans and corn over chicken
- Scatter half the diced onions and jalapeños on top
- Add second layer of chips over first layer
- Repeat with remaining cheese, chicken, beans, corn, and vegetables
- Reserve small handful of cheese for top
- Sprinkle remaining cheese over entire top layer
- Bake for 10-15 minutes until cheese is melted and bubbly
- Watch closely during last few minutes to prevent burning
- Rotate pan halfway through if needed for even browning
- Remove when cheese is completely melted throughout
- Let rest for 2 minutes after removing from oven
- Dollop sour cream randomly across top
- Add spoonfuls of salsa or pico de gallo
- Drop chunks of guacamole in various spots
- Sprinkle fresh cilantro over everything
- Serve immediately with lime wedges on side