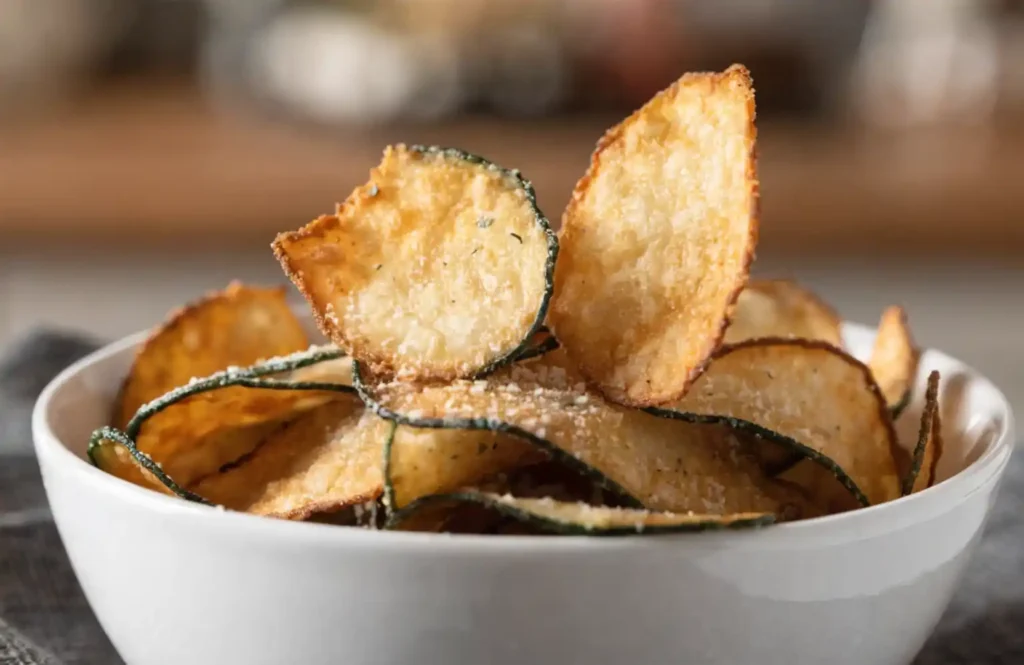
Potato chips are overrated. These Crispy Parmesan Zucchini Chips deliver that satisfying crunch you crave without the carb crash or guilt. Thin-sliced zucchini baked with Parmesan cheese creates addictive chips that disappear fast.
I discovered these during a low-carb phase and never looked back. Now I make them weekly because my family raids the batch before it even cools. They’re legitimately that good.
Prep Time: 15 minutes
Baking Time: 2 hours
Total Time: 2 hours 15 minutes
Servings: 4 servings
Why This Recipe Works
Here’s the secret to perfectly crispy zucchini chips—low and slow baking. The extended time at lower temperature dehydrates the zucchini without burning it. This creates that essential chip-like crunch.
Parmesan cheese adds savory flavor while helping chips crisp up. The salt draws out moisture during baking, which is exactly what you want. Paper-thin slicing is crucial—thick slices stay soggy and chewy.
What Makes These Special
Healthier Than Store-Bought
Zucchini packs vitamins A and C, potassium, and fiber. You’re eating actual vegetables, not processed potato starch. These contain a fraction of the calories and carbs of regular chips.
One serving delivers nutrition while satisfying your snack craving. No artificial flavors, no mystery ingredients, no regrets. Just simple, real food that happens to taste incredible.
The Texture Achievement
Getting vegetables to achieve genuine chip crispiness is no small feat. Moisture is the enemy here. The mandoline creates uniform thickness, ensuring even dehydration across all slices.
The Parmesan forms a delicate crust that shatters when you bite. IMO, achieving this texture at home feels like culinary wizardry. You’ll want to make these constantly once you nail the technique.
Ingredients You’ll Need
For the Chips
These create perfectly crispy, flavorful chips every time. Quality Parmesan makes noticeable difference.
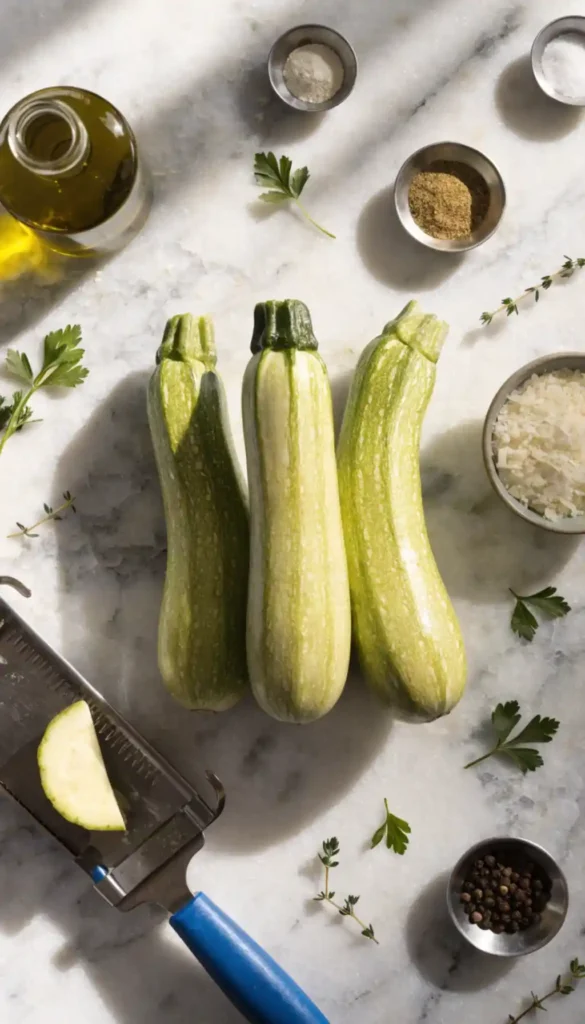
- 3 medium zucchini (about 1.5 pounds total)
- 1/2 cup finely grated Parmesan cheese
- 1 teaspoon garlic powder
- 1/2 teaspoon Italian seasoning
- 1/4 teaspoon black pepper
- 1/4 teaspoon salt
- 2 tablespoons olive oil (optional, for extra crispiness)
Optional Seasonings
These variations change the flavor profile completely. Experiment based on your preferences.
- 1/2 teaspoon smoked paprika
- 1/4 teaspoon cayenne pepper
- 1 teaspoon ranch seasoning mix
- 1/2 teaspoon onion powder
- Lemon zest for brightness
Equipment Needed
You need specific tools for best results. The mandoline is practically essential here.
- Mandoline slicer or very sharp knife
- 2-3 large baking sheets
- Parchment paper or silicone baking mats
- Paper towels
- Mixing bowls
- Measuring cups and spoons
- Wire cooling racks
Preparing the Zucchini
Selecting Good Zucchini
Choose firm, medium-sized zucchini without soft spots or blemishes. Smaller zucchini contain less moisture and seeds. Large, older zucchini are too watery and seedy for chips.
The skin should be bright green and smooth. Dull skin indicates age and excess moisture inside. Fresh zucchini makes all the difference in final crispiness.
Slicing Technique
Wash zucchini thoroughly and trim off both ends. Use mandoline set to 1/8-inch thickness or slightly thinner. Consistent thickness is absolutely crucial for even cooking.
If using knife, slice as thinly and uniformly as possible. Thicker slices won’t crisp properly no matter how long you bake them. Aim for nearly translucent slices.
Safety note: mandolines are wickedly sharp. Use the hand guard religiously. A bandaged finger ruins the whole snacking experience.
Removing Excess Moisture
Lay zucchini slices in single layer on paper towels. Sprinkle lightly with salt and let sit for 10 minutes. The salt draws out moisture through osmosis.
Blot slices thoroughly with more paper towels, pressing gently. You want them as dry as possible before seasoning. Wet zucchini creates steam, which prevents crisping.
This moisture removal step is non-negotiable. Skip it and you’ll get bendy, chewy disappointments instead of chips. FYI, I learned this the hard way.
Seasoning the Slices
Creating the Coating
Combine grated Parmesan, garlic powder, Italian seasoning, black pepper, and remaining salt in small bowl. Mix thoroughly so every flavor distributes evenly.
Use freshly grated Parmesan from a block, not the powdered stuff in a can. Fresh Parmesan melts and crisps better. The pre-grated kind contains anti-caking agents that interfere with texture.
Coating Process
Place dried zucchini slices in large mixing bowl. If using olive oil, drizzle over slices and toss gently. The oil helps seasonings stick and promotes browning.
Sprinkle Parmesan mixture over slices gradually while tossing. You want light, even coating on every piece. Don’t dump all seasoning at once or it clumps.
Work gently to avoid breaking delicate slices. They’re fragile when this thin. Treat them with the respect they deserve.
Arranging for Baking
Preparing Baking Sheets
Line baking sheets with parchment paper or silicone mats. Don’t skip this—zucchini sticks without it. Parchment also promotes even heat distribution.
Spacing the Slices
Arrange zucchini slices in single layer without touching or overlapping. Air needs to circulate around each piece. Overlapping creates steam pockets that prevent crisping.
You’ll need multiple baking sheets or bake in batches. Crowding is the quickest way to ruin these chips. Patience here determines success.
Leave small gaps between each slice. Think of it as giving each chip its personal space to crisp up properly.

Baking Process
Temperature and Time
Preheat oven to 225°F (107°C). This low temperature dehydrates rather than cooks. Higher temps burn the Parmesan before zucchini crisps.
Bake for 1 hour, then flip each chip carefully with thin spatula. Return to oven for another 45-60 minutes. Total time is approximately 2 hours.
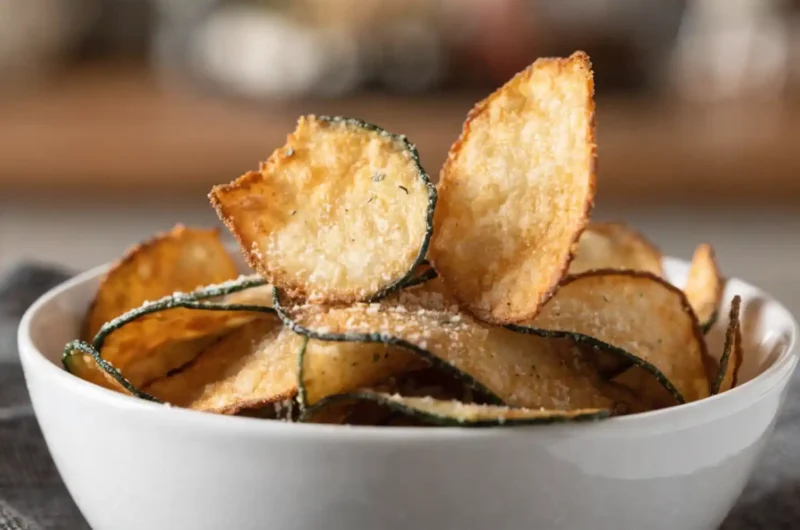
The chips should be golden brown and crispy when done. Some darker spots are fine—those are extra crispy and delicious.
Monitoring Progress
Check chips every 30 minutes after the first hour. Oven hot spots can cause uneven cooking. Rotate baking sheets if needed.
Chips at edges often finish before center ones. Remove finished chips and let others continue baking. Don’t let perfect chips burn waiting for stragglers.
The chips crisp up more as they cool. They might seem slightly soft fresh from oven but will harden within minutes.
Testing for Doneness
A chip is done when it’s rigid and snaps cleanly when bent. If it bends without breaking, it needs more time.
The color should be golden to light brown. Dark brown means you’ve gone too far. Burnt Parmesan tastes bitter and ruins the batch.
Let chips cool on baking sheet for 5 minutes, then transfer to wire rack. Cooling on the hot pan continues cooking them.
Cooling and Storing
Proper Cooling
Let chips cool completely on wire racks. This allows air circulation on both sides. Cooling on solid surface makes bottoms soggy.
They’ll continue crisping during cooling. Don’t panic if they seem soft initially. Give them 10-15 minutes and they’ll firm up.
Resist the urge to eat them all immediately, though I completely understand if you fail here. The crunch is irresistible when fresh.
Storage Methods
Store completely cooled chips in airtight container with paper towel at bottom. The paper towel absorbs any residual moisture. They keep for 2-3 days at room temperature.
Don’t refrigerate—moisture ruins the crispiness instantly. Keep container in cool, dry place away from humidity.
These never last long in my house. They disappear within 24 hours typically. Consider that when deciding how many batches to make.
Flavor Variations
Spicy Version
Add cayenne pepper or red pepper flakes to the Parmesan mixture. Creates satisfying kick that builds with each chip. The heat balances the savory Parmesan beautifully.
Ranch Style
Use ranch seasoning mix instead of Italian seasoning. Creates familiar, crowd-pleasing flavor. Kids especially love this version.
Lemon Pepper
Add lemon zest and extra black pepper. The brightness cuts through richness. Refreshing twist on the classic version.
Everything Bagel
Sprinkle everything bagel seasoning on chips before baking. Creates savory, sesame-forward flavor. Surprisingly delicious on zucchini.
Troubleshooting Common Issues
Chips Won’t Crisp
Your slices are too thick, oven temperature is too high, or you didn’t remove enough moisture. Make slices thinner next time and extend baking time.
Humidity in kitchen can also affect results. Run air conditioning or dehumidifier if your kitchen is very humid.
Burning Before Crisping
Oven is too hot or chips are too thin. Lower temperature to 200°F and extend baking time. Watch closely during final hour.
Chips Turn Soggy
They weren’t fully cooled before storing, or container isn’t airtight. Always cool completely and use proper storage container.
Nutritional Benefits
Zucchini provides vitamins, minerals, and antioxidants with minimal calories. One serving of these chips contains about 80 calories compared to 150+ for potato chips.
The high water content in zucchini means you get volume without density. You can eat more chips while consuming fewer calories. That’s the kind of math I appreciate.
Parmesan adds protein and calcium. The combination creates surprisingly nutritious snack that doesn’t taste like health food.
Serving Suggestions
As Standalone Snack
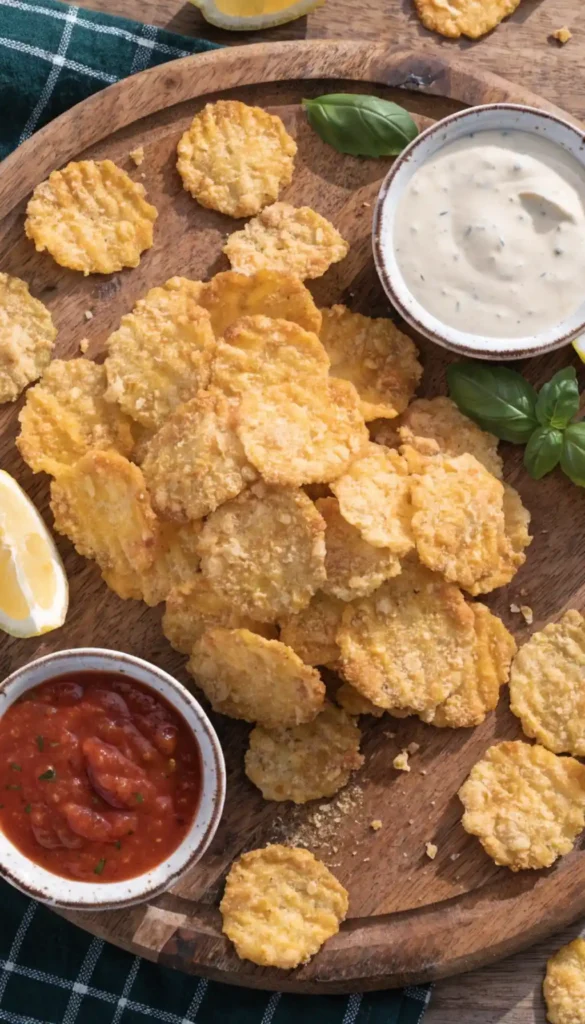
Serve chips in bowl with favorite dip. Ranch, marinara, or garlic aioli all work wonderfully. The chips hold up to dipping unlike many vegetable chips.
Party Appetizer
Arrange on platter with other vegetable chips for variety. Mix with carrot, sweet potato, or beet chips. Creates colorful, impressive spread.
Salad Topper
Crush chips and sprinkle over salads instead of croutons. Adds crunch and flavor without bread. Genius way to use slightly soft chips.
Budget Analysis
This recipe costs about $4 for 4 servings. That’s $1 per person for healthier alternative. Zucchini is incredibly affordable, especially in summer when gardens overflow.
Store-bought veggie chips cost $4-6 for tiny bags. Homemade delivers more chips for less money. Plus, you control ingredients and freshness.
FAQ Section
Why aren’t my chips crispy?
Slices are too thick, not enough moisture removed, or insufficient baking time. Use mandoline for paper-thin slices, salt and blot thoroughly, and bake full 2 hours at low temperature.
Can I use a dehydrator instead?
Yes. Set dehydrator to 135°F and dry for 6-8 hours until crispy. Results are excellent but take longer. Flip chips halfway through drying time.
Do I have to flip the chips?
Flipping ensures even crisping on both sides. You can skip it but bottom side stays softer. Takes 2 minutes and improves final texture significantly.
Can I make these in an air fryer?
Air fryer works at 250°F for 15-20 minutes, shaking basket every 5 minutes. Watch closely—they burn quickly. Oven gives more consistent results for large batches.
How do I keep them crispy longer?
Add silica gel packet to storage container, or re-crisp in 200°F oven for 10 minutes. Store in coolest, driest part of kitchen away from moisture sources.
Crispy Parmesan Zucchini Chips: Guilt-Free Snacking
4
servings80
kcal2
hours15
minutesCrispy zucchini chips feature paper-thin slices coated in Parmesan and spices, baked low and slow until chip-crispy. Slice zucchini thinly, remove moisture with salt, coat with Parmesan mixture, arrange on baking sheets without touching. Bake at 225°F for 2 hours, flipping halfway. Cool completely for maximum crispiness. Healthy, guilt-free snack ready in just over 2 hours.
Ingredients
3 medium zucchini (1.5 lbs total)
1/2 cup grated Parmesan cheese
1 teaspoon garlic powder
1/2 teaspoon Italian seasoning
1/4 teaspoon black pepper
1/4 teaspoon salt
2 tablespoons olive oil (optional)
Directions
- Preheat oven to 225°F, line baking sheets with parchment
- Wash zucchini, trim ends
- Slice zucchini paper-thin (1/8 inch) with mandoline
- Lay slices on paper towels in single layer
- Sprinkle with salt, let sit 10 minutes
- Blot thoroughly with paper towels to remove moisture
- Combine Parmesan, garlic powder, Italian seasoning, pepper, salt
- Toss zucchini with olive oil if using
- Sprinkle Parmesan mixture over slices, toss gently
- Arrange slices on prepared sheets without touching
- Bake 1 hour
- Flip each chip carefully with spatula
- Bake another 45-60 minutes until golden and crispy
- Cool on wire racks 10-15 minutes
- Store in airtight container with paper towel
Final Thoughts
There you have it—everything you need to make incredible Crispy Parmesan Zucchini Chips that transform vegetables into addictive snacks. This recipe proves healthy eating doesn’t mean sacrificing crunch or flavor.
The combination of technique and simple ingredients creates chip perfection. Every bite delivers satisfying crunch without guilt. So grab that mandoline and get slicing—your snack drawer is about to get seriously upgraded.