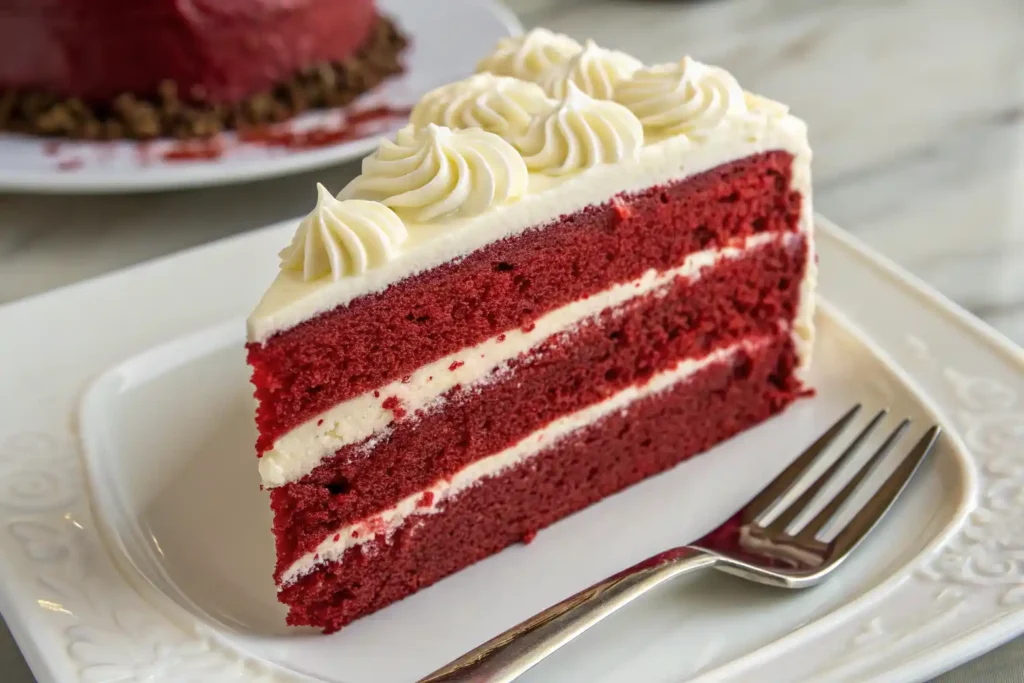
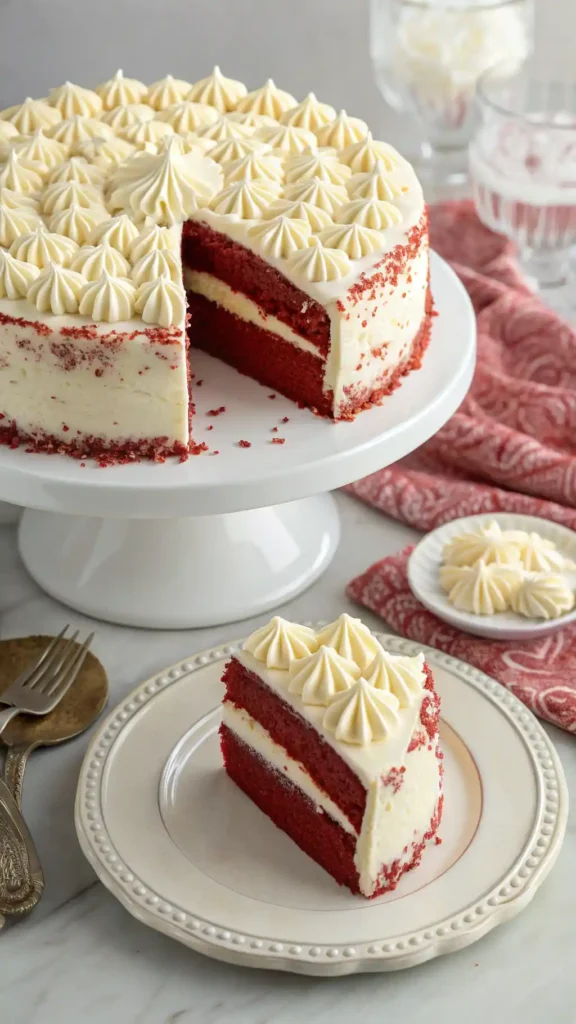
That gorgeous red cake with cream cheese frosting isn’t just for Valentine’s Day. This Red Velvet Cake Recipe creates the most tender, velvety perfection you’ll ever taste.
I’ve made this countless times for birthdays, holidays, and random Tuesdays. It never fails to impress, and people always ask if I bought it from a fancy bakery.
Prep Time: 20 minutes
Baking Time: 30 minutes
Total Time: 55 minutes (plus cooling)
Servings: 12 slices
Why This Recipe Works
Here’s the thing about Moist Red Velvet Cake—buttermilk is the secret. It creates that signature tender crumb and slight tang.
The cocoa powder adds depth without making it chocolate cake. Just enough to enhance the flavor complexity.
This Best Red Velvet Cake uses the traditional vinegar-baking soda reaction. Creates a light, airy texture that melts in your mouth.
Ingredients You’ll Need
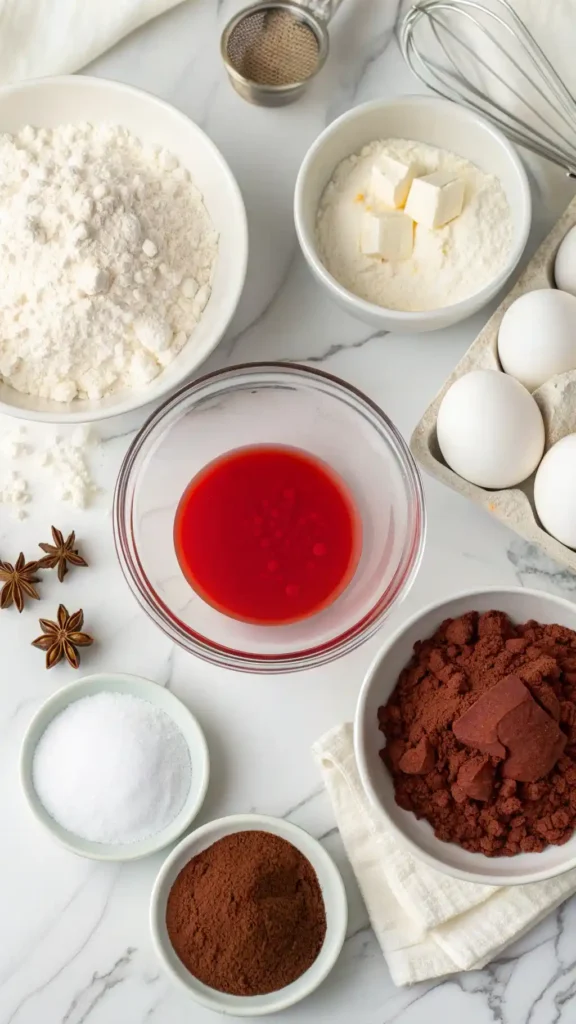
For the Cake
These ingredients create authentic Southern Red Velvet Cake texture and flavor. Each one plays a specific role.
- 2 and 1/2 cups all-purpose flour
- 1 and 1/2 cups granulated sugar
- 1 teaspoon baking soda
- 1 teaspoon salt
- 2 tablespoons unsweetened cocoa powder
- 1 and 1/2 cups vegetable oil
- 1 cup buttermilk, room temperature
- 2 large eggs, room temperature
- 2 tablespoons red food coloring
- 1 teaspoon white vinegar
- 1 teaspoon vanilla extract
For the Cream Cheese Frosting
This Red Velvet Frosting Recipe is non-negotiable. The tangy cream cheese balances the sweet cake perfectly.
- 16 ounces cream cheese, softened
- 1 cup unsalted butter, softened
- 4 cups powdered sugar
- 2 teaspoons vanilla extract
- 1/4 teaspoon salt
Equipment Needed
You need standard baking tools for this Easy Red Velvet Cake. Nothing fancy or specialized required.
- Two 9-inch round cake pans
- Parchment paper
- Electric mixer (stand or hand)
- Mixing bowls
- Rubber spatula
- Measuring cups and spoons
- Cooling racks
Making the Cake
Preparing Your Pans
Preheat oven to 350°F (175°C). Get this going first so it’s ready.
Grease your pans thoroughly with butter or cooking spray. Don’t miss any spots.
Line pan bottoms with parchment paper circles. This guarantees perfect release every time.
Lightly flour the greased pans, tapping out excess. Creates extra insurance against sticking.
Mixing Dry Ingredients
Sift together flour, sugar, baking soda, salt, and cocoa powder into a large bowl.
Sifting is actually important here. It aerates the flour and distributes cocoa evenly.
Whisk the dry mixture thoroughly. You want no cocoa clumps anywhere.
Set this bowl aside. You’ll add wet ingredients to it later.
Combining Wet Ingredients
Whisk together oil and buttermilk in a separate bowl. Mix until well combined.
Add eggs one at a time, whisking after each addition. Room temperature eggs incorporate better.
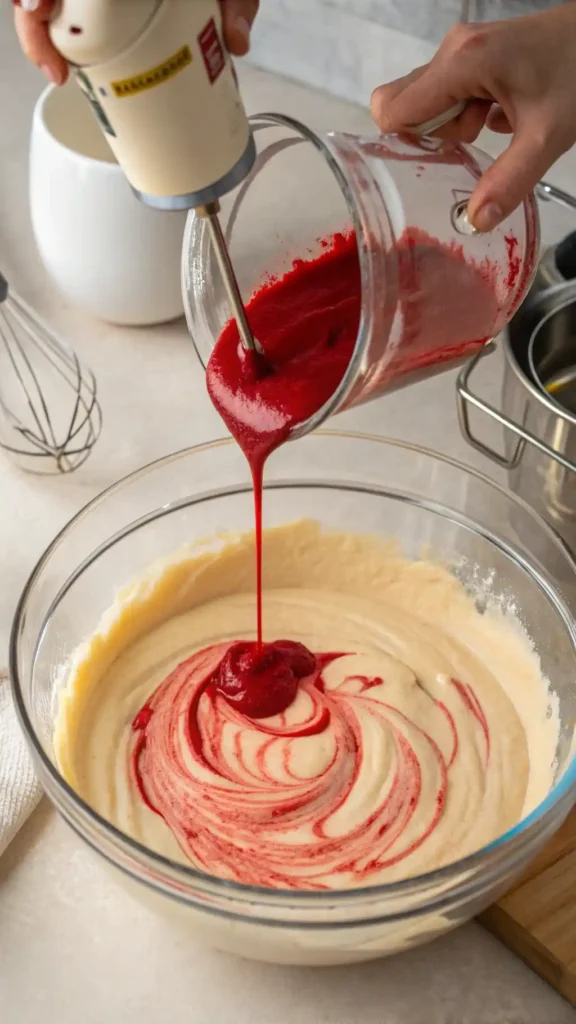
Stir in red food coloring. I use liquid gel for vibrant color without adding too much liquid.
Add vinegar and vanilla extract. Mix just until combined.
The vinegar reacts with baking soda during baking. Creates that signature fluffy texture.
Bringing It All Together
Pour wet ingredients into the dry mixture. Mix on low speed just until combined.
Scrape down bowl sides with a rubber spatula. Make sure you catch all the flour at the bottom.
Increase speed to medium and beat for exactly 1 minute. No longer.
The batter will be thin and pourable. That’s exactly what you want for Soft Red Velvet Cake.
Don’t overmix or you’ll develop gluten. That creates tough cake instead of tender velvet.
The color should be vibrant red. If it looks brown, you need more food coloring.
Baking Process
Divide batter evenly between prepared pans. Use a kitchen scale for perfect layers.
Tap pans gently on the counter. This releases trapped air bubbles.
Bake for 28-30 minutes. Don’t open the oven door before 25 minutes.
Test with a toothpick inserted in the center. It should come out clean or with tiny crumbs.
The cakes will spring back when lightly touched. Edges pull slightly from pan sides.
Cooling Properly
Let cakes cool in pans for 10 minutes. Any longer and they might stick.
Run a knife around pan edges to loosen. Invert carefully onto cooling racks.
Peel off parchment paper while still warm. It removes more easily than when cold.
Cool completely before frosting. This takes about 1 hour. Be patient.
Warm cake melts cream cheese frosting into a sliding disaster. IMO, overnight cooling works best.
Making Cream Cheese Frosting
Preparing the Base
Ensure cream cheese and butter are properly softened. Not melted, not cold—just soft.
They should dent easily when pressed. Room temperature for about 1 hour works.
Cold ingredients create lumpy frosting. Melted ingredients create runny mess.
This step determines frosting texture. Don’t rush it.
Beating Cream Cheese and Butter
Beat cream cheese and butter together for 3-4 minutes. You want them completely smooth.
Scrape bowl sides frequently. Hidden lumps ruin the final texture.
The mixture should be fluffy and increased in volume. Light pale yellow color.
This creates the foundation for silky frosting. Worth the time investment.
Adding Sugar and Flavorings
Add powdered sugar one cup at a time. Mix on low to avoid sugar clouds.
After each cup, increase speed and beat well. This incorporates air.
The frosting looks dry at first. Keep going—it comes together beautifully.
Add vanilla extract and salt with the last cup of sugar. Mix thoroughly.
Beat on medium-high for 2-3 minutes. The transformation is magical.
Taste it. Adjust sweetness or vanilla to your preference. Make it yours.
If too thick, add cream one tablespoon at a time. Too thin? More powdered sugar.
Assembling Your Cake
Leveling the Layers
Use a long serrated knife to level any domed tops. Flat layers stack beautifully.
Those scraps make excellent baker’s snacks. Perk of the job.
Place first layer on serving plate. Tuck parchment strips under edges.
This keeps your plate pristine during frosting. Pull strips out when finished.
Frosting Between Layers
Spread about 1 cup frosting on first layer. Use offset spatula for even coverage.
Don’t spread to the very edge. The top layer’s weight spreads it naturally.
Place second layer on top, cut side down. Press very gently to secure.
Check for level. Adjust now before adding more frosting.
Crumb Coating
Apply a thin frosting layer over entire cake. This traps loose crumbs.
Don’t worry about perfection. You’re creating a base coat.
Refrigerate for 20-30 minutes. This sets the crumb coat.
This step separates amateur from professional-looking cakes. Never skip it.
Final Frosting
Apply remaining frosting generously. Use smooth, even strokes with spatula.
Create swirls, rosettes, or smooth finish. All work beautifully for Red Velvet Cake Ideas.
Pipe borders or add decorative touches. Simple elegance works great.
The classic look is smooth sides with piped rosettes on top.
Decoration Ideas
Classic Presentation
Pipe cream cheese frosting rosettes on top. Use a star tip for texture.
Sprinkle with red velvet cake crumbs. Use your leveled scraps.
Dust lightly with cocoa powder. Creates subtle contrast.
Holiday Versions
Make Red Velvet Christmas Cake with white frosting “snow” and cranberries on top.
Add peppermint for festive twist. Candy cane pieces look beautiful.
Red and green sprinkles create instant holiday vibe. Simple but effective.
Elegant Options
Fresh raspberries or strawberries add color and freshness. Gorgeous contrast.
White chocolate shavings create luxury. Elegant and sophisticated.
Edible flowers make it wedding-worthy. Choose food-safe varieties.
Gold leaf adds drama for special occasions. A little goes far.
Flavor Variations
Red Velvet Cheesecake Cake
Layer cheesecake between red velvet layers. Requires extra baking time.
Bake cheesecake separately, chill completely, then assemble. Worth the effort.
This creates ultimate indulgence. Three flavors in one cake.
Red Velvet Pound Cake
Use pound cake ratios for denser texture. Increase butter, reduce leavening.
Bake in bundt pan for 50-60 minutes. Beautiful presentation.
Drizzle with cream cheese glaze instead of frosting. Lighter finish.
Cupcake Version
Divide batter into cupcake liners. Fill two-thirds full.
Bake for 18-22 minutes. Check at 18 minutes.
Perfect for parties and portion control. Easier serving too.
Storage Tips
Room Temperature
Cover with cake dome or wrap loosely. Stays fresh for 2 days at room temp.
The cream cheese frosting is fine unrefrigerated short-term. Seriously.
Don’t refrigerate unless absolutely necessary. Cold dries out cake.
Refrigerator Storage
Store in fridge for up to 1 week. Cover well to prevent drying.
Bring to room temperature before serving. Let sit 30 minutes.
The flavor improves after a day. Allows flavors to meld.
Freezer Instructions
Freeze unfrosted layers wrapped tightly. Keeps for 3 months perfectly.
Freeze frosted cake uncovered first, then wrap. Prevents frosting smearing.
Thaw in refrigerator overnight. Remove wrapping to prevent condensation.
Why Red Velvet Is Special
The vibrant red color makes it memorable. Visually stunning on any table.
The subtle cocoa flavor creates complexity. Not chocolate, not vanilla—something unique.
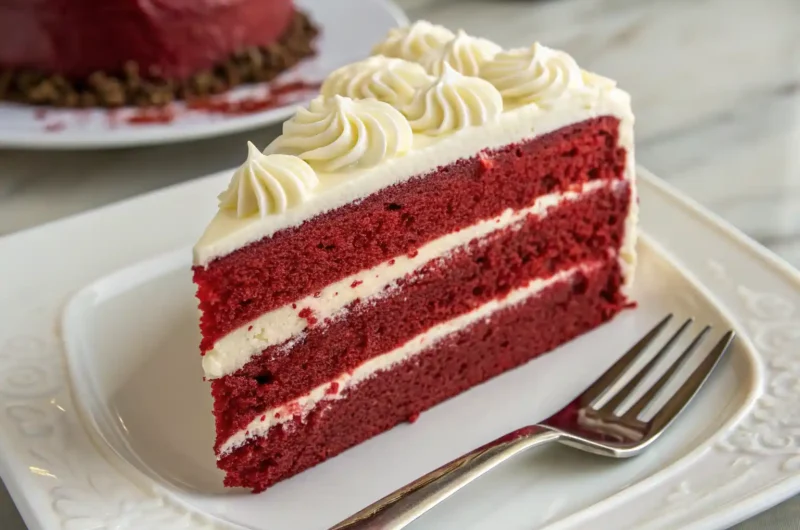
The tender, velvety crumb justifies the name. Texture is unmatched.
This How To Make Velvet Cake method creates authentic results. Not just red cake.
Common Mistakes to Avoid
Wrong Food Coloring Amount
Too little makes it brown. Too much can taste bitter.
Use liquid gel food coloring. Regular liquid requires too much volume.
Add gradually and check color. You can always add more.
Overmixing the Batter
Mix just until combined. Overmixing develops gluten.
Gluten creates tough, chewy texture. We want tender velvet.
One minute of beating after combining is enough. No more.
Skipping Room Temperature Ingredients
Cold eggs and buttermilk don’t emulsify properly. Creates lumpy batter.
Room temperature ingredients incorporate smoothly. Better final texture.
Plan ahead and take them out 1 hour before baking.
Budget-Friendly Tips
This Red Velvet Cake Easy Recipe costs about $12 to make. Less than $1 per slice.
Make your own buttermilk. Mix 1 cup milk with 1 tablespoon vinegar.
Buy food coloring in bulk. Cheaper per ounce than small bottles.
Skip fancy decorations for everyday cakes. Save those for special occasions.
Perfect Occasions
Valentine’s Day
The red color is perfect for romance. Classic choice for the holiday.
Heart-shaped pans create instant theme. Simple but effective.
Add fresh strawberries for extra romance. Pairs beautifully.
Birthdays
Red velvet makes memorable birthday cake. Different from usual chocolate or vanilla.
Kids and adults both love it. The color alone excites people.
Customize decorations based on age or interests. Versatile canvas.
Southern Gatherings
This is traditional Southern dessert. Authentic recipe honors that heritage.
Bring to potlucks and watch it disappear. Always a hit.
FYI, Southerners take their red velvet seriously. Don’t mess with the classics.
FAQ Section
What makes red velvet different from chocolate cake?
Red velvet uses much less cocoa—just enough for subtle flavor and color enhancement. The buttermilk and vinegar create unique tangy flavor and tender texture. It’s a distinct flavor profile, not just colored chocolate cake.
Can I use natural food coloring?
Yes, but the color won’t be as vibrant. Beet juice or powder works but creates more burgundy than red. The flavor might change slightly too. For true red velvet color, conventional food coloring works best.
Why did my cake turn brown?
Not enough food coloring, or the cocoa overpowered it. Cocoa reacts with leavening and can affect color. Use quality cocoa and adequate food coloring. The vinegar-baking soda reaction also impacts final color.
Can I make this without buttermilk?
Make your own: mix 1 cup milk with 1 tablespoon white vinegar or lemon juice. Let sit 5 minutes. This creates the acidity needed for proper texture and flavor. Don’t skip this step.
How do I get smooth frosting?
Ensure cream cheese and butter are properly softened—not melted. Beat them thoroughly before adding sugar. Sift powdered sugar to remove lumps. Beat frosting for full 2-3 minutes at the end.
Red Velvet Cake Recipe: The Perfect Southern Classic
12
slices545
kcal1
hour55
minutesRed velvet cake combines buttermilk, vinegar, and cocoa for tender, velvety texture with vibrant red color. Mix dry ingredients, combine wet ingredients with food coloring, blend together briefly, and bake. Cool completely, then frost with tangy cream cheese frosting. The result is stunning, moist cake perfect for celebrations or satisfying red velvet cravings anytime.
Ingredients
- Cake:
2 and 1/2 cups all-purpose flour
1 and 1/2 cups granulated sugar
1 teaspoon baking soda
1 teaspoon salt
2 tablespoons cocoa powder
1 and 1/2 cups vegetable oil
1 cup buttermilk, room temperature
2 large eggs, room temperature
2 tablespoons red food coloring
1 teaspoon white vinegar
1 teaspoon vanilla extract
- Frosting:
16 ounces cream cheese, softened
1 cup unsalted butter, softened
4 cups powdered sugar
2 teaspoons vanilla extract
1/4 teaspoon salt
Directions
- Preheat oven to 350°F and prepare two 9-inch pans
- Sift flour, sugar, baking soda, salt, and cocoa together
- Whisk oil and buttermilk in separate bowl
- Add eggs one at a time to wet mixture
- Stir in red food coloring, vinegar, and vanilla
- Pour wet ingredients into dry ingredients
- Mix on low until combined, scrape bowl
- Beat on medium for 1 minute exactly
- Divide batter between prepared pans
- Bake 28-30 minutes until toothpick comes out clean
- Cool in pans 10 minutes, then on racks completely
- Beat cream cheese and butter 3-4 minutes until smooth
- Add powdered sugar one cup at a time
- Add vanilla and salt, beat 2-3 minutes
- Level cake layers and apply crumb coat
- Refrigerate 20-30 minutes, apply final frosting
Final Thoughts
There you have it—everything you need to make incredible Moist Red Velvet Cake Recipe that’ll become your signature dessert. This proves classic recipes never go out of style.
The combination of tender cake, vibrant color, and tangy frosting creates perfection. Every bite delivers that signature velvet texture.
So grab your ingredients and get baking. Your kitchen is about to smell amazing, and you’ll have a showstopper cake everyone remembers.