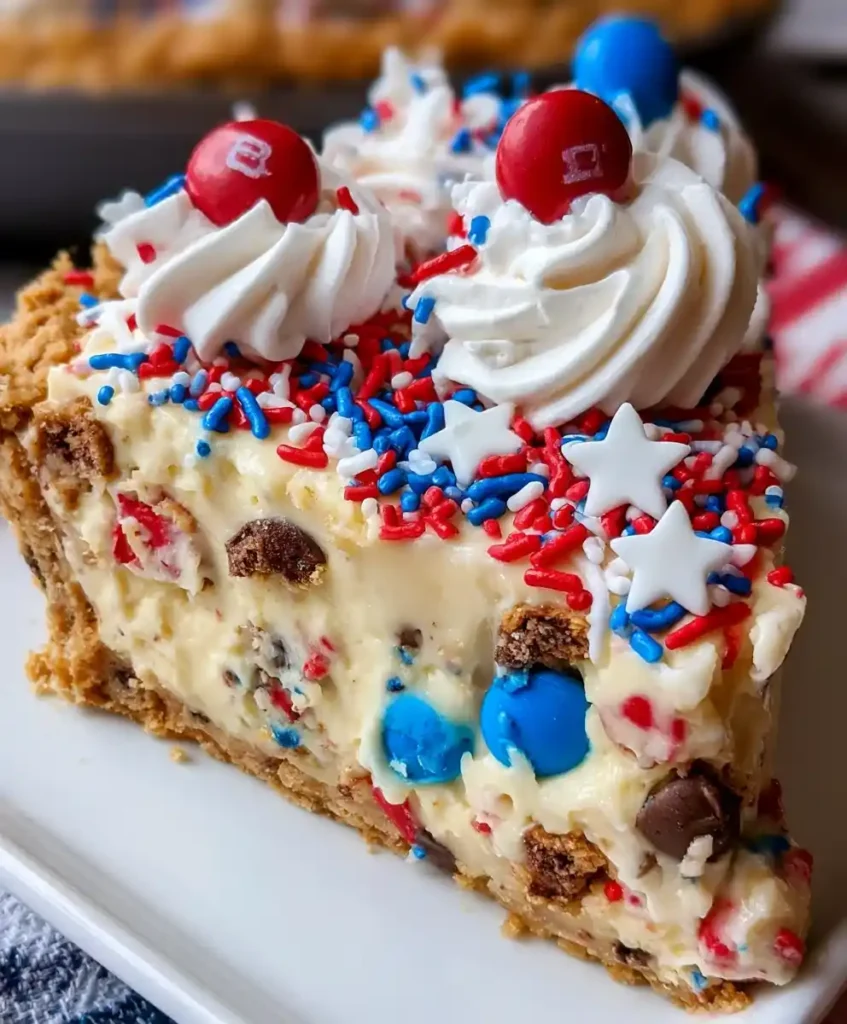
Need a dessert that screams festive without turning on your oven? 4th of July Cookie Cheesecake Pie is exactly that lifesaver. I made this the year my oven decided to break down right before the holiday, and honestly, it might be even better than the baked version. No-bake, colorful, and genuinely crowd-pleasing.
Servings: 10–12 Prep Time: 30 minutes Chill Time: 8 hours (overnight recommended) Total Time: About 8 hours 30 minutes
Why This 4th of July Cookie Cheesecake Pie Steals the Show
Ever notice how the best holiday desserts are the ones nobody has to babysit in the oven? This pie fits that description perfectly. It’s creamy, crunchy, colorful, and comes together with barely any effort on your part.
IMO, the real win here is the crust. Combining graham cracker crumbs with crushed Chips Ahoy cookies creates a crust that’s sweeter and more interesting than the standard graham-only version. Once you try it, plain graham crusts might feel a little boring by comparison.
Ingredients You’ll Need
This recipe has quite a few fun mix-ins, but nothing here requires a specialty store run. Here’s your full shopping list:
- Graham cracker crumbs
- Crushed Chips Ahoy cookies
- Granulated sugar
- Unsalted butter
- Cream cheese
- Powdered sugar
- Vanilla extract
- Almond extract (optional)
- Instant vanilla pudding mix
- Cold whole milk
- Whipped topping
- Mini chocolate chips
- Mini patriotic M&M’s
- Chopped Chips Ahoy cookies
- Red, white, and blue jimmies sprinkles
- Extra whipped topping, for decorating
- Regular patriotic M&M’s and white star sprinkles, optional
Exact measurements are waiting for you in the recipe card at the bottom of this article. Nothing here requires a specialty bakery supply trip, just your regular grocery store.
How to Make 4th of July Cookie Cheesecake Pie
Let’s break this down step by step, because no-bake desserts still deserve careful technique. Rushing the chilling steps especially leads to a pie that won’t hold its shape when sliced. Patience really does matter here.
Step 1: Build a Sturdy Cookie Crust
Start by combining graham cracker crumbs, crushed Chips Ahoy cookies, granulated sugar, and melted butter in a mixing bowl. Stir everything together until the mixture looks evenly moistened and holds together when pressed. This texture check matters more than people realize.
Press the mixture firmly and evenly into a deep 9-inch pie plate, working it up the sides as well. A firm, even crust prevents crumbling once you slice the finished pie later. Pop the crust into the freezer for 15 to 20 minutes to set completely.
Step 2: Whip the Cream Cheese Until Smooth
While your crust chills, beat softened cream cheese in a separate bowl until it turns completely smooth and lump-free. This takes a couple of minutes with an electric mixer, though your arm gets a decent workout without one. Either way, don’t rush this step.
Add powdered sugar, vanilla extract, and almond extract if you’re using it, then beat everything together again. You want the mixture to look light, fluffy, and airy rather than dense. Have you ever bitten into a heavy, gritty cheesecake filling? This step prevents that outcome entirely.
Step 3: Whisk the Pudding Mixture Separately
Grab another bowl and combine the instant vanilla pudding mix with cold whole milk. Whisk continuously for about two minutes until the mixture starts thickening slightly. This step adds body and structure to your final filling.
Skipping this thickening step leads to a runny, unstable pie, so don’t shortcut it even if you’re in a hurry. The pudding mixture is doing quiet, important work behind the scenes here.
Step 4: Fold Everything Together Gently
Take your thickened pudding mixture and gently fold it into the whipped cream cheese base. Work slowly with a spatula rather than stirring aggressively, since you want to preserve that airy texture. Add whipped topping next, folding it in the same careful way.
Now fold in mini chocolate chips, mini patriotic M&M’s, chopped Chips Ahoy cookies, and the red, white, and blue jimmies. Every fold should feel gentle and deliberate rather than rushed. This is where the pie’s festive personality really comes together.
Step 5: Fill the Chilled Crust Completely
Once your crust has firmed up in the freezer, pull it out and pour in the finished cream cheese filling. Spread it evenly using your spatula, smoothing the top until it looks neat and level. Take your time here since presentation matters for a holiday dessert.
Cover the entire pie with plastic wrap, pressing it gently against the surface to avoid air pockets. Slide it into the refrigerator for at least 8 hours, though overnight chilling works even better.
Step 6: Let the Pie Set Completely
This chilling stage isn’t optional, even though waiting feels genuinely difficult. Besides firming up the texture, it gives every flavor time to blend together properly. Rushing this step usually means a pie that slumps instead of holding its shape.
FYI, the difference between a 4-hour chill and an overnight chill is noticeable. Trust the process, and resist the urge to slice into it too early, no matter how tempting it looks through the fridge door.
Step 7: Decorate and Serve With Flair
When you’re finally ready to serve, whip up a bit of extra whipped topping and pipe or swirl it around the pie’s edge. This small touch instantly makes the whole dessert look bakery-quality. Don’t skip it if presentation matters to you.
Top everything with regular patriotic M&M’s, more jimmies sprinkles, and white star sprinkles if you’re feeling extra festive. Slice using a hot, clean knife for the neatest possible cuts. Watch everyone’s face light up as you serve the first piece.
Tips for Getting It Right Every Time
A handful of small habits separate an okay pie from a genuinely memorable one. None of these require special skills, just a little extra attention.
- Always soften your cream cheese fully before beating for the smoothest filling
- Chill overnight rather than the minimum 8 hours whenever possible
- Use a deep pie plate so all the filling actually fits
- Customize the sprinkle colors and mix-ins based on your specific theme
- Keep whipped topping refrigerated right up until you’re ready to use it
Equipment That Makes This Easier
You don’t need any fancy bakeware for this dessert, just a few kitchen basics. Here’s what actually gets used.
- A 9-inch deep pie plate
- Mixing bowls, ideally a few different sizes
- An electric mixer, or a whisk if you want the arm workout
- A silicone spatula for scraping and spreading
- Measuring cups and spoons for accuracy
Fun Variations Worth Trying
Once you’ve made the classic version, feel free to switch things up a bit. Small tweaks completely change the vibe of this pie.
- Fruity Twist: Fold in fresh strawberries or blueberries for extra flavor and color
- Gluten-Free Option: Use gluten-free graham crackers and cookies throughout
- Chocolate Lover’s Version: Swap vanilla pudding for chocolate pudding mix
- Lighter Option: Use reduced-fat cream cheese and sugar-free whipped topping
- Jam Surprise: Add a thin layer of raspberry or strawberry jam before serving
What to Serve Alongside It
This pie pairs wonderfully with a handful of simple additions. Choose based on your crowd and the overall occasion.
- Fresh whipped cream on the side for extra richness
- A scoop of vanilla ice cream for temperature contrast
- A festive platter decorated with more patriotic sprinkles
- Sweet tea or sparkling lemonade to round out the meal
- Fresh berries scattered around the serving plate
FAQs About 4th of July Cookie Cheesecake Pie
Can I make this pie ahead of time? Absolutely, and it’s actually recommended. Making it a day in advance improves the flavor and helps everything set properly before serving.
Can I use low-fat cream cheese for this recipe? Yes, you can. The texture may come out slightly less rich, but the overall flavor still holds up nicely.
What can I substitute for graham cracker crumbs? Crushed vanilla wafers or Oreo cookies both work well here. Each brings its own unique flavor twist to the crust.
How should I store leftovers? Keep leftover slices in an airtight container in the refrigerator for up to four days. Proper covering helps maintain freshness throughout that time.
Can I freeze this cheesecake pie? Yes, you can freeze it. Wrap it tightly in plastic wrap and aluminum foil, though expect a slightly different texture once thawed.
Final Thoughts
4th of July Cookie Cheesecake Pie proves that festive desserts don’t require a hot oven or complicated techniques. It’s creamy, crunchy, colorful, and genuinely simple enough for even the busiest holiday prep day. IMO, once you make this, plain cheesecake might start feeling a little one-note by comparison.
Give this recipe a real shot before your next cookout or backyard celebration. The no-bake process does all the heavy lifting, leaving you free to actually enjoy the holiday. Your dessert table just found its new star attraction
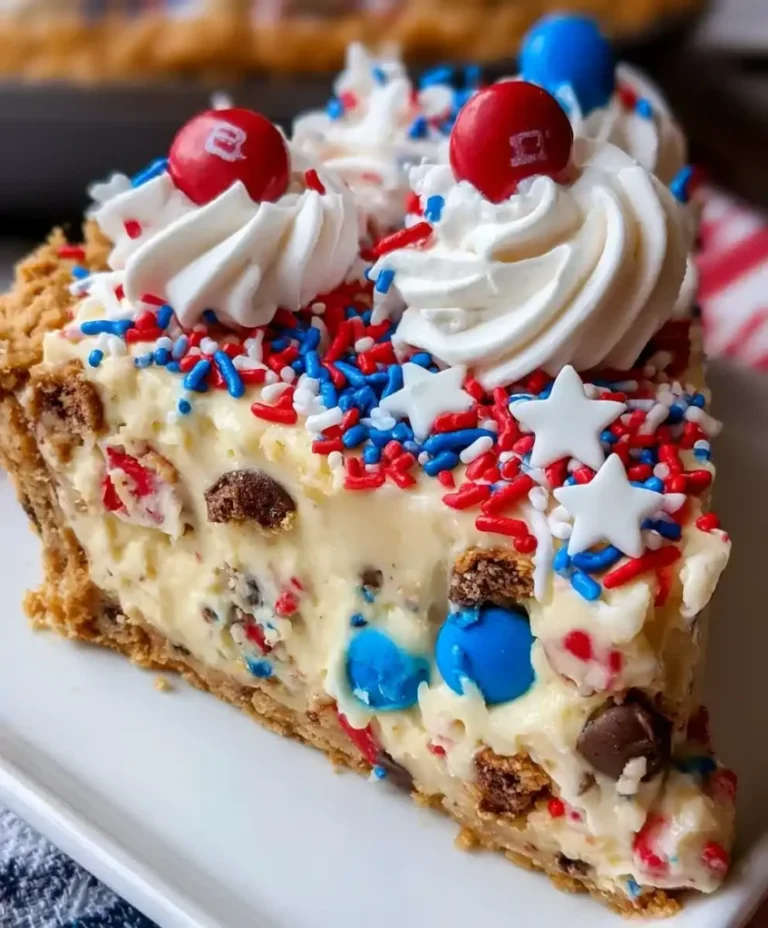
4th of July Cookie Cheesecake Pie
Ingredients
Method
- Combine graham cracker crumbs, crushed Chips Ahoy cookies, granulated sugar, and melted butter in a mixing bowl. Stir until the mixture is evenly moistened.
- Press the mixture firmly into a 9-inch pie plate and freeze for 15-20 minutes to set.
- Beat softened cream cheese until smooth and lump-free.
- Add powdered sugar, vanilla extract, and almond extract and beat until fluffy.
- In another bowl, combine instant vanilla pudding mix with cold whole milk and whisk until it starts to thicken.
- Gently fold the pudding mixture into the whipped cream cheese base.
- Fold in whipped topping, mini chocolate chips, mini patriotic M&M’s, chopped Chips Ahoy cookies, and jimmies.
- Pour the cheesecake filling into the chilled crust and smooth the top.
- Cover with plastic wrap and refrigerate for at least 8 hours or overnight.
- Pipe extra whipped topping around the pie’s edge for decoration.
- Top with additional patriotic M&M’s and jimmies, then slice and serve.



