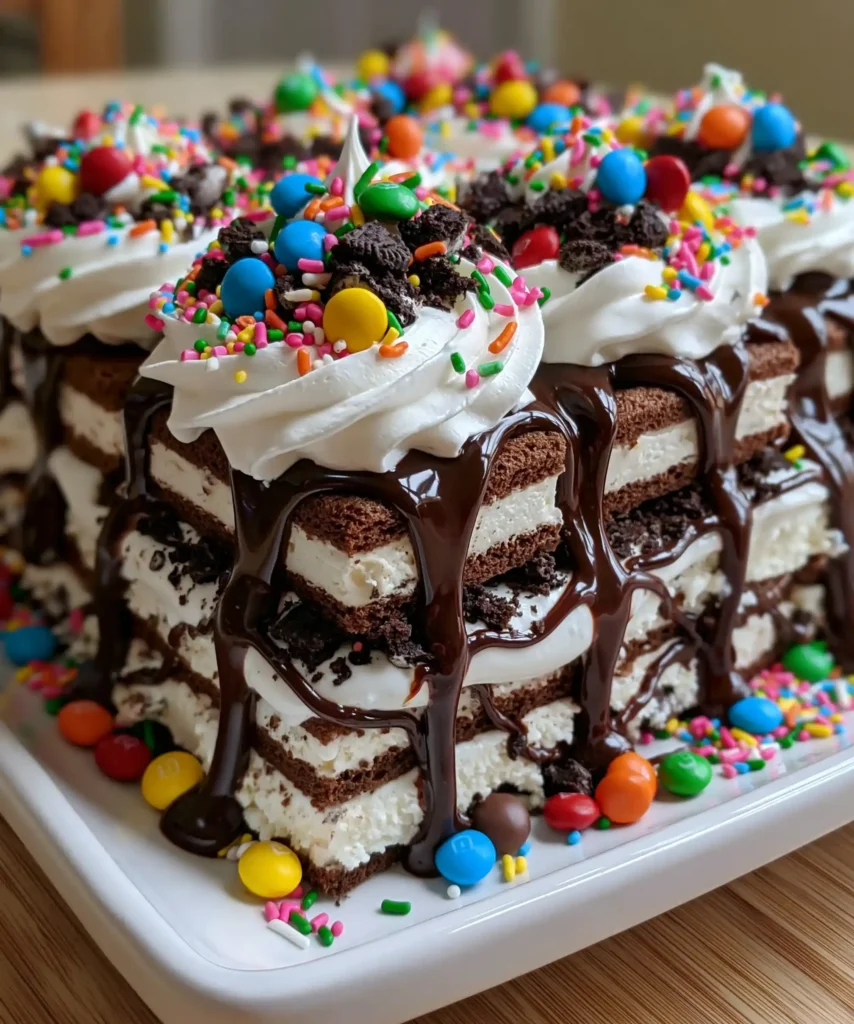
Need a showstopping dessert without turning on the oven? Ice Cream Sandwich Cake is your answer, guaranteed. I first made this for a birthday when I had zero energy left for actual baking, and it’s been requested at every gathering since. Layers of crunch and creaminess, zero stress involved.
Servings: 12 Prep Time: 15 minutes Freeze Time: 1–3 hours Total Time: About 1 hour 15 minutes to 3 hours 15 minutes
Why This Ice Cream Sandwich Cake Wins Every Time
Ever wonder why layered frozen desserts feel so much more special than a regular scoop of ice cream? Each layer adds contrast, texture, and visual drama that a single dessert just can’t replicate. Cutting into it genuinely feels like a reveal.
IMO, the real magic is in the layering. Combining crunchy Oreos, gooey hot fudge, and fluffy Cool Whip between ice cream sandwiches creates a dessert that tastes far more complex than the effort actually required. Don’t tell anyone how easy this really was.
Ingredients You’ll Need
This recipe keeps things wonderfully simple, with no baking and minimal prep. Here’s your shopping list:
- Ice cream sandwiches
- Oreos
- Hot fudge sauce
- Cool Whip
- Toppings (sprinkles or mini M&Ms)
Exact measurements are waiting for you in the recipe card at the bottom of this article. Nothing here requires a specialty grocery run, so you’re likely already halfway there.
How to Make Ice Cream Sandwich Cake
Let’s walk through this slowly, because even a no-bake dessert benefits from a little technique. Rushing the layering steps leads to uneven slices and a messy final result. Take your time, and the payoff is genuinely worth it.
Step 1: Build the Ice Cream Sandwich Base
Start by lining the bottom of a 9×13-inch pan with ice cream sandwiches in a single, even layer. They should fit snugly together, almost like little soldiers standing in formation. If needed, trim a few edges with kitchen scissors so everything fits properly.
A tight, even base layer matters more than people realize here, since gaps mean uneven layers later on. Don’t stress over perfection, though; a few trimmed edges won’t ruin the final presentation at all.
Step 2: Crush the Oreos for Extra Crunch
Grab your Oreos and either chop them into bite-sized pieces or crush them completely using a Ziplock bag and rolling pin. This step is genuinely fun to do with kids, since cookie demolition rarely disappoints anyone. Set the crushed cookies aside for the next layer.
Have you ever watched a kid’s face light up while smashing cookies with a rolling pin? This step turns prep time into an activity everyone can join in on. Keep some crumbs reserved for the top layer too.
Step 3: Add the Fudge and Whipped Topping
Drizzle about half of your warmed hot fudge sauce evenly over the ice cream sandwich layer. Spread it out gently so every bite gets an equally decadent amount. Follow this with half of your thawed Cool Whip, spreading it carefully with a spatula.
Thawing the Cool Whip completely makes spreading significantly easier, so don’t rush that step beforehand. A partially frozen Cool Whip tears the layers underneath instead of gliding smoothly across them.
Step 4: Repeat the Layers for Extra Decadence
Add another layer of ice cream sandwiches directly on top of your first round of fillings. Follow with the remaining hot fudge sauce, then the rest of the Cool Whip, spreading each layer evenly as you go. Sprinkle a generous amount of crushed Oreo crumbs over the top.
FYI, building these layers methodically really pays off visually once you slice into the finished cake. Each cross-section reveals distinct bands of flavor and texture. Take a moment to admire your work before moving to the final step.
Step 5: Add Toppings and Freeze Completely
Finish everything off with a colorful sprinkle of sprinkles or mini M&Ms across the very top. Cover your assembled cake loosely with plastic wrap, avoiding pressing down too hard on the toppings. Slide it into the freezer and let it set for 1 to 3 hours.
Have you ever tried slicing a frozen dessert too early and ended up with a melty mess? Give this cake its full freezing time before attempting to cut into it. Patience here genuinely determines how clean your slices turn out.
Step 6: Slice and Serve With Confidence
Once fully frozen, remove the cake from the freezer and let it sit at room temperature for a few minutes before slicing. This brief rest makes cutting significantly easier without sacrificing that firm, frozen texture. Use a sharp knife for the cleanest possible cuts.
Serve immediately while everything stays perfectly cold and firm. This short resting period prevents shattering through frozen layers with a knife. Your guests will be genuinely impressed by how polished each slice looks.
Tips for Getting It Right Every Time
A handful of small habits separate a decent version from a genuinely impressive one. None of these require special skills, just a little attention.
- Thaw the Cool Whip completely before spreading for much easier layering
- Customize toppings freely based on your family’s personal favorites
- Let the cake sit briefly at room temperature before slicing for cleaner cuts
- Make this ahead of time, since it freezes well for several days
- Keep a sharp knife handy for the neatest possible slices
Equipment That Makes This Easier
You won’t need anything fancy for this dessert, just a few kitchen basics. Here’s what actually gets used.
- A 9×13-inch pan
- A spatula for spreading Cool Whip evenly
- A Ziplock bag and rolling pin for crushing Oreos
- Plastic wrap for covering the cake while it freezes
Fun Variations Worth Trying
Once you’ve made the classic version, why not experiment a little further? Small swaps completely shift the personality of this dessert.
- Flavor Twist: Use chocolate or mint ice cream sandwiches for different layers
- Cookie Swap: Try Nutter Butters or Ginger Snaps instead of Oreos
- Fruity Touch: Add sliced strawberries or bananas between the layers
- Caramel Drizzle: Combine caramel sauce alongside the hot fudge
- Lighter Option: Use Greek yogurt or whipped coconut cream instead of Cool Whip
What to Serve Alongside It
This cake pairs beautifully with a handful of simple additions. Choose based on the occasion and your personal taste.
- A scoop of fresh vanilla ice cream on the side
- A light fruit salad to balance the richness
- Cold milk or iced coffee for a refreshing contrast
- Colorful plates topped with extra sprinkles for presentation
- A drizzle of extra hot fudge for serving
FAQs About Ice Cream Sandwich Cake
Can I make this dessert ahead of time? Absolutely. Make it a few days in advance, cover it tightly, and keep it frozen until you’re ready to serve. The flavors only improve with time.
What can I use instead of Cool Whip? Homemade whipped cream works beautifully as a substitute. Whip heavy cream until soft peaks form, then sweeten with a bit of sugar to taste.
How do I prevent the cake from melting too quickly once served? Freeze it for the full 1 to 3 hours before slicing, and pop leftovers back into the freezer promptly if they start softening too much.
Can I change the flavor of the hot fudge sauce? Definitely. Swap in caramel or butterscotch sauce for a different flavor profile entirely. Get creative based on your own taste preferences.
What if the Oreos get too soggy? Layering them between frozen sections generally helps maintain their crunch. Sprinkling extra crumbs on top also adds fresh texture right before serving.
Final Thoughts
Ice Cream Sandwich Cake proves that impressive desserts don’t require complicated baking or a long ingredient list. It’s crunchy, creamy, and genuinely simple enough for even the busiest week. IMO, once you make this for a gathering, plain ice cream might start feeling a little one-note by comparison.
Give this recipe a real shot before your next family get-together or summer party. The layering process does all the visual heavy lifting, leaving you free to actually enjoy the occasion. Your dessert table just found its new easiest showstopper
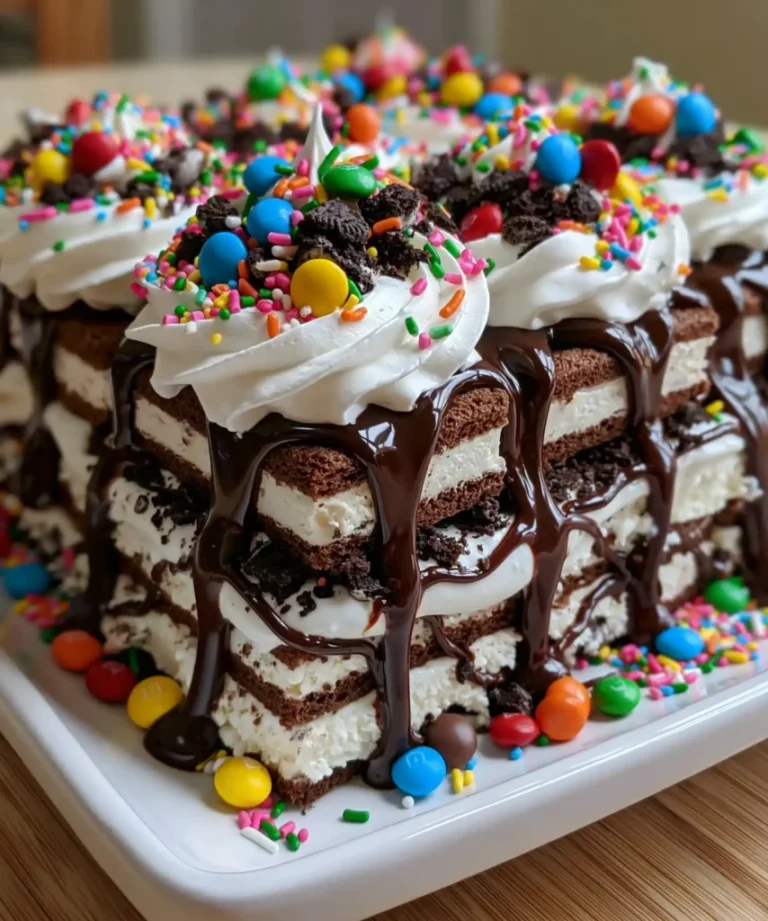
Ice Cream Sandwich Cake
Ingredients
Method
- Line the bottom of a 9x13-inch pan with ice cream sandwiches in a single, even layer.
- Crush the Oreos into bite-sized pieces or completely in a Ziplock bag using a rolling pin.
- Drizzle half of the warmed hot fudge sauce over the ice cream sandwiches, then half of the thawed Cool Whip.
- Repeat the layering with another layer of ice cream sandwiches, the remaining hot fudge sauce, and Cool Whip.
- Sprinkle crushed Oreo crumbs on top and add colorful sprinkles or mini M&Ms.
- Cover the cake loosely with plastic wrap and freeze for 1 to 3 hours.
- Once fully frozen, let the cake sit at room temperature for a few minutes before slicing.
- Serve immediately while cold and firm.



