Servings: 8 slices | Prep Time: 20 minutes | Chill Time: 4 hours (or overnight) | Total Active Time: About 20 minutes
The Coolest Pie You Will Make All Summer
Some desserts require hours of work. Some require a culinary degree and a lot of patience. And then there is Strawberry Icebox Pie, which requires neither and still manages to look and taste like something from a proper dessert menu. That is exactly the kind of recipe I want in my life.
I first made this on a sweltering July afternoon when turning on the oven felt like a personal threat. No baking, no fussing, no complicated technique — just a buttery crust, a luscious creamy strawberry filling, and a refrigerator doing all the heavy lifting. I have made it every summer since.
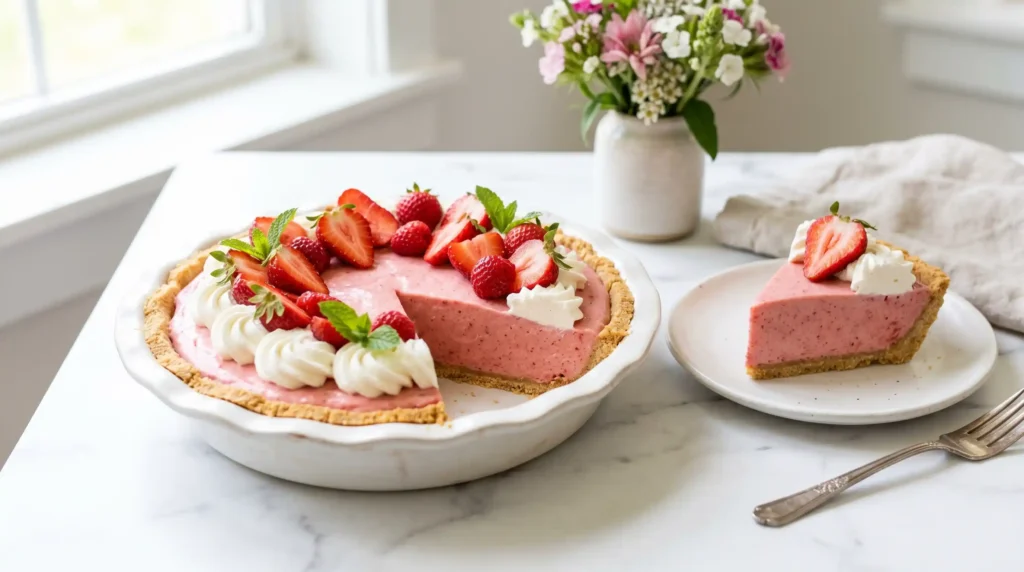
What makes this pie so special is the texture. The filling is thick, silky, and intensely strawberry without tasting artificial for a single second. IMO, this is the perfect summer dessert — effortless to make, stunning to look at, and gone within minutes of hitting the table.
What Exactly Is an Icebox Pie and Why Should You Care
An icebox pie is any pie that sets in the refrigerator rather than the oven. The name comes from the era before modern refrigerators when people used literal iceboxes to keep food cold. The concept stuck around because no-bake pies are genuinely brilliant, especially in warm weather.
No oven means no hot kitchen. You mix the filling, pour it into the crust, and let the cold do the work. The result is a creamy, dense, sliceable pie that holds its shape perfectly and tastes refreshing in a way that a baked pie simply cannot match during summer.
Have you ever noticed how a chilled dessert just hits differently on a hot day? There is something deeply satisfying about pulling a cold, vibrant strawberry pie from the fridge and slicing into it while everyone around the table leans forward. Icebox pies deliver that moment every single time.
Ingredients for Strawberry Icebox Pie

Short list, big results. Everything here is easy to find at any grocery store. Here is what you need to make one 9-inch pie that serves 8 people comfortably:
For the Graham Cracker Crust
- 2 cups (200g) graham cracker crumbs (about 14 to 15 full graham crackers)
- 1/4 cup (50g) granulated sugar
- 1/2 cup (115g) unsalted butter, melted
- Pinch of salt
For the Strawberry Filling
- 500g (about 1 lb) fresh strawberries, hulled
- 8 oz (225g) full-fat cream cheese, softened to room temperature
- 1 cup (240ml) heavy whipping cream, cold
- 1/2 cup (60g) powdered sugar, sifted
- 3 tablespoons strawberry gelatin powder (about half a 3 oz packet)
- 2 tablespoons fresh lemon juice
- 1 teaspoon pure vanilla extract
For Topping
- 1/2 cup (120ml) heavy whipping cream, cold
- 2 tablespoons powdered sugar
- Fresh strawberries, sliced, for garnish
How to Make Strawberry Icebox Pie Step by Step
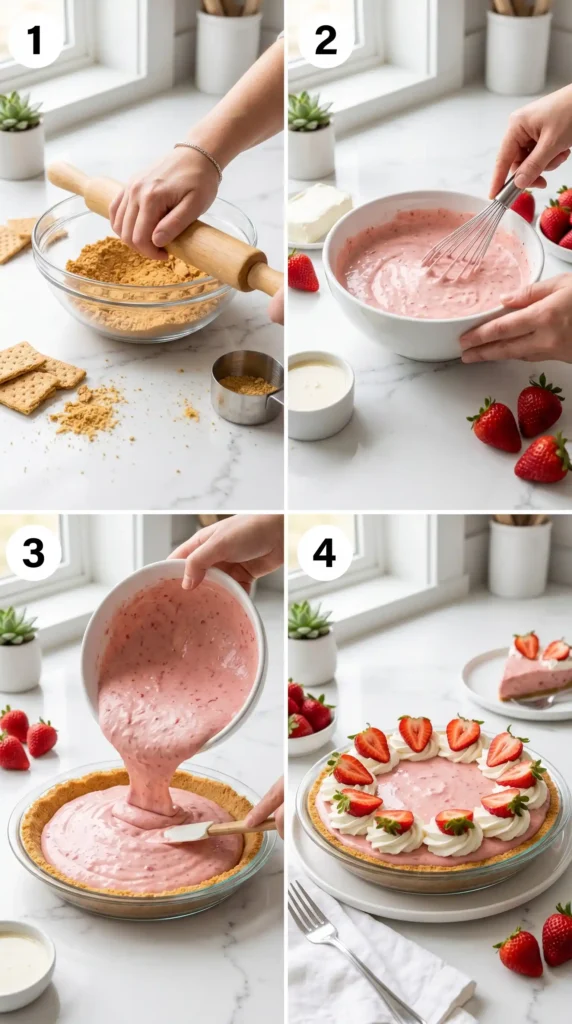
Let us walk through this carefully. Every step is straightforward, but a few small details make the difference between a pie that slices beautifully and one that falls apart on the plate. Follow along and you will nail it on the first try.
Step 1: Make the Graham Cracker Crust
Start by crushing the graham crackers into fine crumbs. The easiest method is to place them in a zip-lock bag, seal it, and roll over it firmly with a rolling pin until you have uniform crumbs with no large chunks remaining. Alternatively, pulse them in a food processor for about 30 seconds.
Combine the crumbs, sugar, melted butter, and salt in a bowl and stir until the mixture looks like wet sand and holds together when you squeeze a small amount in your fist. If it crumbles apart instead of holding, add one more tablespoon of melted butter and stir again.
Press this mixture firmly and evenly into a 9-inch pie dish. Use the flat bottom of a measuring cup or a glass to press the crumbs up the sides and across the base. Press hard enough that the crust feels compact and solid, not loose. A well-packed crust slices cleanly every time.
Refrigerate the crust for at least 30 minutes before adding the filling. Chilling firms up the butter and sets the crust so it does not crumble when you pour the filling in. If you are in a hurry, freeze it for 15 minutes instead. Do not skip this step
Step 2: Prepare the Strawberries
Wash and hull all the strawberries. Set aside about 8 to 10 of the nicest looking ones for garnishing the top of the finished pie. Cut those reserved strawberries in half lengthwise and refrigerate them until needed. The rest go into the filling.
Place the remaining strawberries in a blender or food processor. Add the lemon juice and blend until completely smooth. You should end up with about 1 and 1/4 cups of strawberry puree. If the puree looks very watery, strain it briefly through a fine mesh sieve to remove excess liquid.
The lemon juice does two things here. It brightens the strawberry flavor and prevents the puree from turning dull in color. Fresh strawberries can taste flat on their own when blended. The acid in the lemon juice wakes up all the natural sweetness and makes the filling taste more intensely strawberry.
Step 3: Beat the Cream Cheese
Beat the softened cream cheese in a large mixing bowl using a hand mixer on medium speed for about 2 minutes until it looks completely smooth and fluffy with no lumps. Starting with room temperature cream cheese is critical here. Cold cream cheese will not beat smooth and leaves lumps in the finished filling.
Add the sifted powdered sugar, vanilla extract, and strawberry gelatin powder to the beaten cream cheese. Beat again on medium speed for another minute until everything incorporates evenly and the mixture turns a pale pink. Scrape down the sides of the bowl with a spatula partway through to catch any unmixed bits.
Step 4: Add the Strawberry Puree
Pour the strawberry puree into the cream cheese mixture and beat on low speed until fully combined. Once the puree disappears into the cream cheese, increase to medium speed and beat for 30 seconds more. The mixture should look smooth, evenly pink, and slightly thickened at this point.
Taste the filling now and adjust if needed. Want it sweeter? Add an extra tablespoon of powdered sugar. Want more tang? A few drops more of lemon juice. This is your pie and the filling should taste exactly how you want it before you add the whipped cream.
Step 5: Whip the Heavy Cream
Pour the cold heavy whipping cream into a separate clean bowl. Beat on high speed with a hand mixer or stand mixer until stiff peaks form. This takes about 3 to 4 minutes. The cream is ready when you lift the beaters and the peaks that form stand straight up without drooping.
Cold cream whips much faster and holds better than warm cream. If your kitchen is warm, chill the mixing bowl and beaters in the freezer for 10 minutes before whipping. Do not over-whip the cream past stiff peaks or it will start to look grainy and eventually separate into butter.
Step 6: Fold the Whipped Cream Into the Filling
Add the whipped cream to the strawberry cream cheese mixture in three additions. Use a rubber spatula and fold with slow, sweeping strokes from the bottom of the bowl upward. Do not stir or beat. Folding keeps the air in the whipped cream intact, which gives the filling its light, mousse-like texture.
After the third addition, the filling should look evenly colored, smooth, and thick enough to hold its shape when you run the spatula through it. A few white streaks in the mixture are fine. Overmixing in pursuit of a perfectly uniform color deflates the filling and makes it dense.
Step 7: Fill and Chill the Pie
Remove the chilled crust from the refrigerator. Pour the strawberry filling into the crust and use an offset spatula or the back of a spoon to smooth the top into an even, level surface. Give the pie dish a gentle shake to help the filling settle into the edges of the crust.
Cover the pie loosely with plastic wrap and refrigerate for at least 4 hours. Overnight chilling gives the best results. The gelatin needs time to fully set the filling so it slices cleanly. A pie pulled after only 2 hours will be too soft to slice neatly and will slide on the plate.
Step 8: Top and Serve
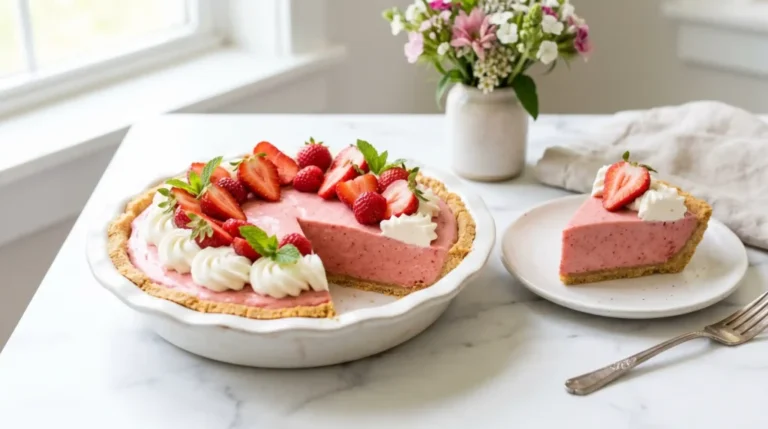
Right before serving, make the whipped cream topping. Beat the cold heavy cream and powdered sugar together on high speed until soft peaks form. Spoon or pipe this whipped cream over the top of the pie. Arrange the reserved fresh strawberry halves decoratively across the whipped cream.
Slice the pie with a sharp knife dipped briefly in hot water and wiped clean between cuts. Hot water on the blade helps it glide through the cold filling without dragging. Serve immediately straight from the refrigerator. This pie tastes best when it is properly cold.
Tips for a Perfect Strawberry Icebox Pie
- Use ripe, deeply red strawberries for the most intense flavor and color. Pale or underripe berries produce a bland filling.
- Full-fat cream cheese and heavy cream are non-negotiable. Low-fat versions do not set as firmly and the filling stays soft.
- The gelatin powder acts as a stabilizer. Do not skip it or the filling will not hold its shape when sliced.
- Always chill the crust before filling. A warm crust causes the bottom of the filling to soften and makes the pie hard to slice.
- Make this pie the night before you need it. Overnight chilling gives the cleanest, most beautiful slices.
Why Every Bite of Strawberry Icebox Pie Tastes So Good
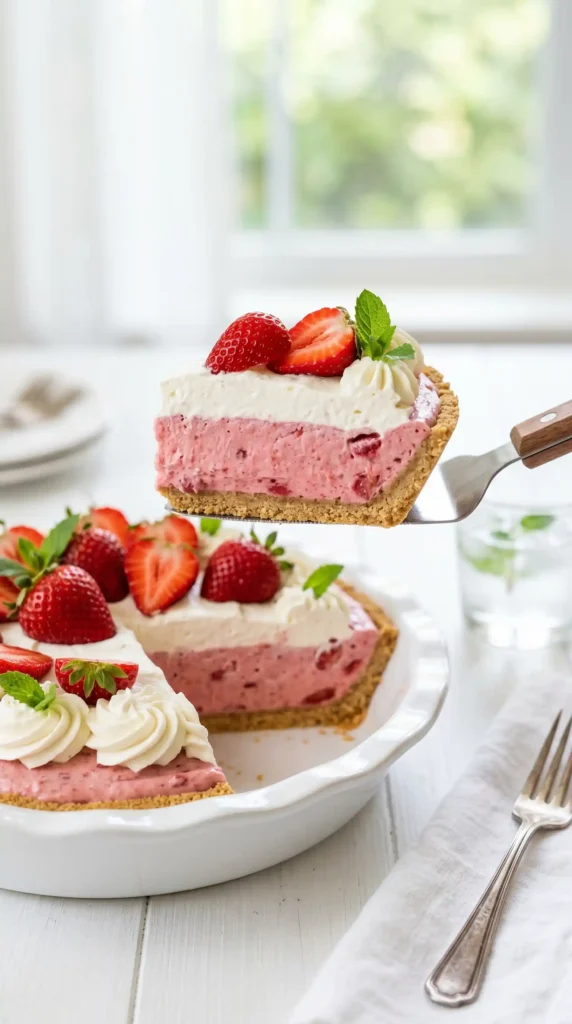
Have you ever thought about why cold creamy desserts hit so differently than warm ones? Temperature affects how we taste sweetness and fruit flavors. Cold dulls some flavors slightly, which is why this pie uses a full pound of fresh strawberries and bright lemon juice to make sure the flavor punches through.
The combination of cream cheese, whipped cream, and gelatin creates a filling that is simultaneously rich, light, and stable. Cream cheese brings body and tang. Whipped cream brings airiness. Gelatin holds everything together so the pie slices cleanly rather than collapsing into a puddle.
The graham cracker crust adds a buttery, slightly caramelized crunch that contrasts with the smooth cold filling. That textural contrast is what makes each bite interesting from start to finish. Strawberry Icebox Pie succeeds because every element has a job and does it well.
Frequently Asked Questions
Can I use frozen strawberries instead of fresh?
Yes, with one adjustment. Thaw the frozen strawberries completely and drain off the excess liquid before blending. Frozen strawberries release a lot of water when thawed and too much liquid will prevent the filling from setting properly. Pat them with paper towels after draining to remove extra moisture.
Can I make Strawberry Icebox Pie without gelatin?
You can skip the gelatin but the filling will be softer and harder to slice. If you prefer to avoid gelatin, increase the cream cheese to 12 oz and chill the pie overnight. The slices will be less firm but will still taste excellent. Serve them with a wide spatula and work quickly.
How long does Strawberry Icebox Pie keep in the refrigerator?
This pie keeps well for up to 4 days covered tightly in the refrigerator. Add the whipped cream topping and fresh strawberry garnish only on the day you plan to serve it. Pre-topped pie can look soggy after a day because the whipped cream softens and the strawberries release juice.
Can I use a store-bought graham cracker crust?
Absolutely. A pre-made 9-inch graham cracker crust works fine and saves about 10 minutes of prep. The homemade version tastes noticeably better because you control the butter ratio and can pack it more firmly. FYI, homemade crust also holds together better when you slice into the cold filling.
Why did my filling not set properly?
A filling that stays soft usually means one of three things: not enough chill time, too much liquid in the strawberry puree, or skipping the gelatin. Make sure to chill for the full 4 hours minimum, strain the puree if it looks very thin, and always include the gelatin powder.
Pull It From the Fridge and Watch It Disappear
Strawberry Icebox Pie is everything a summer dessert should be. It is cool, creamy, and bursting with real strawberry flavor. It takes about 20 minutes to put together, requires zero oven time, and looks genuinely impressive on the table. What more could you ask for from a dessert?
Make it the night before, keep it cold, and slice it right before serving. The combination of the buttery graham crust, the thick strawberry cream filling, and the fresh whipped cream on top is the kind of thing that gets people asking you for the recipe before they finish their first slice. So grab those strawberries, crush those crackers, and get that pie into the fridge tonight. Your future self at tomorrow’s dinner table is going to be very happy you did
Strawberry Icebox Pie
Ingredients
Method
- Crush the graham crackers into fine crumbs using a zip-lock bag and rolling pin or a food processor.
- Combine the crumbs, sugar, melted butter, and salt in a bowl until it looks like wet sand.
- Press the mixture firmly into a 9-inch pie dish and refrigerate for at least 30 minutes.
- Wash and hull the strawberries, reserving some for garnish.
- Blend the remaining strawberries with lemon juice until smooth, and strain if too watery.
- Beat softened cream cheese until smooth. Add powdered sugar, vanilla extract, and gelatin powder until fully combined.
- Add the strawberry puree to the cream cheese mixture and mix until smooth.
- Whip the heavy cream until stiff peaks form and gently fold into the strawberry mixture.
- Pour the filling into the chilled crust and smooth the top.
- Cover and refrigerate for at least 4 hours, preferably overnight.
- Prepare the whipped cream topping before serving and garnish with fresh strawberries.
- Slice with a knife dipped in hot water for clean cuts.