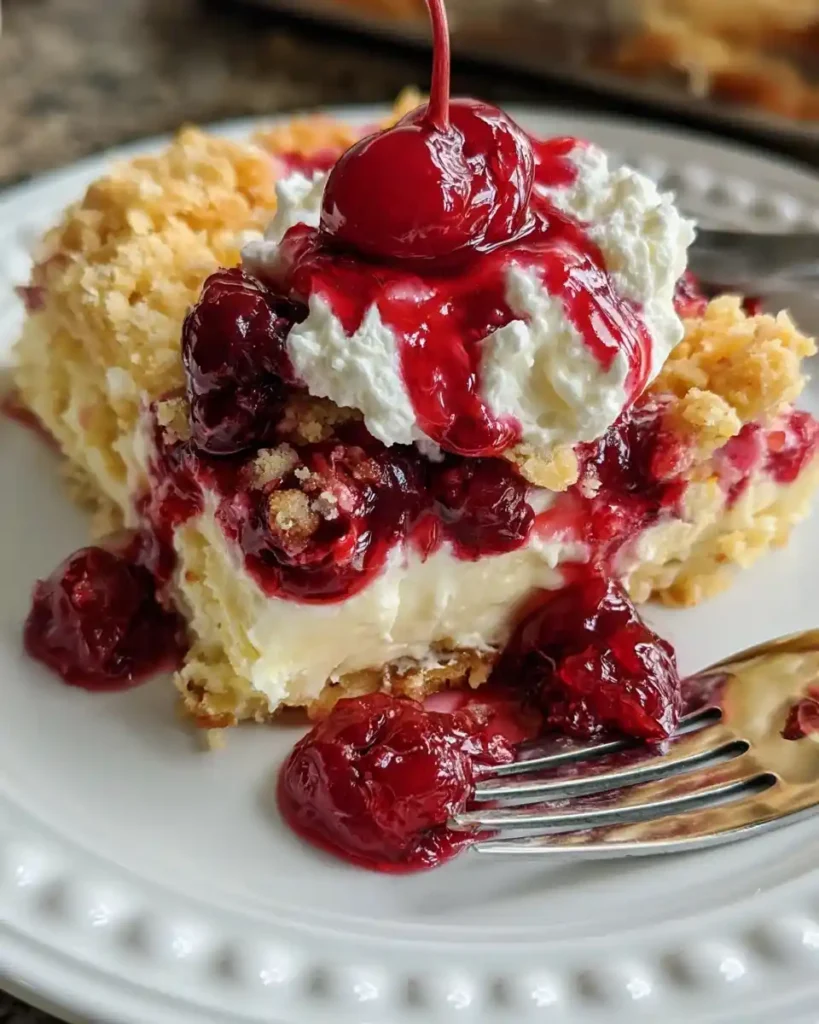
Want a dessert that tastes like you slaved away in the kitchen but actually took 15 minutes to assemble? This Cherry Cream Cheese Dump Cake is exactly that kind of magic.
Servings: 12 Prep time: 15 minutes Cook time: 40–45 minutes Total time: About 1 hour
I started making this for potlucks when I needed something impressive without spending my whole afternoon baking. Cherry, cheesecake, and buttery cake layered together? People always ask what bakery it came from.
Why This Recipe Earns a Permanent Spot in Your Dessert Rotation
This isn’t your average dump cake thrown together with zero thought. It genuinely delivers, and here’s exactly why it works so well.
- Ridiculously easy — no complicated mixing or decorating required
- Tastes like cherry cheesecake — thanks to that rich cream cheese layer
- Great warm or cold — leftovers taste completely different and equally good
- Perfect for a crowd — feeds 12 with almost no extra effort
Have you ever noticed how the simplest desserts often get the most compliments? This dump cake is a perfect example of that.
Ingredients You’ll Need
Simple pantry staples come together here for something that tastes far more impressive than the effort involved.
- 1 (21 ounce) can cherry pie filling
- 8 ounces cream cheese, softened
- 1/2 cup powdered sugar
- 1 teaspoon vanilla extract
- 1 box yellow cake mix
- 1/2 cup butter, melted
- 1/4 cup milk
- 1/2 cup chopped pecans, optional
That’s the entire list. FYI, softening the cream cheese fully before mixing makes the biggest difference in whether your cheesecake layer turns out smooth or lumpy.
How to Make Cherry Cream Cheese Dump Cake
Let’s slow this down and walk through each layer, since a little extra care here makes a genuinely impressive final result.
Step 1: Preheat the Oven and Prep Your Dish
Preheat your oven to 350°F. While it heats, lightly grease a 9×13-inch baking dish with butter or nonstick cooking spray. Don’t skip this step, since a bare dish makes cleanup a much bigger headache later.
Set the greased dish aside and move on to the cheesecake filling while the oven finishes heating.
Step 2: Make the Cheesecake Filling
In a medium mixing bowl, combine the softened cream cheese, powdered sugar, and vanilla extract. Beat everything together with an electric mixer for 2 to 3 minutes, until it turns completely smooth and creamy. Scrape down the sides of the bowl as needed to make sure nothing gets left unmixed.
Take your time here, since a properly smooth filling makes the biggest difference in how this dessert turns out. Rushing this step is the most common reason people end up with a lumpy cheesecake layer.
Step 3: Spread the Cherry Layer
Open your can of cherry pie filling and spread it evenly across the bottom of the prepared baking dish. Use the back of a spoon or an offset spatula to smooth it into an even layer, reaching all the way to the corners of the dish.
This layer forms the juicy fruit base that everything else builds on top of. An even spread here means every slice gets a fair share of cherries.
Step 4: Add the Cheesecake Dollops
Using a spoon, drop dollops of your cream cheese mixture over the cherry filling. Gently spread each dollop to cover as much of the fruit layer as you can, without worrying too much about perfect coverage. A little cherry filling peeking through is completely normal at this stage.
Everything blends together beautifully once it bakes, so don’t stress over making this layer look flawless right now.
Step 5: Mix the Cake Batter
In a separate bowl, combine the yellow cake mix, melted butter, and milk. Stir just until everything comes together into a smooth batter, being careful not to overmix. Overmixing at this stage can leave the finished cake layer dense instead of light and tender.
Keep the mixing brief and gentle, checking for any dry pockets of cake mix hiding at the bottom of the bowl.
Step 6: Add the Cake Layer on Top
Carefully spoon or pour the cake batter over the cream cheese layer, working slowly so you don’t disturb the layers underneath. Use a spatula to spread it into an even layer across the entire dish, covering as much of the cheesecake mixture as possible.
Try to resist the urge to stir the layers together at this point. Keeping them distinct is exactly what creates those beautiful, defined layers once the cake is sliced.
Step 7: Add Pecans and Bake
If you’re using pecans, sprinkle them evenly across the top of the batter now. They’ll toast beautifully in the oven, adding a satisfying crunch to every bite.
Place the baking dish in your preheated oven and bake for 40 to 45 minutes. IMO, you’ll know it’s ready when the top turns golden brown, the center looks set, and the edges bubble gently around the sides of the dish.
Step 8: Cool Slightly Before Serving
Once it’s out of the oven, let the dump cake cool for about 10 to 15 minutes before serving. This resting period allows the filling to continue setting, which makes for much cleaner slices when you serve it.
Serve warm for that fresh-from-the-oven experience, or let it cool completely and enjoy it chilled the next day. Both versions taste genuinely different, and both are equally delicious.
Tips for Getting It Right Every Time
A handful of small habits separate a good dump cake from a genuinely memorable one.
- Always soften the cream cheese fully before mixing to avoid lumps
- Don’t overmix the cake batter, or the topping turns dense instead of tender
- Keep the layers distinct rather than stirring them together
- Choose a cherry pie filling with plenty of whole cherries for the best flavor
- Let the cake rest before serving so the layers have time to set
Fun Variations to Try
Once you’ve made the classic version, these twists keep this dessert exciting all year.
- Blueberry swap — replace the cherry filling with blueberry pie filling
- Peachy version — use peach pie filling for a warm-weather twist
- Apple cinnamon — swap in apple pie filling and add a teaspoon of cinnamon to the batter
- Mixed berry — combine cherry, blueberry, and strawberry fillings together
- Chocolate cherry — sprinkle chocolate chips over the cream cheese layer before adding the cake batter
Why settle for one flavor when a handful of variations keep this dessert from ever feeling repetitive? Rotate through them depending on the season or occasion.
What to Serve With It
Round out this dessert with a few toppings that make it feel extra special.
- A scoop of vanilla ice cream
- Fresh whipped cream
- A drizzle of caramel sauce
- Toasted pecans or white chocolate shavings on top
FAQs About Cherry Cream Cheese Dump Cake
Can I use homemade cherry pie filling? Absolutely. Homemade filling adds a wonderful fresh flavor and works perfectly in place of the canned version.
Can I use a different cake mix? Yes. White, butter, French vanilla, or even spice cake mix all create delicious variations on this classic dessert.
Can I leave out the pecans? Of course. They’re completely optional, and the dessert is just as delicious without that extra crunch.
Why is my cream cheese layer lumpy? This usually means the cream cheese wasn’t fully softened before mixing. Let it reach room temperature fully before beating it together.
Can I make this dessert ahead of time? Yes. It reheats beautifully, and many people actually think it tastes even better the next day after the flavors settle.
Final Thoughts
Cherry Cream Cheese Dump Cake proves that an impressive dessert doesn’t need hours of effort or a long ingredient list. Juicy cherries, creamy cheesecake, and a buttery golden topping come together in about an hour flat.
Give this recipe a try before your next gathering and watch how fast it disappears. Once that first spoonful hits the table, don’t be surprised when everyone starts asking for the recipe before dessert is even finished.
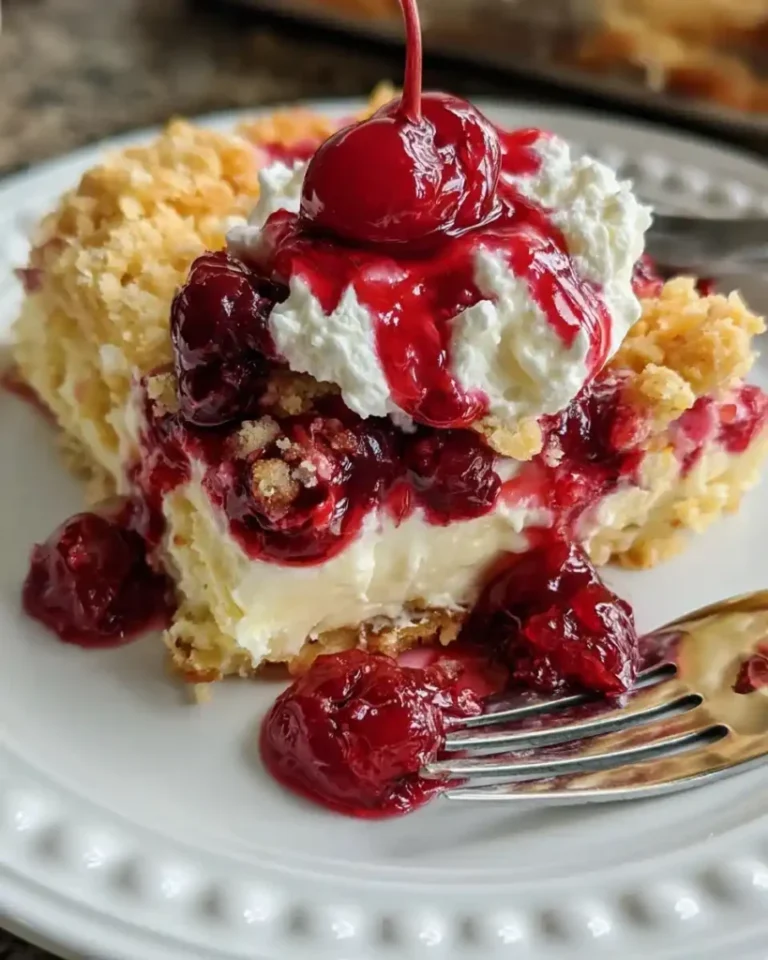
Cherry Cream Cheese Dump Cake
Ingredients
Method
- Preheat your oven to 350°F (175°C) and lightly grease a 9x13-inch baking dish.
- In a medium mixing bowl, beat together softened cream cheese, powdered sugar, and vanilla extract until smooth and creamy.
- Spread cherry pie filling evenly in the bottom of the prepared baking dish.
- Spoon dollops of the cream cheese mixture over the cherry filling and gently spread it.
- In a separate bowl, combine yellow cake mix, melted butter, and milk, stirring until smooth.
- Pour the cake batter over the cheesecake layer, spreading it evenly without mixing.
- If using pecans, sprinkle them on top of the batter and bake for 40 to 45 minutes, until the top is golden brown.
- Let the cake cool for 10 to 15 minutes before serving.



