Hot day, no desire to touch the oven, but you still want dessert? Peach Pie Cheesecake Cups are exactly what you need, and they come together without a single minute of baking.
I started making these on summer weekends when turning on the oven felt like a personal attack. Layered, creamy, and loaded with peach flavor, this recipe stuck around for good reason.
Servings: 6 cups Prep time: 20 minutes Chill time: 30 minutes Total time: 50 minutes
Why These Cheesecake Cups Deserve a Spot on Your Dessert List
No oven, no stress. That alone makes this recipe a win on a hot day when the last thing you want is extra heat in your kitchen.
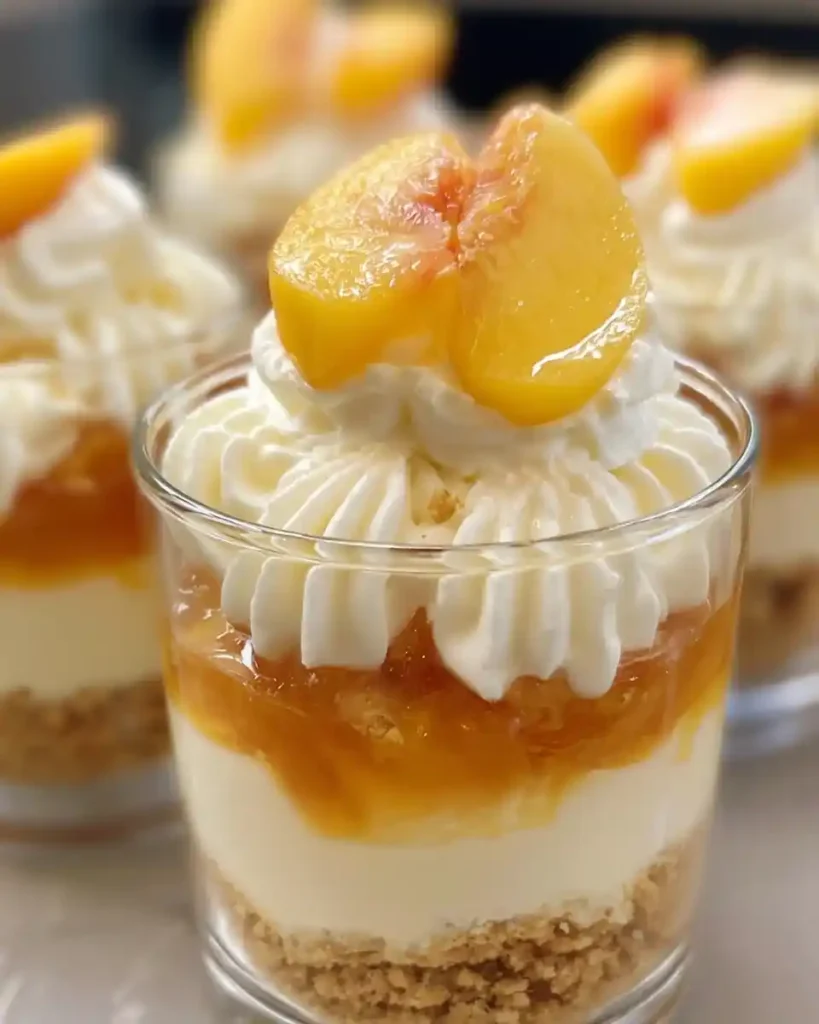
The layers do all the heavy lifting here. Buttery graham cracker crust, silky cheesecake filling, and sweet peach topping combine into something that looks fancy but takes almost no real effort.
Have you ever needed a dessert that looks impressive but actually takes fifteen minutes of hands-on work? This is that dessert.
Ingredients You’ll Need
Nothing complicated here, just a handful of pantry staples and one trip to the fridge section. Here’s your full list.
- 1 ½ cups graham cracker crumbs
- 6 tablespoons unsalted butter, melted
- 3 tablespoons brown sugar
- 1 (3.4-ounce) box instant cheesecake pudding mix
- 1 ½ cups cold milk
- 1 cup whipped topping, thawed
- 1 (21-ounce) can peach pie filling
- 1 fresh peach, thinly sliced, for garnish (optional)
- Whipped cream, for topping
Cold milk matters more than people expect. Warm milk won’t let the pudding mix thicken properly, so pull it straight from the fridge right before you start.
How to Make Peach Pie Cheesecake Cups
Four simple stages, zero baking, and a payoff that looks way fancier than the effort it actually takes. Let’s break it down.
Step 1: Build the Graham Cracker Crust
Grab a small bowl and combine the graham cracker crumbs, melted butter, and brown sugar. Stir with a fork until the mixture looks like damp sand and holds together when you press a bit between your fingers.
Too dry? Add another teaspoon of melted butter at a time until it clumps properly. Too wet just isn’t really a problem you’ll run into here, so don’t overthink it.
Divide the crumb mixture evenly among your serving cups, roughly 3 tablespoons per cup. Press it down firmly with the back of a spoon so it forms a solid, compact base rather than loose crumbs.
This crust step takes maybe five minutes total, but it’s what gives every bite that satisfying crunch against the creamy layers above. Don’t rush it, and don’t skip the pressing step either.
Step 2: Whip Up the Cheesecake Filling
In a medium bowl, whisk together the instant cheesecake pudding mix and cold milk. Keep whisking steadily for about 2 minutes until the mixture thickens and turns smooth and silky.
Let it rest for a minute once it thickens. This short pause lets the pudding fully set before you move to the next step, which matters more than it sounds.
Now fold in the whipped topping using a spatula, working gently so you don’t deflate all that airy texture. Fold rather than stir, since stirring too hard knocks the fluffiness right out of your filling.
Once combined, the mixture should look light, cloud-like, and completely uniform. FYI, transferring it into a piping bag or a zip-top bag with the corner snipped off makes the next step way less messy.
Step 3: Layer Everything Together
Pipe or spoon a generous layer of cheesecake filling directly over your prepared crust in each cup. Smooth the top with the back of a spoon so it sits level before adding the next layer.
Spoon the peach pie filling over the cheesecake layer, spreading it gently so it reaches the edges of the cup. Watching those peach chunks settle over the creamy layer is honestly half the fun of making this dessert.
Want a showstopper version? Repeat both layers a second time for a taller, more dramatic presentation. It takes an extra two minutes and makes the cups look like something from a bakery display case.
Step 4: Chill Until Set
Cover your cups and place them in the refrigerator for at least 30 minutes. This chilling time lets the layers firm up and allows the flavors to meld into something greater than the sum of its parts.
Resist the urge to serve these early. I know waiting is hard when peach cheesecake is sitting right there, but the texture genuinely improves with a proper chill.
Right before serving, top each cup with a dollop of whipped cream and a few slices of fresh peach if you have them on hand. This final touch turns a simple dessert into something that looks genuinely restaurant-worthy.
Tips for Success
A handful of small details separate an okay batch from a truly great one. None of these take much extra time.
- Use cold milk straight from the fridge for proper pudding thickness
- Fold, don’t stir, the whipped topping to keep the filling airy
- Chill your mixing bowl beforehand if you’re whipping your own cream
- Press the crust firmly so it holds together when scooped
- Use gluten-free graham crackers if you need a gluten-free version
Equipment Needed
Chances are you already own everything this recipe calls for. Here’s the short list.
- Small and medium mixing bowls
- Whisk or fork
- Piping bag or zip-top bag with a snipped corner
- Serving cups, mason jars, or small glasses
- Refrigerator space for chilling
Variations to Try
Once you’ve nailed the classic version, this recipe is easy to riff on. Here are a few ideas worth trying.
- Swap peach pie filling for coconut cream and mango slices for a tropical twist
- Add a pinch of cinnamon or nutmeg to the crust for extra warmth
- Use flavored whipped topping, like vanilla or almond, for a subtle flavor shift
- Substitute fresh berries for peaches when you want a different fruit profile
- Try a gluten-free pudding mix and graham crackers for a fully gluten-free dessert
What to Serve Alongside It
These cups are rich enough to stand alone, but a few pairings round out the experience nicely. Here’s what works well.
- Iced tea or lemonade for a refreshing summer combo
- A light green salad if you’re serving these as part of a larger meal
- Fresh mint leaves scattered on top for color and a fresh aroma
- Sparkling water with a peach slice for a matching, non-alcoholic pairing
Frequently Asked Questions
Can I use fresh peaches instead of canned pie filling? Yes, sliced fresh peaches work beautifully layered with the cheesecake filling. You’ll lose a bit of the syrupy sweetness canned filling provides, so consider adding a light drizzle of honey if you want extra sweetness.
How long do these cheesecake cups last in the fridge? Stored covered in the refrigerator, they stay fresh for up to two days. The crust softens slightly the longer they sit, so enjoy them sooner rather than later for the best crunch.
Can I make these cups a day ahead of time? Absolutely, this recipe is ideal for prepping in advance. Assemble everything, chill overnight, and add the whipped cream garnish right before serving.
What can I use instead of whipped topping? Homemade whipped cream works great as a substitute and adds a slightly richer flavor. Whip heavy cream with a bit of sugar until soft peaks form, then fold it in the same way.
Are Peach Pie Cheesecake Cups gluten-free? They can be, as long as you swap in gluten-free graham crackers for the crust. Always double-check your pudding mix label too, since some brands vary.
Can I turn this into one big dessert instead of individual cups? Definitely, layer everything into a trifle dish or a 9×9 pan instead of individual cups. Just increase your chill time slightly since a larger batch takes longer to set.
Final Thoughts
Peach Pie Cheesecake Cups prove that summer dessert doesn’t need an oven or hours of effort to feel special. Layer the crust, whip the filling, add the peaches, and let the fridge do the rest.
Make a batch this weekend and watch how fast they disappear. Once your family tastes those creamy, peachy layers, this one’s guaranteed to land in your regular dessert rotation