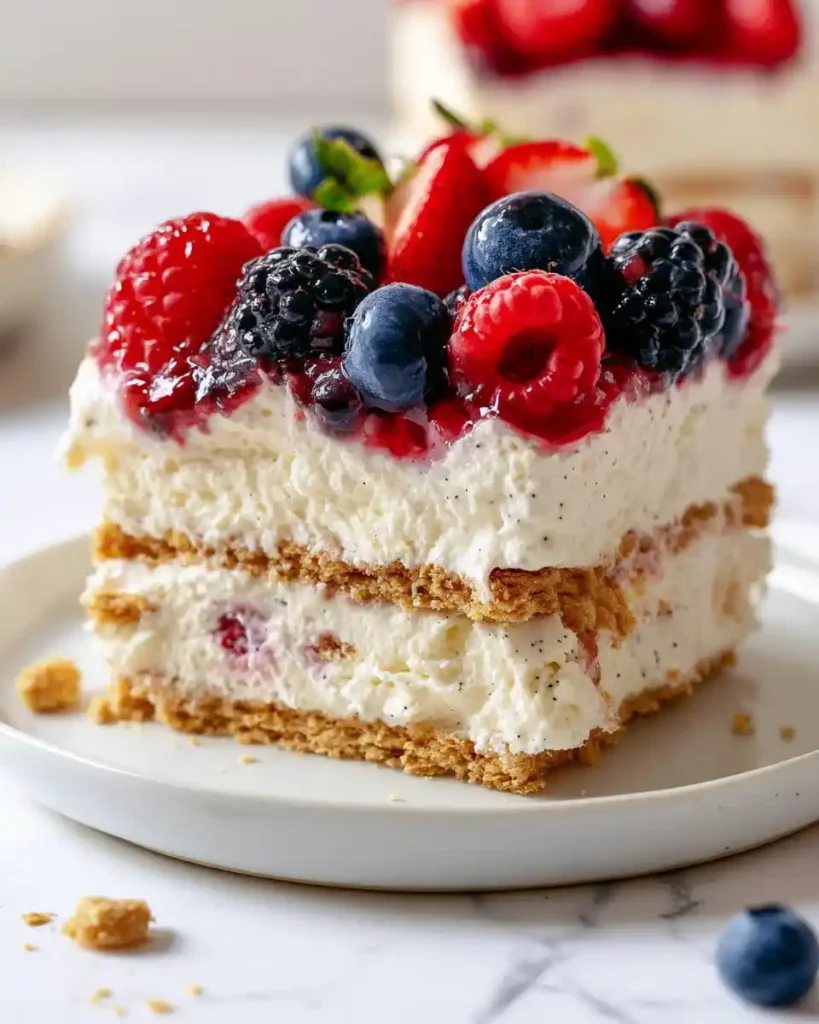
Picture this: 95-degree heat, a kitchen you refuse to enter, and a dessert craving that won’t quit. That’s exactly why I made this No-Bake Berry Icebox Cake last week. No oven, no sweating over a stove, just layers of berries and cream that basically build themselves.
Servings: 12 slices Prep time: 30 minutes (active) Chill time: 6 hours minimum, overnight is better
I’ve made this cake more times than I can count, and it never once let me down. FYI, this is the recipe I bring to every potluck now, and people always ask for it.
Why This No-Bake Berry Icebox Cake Works So Well
Have you ever noticed how the best summer desserts require zero baking? This cake proves that point beautifully. The graham crackers soften overnight into cake-like layers, while the berries add a tartness that cuts through all that cream.
I love that it looks fancy without demanding fancy skills. Anyone who can operate a mixer and stack crackers can pull this off. That’s not me being modest — it’s genuinely that simple.
There’s also the flavor payoff. You get sweet, tangy, creamy, and crunchy in a single bite. What more could a dessert possibly ask of itself?
What You’ll Need: Ingredients for No-Bake Berry Icebox Cake
Here’s everything this recipe calls for. Nothing exotic, nothing you can’t grab at a regular grocery run.
- Heavy whipping cream — 2 cups, chilled
- Powdered sugar — 1/2 cup
- Vanilla extract — 2 teaspoons
- Cream cheese — 16 ounces, softened
- Vanilla instant pudding mix — 1 box (3.4 ounces)
- Cold milk — 1 1/2 cups
- Graham crackers — 2 boxes (about 28 sheets)
- Fresh strawberries — 3 cups, sliced
- Fresh blueberries — 2 cups
- White chocolate chips — 1/2 cup, for drizzling
I know the ingredient list looks long, but honestly, it’s mostly pantry basics plus fresh fruit. IMO, that’s what makes this cake so approachable for a weeknight dessert project.
How to Make No-Bake Berry Icebox Cake, Step by Step
This is where I slow down and walk you through everything, because rushing this part is where people mess up. Take your time here — it genuinely pays off later.
Step 1: Whip the Cream Until It Holds Its Shape
Pour the chilled heavy whipping cream into a large mixing bowl. Cold cream whips faster and holds better, so don’t skip refrigerating it first. Add the powdered sugar and vanilla extract right into the bowl with the cream.
Turn your mixer to medium-high speed and beat everything together. Watch closely as the cream thickens and starts to form soft mounds. Keep going until stiff peaks form, meaning the cream stands up straight when you lift the beaters out.
Stop mixing the second you hit that point. Overbeaten cream turns grainy and starts separating into butter, which nobody wants here. Set this bowl aside in the fridge while you tackle the next step.
Step 2: Build the Cream Cheese Filling
Grab a separate large bowl and add your softened cream cheese. Beat it alone first until every lump disappears and it looks completely smooth. This step matters more than people realize, since lumpy cream cheese never fully blends in later.
Sprinkle in the vanilla pudding mix and pour in half of your cold milk. Mix on low speed so it doesn’t splatter everywhere, then gradually increase the speed as it combines. Slowly stream in the remaining milk while continuing to mix.
Keep beating until the mixture turns thick, glossy, and completely lump-free. This filling should look almost like a rich pudding at this stage. Fold the whipped cream from Step 1 gently into this mixture using a spatula, working in broad strokes until no white streaks remain.
Step 3: Layer the Bottom of the Dish
Grab your 9-by-13-inch casserole dish and spread a thin layer of filling across the bottom. About half a cup does the trick here. This thin layer acts as glue, keeping your first row of graham crackers from sliding around later.
Arrange whole graham crackers over that filling, breaking pieces as needed to cover every gap. Don’t stress over perfect symmetry — nobody flips this cake over to judge your cracker Tetris skills. Just aim for full coverage across the bottom.
Step 4: Add Filling, Then Pile On the Berries
Spread roughly one-third of your remaining filling evenly over the cracker layer. Use an offset spatula if you have one, though the back of a spoon works fine too. Even, gentle strokes keep the crackers from shifting underneath.
Scatter a generous layer of sliced strawberries across the filling. Fill in the gaps with blueberries so every slice eventually gets some berry action. This colorful layer is honestly my favorite part to build, since it’s when the cake starts looking like something worth photographing.
Step 5: Repeat, Then Repeat Again
Add another layer of graham crackers directly on top of the berries. Follow with another third of the filling, then another round of strawberries and blueberries. Repeat this entire sequence one more time until you’ve used up your ingredients.
Finish with one final layer of graham crackers on top. Spread whatever filling remains evenly across that top layer, smoothing it out with your spatula. This creates that clean, frosted look you see in bakery cases.
Step 6: Decorate Like You Mean It
Take a handful of reserved strawberry halves and whole blueberries and arrange them across the top. Melt your white chocolate chips in short microwave bursts, stirring between each one to avoid scorching. Drizzle the melted chocolate over the berries in loose zigzag lines.
This decorating step takes maybe five extra minutes, but it transforms the cake’s appearance entirely. Have you ever noticed how a good drizzle makes anything look intentional? Consider this your dessert’s finishing touch.
Step 7: Chill Before You Even Think About Slicing
Cover the dish tightly with plastic wrap and slide it into the fridge. Let it chill for at least six hours, though overnight genuinely produces better results. This resting time softens the graham crackers into tender, cake-like layers.
Skipping this step is the number one mistake people make with icebox cakes. The crackers need that time to absorb moisture and soften properly. Trust the process, walk away, and let your fridge do the heavy lifting.
Tips That Actually Make a Difference
- Chill your mixing bowl and beaters beforehand for faster, fluffier whipped cream
- Bring cream cheese fully to room temperature before mixing to avoid lumps
- Pat sliced strawberries dry with a paper towel to prevent excess liquid pooling
- Use a sharp knife wiped clean between cuts for neater slices
- Store leftovers covered in the fridge for up to four days
Equipment You’ll Actually Use
- Large mixing bowls (two, since you’re making separate components)
- Hand mixer or stand mixer
- 9-by-13-inch casserole or baking dish
- Measuring cups and spoons
- Offset spatula or the back of a spoon
Fun Variations Worth Trying
Once you’ve nailed the base recipe, branching out gets tempting. I’ve tested a few spins myself, and they all earned repeat requests.
- Mixed berry version: swap in raspberries and blackberries alongside the strawberries and blueberries
- Chocolate lover’s twist: use chocolate pudding mix and layer in crushed sandwich cookies
- Dairy-free adaptation: substitute coconut cream and dairy-free cream cheese
- Lower-sugar option: replace powdered sugar with your preferred sugar substitute
Frequently Asked Questions
Can I make No-Bake Berry Icebox Cake a day ahead? Yes, and honestly, you should. The flavor and texture both improve significantly after resting overnight in the fridge.
What can I use instead of graham crackers? Digestive biscuits or shortbread cookies work great as substitutes. Both soften nicely and add their own distinct flavor.
Can frozen berries replace fresh ones in this recipe? They can, but thaw them fully and drain excess liquid first. Skipping that step leaves your layers soggy and watery.
How long does this cake stay fresh in the fridge? It keeps well for three to four days when covered tightly. IMO, it rarely survives that long once people taste it 🙂
Can I freeze No-Bake Berry Icebox Cake? Freezing isn’t ideal, since the cream layers can separate after thawing. Fresh from the fridge is really where this cake shines.
Why did my whipped cream turn grainy? That happens from overbeating past the stiff-peak stage. Watch closely near the end and stop the moment peaks hold their shape.
Final Thoughts
This No-Bake Berry Icebox Cake earns its spot as my go-to summer dessert every single year. It skips the oven, layers beautifully, and tastes like way more effort went into it than actually did. Give it a try this weekend — your fridge is basically doing all the hard work anyway.
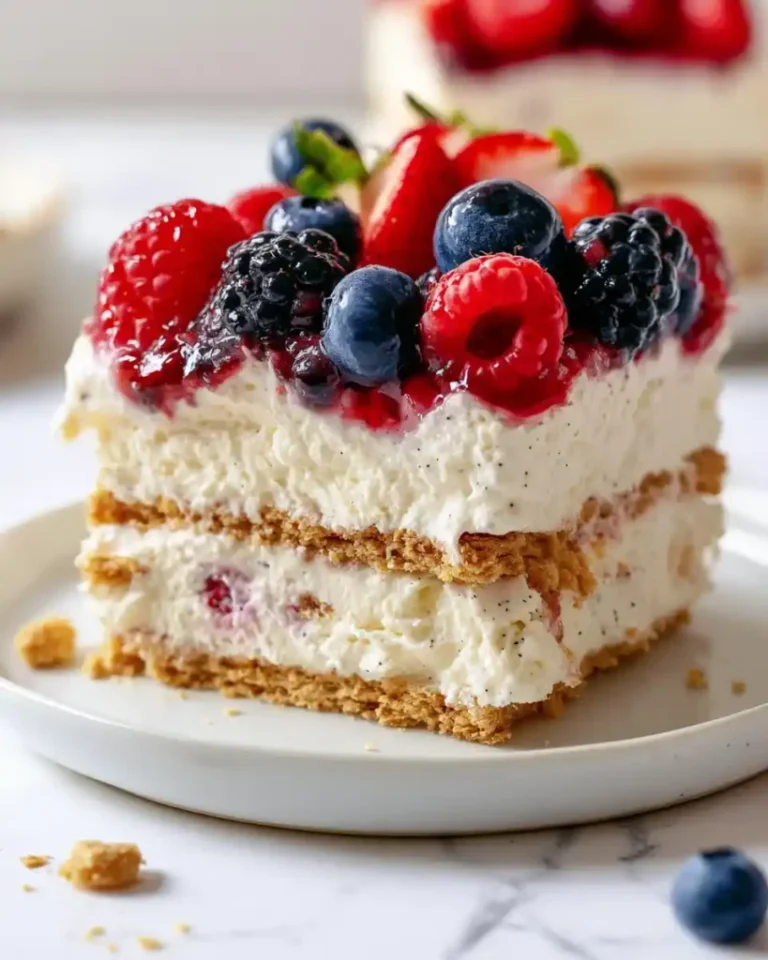
No-Bake Berry Icebox Cake
Ingredients
Method
- Pour the chilled heavy whipping cream into a large mixing bowl. Add the powdered sugar and vanilla extract.
- Beat on medium-high speed until stiff peaks form. Set aside in the fridge.
- In a separate bowl, beat the softened cream cheese until smooth. Add the vanilla pudding mix and half of the cold milk, mixing until smooth.
- Gradually stir in the remaining milk while mixing. Fold the whipped cream gently into the cream cheese mixture until smooth.
- Spread a thin layer of filling at the bottom of a 9-by-13-inch casserole dish.
- Arrange whole graham crackers over the filling to cover the bottom.
- Evenly spread one-third of the filling over the graham crackers.
- Add a layer of sliced strawberries and fill gaps with blueberries.
- Repeat the layers: graham crackers, filling, strawberries, and blueberries two more times.
- Finish with a final layer of graham crackers and spread the remaining filling over the top.
- Decorate with reserved berries on top and drizzle melted white chocolate over.
- Cover with plastic wrap and chill for at least six hours, preferably overnight.



