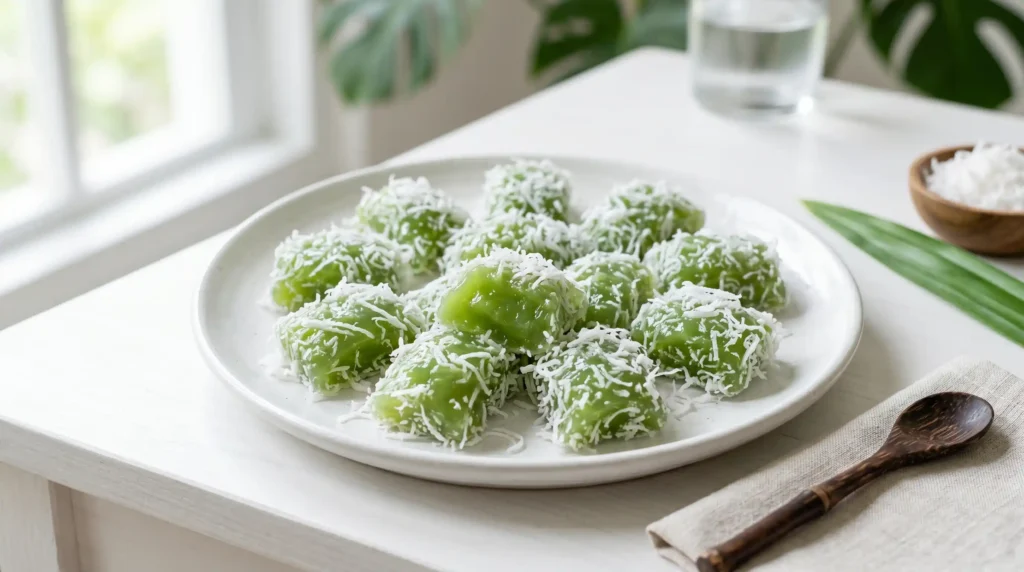
Servings: 20-24 pieces | Prep Time: 10 minutes | Steam Time: 25-30 minutes | Total Time: ~45 minutes
Some Filipino kakanin recipes take all day. This one does not. Pichi Pichi Cassava gives you soft, chewy, pandan-scented treats coated in grated coconut — and the whole thing comes together in under an hour with just six ingredients. Yes, really. Six.
I grew up eating Pichi Pichi Cassava at every family gathering, merienda table, and fiesta buffet that mattered. It’s one of those kakanin that looks deceptively simple but delivers a deeply satisfying chew and a fragrance that fills the kitchen the moment you lift the steamer lid.
The texture is somewhere between jelly and mochi — bouncy, slightly sticky, and incredibly satisfying. If you have never made it at home before, this recipe will show you exactly how. And once you make it once, it becomes a permanent part of your repertoire.
What Is Pichi Pichi Cassava?
Pichi Pichi is a traditional Filipino steamed dessert made primarily from grated cassava, sugar, and water. It belongs to the kakanin family — a broad category of native Filipino rice and root crop-based sweets that show up at every celebration worth attending.
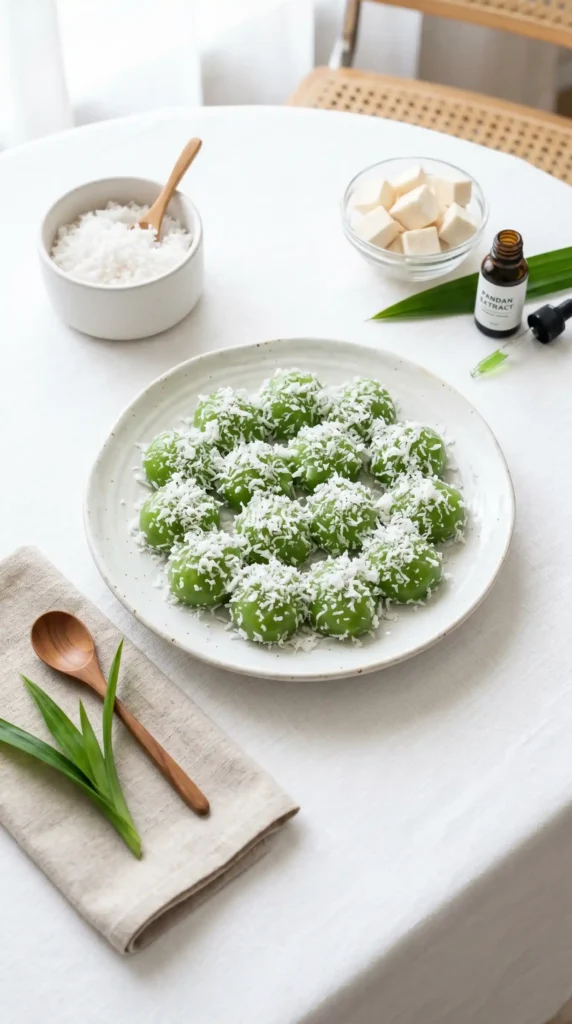
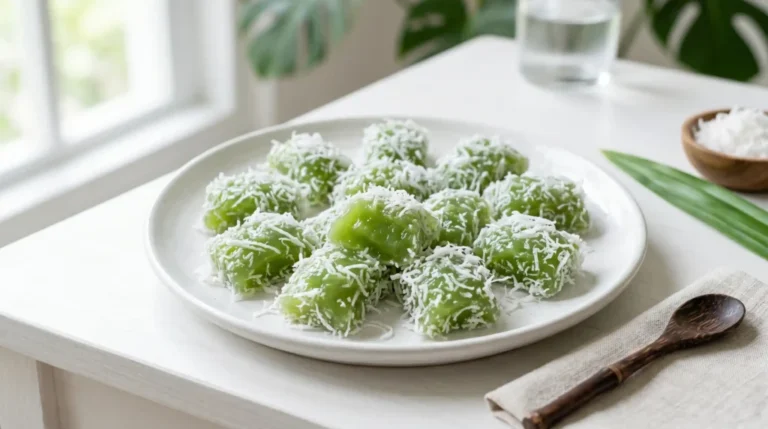
What makes Pichi Pichi distinct is its translucent, gel-like appearance after steaming. Fresh from the steamer, the pieces look almost jewel-like — glossy, slightly clear, and deeply colored from the pandan flavoring. Then you roll them in grated coconut and the transformation is complete.
The name itself reportedly comes from the Spanish word for a type of native sweet. But honestly, the origin story matters less than the experience of eating one. It is one of those snacks that transports you instantly, wherever you are.
This version uses pandan flavor for that signature green color and fragrant aroma. Pandan is to Filipino desserts what vanilla is to Western baking — foundational, comforting, and deeply associated with something good about to happen.
Why This Pichi Pichi Recipe Works
Before we get into the steps, here is a quick look at why this particular recipe is worth trusting.
- Only 6 ingredients — cassava, sugar, water, pandan flavor, lye water, and coconut
- No oven required — a steamer is all you need
- Under 45 minutes total — faster than most kakanin recipes
- Crowd-pleasing — it disappears fast at any gathering, guaranteed
- Budget-friendly — cassava and coconut are widely available and affordable
- Naturally gluten-free — cassava contains no wheat, making this suitable for gluten-sensitive guests
Understanding the Key Ingredients
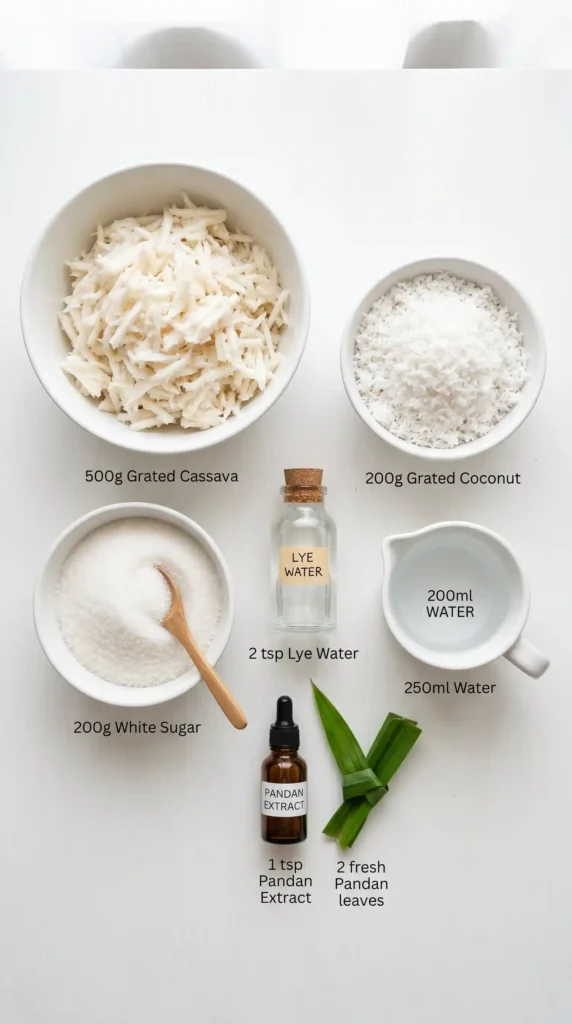
This recipe uses a short ingredient list, but each item plays a specific role. Knowing what each one does helps you make smarter adjustments if needed.
Grated Cassava
Cassava is the backbone of this recipe. Fresh grated cassava gives the pichi pichi its characteristic chew and body. You can buy fresh cassava and grate it yourself, or use frozen grated cassava which is widely available in Asian grocery stores. If using frozen, thaw completely and drain any excess liquid before measuring.
The cassava’s natural starch gelatinizes during steaming, which is what turns the mixture from an opaque, grainy batter into a translucent, smooth, bouncy treat. This gelatinization is the whole point — and it only works properly when the cassava is evenly grated and well-mixed with the liquid before steaming.
Lye Water (Lihiya)
Lye water, or lihiya in Filipino, is a diluted alkaline solution used in many traditional Asian desserts and noodle recipes. In pichi pichi, it plays two critical roles: it helps the cassava starch gelatinize more effectively, and it gives the finished product its characteristic firm-yet-bouncy texture.
Only 1/2 teaspoon is needed — a tiny amount that makes a significant difference. Do not be tempted to add more. Too much lye water gives the pichi pichi a soapy, bitter taste that cannot be fixed after the fact. Measure precisely and move on.
FYI, lye water is available at most Asian grocery stores and is sold in small bottles. A single bottle lasts for many batches since you only ever use a small amount at a time.
Pandan Flavor
Pandan is the defining flavor and color of this recipe. It contributes a fragrant, slightly grassy-sweet aroma that is immediately recognizable as kakanin. The 1 teaspoon of pandan flavor used here gives the pichi pichi a lovely light green color that intensifies slightly after steaming.
If you prefer a more vibrant green, you can increase to 1 and 1/2 teaspoons. For a more subtle color, use just 3/4 teaspoon. The flavor will remain consistent either way since the pandan is used as much for visual appeal as for taste.
Grated Coconut for Coating
Freshly grated coconut makes a noticeably better coating than the desiccated or dried variety. Fresh coconut is moist, slightly sticky, and clings to the pichi pichi in a way that dried coconut simply cannot replicate. The subtle sweetness and creamy fat of fresh coconut pairs perfectly with the pandan-scented cassava.
If fresh coconut is unavailable, use frozen grated coconut that has been thawed. As a last resort, rehydrate desiccated coconut by soaking it in a small amount of warm water for 10 minutes and patting it dry before use.
Full Ingredients List
- 3 cups grated cassava (fresh or frozen, thawed and drained)
- 1 and 1/3 cups (265g) granulated white sugar
- 1 and 1/4 cups (300ml) water
- 1 teaspoon pandan flavor
- 1/2 teaspoon lye water (lihiya)
- Grated coconut for coating (fresh preferred)
Equipment You Will Need
- A large mixing bowl
- A steamer or large pot with a steaming rack and tight-fitting lid
- Small heat-proof molds, silicone cups, or small heat-proof ramekins
- A ladle or large spoon for filling the molds
- A wide plate or tray for rolling in coconut
- A rubber spatula or butter knife for unmolding
How to Make Pichi Pichi Cassava: Step-by-Step
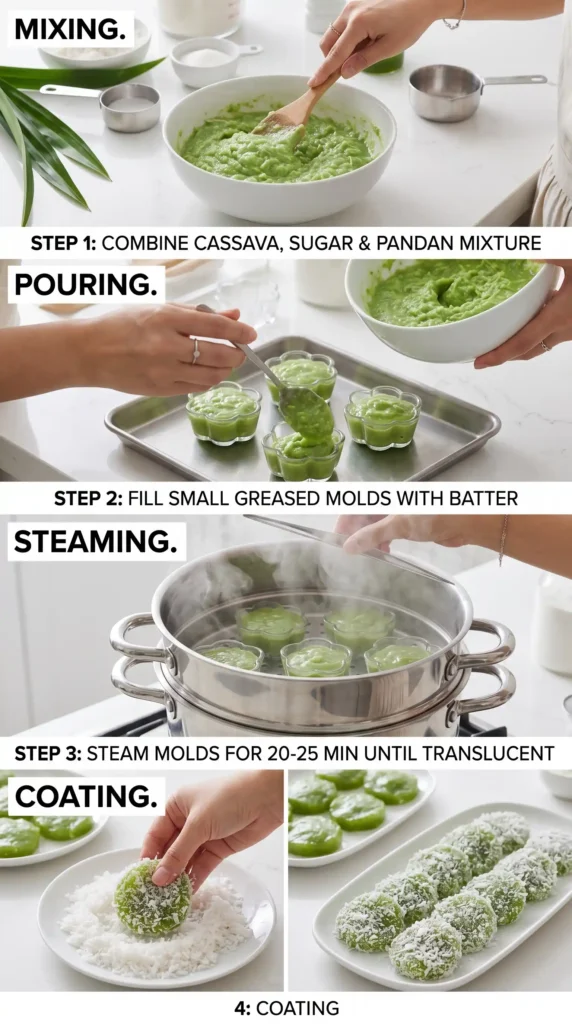
Follow these steps in order and you will have a tray of perfect, glossy, coconut-coated Pichi Pichi Cassava ready to serve.
Step 1: Mix All the Ingredients Together
Start with a large mixing bowl. Add the 3 cups of grated cassava and pour in the 1 and 1/4 cups of water. Stir them together first so the cassava is evenly moistened before the sugar goes in. This prevents clumping when you add the dry sugar.
Add the 1 and 1/3 cups of sugar and stir thoroughly until the sugar fully dissolves into the cassava and water. This takes about 2 minutes of steady stirring. You want no visible sugar granules remaining — the mixture should feel smooth and slightly thick when you run a spoon through it.
Now add the 1 teaspoon of pandan flavor and stir it in until the color is completely even throughout the mixture. There should be no streaks of white cassava or green pandan — everything fully combined into a uniform light green batter.
Finally, add the 1/2 teaspoon of lye water. Pour it directly into the bowl and stir well for another 30 seconds to make sure it is evenly distributed. The lye water is alkaline and needs to be fully incorporated so every piece of pichi pichi sets with the same texture. Uneven mixing leads to some pieces being firmer than others.
Take one final look at the mixture before moving to the molds. The batter should be smooth, uniformly green, and slightly liquid — closer to a thick slurry than a dough. That consistency is exactly right.
Step 2: Fill the Molds
Set up your heat-proof molds or silicone cups on your steaming rack or inside your steamer. Fill each mold about two-thirds full — not to the brim. The cassava mixture expands slightly as it steams and gelatinizes, and overfilled molds will bubble over, making a mess and producing misshapen pichi pichi.
Use a ladle or a large spoon to transfer the batter into each mold. Stir the bowl between each scoop to keep the mixture evenly distributed — the cassava can settle slightly at the bottom if you leave it sitting. Consistency across all the molds means even cooking.
If you do not have formal molds, small heat-proof glass cups, silicone muffin cups, or even small ceramic ramekins all work perfectly well. The shape matters less than the material — make sure whatever you use can handle direct steam heat safely.
Step 3: Steam Until Translucent
Bring the water in your steamer to a full, rolling boil before placing the molds inside. Starting with boiling water ensures the pichi pichi begins cooking immediately and evenly from the first minute. Placing molds into water that is still heating up can produce uneven textures.
Place the filled molds into the steamer, cover with the lid, and steam on medium heat for 25 to 30 minutes. Do not open the lid during the first 20 minutes. Steam is what does the work here — every time you lift the lid, steam escapes and the temperature drops, which can affect how the cassava sets.
At the 25-minute mark, check for doneness by looking at the color and texture. The pichi pichi should have changed from an opaque white-green batter into a translucent, slightly glossy, firm piece. If it still looks opaque or milky in the center, close the lid and steam for another 3 to 5 minutes.
The translucency is the key visual cue. A fully steamed pichi pichi looks almost like a clear green jelly with a firm, smooth surface. If you press the top gently with a clean fingertip and it springs back, it is done. IMO, that moment when the lid comes off and you see those glossy green pieces is genuinely one of the most satisfying things in Filipino dessert-making.
Step 4: Cool and Unmold
Remove the steamer from the heat and let the pichi pichi cool inside the molds for at least 15 to 20 minutes before attempting to unmold them. Hot pichi pichi is fragile — it is set but still warm and soft, and it will tear or deform if you try to remove it too soon.
Once the molds feel cool enough to handle comfortably, run a thin butter knife or rubber spatula around the edge of each mold to loosen the pichi pichi. Then gently invert the mold onto a clean surface or your hand. The piece should slide out cleanly, smooth-sided and intact.
If any pieces stick, give them a few more minutes to cool. A fully cooled pichi pichi releases more easily than a warm one. Patience here prevents torn, misshapen pieces — and every piece deserves to look its best before the coconut goes on.
Step 5: Roll in Grated Coconut
Spread a generous layer of grated coconut onto a wide plate or shallow tray. Place each unmolded pichi pichi piece onto the coconut and roll it gently, pressing lightly so the coconut adheres to all sides. The slightly tacky surface of the pichi pichi grabs the coconut beautifully.
Make sure every surface gets coated — top, bottom, and all sides. A fully coated piece not only looks more appealing, but the coconut also prevents the pieces from sticking together when you pile them on a serving plate. Coconut is essentially doing double duty: flavor and function.
Work through all the pieces, refreshing the coconut on the plate as needed. Once coated, arrange the finished pichi pichi on a serving plate and they are ready to eat.
Tips for Perfect Pichi Pichi Cassava Every Time
- Drain excess liquid from frozen cassava thoroughly before measuring — too much liquid makes the texture too soft and the pieces may not hold their shape
- Measure the lye water precisely — even a small excess creates a noticeably off flavor that ruins the entire batch
- Use fresh grated coconut for coating when possible — the moisture and fat content make it cling far better than dried coconut
- Let the pieces cool fully before unmolding — warm pichi pichi tears easily and loses its shape
- Keep the steamer on medium, not high heat — too much heat causes the surface to bubble and crater instead of setting smoothly
Variations to Try
Cheese-Coated Pichi Pichi: Skip the grated coconut and instead roll the finished pieces in finely grated cheese — quick-melt or cheddar both work well. The salty-sweet contrast is genuinely addictive and a popular modern variation at Filipino bakeries.
Ube Pichi Pichi: Replace the pandan flavor with ube flavor and purple food coloring for a vibrant purple version. The ube flavor pairs beautifully with the coconut coating and gives you a visually striking alternative to the classic green.
Buko Pandan Pichi Pichi: Add 1/2 cup of young coconut strips (buko) directly into the cassava mixture before steaming. The coconut pieces steam inside the pichi pichi and add a tender, chewy surprise in every bite.
How to Store Pichi Pichi
- Room temperature: Store in an airtight container for up to 1 day. Keep away from direct sunlight and heat
- Refrigerator: Keeps for up to 3 to 4 days covered. Note that refrigeration firms up the texture significantly — let pieces come to room temperature for 10 to 15 minutes before serving for the best chew
- Do not freeze: Freezing breaks down the cassava’s gelatinized starch and produces a crumbly, watery texture upon thawing. This is one recipe best made fresh
Frequently Asked Questions
Can I make Pichi Pichi Cassava without lye water?
You can, but the texture will be noticeably different — softer, less bouncy, and less firm overall. Lye water is what gives pichi pichi that signature gel-like chew. Some recipes substitute baking soda dissolved in water, but the result is not identical. If you can find lye water at an Asian grocery store, it is worth using the real thing.
Can I use cassava flour instead of grated cassava?
Cassava flour and grated cassava are not interchangeable in this recipe. Grated cassava contains natural moisture and a specific starch structure that gelatinizes correctly during steaming. Cassava flour is dried and processed differently, and produces a completely different texture. Always use fresh or frozen grated cassava for authentic pichi pichi.
Why is my pichi pichi not turning translucent?
If the pieces stay opaque after 30 minutes, they need more steam time. Check that your steamer has enough water and is producing strong, consistent steam throughout the cooking time. Also check that the lye water was added and mixed in fully — lye water directly assists the gelatinization process that creates the translucency.
How do I know when pichi pichi is fully cooked?
The clearest sign is the color change from opaque white-green to translucent and glossy. You can also press the surface gently — a fully cooked piece springs back when pressed and does not leave an indentation. If you are unsure, give it an extra 5 minutes of steaming and check again.
5. Can I make pichi pichi without a steamer?
Yes. You can improvise a steamer using a large pot, a heatproof plate or rack, and a tight-fitting lid. Place the rack or an upside-down heat-proof bowl inside the pot, add water below the rack level, bring to a boil, and place your molds on the rack. Cover tightly and steam as directed. It works just as well.
Why does my pichi pichi taste bitter?
Bitterness almost always comes from too much lye water. The recipe calls for exactly 1/2 teaspoon — even a full teaspoon produces a noticeably bitter, soapy aftertaste that no amount of coconut coating will cover. Use a proper measuring spoon and be precise. This is not the ingredient to eyeball.
Final Thoughts
This Pichi Pichi Cassava recipe is one of those Filipino kakanin classics that rewards you every single time you make it. Six ingredients, one steamer, and under 45 minutes produce something genuinely special — chewy, fragrant, visually beautiful, and deeply comforting.
Whether you grew up eating pichi pichi at every family occasion or you’re discovering it for the first time, this recipe is the right place to start. The technique is forgiving, the results are consistent, and the finished product disappears faster than you’d expect. So pick up some fresh cassava, find that bottle of pandan flavor at the back of your pantry, and make a batch this weekend. Bring it to a gathering and watch what happens. You’ll never show up empty-handed again.
Pichi Pichi Cassava
Ingredients
Method
- Start with a large mixing bowl. Add the grated cassava and water, stirring first to moisten the cassava.
- Add the sugar and stir thoroughly until fully dissolved.
- Stir in the pandan flavor until the mixture is a uniform light green.
- Add the lye water and mix well for even distribution.
- Set up your molds on the steaming rack. Fill each mold about two-thirds full with the mixture.
- Ensure not to overfill as the mixture will expand while steaming.
- Bring the water to a full boil before placing the molds in the steamer.
- Cover and steam on medium heat for 25 to 30 minutes without lifting the lid during the first 20 minutes.
- Check for doneness; they should be translucent and bouncy.
- Let the pichi pichi cool in the molds for 15 to 20 minutes.
- Run a knife around the edge and gently unmold.
- Roll each piece in freshly grated coconut until fully coated.
- Ensure all sides are covered to prevent them from sticking.