Servings: 8 pies Prep Time: 45 minutes Cook Time: 15 minutes Total Time: 1 hour
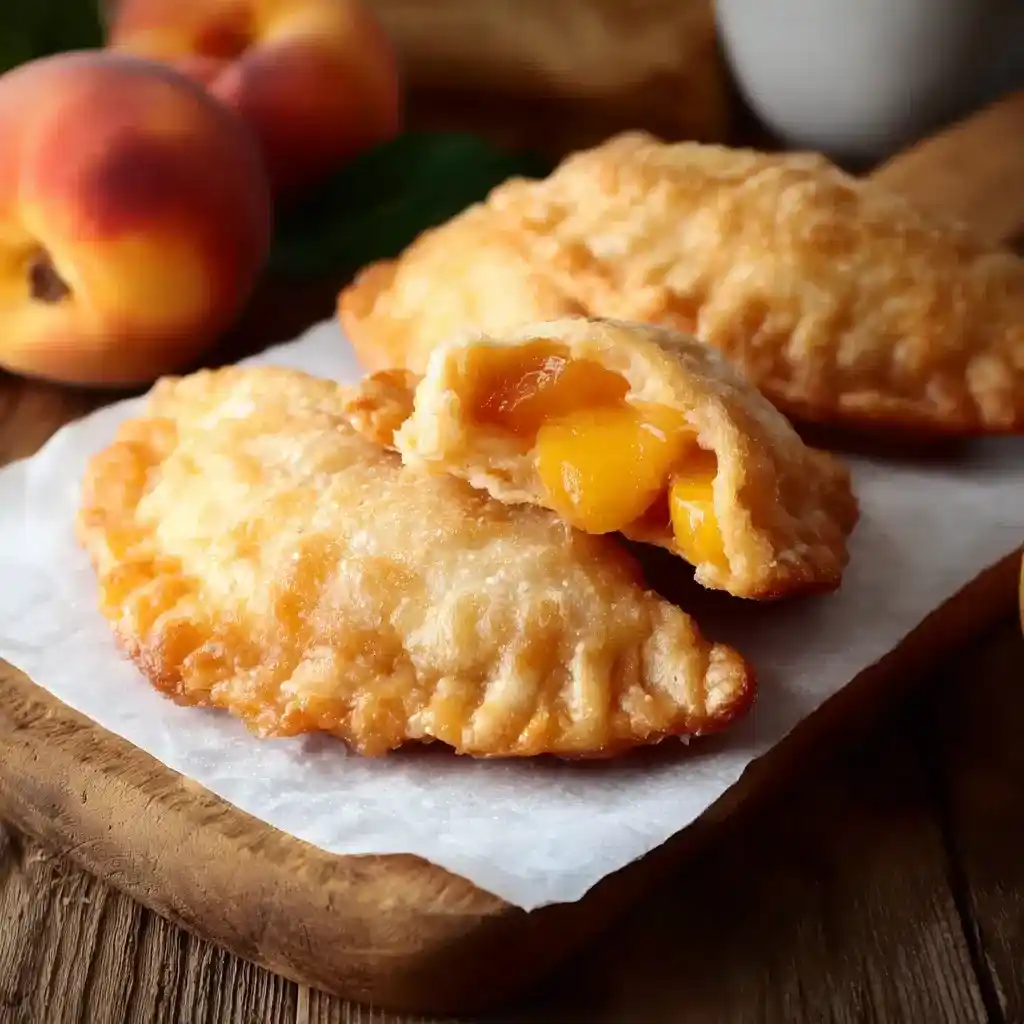
Crispy crust. Sweet, juicy peaches. A dessert that fits in one hand. Fried Peach Pies deliver all of that, and I’ve been chasing this exact flavor since my grandmother first handed me one straight off the cooling rack.
Growing up, these showed up at every family gathering without fail. Store-bought versions never quite compared, so eventually I learned to make them myself, mistakes and all.
This recipe wraps a rich peach filling inside a flaky homemade dough, fries it golden, then finishes with a smooth vanilla glaze. Ever had a dessert that tastes like an actual hug? That’s exactly what these little pies feel like.
Why Fried Peach Pies Are Worth the Effort
Sure, these take a bit more work than your average dessert, but that’s exactly what makes them special. Homemade dough and slow-cooked peach filling create layers of flavor that store-bought versions just can’t touch.
Frying instead of baking gives these pies their signature crispy, golden shell. IMO, that crunchy exterior against the soft, juicy peach filling is the entire reason these pies are so addictive.
The vanilla glaze on top adds one final layer of sweetness that ties everything together. Have you ever bitten into a warm fried pie with glaze still slightly soft? That’s peak dessert experience right there.
What You’ll Need for Fried Peach Pies
This recipe has three parts: crust, filling, and glaze. Here’s everything broken down.
Pie Crust Ingredients
- 2 cups all-purpose flour
- 1 teaspoon salt
- ¼ cup cold unsalted butter
- ¼ cup butter-flavored shortening
- ½ cup cold water
Peach Filling Ingredients
- 16 ounces frozen sliced peaches
- ½ cup granulated sugar
- 1 tablespoon light brown sugar
- 1 tablespoon unsalted butter
- 2 to 3 teaspoons fresh lemon juice
- 1 to 2 teaspoons cornstarch, if needed
Vanilla Glaze Ingredients
- 1 cup powdered sugar
- 2 tablespoons milk
- ½ teaspoon vanilla extract
- Pinch of salt
Three simple components, none of which require a trip to a specialty store.
How to Make Fried Peach Pies
Step 1: Make the Pie Crust
Sift together your flour and salt in a large bowl, this removes lumps and evenly distributes the salt throughout. Cut in the cold butter and shortening using a pastry cutter or your fingers, working until the mixture resembles coarse crumbs.
Add the cold water gradually, mixing gently as you go. Keep adding just until the dough comes together, adding too much water at once can make your crust tough instead of flaky.
Knead the dough briefly until it feels smooth and uniform, then divide it into eight equal pieces. Shape each piece into a ball, flatten into a disc, cover, and refrigerate for thirty minutes.
Step 2: Cook the Peach Filling
While the dough chills, combine your frozen peaches, granulated sugar, and brown sugar in a saucepan. Cook over medium heat, stirring occasionally, until the peaches soften and start releasing their juices.
Use a spoon or fork to mash some of the peaches while leaving others in small chunks. This creates a filling with actual texture instead of a smooth, uniform mush, which honestly tastes way more interesting.
Let the mixture simmer until it thickens slightly, then stir in the butter and lemon juice. FYI, that splash of lemon juice brightens the whole filling and keeps it from tasting flat or overly sweet.
If the filling still looks thin after simmering, stir in the cornstarch to help it thicken further. Once it reaches a jammy consistency, remove it from the heat and let it cool completely before assembling your pies.
Step 3: Prepare the Vanilla Glaze
In a small bowl, whisk together the powdered sugar and milk until completely smooth. Add the vanilla extract and a pinch of salt, then stir everything together one more time.
Check the consistency before setting it aside. It should drizzle easily off a spoon without being watery, adjust with a touch more milk or powdered sugar if needed.
Step 4: Roll Out the Dough
Take your chilled dough discs out of the refrigerator and roll each one out to about five or six inches wide. Work on a lightly floured surface so the dough doesn’t stick as you roll.
Rolling cold dough takes a little patience, but that chill time is exactly what keeps your crust flaky instead of tough. Don’t rush this step just because you’re excited to fry something.
Step 5: Fill and Seal the Pies
Spoon about two tablespoons of the cooled peach filling into the center of each rolled dough circle. Resist adding more, since overfilled pies tend to burst open in the hot oil.
Fold the dough over into a half-moon shape and press the edges together firmly to seal. Trim any uneven edges, then crimp along the seam with a fork for both decoration and an extra tight seal.
Step 6: Heat the Oil
Pour oil into a deep pot or skillet and heat it to 350°F. Use a thermometer if you have one, guessing at oil temperature usually ends in either soggy or burnt pies.
Getting the temperature right matters more than people expect. Have you ever fried something in oil that was too cool? You end up with greasy, undercooked dough instead of crispy, golden perfection.
Step 7: Fry the Pies
Carefully lower two or three pies into the hot oil at a time, avoiding overcrowding the pot. Fry for three to four minutes, flipping partway through if needed, until both sides turn a deep golden brown.
Remove the pies with a slotted spoon or tongs and place them directly onto a cooling rack. Skip paper towels here, they trap steam underneath and can make your crispy crust turn soggy fast.
Step 8: Glaze and Serve
Once the pies have cooled slightly but are still warm, brush a layer of vanilla glaze over the top of each one. Let that first coat set for a few minutes, then brush on a second layer for extra shine and sweetness.
Let the glaze fully harden before serving if you want a clean, glossy finish. IMO, though, sneaking a bite while it’s still slightly warm and gooey is honestly the best part of the whole process.
Tips for the Best Results
- Keep the dough cold throughout the process for the flakiest crust.
- Don’t overfill each pie, this prevents bursting in the hot oil.
- Monitor oil temperature closely for evenly fried, golden pies.
- Cool on a rack, not paper towels, to preserve crispiness.
Storage and Reheating Tips
These pies taste best served warm, ideally the same day you make them. Store leftovers in an airtight container at room temperature for up to two days.
Refrigerate for slightly longer storage, up to four days, then reheat in the oven to bring back that crispy texture. Skip the microwave if you can, it tends to leave the crust soft and a bit sad.
Want to plan ahead? Freeze the pies unglazed for up to two months, then reheat and glaze fresh whenever a craving hits.
Fun Variations to Try
Ready to experiment a little? These twists are worth trying:
- Cinnamon version: Add half a teaspoon of cinnamon to the filling for warmth.
- Bourbon twist: Stir a tablespoon of bourbon into the filling for a Southern kick.
- Fresh fruit swap: Use fresh sliced peaches instead of frozen when they’re in season.
- Berry blend: Mix in blueberries or raspberries alongside the peaches.
- Baked alternative: Bake at 375°F for 20 to 25 minutes instead of frying.
Frequently Asked Questions
Can I use canned peaches instead of frozen? Yes, just drain them thoroughly before cooking to avoid a watery filling.
How do I prevent the pies from opening while frying? Seal the edges tightly and crimp firmly with a fork before frying.
What oil works best for frying? Neutral oils like vegetable or canola oil give the cleanest, most consistent results.
Can I make the dough ahead of time? Yes, the dough keeps well in the refrigerator for up to two days before use.
Why is my filling turning out runny? It likely needs more simmering time or a bit of added cornstarch to thicken properly.
Can I skip the vanilla glaze entirely? Absolutely, these pies taste great plain or with a light dusting of powdered sugar instead.
Final Thoughts
Fried Peach Pies bring together everything great about Southern desserts, crispy crust, sweet fruit filling, and just the right amount of glaze on top. They take a bit of effort, but every bite makes it worthwhile.
Make a batch this weekend and watch them vanish faster than you expected 🙂 Just maybe fry a couple extra, because these never seem to last as long as you plan for.

Fried Peach Pies
Ingredients
Method
- Sift together your flour and salt in a large bowl.
- Cut in the cold butter and shortening until the mixture resembles coarse crumbs.
- Gradually add the cold water, mixing gently until the dough comes together.
- Knead the dough briefly until smooth, divide into eight equal pieces, shape into balls, flatten into discs, cover, and refrigerate for thirty minutes.
- Combine frozen peaches, granulated sugar, and brown sugar in a saucepan.
- Cook over medium heat until peaches soften and release juices; mash some for texture.
- Simmer until thickened, then stir in butter and lemon juice. If too thin, add cornstarch.
- Let cool before assembling pies.
- Whisk together powdered sugar and milk in a small bowl until smooth.
- Add vanilla extract and a pinch of salt, adjusting consistency as needed.
- Roll out each dough disc to about five or six inches wide.
- Fill each rolled dough circle with about two tablespoons of cooled peach filling.
- Fold dough over and seal edges firmly; crimp with a fork for extra security.
- Heat oil in a deep pot to 350°F and fry a few pies at a time for 3 to 4 minutes.
- Cool fried pies on a rack, avoiding paper towels.
- Brush each warm pie with the vanilla glaze shortly after frying for best results.
- Allow glaze to set before serving, or enjoy immediately while still warm.




