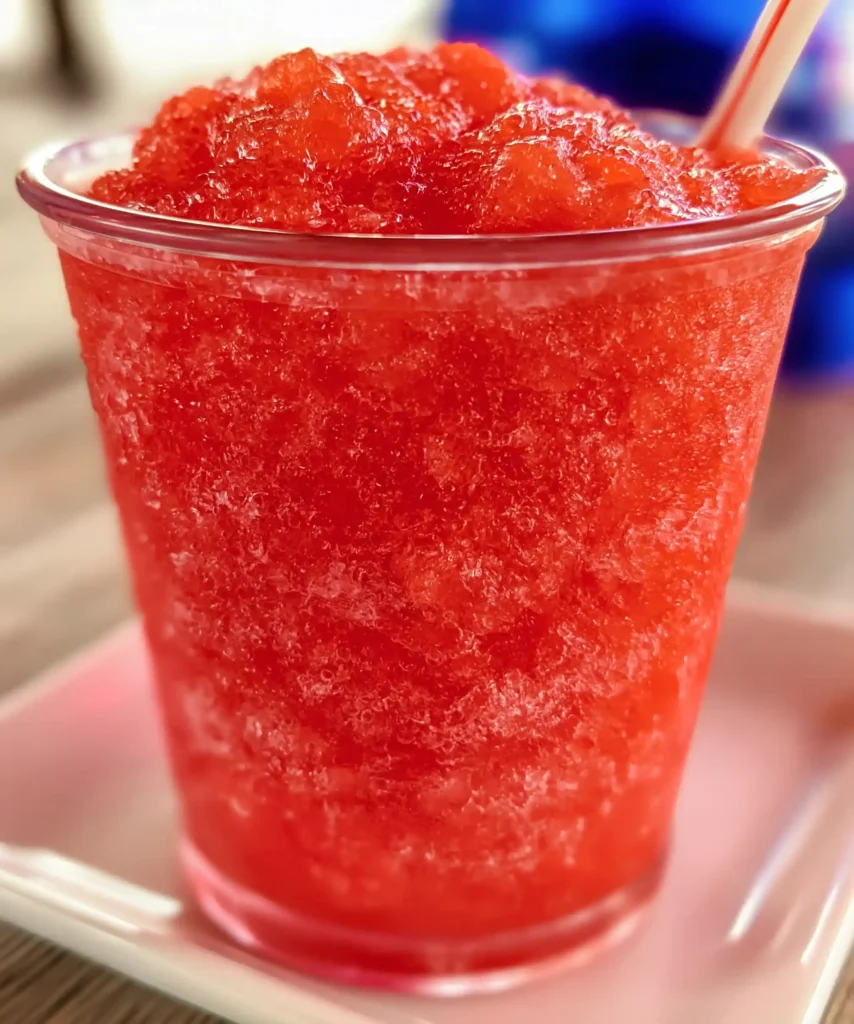
Hot day. Zero patience. A bag of Kool Aid and a blender full of ice. That’s all it takes to make a Kool Aid Slurpee at home that’s colder, brighter, and way more fun than anything you’d pay four dollars for through a drive-through window. Five ingredients, ten minutes, done.
I’ve been making this since I was old enough to reach the kitchen counter. My kids now request specific flavor combinations like they’re ordering at a restaurant. Cherry lemonade, grape blue raspberry, tropical punch — the variations are endless and every version disappears within minutes. That tracks.
Servings and Prep Time
- Servings: 2 large (12 oz each)
- Prep Time: 5 minutes
- Blend Time: 5 minutes
- Total Time: About 10 minutes
Why Homemade Kool Aid Slurpee Beats Store-Bought
Have you ever read the ingredient list on a convenience store slushie? It’s a long parade of dyes, artificial flavors, and preservatives that makes you feel slightly guilty with every sip. A homemade Kool Aid Slurpee uses five simple ingredients and you control every single one of them.
The other advantage is customization. You pick the flavor, the sweetness level, the texture, and the size. No mystery liquids, no weird aftertaste. Just bold, icy, fruity slush exactly the way you want it. IMO that alone makes this recipe worth keeping permanently in your summer rotation.
Ingredients for Kool Aid Slurpee
Here’s everything you need:
- 1/4 cup hot water (just hot enough to dissolve the sugar)
- 1/4 cup granulated sugar (or adjust to taste)
- 1 packet (0.13 oz) Kool Aid powder — your favorite flavor
- 1.5 cups cold water
- 3 cups ice cubes (about 24 standard ice cubes)
That’s it. Five ingredients. The hot water and sugar combine to form a simple syrup base that blends smoothly into the ice rather than leaving gritty, undissolved sugar granules in your drink.
How to Make a Kool Aid Slurpee
Step 1: Make the Sugar Syrup Base
Pour the hot water into a small bowl or measuring cup. Add the granulated sugar and stir continuously for about 60 seconds until every grain fully dissolves. You’re making a basic simple syrup, and the water needs to be genuinely hot — not warm, not room temperature — for the sugar to dissolve completely.
If you skip this step or use cold water to dissolve the sugar, you’ll end up with sugar crystals at the bottom of your finished Slurpee that never fully integrate. That gritty texture ruins the whole drink. Take the extra minute to do this step right and the rest of the recipe falls into place perfectly.
Step 2: Add the Kool Aid Powder to the Syrup
While the syrup is still warm, add the full packet of Kool Aid powder directly into the sugar water. Stir vigorously for 30 seconds until the powder completely dissolves and the mixture turns a vivid, uniform color with no clumps of dry powder floating on the surface.
The warm syrup dissolves the Kool Aid powder far more efficiently than cold water does. If you add the powder to cold water first, you often end up with small clumps of undissolved mix that survive the blending process and create uneven patches of flavor in the finished Slurpee. This sequence — syrup first, powder second — matters.
Step 3: Pour the Syrup Into the Blender
Add the Kool Aid syrup to your blender first, before the ice. Pour the cold water in next on top of the syrup. Starting with the liquids at the bottom of the blender allows the blades to move freely and pull the ice down from above as it crushes — rather than creating an air pocket under a solid wall of frozen ice that blocks the blades entirely.
Give the liquid a quick swirl in the blender to make sure the syrup and cold water combine before you add the ice. A well-combined liquid base means more even flavor distribution throughout the finished Slurpee rather than sweet spots and bland spots in the same glass.
Step 4: Add the Ice and Get the Texture Right
Add 3 cups of ice cubes to the blender on top of the liquid. Secure the lid firmly with your hand on top before starting — this is not the step to discover your blender lid is loose. Start the blender on low speed for the first 5 seconds to break up the ice, then increase to high speed.
Blend on high for 20 to 30 seconds, then stop and check the texture. The Slurpee should look like fine, uniform slush — similar to a snow cone but slightly looser. If it looks too chunky, blend another 10 seconds. If it looks fully liquid and thin, add another 1/2 cup of ice and pulse a few more times. The ideal texture is pourable but thick enough to mound slightly in the glass.
Step 5: Taste and Adjust Before Serving
Before you pour, taste a small spoonful of the Slurpee directly from the blender. Check the sweetness and flavor intensity. If it tastes too mild, add a small pinch more Kool Aid powder or a teaspoon more sugar and blend briefly. If it tastes too sweet, add a splash of cold water and pulse once more to incorporate.
This tasting step takes 15 seconds and catches any balance issues before they end up in the finished glass. Flavor at the right sweetness level is what separates a great Slurpee from a forgettable one. Cold temperatures naturally dull sweetness perception, so it’s normal for the Slurpee to taste slightly less sweet than the syrup did at room temperature.
Step 6: Pour and Serve Immediately
Pour the finished Slurpee into two 12-ounce glasses. Fill them to the top and serve immediately with wide straws — regular thin straws don’t handle the slush consistency well and create a frustrating drinking experience. Wide straws or spoon straws let you actually enjoy the texture you worked for.
If you made more than you can drink right now, pour the extra into a freezer-safe container and freeze it. When you’re ready for round two, let it thaw on the counter for 3 to 5 minutes then blend briefly with a small amount of cold water to bring it back to the right slushy consistency.
Tips for the Best Kool Aid Slurpee Every Time
- Dissolve the sugar in hot water before adding anything else — undissolved sugar ruins the texture.
- Use crushed ice if your blender struggles — it reduces blending time and produces smoother slush.
- Don’t over-blend — 20 to 30 seconds on high is usually enough; over-blending melts the ice and turns the Slurpee watery.
- Serve immediately — slush separates and pools liquid at the bottom of the glass quickly, so pour and drink right away.
- Chill your glasses in the freezer for 5 minutes beforehand to keep the Slurpee colder longer.
Flavor Combinations Worth Trying
This Kool Aid Slurpee base recipe works with any Kool Aid flavor, and mixing packets opens up a world of options:
- Cherry + Lemonade: Classic and bright — tastes like summer in every sip.
- Grape + Blue Raspberry: A deep, vibrant purple slush that kids go absolutely wild over.
- Tropical Punch + Pineapple: Creamy and fruity, almost like a tropical cocktail without the alcohol.
- Watermelon + Strawberry: Light, fresh, and beautifully pink.
- Orange + Mango: A citrusy combo that works especially well on the hottest days.
You can also add a splash of lemon-lime soda to the blender instead of some of the cold water for a fizzier, lighter texture. FYI it changes the consistency slightly but adds a fun effervescence that some people absolutely love.
Fun Ways to Serve and Customize
The base recipe is just the starting point:
- Layered Slurpee: Make two different flavors and layer them carefully in the glass for a striped effect.
- Creamy version: Blend in one scoop of vanilla ice cream for a Slurpee that sits between a slushie and a milkshake.
- Adult version: Add a shot of vodka or coconut rum to the blender before processing — the alcohol lowers the freezing point slightly and keeps the texture loose.
- Party bar: Set out multiple flavors and let guests blend their own combinations — this is genuinely one of the best warm-weather party ideas and requires zero cooking skill.
FAQs About Kool Aid Slurpee
What blender works best for making a Kool Aid Slurpee? Any standard household blender handles this recipe fine. A high-powered blender like a Vitamix produces smoother, finer slush. If your blender struggles with ice, use crushed ice from your freezer’s ice maker or crush the ice in a zip-lock bag with a rolling pin before adding it to the blender.
Can I make this without any sugar? Yes. Use sugar-free Kool Aid packets and skip the sugar entirely, or substitute with a sugar-free sweetener like stevia or erythritol. Dissolve the substitute in hot water the same way you would regular sugar. The texture and color stay identical; only the sweetness source changes.
How do I store leftover Kool Aid Slurpee? Pour leftovers into a freezer-safe container and freeze flat. It will freeze solid. When you’re ready to use it, let it sit at room temperature for 4 to 5 minutes until the outer edges soften, break it into chunks, then blend with 2 to 3 tablespoons of cold water until it returns to slush consistency.
Can I make a big batch for a party ahead of time? Make the Kool Aid syrup up to 24 hours in advance and refrigerate it. When ready to serve, blend the syrup with cold water and ice in batches. This approach lets you serve large groups quickly without making everything from scratch at serving time.
What if my Slurpee comes out too watery? Add more ice — 1/2 cup at a time — and blend briefly until the texture thickens. Watery Slurpee almost always means too little ice relative to liquid. The ratio in this recipe is calibrated for thick slush, but blender size and ice cube size vary, so adjust by feel.
Final Thoughts
Making a Kool Aid Slurpee at home takes ten minutes, costs almost nothing, and produces a result that genuinely competes with anything you’d buy. The key is the simple syrup base — hot water, dissolved sugar, Kool Aid powder, in that order — then good ice coverage in the blender and serving it immediately before it separates.
Pick a flavor that makes you happy. Make a double batch. Share it with someone — or don’t. No judgment here.



