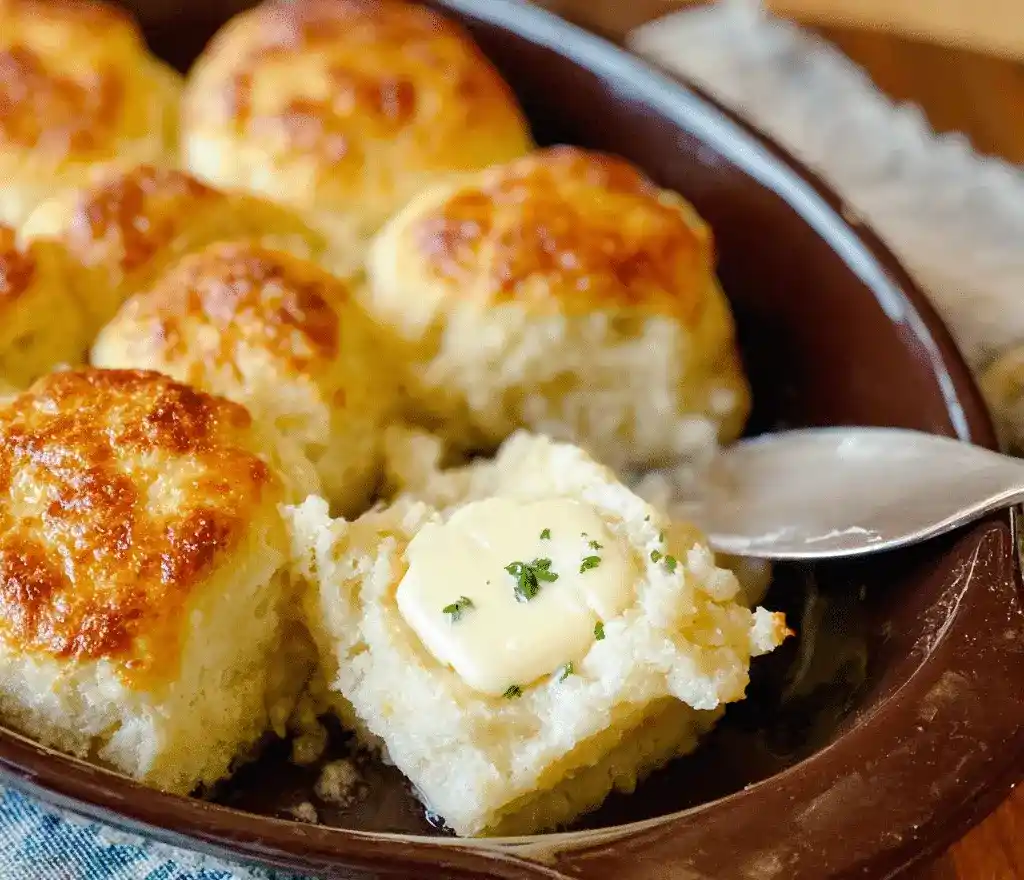
Let’s be honest: nobody wants to cut cold butter into flour before their coffee kicks in. Butter dip biscuits skip that whole struggle. I made these on a whim one Sunday morning and now they’re a permanent fixture in my kitchen rotation.
Servings: 9 biscuits | Prep time: 10 minutes | Cooking time: 25 minutes | Total time: 35 minutes | Calories: roughly 250 per serving
What Are Butter Dip Biscuits, Exactly?
Butter dip biscuits go by another name too: butter swim biscuits. That name comes from the fact that the dough literally swims in melted butter while it bakes. It’s dramatic, it’s indulgent, and honestly, it’s exactly what a biscuit should be.
Unlike traditional biscuits, you don’t cut cold butter into flour here. You pour warm buttermilk batter over melted butter instead. Have you ever wanted a recipe that skips the fussy technique but keeps all the flavor? This is it.
I’ll admit I was skeptical the first time. Pouring wet batter over a pool of butter felt wrong. IMO, that skepticism disappeared the second I pulled these out of the oven.
What You’ll Need for This Butter Dip Biscuits Recipe
This ingredient list is refreshingly short. No fancy pastry tools, no chilled butter cubes, no rolling pin required. Here’s exactly what you need, with quantities included so nothing gets guessed.
- 1/2 cup salted butter (1 stick)
- 2 1/2 cups all-purpose flour
- 1 1/2 tablespoons granulated sugar
- 1 tablespoon aluminum-free baking powder
- 1 1/2 teaspoons salt
- 1 3/4 cups buttermilk, possibly up to 2 cups
That’s six ingredients, most of which are already sitting in your pantry. FYI, buttermilk matters here. Its tang reacts with the baking powder and gives these biscuits their signature lift and flavor.
How to Make Butter Dip Biscuits, Step by Step
This recipe reads long because I’m explaining every detail clearly, but the actual process moves fast. Give yourself about 10 minutes of prep and let the oven handle the rest.
Preheating and Prepping Your Pan
Crank your oven up to 450°F. That’s hotter than most biscuit recipes ask for, but it’s exactly what creates that crisp golden top. Grab an 8×8 or 9×9 inch glass or ceramic baking dish and coat it generously with nonstick spray.
Using a spray with flour in it works best for this recipe. It helps prevent sticking around the edges once that butter starts bubbling. Set your prepared dish aside while you handle the next steps.
Melting the Butter
Place your stick of salted butter into a microwave-safe bowl and melt it completely. This usually takes about 45 seconds to a minute, depending on your microwave’s strength. Keep an eye on it so it doesn’t splatter everywhere.
Once melted, pour the butter directly into your prepared baking dish, tilting the pan slightly to coat the bottom evenly. This butter layer is the whole point of the recipe. Don’t skip it, and definitely don’t wipe any of it away.
Mixing the Dry Ingredients
Grab a medium mixing bowl and combine your flour, sugar, baking powder, and salt. Whisk these together thoroughly so the leavening agent distributes evenly throughout the flour. An uneven mix means uneven rising, and nobody wants a lopsided biscuit.
This step takes maybe a minute, but it’s an important one. Have you ever bitten into a biscuit with a weird pocket of baking powder taste? That happens when this step gets rushed.
Adding the Buttermilk
Pour 1 3/4 cups of cold buttermilk into your dry ingredient bowl. Stir everything together until a thick, sticky batter forms, and don’t worry about making it smooth like cake batter. This dough should look shaggy and rough, not silky.
If the mixture looks too dry or crumbly, add a splash more buttermilk at a time. Keep stirring until it reaches that sticky, cohesive texture bakers love. You’re aiming for thick and stretchy, not runny.
Assembling the Biscuits
Pour your sticky dough directly on top of the melted butter sitting in your baking dish. Some butter will overflow onto the surface of the dough, and that’s completely normal. Spray your hand lightly with nonstick spray so the dough doesn’t stick to your fingers.
Gently press and spread the dough across the pan until it reaches all the corners evenly. Take your time here since an even layer bakes more consistently. Once it’s spread out, grab a knife or bench scraper.
Cutting and Baking
Cut the dough into 9 roughly even squares, right there in the dish before baking. This precut step makes pulling apart individual biscuits so much easier later. Don’t stress over perfect lines; rustic edges are part of the charm here.
Slide the dish onto the middle rack of your preheated oven and bake for 25 to 30 minutes. Rotate the pan halfway through so every biscuit browns evenly. Ovens run hot or cold depending on the day, so keep watching near the 25-minute mark.
Checking for Doneness
Look for a deep golden brown color across the top of your biscuits. Gently press the center; it should spring back rather than leave an indentation. Insert a toothpick into the middle and pull it out.
If that toothpick comes out clean with no wet batter clinging to it, your biscuits are officially done. Pull the dish out and let it rest for a couple of minutes before serving. That resting time keeps you from burning your mouth on molten butter.
Tips for Nailing These Every Time
I’ve made this recipe enough times to know exactly where it can go wrong. These small adjustments make a noticeable difference in your final batch.
- Use real buttermilk, not regular milk, for the tangy flavor and proper rise.
- Don’t skip the hot oven temperature. 450°F is what creates that crispy golden crust.
- Spray your hands before pressing the dough so it doesn’t stick everywhere.
- Rotate the pan halfway through baking for even browning across all nine squares.
Serving Suggestions Worth Trying
These biscuits work for basically every meal of the day, which is exactly why I keep making them. Serve them warm with honey or jam alongside scrambled eggs for breakfast. They also make a fantastic side for soup, stew, or a hearty casserole.
Want a quick snack? Split one open and add a slice of cheese or deli meat. Craving something sweet instead? Drizzle a warm biscuit with honey or dust it with cinnamon sugar.
Storing and Reheating Your Biscuits
Store leftover biscuits in an airtight container at room temperature for up to two days. For longer storage, refrigerate them in an airtight container for up to a week. Freeze them for up to three months if you want to stock up ahead of time.
To reheat, warm biscuits in a 350°F oven for 10 to 15 minutes, covered loosely with foil. Alternatively, microwave a biscuit under a damp paper towel for 20 to 30 seconds. Both methods bring back that fresh-baked softness.
Fun Variations on Butter Dip Biscuits
Once you’ve got the base recipe down, this dough becomes wildly adaptable. Here are a few of my favorite twists to try next time.
- Cheddar and chive: Mix in shredded cheddar and chopped chives for a savory bite.
- Garlic and herb: Add garlic powder and Italian seasoning to the dry mix.
- Sweet cinnamon: Stir in sugar and cinnamon, then top with a simple glaze.
- Jalapeño cheddar: Fold in cheddar cheese and finely chopped jalapeños for heat.
Frequently Asked Questions About Butter Dip Biscuits
Can I use unsalted butter instead of salted butter?
Yes, unsalted butter works fine here. Just add an extra 1/4 teaspoon of salt to your dry ingredients to make up for it.
Can I substitute regular milk for buttermilk?
Buttermilk gives these biscuits their signature tang and reacts properly with the baking powder. If you’re out, mix a tablespoon of lemon juice or vinegar into a cup of milk and let it sit for five minutes.
How do I know when the biscuits are fully baked?
Check for a golden brown top that springs back when pressed gently. A toothpick inserted into the center should come out completely clean.
Can I make these biscuits gluten-free?
Yes, swap in a gluten-free all-purpose flour blend that contains xanthan gum. That ingredient helps maintain the proper texture and structure.
Can I freeze the biscuits for later?
Bake them first, then freeze the finished biscuits for up to three months. Wrap each one individually before placing them in a freezer-safe bag.
Why does my dough look too dry before baking?
Add a splash more buttermilk at a time until the dough turns thick and sticky. Different flour brands absorb liquid differently, so this step varies slightly each time.
Wrapping This Up
Butter dip biscuits prove that comfort food doesn’t need complicated technique to taste incredible. Six ingredients, one pan, and 35 minutes total gets you a batch of golden, buttery biscuits everyone fights over. Isn’t that exactly what a weeknight recipe should deliver?
Go melt that stick of butter and give this recipe a shot tonight. Just make a double batch, because trust me, one pan disappears faster than you’d expect

Butter Dip Biscuits
Ingredients
Method
- Preheat the oven to 450°F (232°C). Coat an 8x8 or 9x9 inch baking dish with nonstick spray.
- Melt the stick of salted butter in a microwave-safe bowl for about 45 seconds to a minute. Pour it into the prepared baking dish.
- In a medium bowl, whisk together the flour, sugar, baking powder, and salt until well combined.
- Pour 1 3/4 cups of cold buttermilk into the dry mixture and stir until a thick, sticky batter forms.
- Pour the batter over the melted butter in the baking dish. Spray your hands with nonstick spray and gently spread the dough evenly.
- Cut the dough into 9 squares before baking. Bake for 25-30 minutes, rotating the pan halfway through.
- Biscuits are done when they are golden brown on top, spring back when pressed, and a toothpick comes out clean.




