Let’s be honest — ampalaya has a bit of a PR problem. Bitter, pungent, and genuinely intimidating if you have never cooked with it before. Most people either love it or run in the other direction. But what if I told you there is a version that converts even the most committed ampalaya skeptics?
Enter Atcharang Ampalaya — the tangy, sweet, lightly spiced pickled bitter gourd that belongs on every Filipino table. I grew up watching my grandmother make jars of this every week, and the smell of warming vinegar and garlic still takes me straight back to her kitchen.
This recipe takes that sharp bitterness and transforms it into something crunchy, bright, and genuinely craveable. And the whole process takes under an hour of active work. Let me show you exactly how to make it.
What Is Atcharang Ampalaya?
Atchara (also spelled achara) is the Filipino word for pickled vegetables. It is a condiment deeply rooted in Filipino cooking, typically served alongside fried or grilled dishes to cut through the richness with its tangy sweetness. Atcharang Ampalaya specifically uses bitter gourd as the main vegetable.
Unlike the more common atchara made from green papaya, the ampalaya version carries a distinctive edge — that signature bitterness gets mellowed by the vinegar and sugar brine, but it does not disappear entirely. It becomes a complex, layered flavor that makes the condiment incredibly interesting.
Have you ever had a condiment that actually makes the main dish taste better just by sitting next to it? That is exactly what Atcharang Ampalaya does alongside sinangag, grilled pork, or fried fish. It earns its spot on the table every single time.
Why You Should Make Atcharang Ampalaya at Home
Store-bought atchara exists, yes. But the homemade version is on a completely different level. You control the sweetness, the spice, the crunch, and the intensity of the brine. That level of control is something no jar from the grocery shelf gives you.
Beyond taste, ampalaya also carries genuine nutritional value. It is rich in vitamin C, folate, and antioxidants. The pickling process preserves much of that nutrition while making the bitter gourd far more palatable for people who struggle with its raw flavor.
IMO, making a fresh batch at home costs a fraction of what you pay for packaged versions and tastes exponentially better. Once you make it yourself, going back feels like a downgrade.
Atcharang Ampalaya Ingredients

The ingredient list is short, affordable, and almost entirely pantry-friendly. The most important thing to get right is the ampalaya itself — choose firm, unblemished ones for the best crunch.
Main Ingredients:
- 3 medium ampalaya (bitter gourd), about 500g total
- 1 tablespoon rock salt or coarse salt (for the initial salting process)
- 1 medium carrot, cut into thin matchsticks (about 1/2 cup)
- 1 small red bell pepper, thinly sliced (about 1/2 cup)
- 4-5 cloves garlic, thinly sliced
- 1 small white onion, thinly sliced into rings
- 1 thumb-sized piece of ginger, cut into fine matchsticks
For the Pickling Brine:
- 1 cup white cane vinegar or coconut vinegar
- 3/4 cup white sugar
- 1/2 teaspoon salt
- 1/4 teaspoon whole black peppercorns
- 1-2 red chili peppers, sliced (optional, for heat)
- 1/4 cup water
FYI — white cane vinegar is the traditional choice and gives the cleanest flavor. Coconut vinegar works beautifully too and adds a very subtle earthy note. Avoid dark vinegar like apple cider or balsamic here — they overpower the delicate ampalaya flavor and discolor the vegetables.
How to Make Atcharang Ampalaya — Full Step-by-Step Process
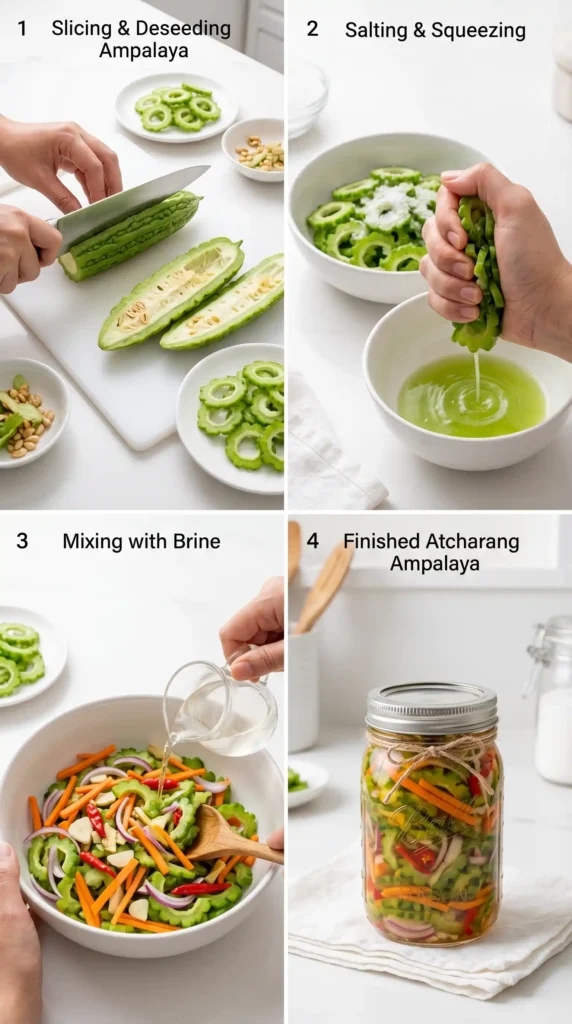
The process splits into three clear stages: preparing the ampalaya, making the brine, and putting it all together. Take your time on the prep – the quality of your slicing and salting directly affects the final crunch and color of the atchara.
Stage 1 — Preparing the Ampalaya
Clean and Slice the Ampalaya
Wash the ampalaya thoroughly under cold running water and dry them with a clean towel. Slice each one in half lengthwise from top to bottom. Inside, you will see white pith and seeds, which are responsible for most of the bitterness.
Using a spoon, scrape out all the seeds and white pith carefully. Remove as much as possible for a milder final flavor. Once cleaned, place the halves cut-side down and slice them into thin half-moon pieces about 3–4mm thick. Thin slices pickle more evenly and stay pleasantly crisp.
Salt the Ampalaya
Transfer the sliced ampalaya to a large bowl and sprinkle the rock salt evenly over the top. Toss everything well with your hands so all the slices are coated. The salt helps draw out moisture and reduce bitterness.
Let the salted ampalaya rest at room temperature for at least 30 minutes. During this time, liquid will collect at the bottom of the bowl as the bitterness is pulled from the vegetable.
Rinse and Dry
After resting, squeeze the ampalaya in small handfuls over the sink to remove as much liquid as possible. Transfer the slices to a colander and rinse thoroughly under cold water to remove excess salt.
Squeeze the slices one more time to remove remaining moisture. Finally, spread them on paper towels or a clean kitchen towel and pat them dry gently. Drier ampalaya stays crunchier and absorbs the pickling brine better.
Stage 2 — Preparing the Vegetables
While the ampalaya drains, prepare your other vegetables. Peel and cut the carrot into thin matchsticks about 4-5cm long and 2-3mm wide. Uniform matchsticks pickle evenly and look beautiful in the jar.
Slice the red bell pepper into thin strips, removing all seeds and the white inner membrane. Thinly slice the white onion into rings. Peel the garlic and cut into very thin slices. Peel the ginger and cut into fine matchsticks similar in size to the carrot.
Combine the prepared ampalaya, carrot, bell pepper, onion, garlic, and ginger in a large clean bowl. Toss gently to mix the vegetables evenly together. Set the bowl aside while you prepare the brine.
Stage 3 — Making the Pickling Brine
Combine the 1 cup of white cane vinegar, 1/4 cup of water, 3/4 cup of white sugar, and 1/2 teaspoon of salt in a small saucepan. Place over medium heat and stir continuously.
Heat the brine mixture, stirring frequently, until the sugar dissolves completely and the liquid turns clear. This takes about 3-4 minutes. You do not need to boil it aggressively — a gentle simmer with complete sugar dissolution is all you need.
Add the whole black peppercorns and sliced chili peppers to the brine at this point if you are using them. Stir once and remove the pan from the heat. Let the brine sit for 2-3 minutes to cool slightly before pouring it over the vegetables.
Taste the brine carefully — it should taste tangy, clearly sweet, and lightly salty with a clean vinegar bite. If you want it sweeter, add another tablespoon of sugar and stir until dissolved. If you want it tangier, add a splash more vinegar. Adjust before you pour it over the vegetables.
Stage 4 — Combining and Pickling
Pour the warm brine slowly and evenly over the mixed vegetables in the bowl. Use a spoon or spatula to gently stir and submerge all the vegetables in the brine. Every piece should come into contact with the liquid.
Let the mixture cool to room temperature uncovered, stirring once or twice as it cools. As it cools, the vegetables soften very slightly and begin absorbing the brine. The color of the vegetables will shift subtly — the ampalaya brightens, the carrot deepens.
Once the mixture reaches room temperature, transfer everything into a clean, sterilized glass jar or airtight container. Press the vegetables down gently so they sit submerged in the brine as much as possible. If you have excess brine, pour it in until the jar is full.
Seal the jar and refrigerate. The Atcharang Ampalaya is ready to eat after 2 hours in the fridge, but overnight chilling produces a dramatically better result. By the next day, the flavors meld fully, the bitterness rounds out, and the crunch remains satisfying without being raw-tasting.
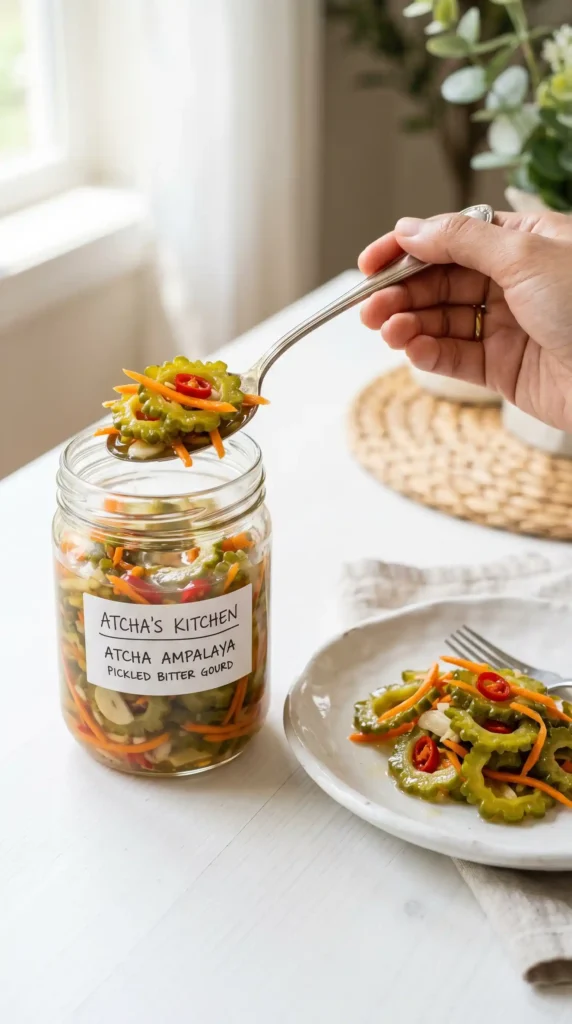
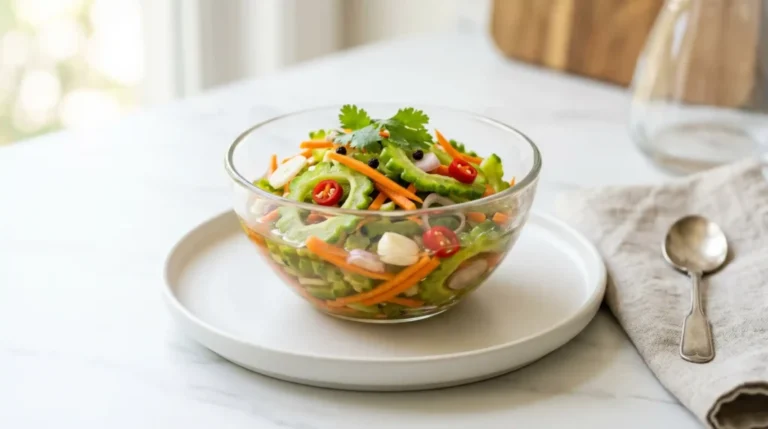
How to Serve Atcharang Ampalaya
The classic pairing is simple and perfect — serve it cold from the fridge alongside any fried or grilled Filipino dish. The contrast between the hot, oily main and the cold, tangy atchara is genuinely one of the great flavor combinations in Filipino cuisine.
- [object Object]The tangy atchara cuts right through the sweetness of the cured meat and the starchiness of the garlic rice. This is the textbook use case.
- [object Object]The acidity brightens the fish and provides a palate-cleansing element between bites.
- [object Object]The pickled bitterness against fatty grilled pork belly is an exceptional combination.
- [object Object]Sometimes the simplest pairings are the best. A spoonful of atchara on the side of a plain rice bowl works wonderfully.
- [object Object]Slightly unusual but completely delicious. The crunch and tang make for a memorable breakfast bite.
How Long Does Atcharang Ampalaya Keep?
In the refrigerator: Stored in a sealed glass jar, Atcharang Ampalaya keeps well for up to 2 weeks. The flavor actually improves over the first few days as the vegetables continue to absorb the brine.
Important note: Always use a clean, dry spoon when serving from the jar. Introducing water or food particles from other dishes shortens the shelf life significantly and can cause spoilage.
Can you preserve it longer? For longer storage without refrigeration, you need to properly sterilize your jars and process them in a water bath. For home use and regular consumption within two weeks, refrigeration is perfectly sufficient.
Tips for the Best Atcharang Ampalaya
- [object Object]Pale or yellowing ampalaya is overripe, softer, and has a different bitter profile. Dark green and firm gives you the best crunch.
- [object Object]This is the single most important step for controlling bitterness. Do not rush the scraping.
- [object Object]It reduces bitterness, removes excess water, and creates a better texture in the finished atchara.
- [object Object]Glass does not absorb odors or flavors from the vinegar brine. Plastic containers can leave an aftertaste.
- [object Object]Every batch of vinegar is slightly different in acidity. Tasting lets you calibrate the balance perfectly.
Frequently Asked Questions About Atcharang Ampalaya
1. How do I make Atcharang Ampalaya less bitter?
The key steps are thorough pith removal, generous salting, and a good long squeeze after the 30-minute rest. Each of these draws out bitter compounds. If you want an even milder result, you can blanch the salted and squeezed ampalaya briefly in boiling water for 30 seconds before rinsing. This reduces bitterness further while keeping most of the crunch.
2. Can I use other vegetables in the atchara?
Absolutely. Many versions of Atcharang Ampalaya include additional vegetables like green bell pepper, cucumber strips, or even young green papaya mixed in with the bitter gourd. Adding vegetables with milder flavors helps balance the overall bitterness of the batch and makes the jar more visually colorful.
3. Why is my atchara too sour?
Too much acidity usually means the vinegar-to-sugar ratio in your brine tipped too far toward vinegar. The fix is simple: dissolve an extra tablespoon or two of sugar into the brine before pouring, or mix a small amount of sugar directly into the finished jar and let it sit for a few hours to balance out.
4. How do I sterilize the jars properly?
Wash your glass jars and lids with hot soapy water, then submerge them in a pot of boiling water for 10 minutes. Remove them carefully with tongs and let them air-dry on a clean towel. Do not wipe them dry — air-drying is cleaner. Fill the jars while they are still warm for best results.
5. Can I make Atcharang Ampalaya without sugar for a diabetic diet?
Yes, with some adjustments. You can substitute white sugar with a sugar alternative like erythritol or monk fruit sweetener in the same quantity. The brine will taste slightly different since these sweeteners behave differently from cane sugar, but the pickling process still works effectively and the result remains very enjoyable.
Final Thoughts on Atcharang Ampalaya
Atcharang Ampalaya is proof that the most challenging ingredients often produce the most rewarding results. That intimidating bitterness transforms into something genuinely complex and delicious once vinegar, sugar, and time do their work.
Scrape the pith well, salt and squeeze thoroughly, balance your brine carefully, and give it at least overnight in the fridge. Do those four things and your Atcharang Ampalaya will come out better than anything you can buy ready-made. Make a jar this weekend. Serve it alongside your next fried meal and watch people reach for seconds. Even the ampalaya skeptics at the table will come around — and you can act completely unsurprised when they do
Atcharang Ampalaya
Ingredients
Method
- Wash the ampalaya thoroughly under cold running water and dry them with a clean towel.
- Slice each ampalaya in half lengthwise and carefully scrape out all the seeds and white pith.
- Slice the cleaned halves into thin half-moon pieces about 3–4mm thick.
- Transfer the sliced ampalaya to a large bowl and sprinkle the rock salt evenly over the top. Toss everything well.
- Let the salted ampalaya rest at room temperature for at least 30 minutes.
- Rinse the ampalaya slices under cold water and pat them dry with paper towels.
- Peel and cut the carrot into thin matchsticks about 4-5cm long.
- Slice the red bell pepper and onion into thin slices. Prepare the garlic and ginger as well.
- Combine all prepared vegetables with the ampalaya in a large bowl.
- Combine the vinegar, water, sugar, and salt in a small saucepan over medium heat.
- Stir until the sugar dissolves completely to make the brine.
- Add whole black peppercorns and sliced chili peppers, then let it cool slightly.
- Taste the brine and adjust sweetness or tartness as needed before pouring over the vegetables.
- Pour the warm brine over the mixed vegetables, stirring gently to combine.
- Let the mixture cool to room temperature uncovered.
- Transfer everything to a sterilized glass jar and seal.
- Refrigerate and let it sit for at least 2 hours before serving, preferably overnight.