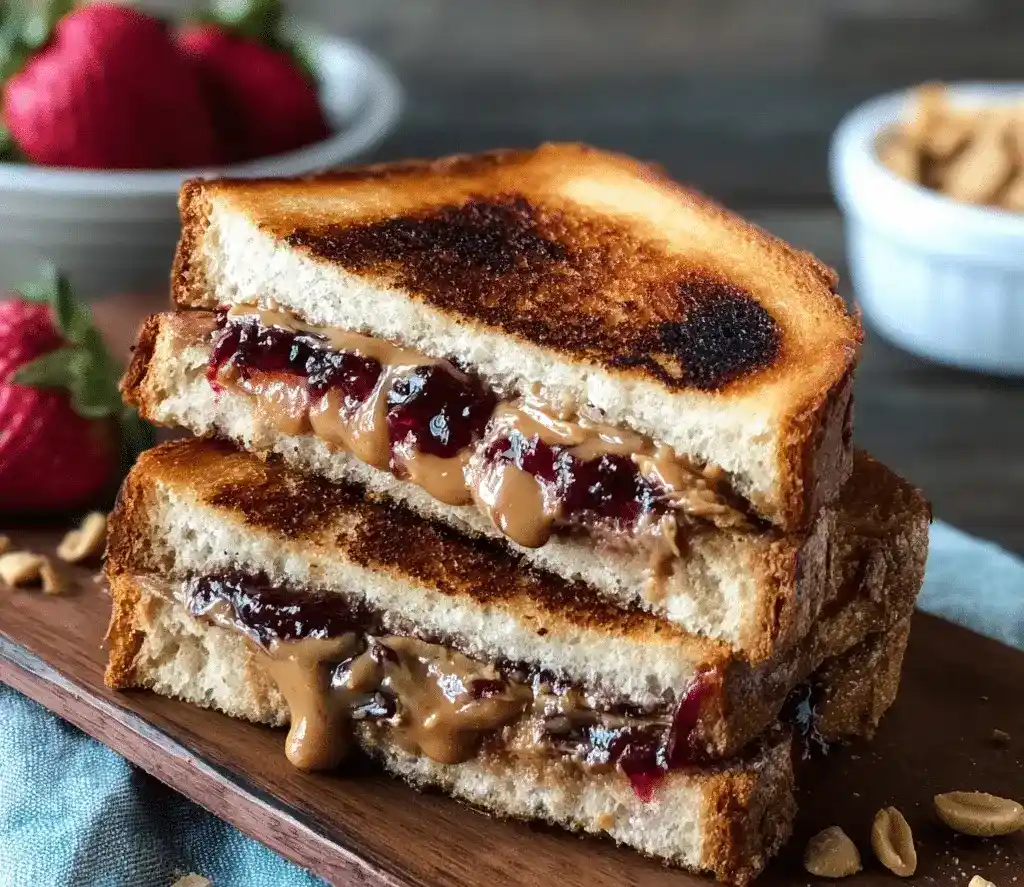
Regular PB&J is fine, but grilled PB&J? That’s a whole different experience. I stumbled onto this trick on a lazy Sunday morning, and now I genuinely can’t go back to the cold version. Have you ever upgraded something so simple that it felt like cheating?
Servings: 1 | Prep time: 5 minutes | Cook time: 5 minutes | Total time: 10 minutes
Why Grilling Your PB&J Changes Everything
A classic peanut butter and jelly sandwich is nostalgic and comforting, sure. But grilling it adds a crispy, buttery crust that turns the whole thing into something warmer and richer. The peanut butter goes creamy and almost melty, while the jelly turns gooey in the best possible way.
This isn’t some complicated culinary hack, either. It’s literally the same sandwich you already love, just treated to a few extra minutes in a pan. IMO, that small effort produces results way out of proportion to how little work it actually takes.
I make this now whenever I want something comforting but don’t feel like cooking a whole meal. It works for breakfast, lunch, or that weird 3 pm snack craving. Once you try the grilled version, plain PB&J starts feeling a little underwhelming.
What You’ll Need for This Grilled PB&J Sandwich
This recipe uses barely any ingredients, which is part of its charm. Here’s exactly what goes into one sandwich, with quantities included so you don’t overdo the butter.
- 2 slices good quality sourdough bread (or any bread you prefer)
- 2 tablespoons peanut butter
- 2 tablespoons of your favorite jam
- 2 tablespoons softened butter
That’s four ingredients total, and you probably already have every single one in your kitchen right now. FYI, sourdough gives this sandwich a nice tangy contrast against the sweetness, but honestly, any bread you like will work just fine.
How to Make a Grilled Peanut Butter & Jelly Sandwich, Step by Step
This process takes barely ten minutes total, but let’s slow down and walk through each stage. A little attention to detail here makes the difference between a good sandwich and a great one.
Spreading the Peanut Butter and Jam
Lay your two slices of bread flat on a cutting board or plate. Spread 2 tablespoons of peanut butter evenly across one slice, making sure it reaches all the way to the edges. An unevenly spread layer means some bites taste bland while others feel overloaded.
On the second slice, spread 2 tablespoons of your favorite jam using the same even technique. Take your time here since this is the flavor foundation of the entire sandwich. Have you ever bitten into a PB&J with barely any filling near the crust? This step prevents that disappointment.
Assembling Your Sandwich
Place the two slices together with the peanut butter and jam sides facing inward. Press gently so the two sides stick together without squeezing all the filling out the edges. This creates your basic sandwich structure before it heads to the pan.
Now grab your softened butter and spread it generously across the outside of both bread slices. Make sure the butter reaches all the way to the edges and covers the entire surface evenly. This outer butter layer is what creates that golden, crispy crust everyone loves about grilled sandwiches.
Heating Your Pan
Place a non-stick pan over medium heat and let it warm up for a minute or two before adding your sandwich. A properly heated pan matters more than people realize here. Too hot, and your bread burns before the inside warms through; too cool, and it never gets that satisfying crunch.
Test your pan’s readiness by flicking a small drop of water onto the surface. If it sizzles and evaporates quickly, your pan is ready to go. Patience during this step pays off in the final texture of your sandwich.
Grilling to Golden Perfection
Carefully lay your assembled sandwich into the center of your hot pan. Let it cook undisturbed for 2 to 3 minutes on the first side, watching for a deep golden brown color to develop across the bottom. Resist the urge to press down on it repeatedly; that just squeezes out the filling.
Once the first side looks properly golden, flip the sandwich carefully using a spatula. Cook the second side for another 2 to 3 minutes, until it matches that same crispy, golden finish. The whole cooking process takes about 5 minutes total from start to finish.
Serving Your Sandwich
Remove your sandwich from the pan and transfer it to a plate. Let it rest for about 30 seconds before cutting, since the filling stays extremely hot right off the heat. Slice it diagonally if you want that classic diner-style presentation.
Serve immediately while the peanut butter is still warm and the jam is gooey. This sandwich tastes best fresh off the pan, so don’t let it sit around too long. Trust me, the crispy exterior softens quickly once it cools.
Tips for the Best Grilled PB&J
I’ve made this sandwich more times than I can count at this point, so here are a few small details worth knowing. These tips separate a decent grilled sandwich from a genuinely great one.
- Spread butter all the way to the edges. Missed spots leave uneven browning and patchy crispiness.
- Use medium heat, not high. High heat burns the bread before the inside warms properly.
- Don’t press down while cooking. Pressing squeezes out the filling and makes a mess in your pan.
- Let it rest briefly before slicing. Cutting immediately can cause the hot filling to spill out.
Serving Suggestions Worth Trying
Pair your grilled PB&J with a glass of cold milk or a hot cup of coffee for a satisfying meal or snack. Fresh fruit, a small salad, or a handful of chips rounds this out into a complete lunch. Simple sides work best alongside a sandwich this rich and comforting.
Want to add extra flavor before grilling? Slip in some sliced bananas or strawberries between the peanut butter and jam layers. This small addition turns a simple sandwich into something that feels genuinely special.
Storing and Reheating Leftovers
Leftovers are rare with this sandwich, but if you have any, store them in an airtight container in the refrigerator for up to 2 days. Reheat in a pan over low heat to bring back that crispy texture. Avoid the microwave, since it turns the crust soft and chewy instead.
You can also freeze the sandwich before grilling it. Wrap it tightly in plastic wrap and place it in a freezer-safe bag. Thaw it in the fridge and grill it fresh whenever the craving hits.
Fun Variations on the Classic Grilled PB&J
Once you’ve mastered the basic version, this sandwich becomes an easy playground for creative combinations. Here are a few of my personal favorites to try next.
- Banana peanut butter and jelly: Add fresh banana slices for a classic, fruity twist.
- Nutella grilled sandwich: Swap Nutella in for jelly on one side for a chocolatey upgrade.
- Apple cinnamon version: Layer thin apple slices and a sprinkle of cinnamon before grilling.
- French toast style: Dip the assembled sandwich in beaten egg before cooking for a breakfast twist.
Frequently Asked Questions About Grilled PB&J Sandwiches
Can I use a different type of bread?
Yes, any bread works here, including whole wheat, rye, or gluten-free options. Sourdough just adds a nice tangy contrast against the sweet filling.
What if I don’t have a non-stick pan?
A regular skillet works fine as a substitute. Just watch the sandwich closely so it doesn’t stick or burn against the pan’s surface.
Can I make this sandwich in a toaster oven?
Yes, assemble your sandwich and toast it at 375°F for about 5 to 7 minutes. Watch for a golden, crispy finish before removing it.
What type of peanut butter works best?
Both creamy and crunchy peanut butter work well here. Pick whichever texture you personally prefer for your sandwich.
Can I use jelly instead of jam?
Absolutely. Jelly, preserves, or even marmalade all work great depending on your taste preference.
How do I prevent the sandwich from getting soggy?
Spread the butter evenly and cook on medium heat rather than high. This lets the bread crisp up properly without steaming into sogginess.
Wrapping This Up
Grilled peanut butter and jelly sandwich takes a beloved childhood classic and elevates it with almost zero extra effort. Four ingredients and ten minutes gets you a warm, crispy, gooey sandwich that beats the cold version every time. Isn’t it wild how one small change can completely transform something so familiar?
Grab your bread, peanut butter, and favorite jam, and give this grilled version a try today. Just don’t be surprised when regular PB&J starts feeling a little boring afterward



