Two ingredients. That’s it. If you’ve been scrolling for a dessert that tastes like summer but takes zero effort, this Pineapple Angel Food Cake recipe is about to become your new best friend.
I stumbled onto this recipe years ago at a family potluck, and honestly? I was skeptical. A cake with only two main ingredients sounded like a scam. Turns out, it’s pure magic 🙂
Servings: 12 slices Prep time: 10 minutes Bake time: 30-35 minutes Total time: About 45 minutes
Why This Cake Deserves a Spot in Your Recipe Box
Have you ever wanted a dessert that feels fancy but doesn’t demand hours in the kitchen? This cake nails that balance perfectly. It’s light, fluffy, and packed with real pineapple flavor in every single bite.
IMO, this is the ultimate “I need a dessert in an hour” recipe. No butter, no oil, no complicated frosting techniques required. Just a bowl, a spoon, and a little patience while it bakes.
Who Should Make This Cake
This recipe works great for beginner bakers who feel intimidated by traditional cakes. It’s also perfect for anyone watching their fat intake, since angel food cake is naturally low in fat. Got a potluck coming up? This is your answer.
What You’ll Need: Pineapple Angel Food Cake Ingredients
Let’s talk ingredients, because this list is refreshingly short. You genuinely don’t need a pantry full of specialty items to pull this off.
Here’s what goes into the batter:
- 1 box (16 ounces) angel food cake mix
- 1 can (20 ounces) crushed pineapple in juice, undrained
That’s the entire base. Seriously.
For garnish (totally optional but highly recommended):
- 1 cup Cool Whip, thawed
- 10 maraschino cherries
Why Undrained Pineapple Matters
Here’s a question I get asked constantly: can you drain the pineapple first? Please don’t. The juice is doing serious work in this recipe, replacing eggs, oil, and butter entirely.
That juice reacts with the cake mix to create moisture and lift. Skip it, and you’ll end up with a dry, sad cake. Trust the process here.
How to Make Pineapple Angel Food Cake: Step by Step
Ready to actually bake this thing? Let’s walk through it slowly, because even though it’s simple, a few small details make a big difference in the final texture.
Step 1: Prep Your Oven and Pan
Start by preheating your oven to 350°F (175°C). While that’s heating up, grab a 9×13-inch baking dish. Spray it generously with nonstick cooking spray, making sure to coat the corners and sides too, not just the bottom.
This step matters more than you’d think. Angel food cake can be sticky, and a poorly greased pan means half your cake stays behind. Nobody wants that heartbreak after all this effort.
Step 2: Combine the Cake Mix and Pineapple
Grab a large mixing bowl. Pour in your angel food cake mix, then add the entire can of crushed pineapple, juice and all. Don’t drain it, don’t rinse it, just dump it in.
Now here’s the fun part. Using a whisk or a sturdy spoon, stir everything together until fully combined. The mixture will start looking foamy and bubbly, almost like it’s alive. That’s completely normal, so don’t panic.
Step 3: Mix Until Smooth But Don’t Overdo It
Keep stirring for about a minute or two, just until you don’t see any dry streaks of cake mix left. Overmixing can deflate some of that airy texture, so be gentle once things look combined. Think folding, not aggressive whisking.
Have you ever overmixed a batter and wondered why your cake came out dense? This is exactly the moment where that mistake happens. Stir just enough, then stop.
Step 4: Pour and Bake
Pour your foamy batter into the prepared baking dish, spreading it evenly with a spatula. Slide it into your preheated oven and set a timer for 30 minutes. Every oven behaves a little differently, so keep an eye on it starting around the 28-minute mark.
You’ll know it’s done when the top turns a light golden brown and springs back gently when touched. A toothpick inserted into the center should come out clean, with no wet batter clinging to it.
Step 5: Cool It Completely
This step tests your patience, but don’t skip it. Let the cake cool completely in the pan, which usually takes about an hour at room temperature. Cutting into it too early causes it to collapse and turn gummy.
I know waiting is torture when something smells this good. But trust me, rushing this step ruins the light, spongy texture that makes this cake special in the first place.
Step 6: Add Your Toppings
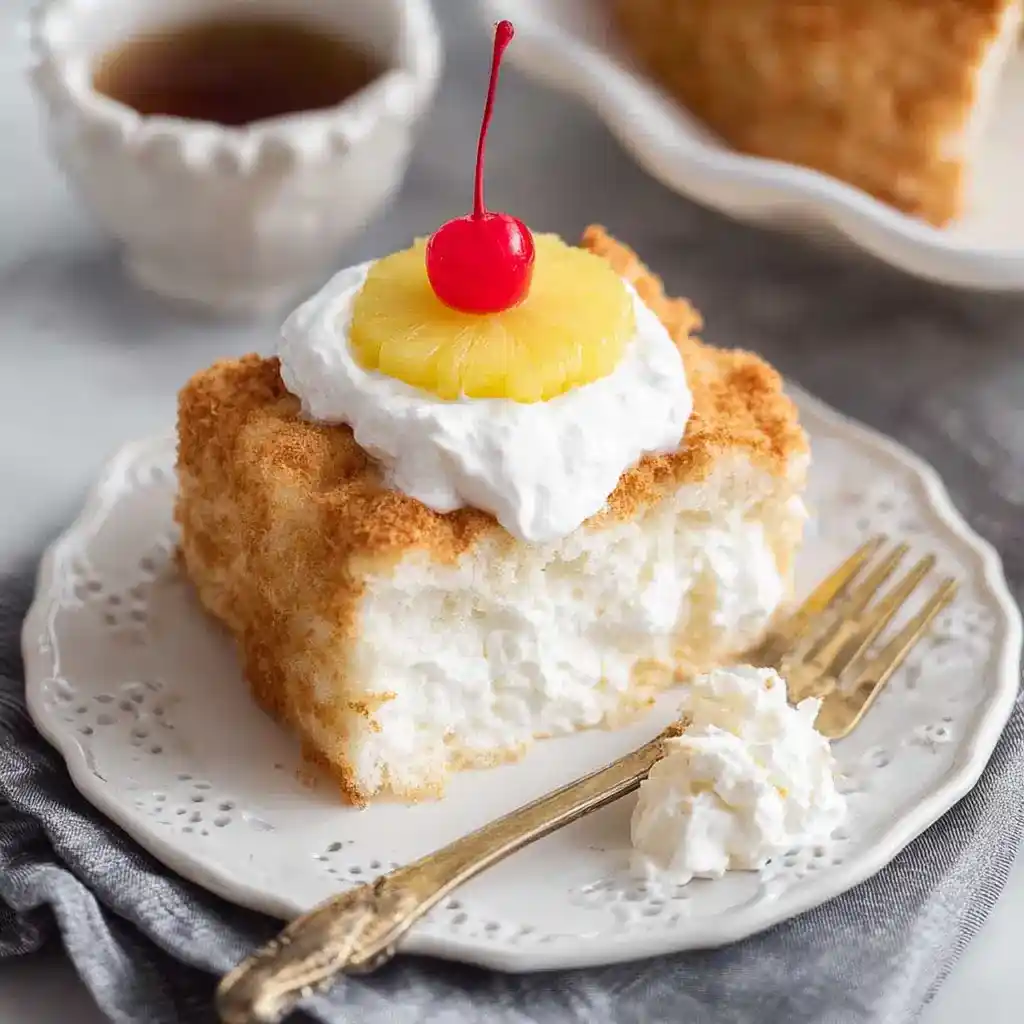
Once fully cooled, slice the cake into squares using a serrated knife for the cleanest cuts. Top each piece with a generous dollop of Cool Whip. Add a maraschino cherry on top if you’re feeling extra fancy.
FYI, you can absolutely skip the toppings if you’re keeping things simple. The cake tastes delicious completely plain, with just the natural pineapple sweetness shining through.
Tips for Nailing This Recipe Every Time
A few small tweaks can take this cake from good to genuinely impressive. Here’s what I’ve learned from making this recipe more times than I can count.
- Use room temperature pineapple for more even mixing
- Don’t substitute fresh pineapple since canned juice has consistent acidity levels needed for the reaction
- Store leftovers covered in the fridge for up to three days
- Add toppings right before serving to avoid a soggy cake
- Freeze plain cake (no toppings) for up to two months if wrapped tightly
Fun Variations to Try
Once you’ve mastered the basic recipe, why stop there? This cake is a fantastic base for experimenting with different flavors and textures.
- Cherry Pineapple Version: Stir in chopped maraschino cherries before baking
- Coconut Topped Cake: Sprinkle toasted coconut flakes over the whipped topping
- Citrus Twist: Add a bit of orange or lemon zest to brighten the flavor
- Berry Bliss: Top with fresh blueberries or strawberries for color
- Tropical Upgrade: Serve alongside fresh mango and kiwi slices
Frequently Asked Questions
Do I need to drain the pineapple before adding it? No, keep all the juice in there. It replaces the eggs and oil, giving the cake moisture and rise.
Can I use fresh pineapple instead of canned? It’s not recommended. Canned pineapple has a consistent juice-to-fruit ratio that fresh pineapple can’t reliably match.
Why does my batter look so foamy? That’s completely normal. The reaction between the cake mix and pineapple juice creates bubbles that help the cake rise.
Can I make this cake ahead of time? Absolutely. Bake it up to a day in advance and store it covered in the refrigerator until you’re ready to serve.
Is this dessert freezer-friendly? Yes, but only freeze it without toppings. Wrap it tightly and it’ll keep well for up to two months.
What size pan works best for this recipe? A standard 9×13-inch baking dish gives you the ideal thickness and bake time for this recipe.
Wrapping Things Up
This Pineapple Angel Food Cake recipe proves that simple desserts can absolutely steal the show. With just two main ingredients and minimal effort, you get a light, fluffy cake bursting with tropical flavor.
Have you tried a two-ingredient cake before, or is this your first rodeo? Either way, grab a can of pineapple and give it a shot this weekend. Your taste buds (and your potluck guests) will thank you.