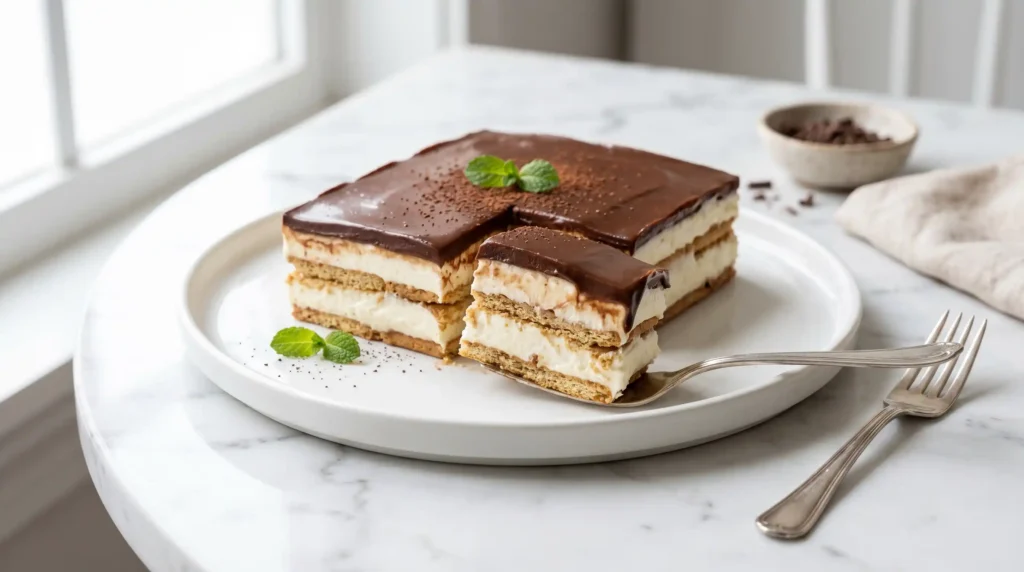
Some desserts require skill, patience, and half a day in the kitchen. This is not one of them. The No Bake Chocolate Eclair Cake gives you a showstopper dessert that tastes like something from a bakery — and you never once turn on the oven. No piping bags. No blind baking.
I first made this for a potluck dinner when I had exactly 25 minutes and zero motivation to bake. I layered everything in a pan, shoved it in the fridge, and forgot about it until the next morning. People asked me what bakery I bought it from. That’s the magic of this recipe.
Graham crackers, vanilla cream, and rich chocolate ganache or frosting – three components, one unforgettable dessert. Let me walk you through every detail so yours comes out perfect on the very first try.
What Is a No Bake Chocolate Eclair Cake?
A Chocolate Eclair Cake takes all the flavors of a classic French eclair — choux pastry, vanilla cream filling, and chocolate glaze — and reimagines them in a completely approachable, no-bake layered form. Graham crackers replace the choux pastry. Pudding-based cream replaces the pastry cream. Chocolate frosting or ganache tops everything.
As the cake chills overnight in the refrigerator, the graham crackers absorb moisture from the cream layers and soften into something remarkably similar to a light, tender cake. That transformation is the key to why this dessert works so brilliantly and surprises people every single time.
Have you ever had a dessert that genuinely gets better the longer it sits? That’s exactly what happens here. Day two tastes even better than day one – and day one already tastes exceptional.
No Bake Chocolate Eclair Cake Ingredients
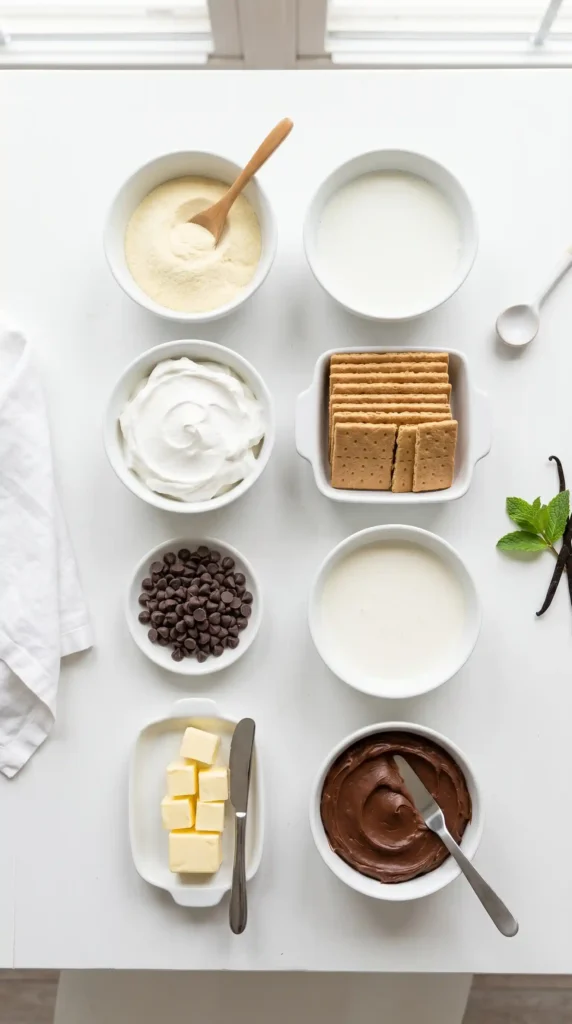
The ingredient list is short, simple, and entirely available at any grocery store. You do not need specialty items or hard-to-find products. Everything on this list is probably already familiar to you.
For the Cream Filling:
- 2 boxes (3.4 oz each) instant vanilla pudding mix
- 3 cups cold whole milk
- 1 container (8 oz) frozen whipped topping, fully thawed (Cool Whip or equivalent)
Now For the Layers:
- 2 sleeves graham crackers (about 27-30 full cracker sheets)
For the Chocolate Topping — Option A (Frosting):
- 1 container (16 oz) store-bought chocolate frosting
Now For the Chocolate Topping — Option B (Ganache):
- 1 cup semi-sweet chocolate chips
- 1/2 cup heavy cream
- 2 tablespoons unsalted butter
- 1 tablespoon light corn syrup (for shine — optional)
FYI — both topping options are delicious, but they produce different results. The canned frosting version is faster and gives a thicker, sweeter topping. The ganache version is richer, glossier, and feels more sophisticated. If you are making this to impress guests, the ganache is worth the extra five minutes.
How to Make No Bake Chocolate Eclair Cake — Step by Step
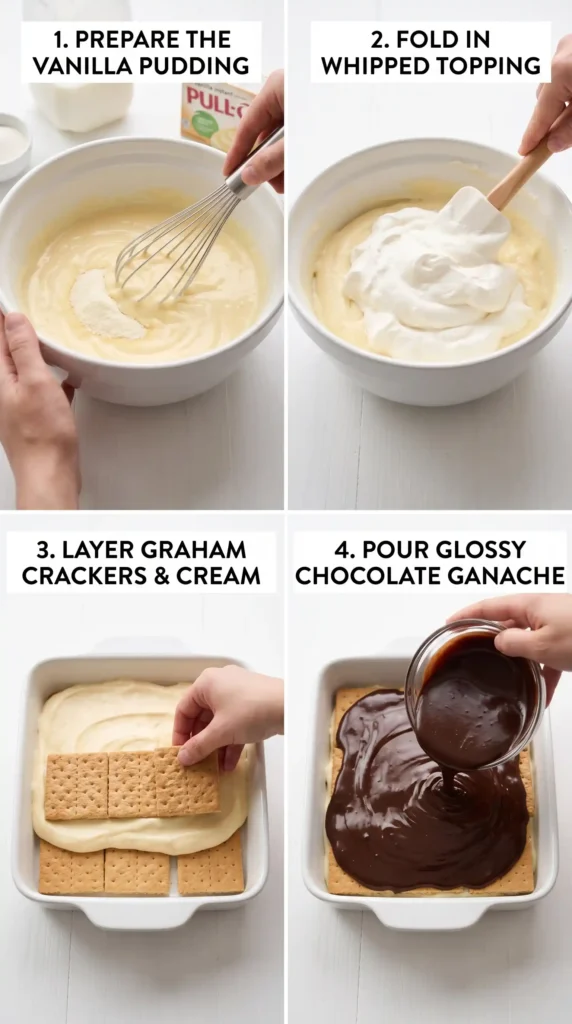
The process is genuinely simple, but the details in each step matter for the final texture and flavor. Follow these steps exactly and you will get a result that makes people genuinely believe you spent hours in the kitchen.
Stage 1 : Making the Vanilla Cream Filling
Open both boxes of instant vanilla pudding mix and pour them into a large mixing bowl. Add the 3 cups of cold whole milk. Using a hand whisk or electric hand mixer on low speed, whisk the pudding and milk together for about 2 minutes until the mixture thickens noticeably.
Stop mixing the moment the pudding reaches a thick, smooth consistency. Do not overmix — overworking instant pudding can make it grainy and cause it to break down slightly. It should look glossy and hold its shape loosely when you lift the whisk.
Let the pudding mixture sit undisturbed for 3-4 minutes. During this time it will set slightly more firm, which makes folding in the whipped topping easier without deflating it. The pudding should jiggle gently but not slosh when you move the bowl.
Add the thawed whipped topping to the pudding mixture. Use a silicone spatula and fold it in gently with a slow, sweeping motion — cut down through the center and fold from the bottom up. Stop folding the moment you no longer see white streaks. Over-folding knocks out the air and makes the cream dense instead of light.
The finished cream filling should look fluffy, smooth, and pale yellow. It will be thick enough to spread easily without running off the crackers. If it feels too loose, refrigerate it for 10 minutes before assembling. A properly set filling is key to getting clean, defined layers in the finished cake.
Stage 2 : Assembling the Layers
Choose a 9×13 inch rectangular baking dish or pan for this recipe. This size gives you the right depth and surface area for three proper layers of cream with cracker layers in between. Do not use a round pan — the rectangular shape matches the graham cracker dimensions and makes assembly much cleaner.
Place a single layer of whole graham cracker sheets across the bottom of the pan. Arrange them in a neat, tight grid to cover the entire base with as few gaps as possible. Break crackers as needed to fill the edges and corners. The crackers do not need to be perfect — they will soften and meld together as the cake chills.
Spoon approximately half of the vanilla cream filling over the first layer of graham crackers. Use an offset spatula or the back of a large spoon to spread the cream evenly all the way to the edges of the pan. Aim for a layer about 1 to 1.5 centimeters thick. Even spreading ensures consistent texture in every bite.
Place a second layer of graham cracker sheets directly on top of the cream filling. Press them down very gently — just enough to level them, not enough to push them into the cream. The crackers should sit flat and form a uniform surface for the next cream layer.
Spoon the remaining cream filling over the second cracker layer and spread it evenly across the entire surface, just as you did with the first layer. Make sure the cream reaches every edge and corner. Use the spatula to smooth the top as flat as possible — this creates a clean, level base for the chocolate topping.
Add a third and final layer of graham cracker sheets on top of the second cream layer. Press gently to level. This top cracker layer will eventually sit directly beneath the chocolate topping, and it creates the firm, structured top of the cake once everything sets overnight.
Stage 3 :Adding the Chocolate Topping
If using store-bought frosting:
Remove the lid and foil seal from the frosting container. Microwave the frosting on medium power for 20-25 seconds. This warms and softens it to a pourable consistency that spreads much more smoothly than cold frosting straight from the jar. Stir after microwaving.
Pour the warmed frosting over the top layer of graham crackers and use a spatula to spread it evenly across the entire surface. Work quickly — warmed frosting sets back up as it cools. Get it spread evenly in one continuous motion for the smoothest result.
If making homemade ganache:
Pour the 1/2 cup of heavy cream into a small saucepan and place over medium heat. Heat until small bubbles begin appearing around the edges of the cream — you want it hot but not boiling. Remove the pan from the heat the moment it reaches this point.
Add the 1 cup of chocolate chips and the 2 tablespoons of butter to the hot cream. Do not stir immediately. Let the chocolate and butter sit in the hot cream for 90 seconds. This resting time allows the heat to melt the chocolate thoroughly before you disturb it.
After 90 seconds, whisk the mixture gently from the center outward in slow, circular motions. The chocolate and butter will incorporate into the cream smoothly, producing a glossy, dark ganache. If you notice any unmelted chips, return the pan to very low heat for 30 seconds and whisk again.
Stir in the optional tablespoon of corn syrup if using — it adds a beautiful shine to the finished ganache. Let the ganache cool for 3-4 minutes at room temperature until it thickens slightly to a pourable but not runny consistency, then pour it slowly and evenly over the top cracker layer.
Stage 4 : Chilling and Setting
Once the chocolate topping covers the entire surface of the cake, cover the pan loosely with plastic wrap. Do not press the wrap down onto the chocolate surface — you will disturb the finish. Drape it gently so it does not touch the topping.
Refrigerate the assembled cake for a minimum of 8 hours. Overnight chilling (10-12 hours) is strongly recommended and produces significantly better results. During this time, the graham crackers absorb moisture from the cream filling and transform in texture — softening completely into something very close to a tender cake layer.
After the full chilling time, remove the pan from the refrigerator and unwrap it. The surface of the chocolate topping should be completely firm and set. Run a sharp knife under hot water and wipe it dry, then use it to cut the cake into neat squares or rectangles for serving.
Tips for the Best No Bake Chocolate Eclair Cake
- [object Object]Warm milk slows pudding from setting properly and can make the filling runny.
- [object Object]Frozen or partially thawed Cool Whip does not fold smoothly and leaves lumps in the cream.
- [object Object]Eight hours is the minimum. Cutting into the cake too early gives you crunchy crackers and a cream filling that slides apart.
- [object Object]Cold canned frosting tears the cracker layer beneath it. Twenty seconds in the microwave solves this completely.
- [object Object]It gives you far more control than a regular spoon and produces cleaner, more even layers.
- [object Object]Dip the blade in hot water, wipe it dry, and slice. Repeat between cuts for clean, photogenic squares.
Fun Variations Worth Trying
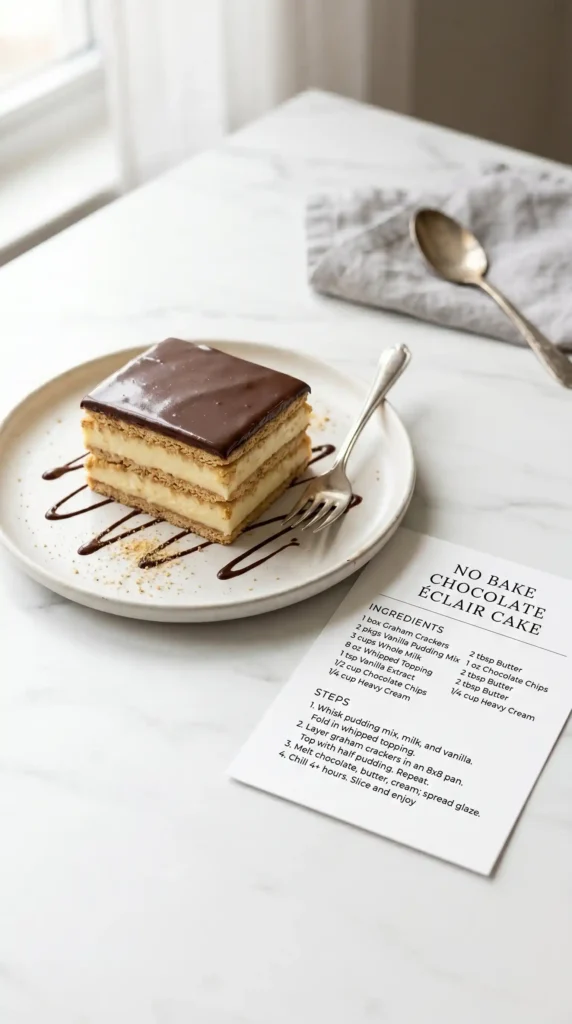
Once you master the base recipe, here are some variations that change the whole personality of the cake.
- [object Object]Replace one box of vanilla pudding with chocolate pudding for a double-chocolate cream layer that chocolate lovers will obsess over.
- [object Object]Use vanilla cream, fresh sliced strawberries between layers, and white chocolate drizzle on top instead of dark chocolate.
- [object Object]Mix 2 tablespoons of creamy peanut butter into the ganache before pouring. The chocolate-peanut butter combination is extraordinary.
- [object Object]Add a layer of thin banana slices on top of the first cream layer. Banana, vanilla cream, and chocolate topping is a genuinely outstanding combination.
How to Store No Bake Chocolate Eclair Cake
Refrigerator: Cover the pan tightly with plastic wrap or store individual pieces in an airtight container. The cake keeps well for up to 5 days in the fridge. The texture actually continues improving through days 2 and 3.
Freezer: You can freeze individual slices tightly wrapped in plastic wrap for up to 1 month. Thaw overnight in the refrigerator before serving. The texture changes slightly — the crackers become a little denser — but the flavor remains excellent.
Transporting tip: Keep the cake in its pan for transport and slice it only at the destination. A fully assembled, uncut cake travels better and arrives looking cleaner than pre-cut pieces.
Frequently Asked Questions About No Bake Chocolate Eclair Cake
Can I use homemade whipped cream instead of Cool Whip?
Yes, but be aware that freshly whipped cream does not hold its structure as long as stabilized whipped topping. If you use fresh whipped cream, add 1 tablespoon of powdered sugar and 1/2 teaspoon of vanilla while whipping to help stabilize it. Serve the cake within 24-48 hours for best results since fresh cream softens faster.
Why are my graham crackers still crunchy after chilling?
This almost always means the cake did not chill long enough, or the cream layers were spread too thinly. The crackers need sustained contact with moisture-rich cream over at least 8 hours to soften fully. Make sure your cream layers are generous and even, and give the cake a full overnight in the fridge.
Can I make this recipe the same day I want to serve it?
Technically yes, with an 8-hour minimum chill — but overnight is always better. If you absolutely need to make and serve it the same day, assemble it early in the morning and refrigerate it all day. Do not attempt to serve it after only 2-3 hours of chilling. The crackers will still be hard and the layers will not hold together cleanly.
Does this recipe work with sugar-free pudding?
Yes. Sugar-free instant vanilla pudding works perfectly in this recipe. The texture and behavior during mixing are essentially identical. If you also want to reduce the topping sugar, use a dark chocolate ganache made with 70% cocoa chocolate — it is naturally less sweet and adds a more intense chocolate flavor.
Can I double this recipe for a crowd?
Absolutely. Simply double all ingredients and use two 9×13 pans instead of one, or use a full sheet pan. The assembly process is the same. IMO, making two pans is always the better call for parties — this dessert disappears fast and you will regret not having a backup.
Final Thoughts on No Bake Chocolate Eclair Cake
No Bake Chocolate Eclair Cake is one of those rare recipes that genuinely over-delivers on every expectation. The effort is minimal, the ingredients are simple, and the result is something people genuinely rave about. It earns its place at every potluck, birthday, and family dinner.
The keys are simple: make a thick, airy cream filling, build even layers, choose a quality chocolate topping, and give it a full overnight chill. Do those four things and you get a perfect cake every single time — no oven required. Make it this weekend. Let it chill overnight. Bring it to whatever gathering you have coming up and watch people absolutely lose their minds over something that took you 20 minutes to assemble. That is exactly the kind of recipe worth having in your back pocket.
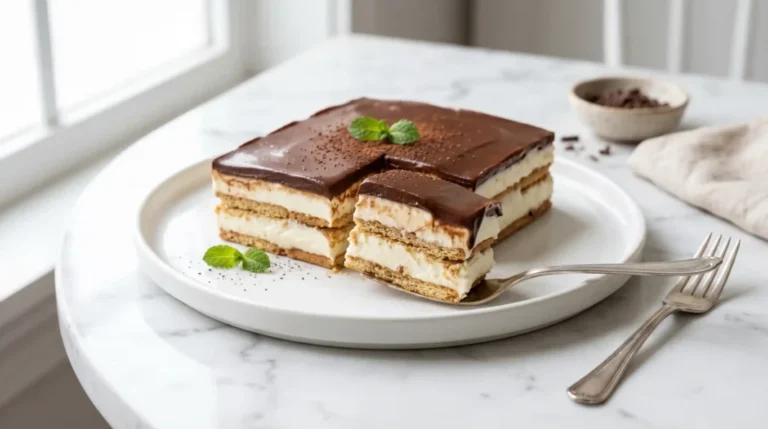
No Bake Chocolate Eclair Cake
Ingredients
Method
- Pour the instant vanilla pudding mix into a large mixing bowl and add the cold whole milk.
- Whisk the pudding and milk together for about 2 minutes until thickened.
- Let the pudding sit for 3-4 minutes to firm up.
- Fold in the thawed whipped topping gently until no white streaks remain.
- Choose a 9x13 inch rectangular baking dish.
- Place a layer of graham cracker sheets across the bottom of the pan.
- Spoon half of the cream filling over the first layer of crackers and spread evenly.
- Add a second layer of graham crackers and then the remaining cream filling.
- Top with a final layer of graham crackers.
- For frosting: Microwave the frosting for 20-25 seconds, then spread over the top layer of graham crackers.
- For ganache: Heat heavy cream until bubbles form, then add chocolate chips and butter without stirring. After 90 seconds, whisk until smooth, stir in corn syrup if using, then pour over the top layer.
- Cover the pan with plastic wrap and refrigerate for at least 8 hours, preferably overnight.
- Once chilled, slice with a hot knife for clean edges.