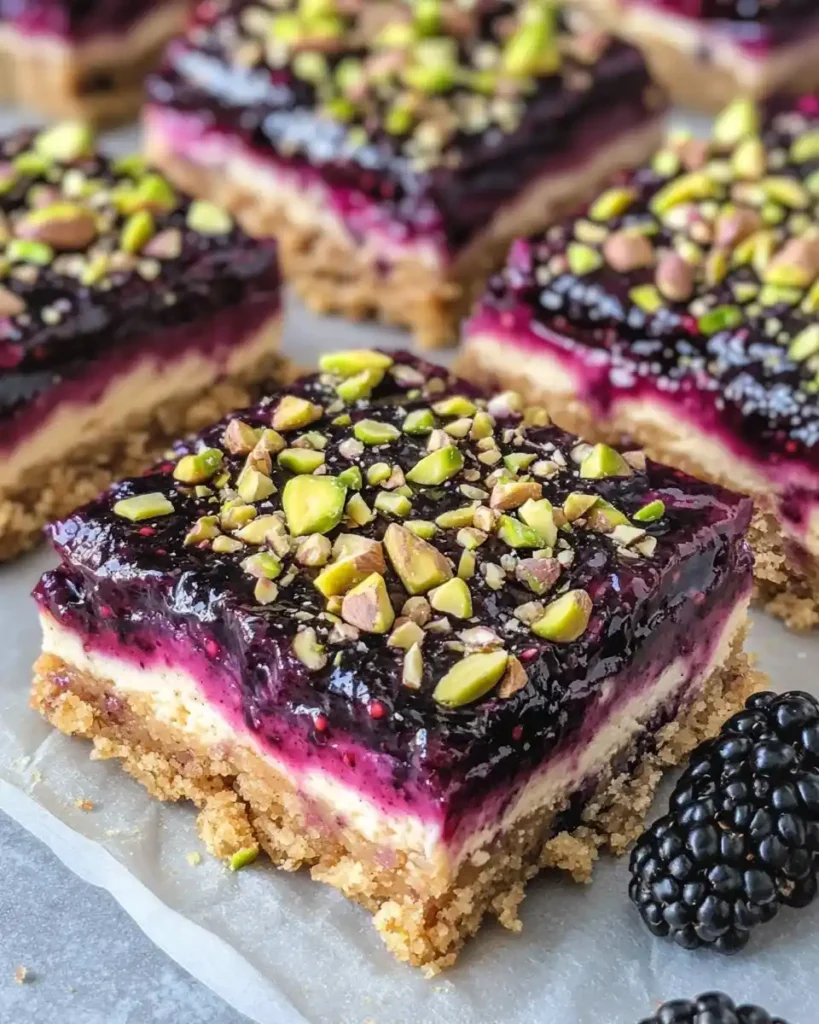
Pistachio and blackberry together? Trust me, it works better than you’d think. This Blackberry Pistachio Dream Bars recipe pairs a nutty, buttery base with a jammy, tangy top, and I’m honestly a little obsessed with it.
I first made these for a dinner party where I wanted something that looked fancy but didn’t require a pastry degree. IMO, that’s the sweet spot for home baking—impressive results without the stress.
Servings: 24 bars Prep time: 35 minutes Chill time: 1 hour Bake time: 30 minutes Total time: About 2 hours 5 minutes
Let’s get into how these come together.
Why Blackberry and Pistachio Just Work
Have you ever paired two ingredients and wondered why nobody thought of it sooner? That’s exactly what happens here. Pistachio brings a rich, buttery nuttiness, while blackberry adds bright tartness that keeps things balanced.
The contrast is the whole appeal. Without the blackberry layer, this dessert would taste flat and one-note. Without the pistachio base, the fruit would have nothing to lean on. Together, they create something genuinely memorable.
Color matters too, not going to lie. The deep purple of the blackberries against the soft green pistachio filling looks stunning on a dessert table. People eat with their eyes first, and these bars deliver on that front.
What You’ll Need: Ingredients List
Here’s everything required to pull this off. Nothing exotic, just a few slightly special items worth seeking out.
For the base:
- Graham crackers or digestive biscuits, crushed – 2 cups
- Unsalted butter, melted – 6 tablespoons
- Granulated sugar – 2 tablespoons
- Salt – a pinch
For the pistachio filling:
- Raw, unsalted shelled pistachios – 140g (about 1 cup)
- White chocolate, chopped – 100g
- Unsalted butter – 25g
- Whole milk – 180ml
- Icing sugar – 1 tablespoon
Now For the blackberry layer:
- Fresh blackberries – 2 cups
- Granulated sugar – 3 tablespoons
- Lemon juice – 1 tablespoon
- Cornstarch – 1 teaspoon
Buy the freshest pistachios you can find. Stale nuts throw off the whole flavor, and FYI, that’s not a hill worth dying on when good ones aren’t much pricier.
Tools That Make This Easier
You don’t need a professional kitchen for this recipe. A handful of basics gets you most of the way there.
- A food processor for grinding pistachios
- A 9-inch square baking pan
- Parchment paper
- A small saucepan
- A fine mesh strainer
- A cooling rack
If you don’t own a food processor, a sturdy blender works in a pinch. It just takes a bit more patience and scraping down the sides.
How to Make Blackberry Pistachio Dream Bars, Step by Step
This recipe has three main components, and each one deserves a little patience. Let’s break it down piece by piece.
Step 1: Build the Base
Preheat your oven to 350°F (175°C) and line your baking pan with parchment paper, leaving some overhang on the sides. Crush your graham crackers into fine crumbs using a food processor or a rolling pin and a sealed bag.
Mix the crumbs with melted butter, sugar, and a pinch of salt until everything looks like wet sand. Press the mixture firmly and evenly into the bottom of your pan using the back of a spoon.
Bake the base for 10 minutes, then set it aside to cool while you work on the filling. This short bake keeps the crust from turning soggy once the layers go on top.
Step 2: Make the Pistachio Filling
Toast your pistachios in a dry pan over medium heat for about 3 minutes, stirring often. This step wakes up their natural oils and deepens the flavor significantly. Let them cool slightly before moving on.
Grind the toasted pistachios in a food processor until they form a fine, slightly oily paste. This takes a couple of minutes, so don’t panic if it looks chunky at first—keep going.
In a small saucepan over low heat, melt the white chocolate and butter together, stirring constantly so nothing scorches. Once smooth, whisk in the whole milk and icing sugar. Fold this mixture into your ground pistachios until fully combined and glossy.
Pour the pistachio filling over your cooled base, spreading it into an even layer with an offset spatula. Chill this in the fridge for at least 30 minutes so it firms up before you add the fruit layer.
Step 3: Prepare the Blackberry Layer
Add your blackberries, sugar, and lemon juice to a saucepan over medium heat. Cook gently, stirring occasionally, until the berries break down and release their juices, about 8 minutes.
Mix the cornstarch with a tablespoon of cold water to form a slurry, then stir it into the blackberry mixture. Keep cooking for another two minutes, until the mixture thickens into a jammy consistency.
Remove the pan from heat and let the blackberry mixture cool for about 10 minutes. Pouring it on too hot can melt your chilled pistachio layer, and nobody wants a muddy mess instead of clean layers.
Step 4: Assemble and Chill
Pour the cooled blackberry mixture over the pistachio layer, spreading it gently so the layers stay distinct. Use a light hand here—pressing too hard blends the layers together instead of keeping them separate.
Cover the pan and refrigerate for at least an hour, though overnight works even better. This chilling time lets everything set properly, so your bars slice cleanly instead of falling apart.
Step 5: Slice and Serve
Once fully chilled, lift the whole thing out of the pan using the parchment overhang. Use a sharp knife dipped in hot water and wiped dry between cuts for the cleanest slices. Cut into 24 even squares and serve straight from the fridge.
Tips for Nailing the Texture
A few small details separate good bars from great ones. Keep these in mind as you work.
- Toast the pistachios first—it makes a noticeable difference in flavor.
- Keep every layer chilled before adding the next one on top.
- Don’t skip the cornstarch in the blackberry layer; it prevents a runny mess.
- Use a hot, clean knife for each slice to keep the layers looking sharp.
Choosing the Best Blackberries
Not all blackberries are created equal, and picking good ones matters more than you’d expect. Here’s what to look for.
| Blackberry Quality | What to Look For | Why It Matters |
|---|---|---|
| Ripeness | Deep, uniform purple-black color | Sweeter flavor, less tartness |
| Firmness | Plump but not mushy | Holds shape while cooking |
| Freshness | No mold or wet spots | Better texture in the finished layer |
If you can only find slightly underripe berries, that’s fine too. Just add an extra teaspoon of sugar to balance out the tartness.
Storing and Freezing These Bars
These bars keep well, which makes them great for prepping ahead of a party or gathering.
- Refrigerator: Store in an airtight container for up to 5 days.
- Freezer: Wrap individual bars tightly and freeze for up to 2 months.
- Thawing: Move frozen bars to the fridge overnight before serving.
Avoid leaving these out at room temperature for long stretches. The pistachio filling softens quickly, and warm blackberry jam isn’t exactly appetizing.
Serving Ideas Worth Trying
These bars work well on their own, but a few extras take them further.
- A dollop of whipped cream on top
- A few extra fresh blackberries for garnish
- A light dusting of powdered sugar right before serving
Bring these to a potluck and watch people ask for the recipe before they’ve even finished the first bite. It happens every single time.
Frequently Asked Questions
Can I use frozen blackberries instead of fresh? Yes, though you may need to cook the mixture a bit longer to evaporate the extra liquid frozen berries release.
Why did my layers turn out messy instead of distinct? This usually happens when the blackberry mixture goes on too hot, melting the chilled pistachio layer underneath.
Can I make these bars ahead of time? Definitely. They actually taste better after chilling overnight, making them ideal for parties.
What can I substitute for pistachios? Almonds or hazelnuts work as substitutes, though the flavor and color will shift noticeably.
Are these bars gluten-free? Swap the graham crackers for a certified gluten-free version and the rest of the recipe stays naturally gluten-free.
How do I get clean, sharp slices? Use a sharp knife dipped in hot water and dried between each cut, and always slice while the bars are cold.
Final Thoughts
This Blackberry Pistachio Dream Bars recipe proves that unexpected flavor pairings can turn into absolute favorites. The nutty base, creamy pistachio layer, and tangy blackberry top all work together without competing for attention.
Give this one a shot next time you want to bring something different to the table. Once people taste that first bite, you’ll be fielding recipe requests for weeks.
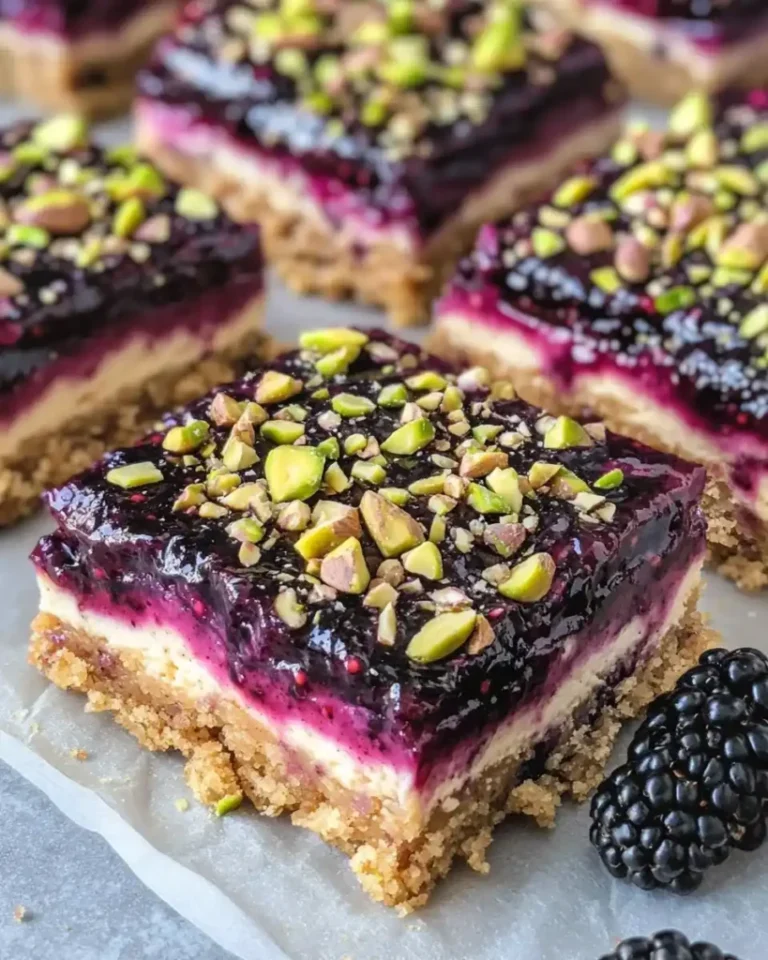
Blackberry Pistachio Dream Bars
Ingredients
Method
- Preheat your oven to 350°F (175°C) and line your baking pan with parchment paper, leaving some overhang on the sides.
- Crush your graham crackers into fine crumbs using a food processor or a rolling pin and a sealed bag.
- Mix the crumbs with melted butter, sugar, and a pinch of salt until everything looks like wet sand.
- Press the mixture firmly and evenly into the bottom of your pan using the back of a spoon.
- Bake the base for 10 minutes, then set it aside to cool.
- Toast your pistachios in a dry pan over medium heat for about 3 minutes.
- Grind the toasted pistachios in a food processor until they form a fine, slightly oily paste.
- In a small saucepan over low heat, melt the white chocolate and butter together, stirring constantly.
- Once smooth, whisk in the whole milk and icing sugar.
- Fold this mixture into your ground pistachios until fully combined and glossy.
- Pour the pistachio filling over your cooled base, spreading it into an even layer and chill for at least 30 minutes.
- Add your blackberries, sugar, and lemon juice to a saucepan over medium heat.
- Cook gently, stirring occasionally, until the berries break down and release their juices, about 8 minutes.
- Mix the cornstarch with a tablespoon of cold water to form a slurry, then stir it into the blackberry mixture.
- Keep cooking for another two minutes, until the mixture thickens into a jammy consistency.
- Remove the pan from heat and let the blackberry mixture cool for about 10 minutes.
- Pour the cooled blackberry mixture over the pistachio layer, spreading it gently.
- Cover the pan and refrigerate for at least an hour, though overnight works even better.
- Once fully chilled, lift the whole thing out of the pan using the parchment overhang.
- Use a sharp knife dipped in hot water and wiped dry between cuts for the cleanest slices.
- Cut into 24 even squares and serve straight from the fridge.




