Some recipes look impressive, taste impressive, and somehow require almost no effort. Mini Baked Chicken Tacos sit firmly in that rare category. You fill small tortillas with seasoned chicken and cheese, fold them over, pack them into a tray so they hold their shape, and bake until golden and crispy. That is genuinely the whole process.
I made these the first time for a game day gathering when I wanted something hand-held that would not require me to stand at a stove for an hour. I pulled two trays of perfectly crispy mini tacos from the oven and they were gone in under ten minutes. Twenty-four tacos. Ten minutes. The math is humbling.
Have you ever needed a recipe that works for a party of twelve and a family dinner of four with equal ease? This is that recipe. Let us build it properly from scratch.
Why Baking These Tacos Makes More Sense Than Frying
Traditional fried tacos are delicious — nobody is disputing that. But frying twenty-four mini tacos requires constant attention, significant oil, and produces a greasy result that becomes soggy fast. The baked version solves all three problems simultaneously. The oven crisps every taco evenly without needing to stand over a pan, uses no frying oil, and produces shells that stay crispy for far longer after baking.
Packing the filled tacos tightly together in the baking tray before they go in the oven is the technique that makes this work. The packed arrangement prevents them from flopping open during baking, which means the shell crisps while the filling stays sealed and melts together inside. When you pull the tray out, you get a full rack of perfectly upright, golden, structurally sound mini tacos.
IMO, this is also the most practical taco format for feeding a crowd. You bake two trays simultaneously, pull them out at the same time, and serve twenty-four tacos at once rather than making them individually. That is the kind of efficiency that makes hosting actually enjoyable rather than stressful. 🙂
What You Need to Make Them
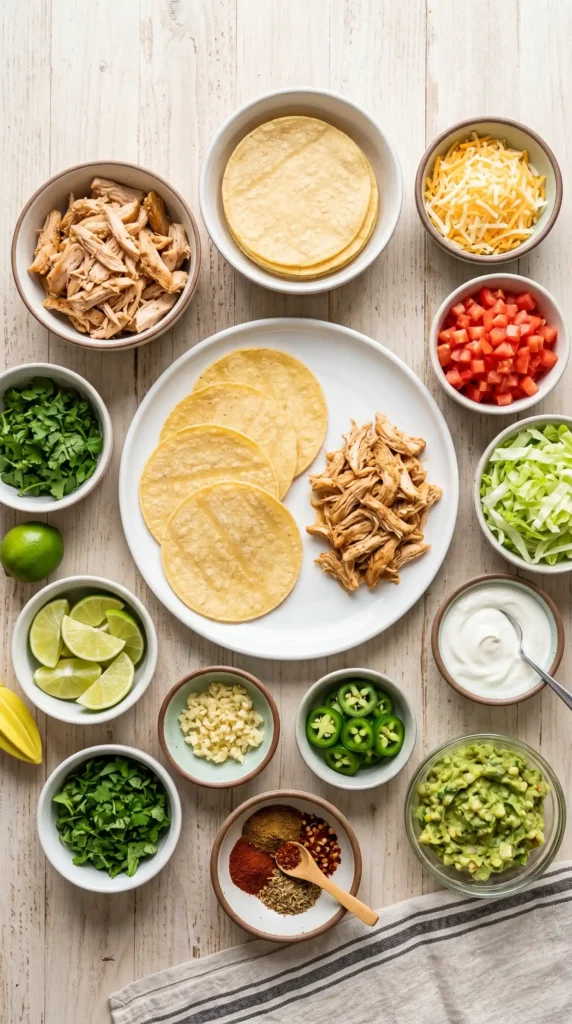
Two main components: the seasoned chicken filling and the taco build. The chicken comes together in under ten minutes. Everything else is assembly. Use small tortillas specifically — standard size tortillas are too large for mini tacos and the proportions will be off. Street taco size tortillas, about 10–12cm (4–5 inches) in diameter, are perfect.
For the Seasoned Chicken Filling
- 2 cups (about 280g) shredded cooked chicken — rotisserie chicken works brilliantly and saves significant time
- 2 tablespoons olive oil
- 3 garlic cloves, finely minced
- 1 teaspoon ground cumin
- 1 teaspoon chilli powder
- 1/2 teaspoon smoked paprika
- 1/2 teaspoon garlic powder
- 1/2 teaspoon onion powder
- 1/4 teaspoon cayenne pepper (optional, adjust to heat preference)
- 1/2 teaspoon salt
- 1/4 teaspoon black pepper
- 2 tablespoons fresh lime juice
- 3 tablespoons chicken broth or water (to keep the filling moist)
For the Taco Build
- 24 small flour or corn tortillas (10–12cm / 4–5 inch diameter)
- 2 cups (225g) shredded Mexican cheese blend, or a mix of Monterey Jack and cheddar
- 2 tablespoons neutral oil or cooking spray (for brushing the taco shells)
Now For the Toppings
- 1 cup shredded iceberg or romaine lettuce
- 1 cup (150g) cherry tomatoes, halved or diced
- 1/2 cup (115g) sour cream
- 1/2 cup (120g) guacamole or 2 ripe avocados, sliced
- 1/2 cup (120ml) salsa or pico de gallo
- 1 jalapeño, thinly sliced (optional)
- Fresh cilantro leaves for garnish
- Lime wedges for serving
- Hot sauce of your choice at the table
Rotisserie Chicken Is Your Best Friend HereA store-bought rotisserie chicken gives you about 3 cups of shredded meat — more than enough for this recipe with some left over. It is already cooked, already seasoned, and pulls apart in minutes. FYI, rotisserie chicken dramatically cuts prep time and produces a more moist, flavourful filling than cooking and shredding a plain chicken breast from scratch, which tends to produce drier results unless you poach it specifically.
How to Make Mini Baked Chicken Tacos Step by Step

Three stages: season and warm the chicken filling, assemble the tacos in the baking tray, then bake until golden. The assembly stage requires a bit of patience on the first tray, but once you understand the packing method it goes quickly. Have all your toppings prepped and ready in bowls before the tacos come out of the oven — these are best served immediately while the shells are still crispy.
Step 1: Preheat and Prepare Your Trays
Preheat your oven to 200°C (400°F) and allow it to reach full temperature before the trays go in. Take two standard 9×13-inch (23x33cm) baking dishes or rimmed baking trays and lightly grease the bases with a thin coat of oil or cooking spray. The greased base prevents the taco bottoms from sticking and helps the lower shells crisp evenly from direct contact with the tray surface.
Prepare all your toppings now and arrange them in individual bowls on the table or counter. Once the tacos come out of the oven, they serve best immediately — having the toppings ready means you go from oven to table in under two minutes without scrambling to chop lettuce with one hand while holding a hot tray with the other.
Step 2: Season and Warm the Chicken Filling
Heat 2 tablespoons of olive oil in a medium skillet over medium heat. Stir in the minced garlic and cook for about 30 seconds until fragrant. Then add the shredded chicken, tossing it well to coat in the garlic-infused oil. Next, sprinkle in the cumin, chili powder, smoked paprika, garlic powder, onion powder, cayenne, salt, and pepper, and mix until everything is evenly combined. Stir everything together thoroughly until the spices coat every strand of chicken evenly.
Add the fresh lime juice and the chicken broth or water to the pan and stir again. The liquid prevents the chicken from drying out during baking and helps the spices adhere evenly. Cook for 2–3 minutes over medium heat, stirring occasionally, until everything smells deeply aromatic and the liquid has mostly absorbed into the chicken. The filling should look moist and well-seasoned but not wet or soggy.
Taste the filling at this stage. It should be boldly seasoned — remember that the cheese and the shells are both fairly neutral, so the chicken needs to carry the full flavour load of each taco. If it tastes mild, add a pinch more cumin and chilli powder. A filling that tastes slightly over-seasoned in isolation will taste perfectly balanced inside the finished taco. Remove from heat and set aside while you warm the tortillas.
Step 3: Warm the Tortillas
Cold, unwarmed tortillas crack and split when you fold them. This is an extremely frustrating discovery to make mid-assembly, especially after you have already filled twenty tortillas. Warm them first — always. Stack all 24 tortillas between two damp paper towels and microwave for 45–60 seconds. The steam from the damp towels makes them pliable, flexible, and crack-resistant for the folding step.
Alternatively, warm them individually for 20 seconds per side in a dry skillet over medium heat. The skillet method gives slightly better texture and mild toasting on the surface, but takes longer. For 24 tortillas, the microwave method is faster and works equally well for achieving the pliability you need. Keep the warmed tortillas covered with the damp paper towels while you assemble to prevent them from cooling and stiffening again before you fold them.
Step 4: Assemble the Tacos
Lightly brush or spray one side of each tortilla with a thin coat of oil or cooking spray. This oil contact on the outer shell surface is what creates the golden, crispy exterior during baking — un-oiled shells bake up pale and slightly leathery rather than crispy and golden. Work through all 24 tortillas, brushing only one side (the outside that will face up in the tray).
Flip each tortilla so the oiled side faces down. In the centre of each tortilla, place a heaped tablespoon of the seasoned chicken filling. Keep it to the centre rather than spreading it to the edges — you need the edges free for folding. Sprinkle about a tablespoon and a half of shredded cheese over the chicken filling on each tortilla. The cheese goes on top of the chicken rather than underneath it, which means it melts directly against the shell and acts as a seal that holds the chicken in place during baking.
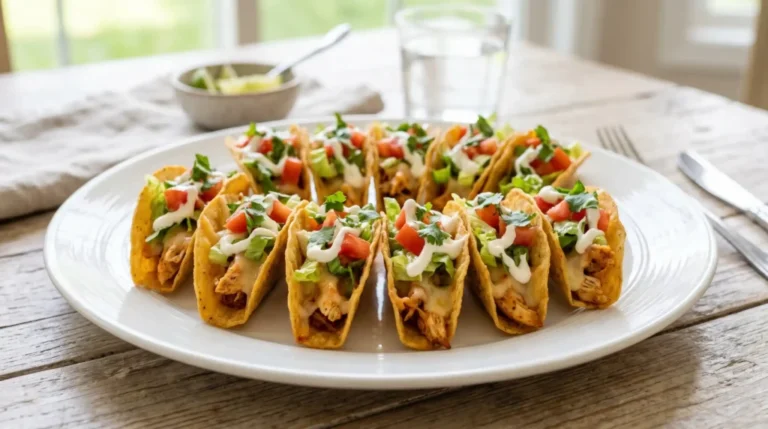
Fold each filled tortilla in half, pressing gently to close it. The oiled side should now face outward on both faces of the folded taco. Stand each folded taco upright in the prepared baking tray, seam-side down, packing them tightly together side by side in neat rows. Packing them tightly is critical — the tacos support each other’s structure during baking. Loosely spaced tacos flop open in the oven and the filling spills out. Tight packing keeps everything in place while the shells crisp up around the filling.
Step 5: Bake the Tacos
Once all 24 tacos are packed into the trays, slide them into the fully preheated oven on the centre rack. Bake for 15–20 minutes until the taco shells look deeply golden and feel crispy when tapped lightly with a finger. Check them at the 15-minute mark — oven temperatures vary and some ovens run hot enough to colour the shells in 15 minutes while others take the full 20.
Rotate the trays halfway through if your oven has hot spots — the front tends to brown faster than the back in most home ovens. The Mini Baked Chicken Tacos are done when the tops are golden, the sides feel firm and crispy, and the cheese inside has melted completely and is visible at the open edge of each taco. Remove from the oven and serve immediately.
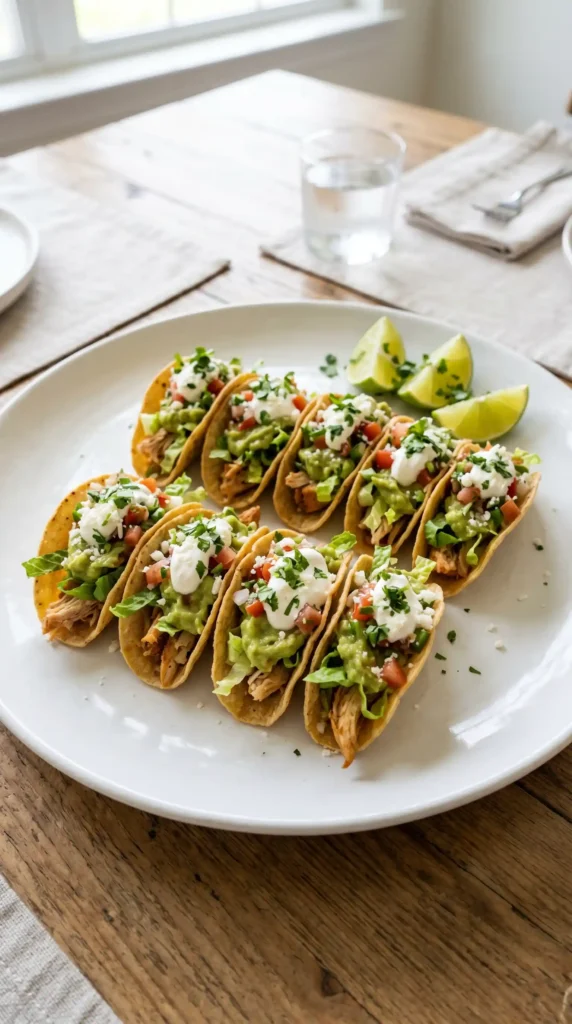
Step 6: Top and Serve
Transfer the crispy tacos to a serving board or leave them in the tray for a casual family-style presentation. Top each taco with your preferred combination of shredded lettuce, diced tomatoes, a small spoonful of sour cream, a slice or spoonful of guacamole, pico de gallo, and fresh cilantro. A thin jalapeño slice and a squeeze of fresh lime finish each one. Serve with hot sauce on the side for anyone who wants extra heat at the table.
Keeping Tacos Crispy After BakingThese taste best within 15 minutes of coming out of the oven. The shells stay crispy for about 20–30 minutes at room temperature before moisture from the filling begins to soften them. If you need to hold them warm for a gathering, keep the baked un-topped tacos on a wire rack in a low oven at 95°C (200°F) for up to 20 minutes. Never cover them with foil — the trapped steam destroys the crunch instantly. :/
Variations Worth Making
Spicy Buffalo Chicken Mini Tacos
Replace the taco seasoning with buffalo sauce. Toss the shredded chicken with 3 tablespoons of your favourite buffalo hot sauce and 1 tablespoon of melted butter, plus a pinch of garlic powder. Use blue cheese crumbles or mozzarella instead of the Mexican cheese blend. Top the finished tacos with a drizzle of ranch dressing and thinly sliced celery. This version disappears even faster than the original at any sports gathering.
BBQ Chicken Mini Tacos
Toss the shredded chicken with 3 tablespoons of your favourite smoky barbecue sauce instead of the taco seasoning mix. Add 1/4 teaspoon of smoked paprika and a pinch of garlic powder. Use smoked cheddar or a sharp cheddar for the cheese. Top the finished tacos with a small spoonful of coleslaw, a drizzle of extra barbecue sauce, and thinly sliced red onion. The result is a sweet, smoky, tangy mini taco that feels completely different from the classic version.
Black Bean and Corn Vegetarian Version
Replace the chicken with a filling of one drained and rinsed can of black beans combined with 1 cup of frozen corn (thawed), 1/2 finely diced red onion, all the taco spices from the original recipe, and a squeeze of lime. Season generously since the beans are mild. Use the same cheese blend and bake exactly as directed. The vegetarian version holds together beautifully in the shell and converts most meat-eaters without any complaint.
Storage and Make-Ahead Tips
The seasoned chicken filling keeps in an airtight container in the fridge for up to 4 days, which makes this an excellent meal prep recipe. Make a double batch of filling on Sunday and use it for tacos across the week, building each batch fresh to keep the shells crispy. Assembled but unbaked tacos can also be prepared up to 4 hours in advance — cover the tray with cling film and refrigerate, then bake fresh when needed, adding 3–4 extra minutes to account for the colder starting temperature.
Fully baked and topped tacos do not store well since the shells soften quickly against the moist toppings. Store baked un-topped tacos separately from the toppings for up to 2 days in the fridge. Reheat in an oven at 190°C (375°F) for 6–8 minutes on a wire rack to restore crispness before adding fresh toppings and serving.
Frequently Asked Questions
Can I use corn tortillas instead of flour tortillas?
Yes, though corn tortillas require more careful warming before folding. They are less flexible than flour tortillas and crack more easily when cold. Wrap them in damp paper towels and microwave for 60–75 seconds, or warm them in a dry skillet for 20 seconds per side — they should feel very pliable before you fold them. Corn tortillas produce a more authentic taco flavour and a slightly more brittle, crispier shell after baking.
Can I make Mini Baked Chicken Tacos in an air fryer?
Yes, with a small adjustment to the packing method. Stand the assembled tacos upright in the air fryer basket, packing them together as you would in a baking tray. Air fry at 190°C (375°F) for 8–10 minutes until the shells are golden and crispy. Work in batches — an average air fryer basket holds about 8–10 mini tacos at a time. The air fryer produces a slightly crispier exterior than the oven version and cooks them faster.
How do I keep the tacos from opening during baking?
Tight packing in the baking tray is the primary method. When the tacos stand upright and press against each other, the neighbouring tacos provide structural support that keeps each one closed during baking. Additionally, placing the cheese directly on top of the chicken (rather than under it) helps — as the cheese melts, it bonds the chicken to the shell and acts as a natural seal. Do not overfill each taco, which creates pressure that forces the shell open regardless of how tightly they are packed.
What cheese works best for baked mini tacos?
A Mexican cheese blend — typically a mix of Monterey Jack, cheddar, asadero, and queso quesadilla — melts the most evenly and delivers the best flavour for this application. Monterey Jack alone melts beautifully and has a mild, creamy flavour that lets the spiced chicken shine. Sharp cheddar adds more bite. Avoid pre-sliced processed cheese, which does not melt smoothly, and fresh mozzarella, which releases too much moisture and makes the filling wet.
Can I prepare the chicken filling ahead of time?
Yes, and this is one of the best arguments for this recipe as a meal prep option. Make the full seasoned chicken filling up to 4 days in advance and store it in an airtight container in the fridge. Warm it briefly in a skillet or microwave before assembling the tacos — using cold filling makes the cheese less likely to melt properly during baking. The spices actually deepen and improve in flavour over the first 24–48 hours as they permeate the chicken.
Final Thoughts
These Mini Baked Chicken Tacos deliver on every promise the name makes: small, crispy, packed with seasoned chicken and melted cheese, and genuinely easy to make for any size crowd. Thirty-five minutes produces twenty-four tacos that disappear reliably faster than any other food on the table — that track record speaks for itself.
They work for game day, for weeknight dinners, for kids’ parties, for casual gatherings, and for those Tuesday evenings when you want something that feels special without requiring actual effort. Few recipes cover that many occasions this reliably.
Preheat that oven, warm those tortillas, and pack that tray as tightly as it will go. Dinner — or the most popular thing at your party — is 35 minutes away.
Mini Baked Chicken Tacos
Ingredients
Method
- Preheat your oven to 200°C (400°F) and grease two standard 9×13-inch (23x33cm) baking dishes with a thin coat of oil or cooking spray.
- Prepare all toppings in individual bowls to serve immediately after baking.
- Heat 2 tablespoons of olive oil in a medium skillet over medium heat.
- Add minced garlic and sauté for 30 seconds until fragrant.
- Stir in shredded chicken and coat well.
- Add cumin, chili powder, smoked paprika, garlic powder, onion powder, cayenne, salt, and pepper, mixing until evenly combined.
- Add lime juice and chicken broth or water, then cook for 2-3 minutes until aromatic.
- Taste the filling and adjust seasoning if mild.
- Wrap all tortillas in damp paper towels and microwave for 45-60 seconds, or warm individually in a skillet until pliable.
- Lightly brush one side of each tortilla with oil.
- Flip tortillas so oiled side is down. Place a heaped tablespoon of the chicken filling in the center and top with cheese.
- Fold each tortilla in half, and stand them upright in the prepared baking tray, packing tightly.
- Bake for 15-20 minutes until golden and crispy. Check at 15 minutes.
- Rotate trays halfway through if necessary.
- Transfer tacos to a serving board or keep in tray, and top with preferred toppings.