Servings: 6 cups | Prep Time: 15 minutes | Freeze Time: 2 hours | Total Time: ~2 hours 15 minutes | No-Bake
The Snack That Actually Keeps You Full
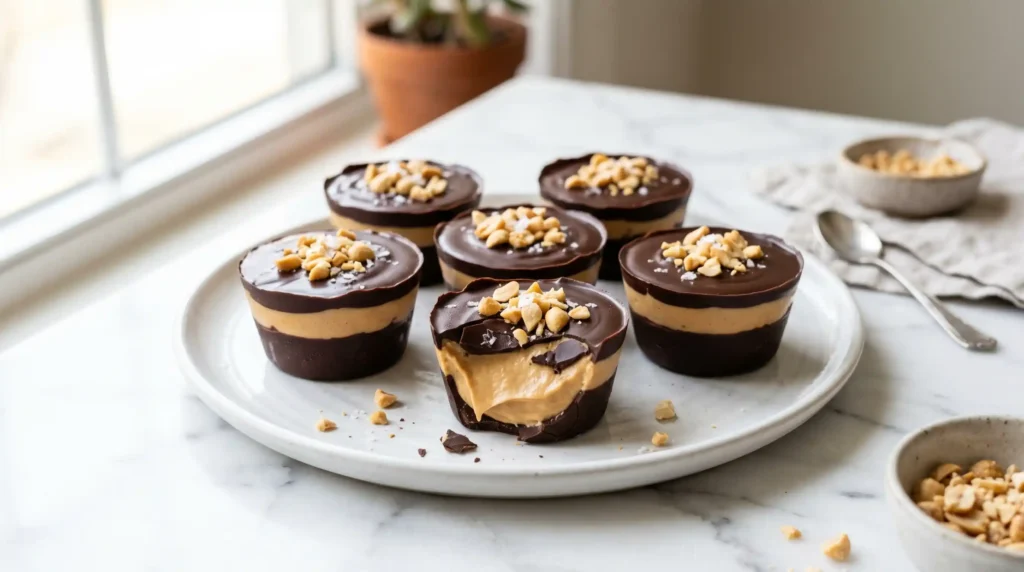
Peanut Butter Greek Yogurt Cups-Most healthy snacks taste like cardboard with a side of disappointment. Peanut Butter Greek Yogurt Cups are the exception. They taste indulgent, they take 15 minutes to prep, and they pack serious protein into every single bite. No sad snacking here.
I started making these when I needed something sweet after workouts that would not undo everything I had just done. One batch lasts me the whole week, and I genuinely look forward to them every single day. That is not something I say about most health food.
Whether you want a post-gym snack, a quick breakfast, or a dessert that feels like a treat, these cups cover all of it. Let me walk you through exactly how to make them.
Why Peanut Butter Greek Yogurt Cups Actually Work
Greek yogurt brings thick creaminess, serious protein, and a natural tang that balances the richness of peanut butter perfectly. Together, they create a filling that tastes like a frozen peanut butter cheesecake — but without any of the effort or the guilt.
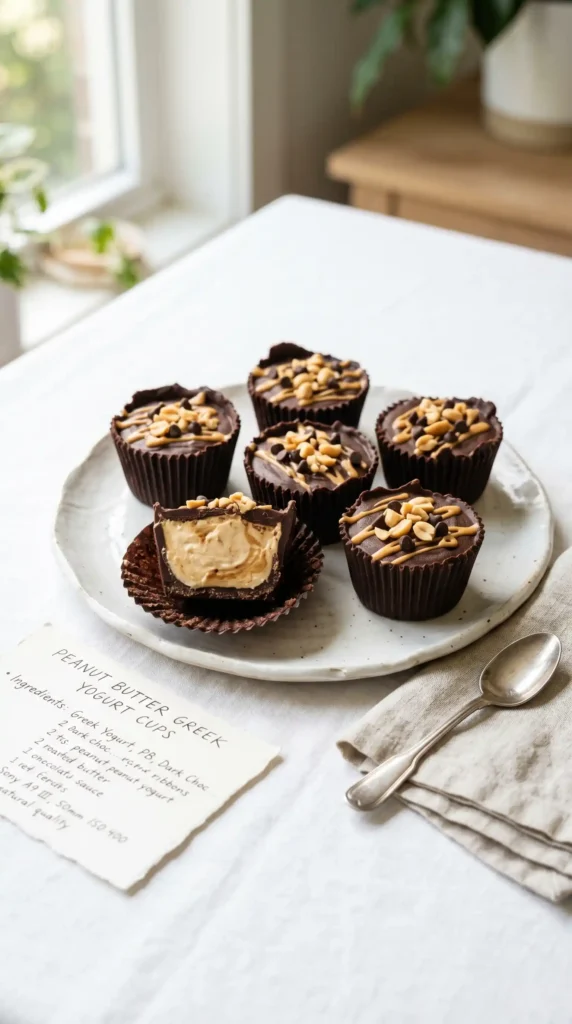
The chocolate shell on top adds a satisfying snap and a little richness that makes these cups feel like a real dessert. That contrast between cold, creamy filling and firm chocolate coating is genuinely hard to put down once you taste it.
IMO, the real genius of this recipe is how versatile it is. You can change the toppings, swap the nut butter, add mix-ins to the filling, or adjust the sweetness to match your taste. It is one base recipe with endless variations.
What Makes These Cups a Smart Choice
Each cup delivers roughly 12 to 15 grams of protein depending on your yogurt brand. Greek yogurt already contains more protein than regular yogurt, and peanut butter adds healthy fats and additional protein on top of that.
These cups keep you satisfied for hours, which is the whole point of a good snack. If you have ever eaten something and felt hungry again 20 minutes later, you understand exactly why protein content matters in a snack.
Have you ever tried to find a packaged snack that hits the protein goal, tastes good, and does not cost a fortune? These homemade Peanut Butter Greek Yogurt Cups solve all three of those problems at once.
Ingredients for Peanut Butter Greek Yogurt Cups

For the Yogurt Filling
- 2 cups (480g) plain full-fat Greek yogurt
- 1/2 cup (130g) natural creamy peanut butter (no sugar added)
- 3 tablespoons (60g) honey or pure maple syrup
- 1 teaspoon pure vanilla extract
- Pinch of salt
For the Chocolate Shell
- 1 cup (170g) dark or semi-sweet chocolate chips
- 1 tablespoon coconut oil
Optional Toppings and Mix-Ins
- Flaky sea salt for topping
- Crushed peanuts or granola for crunch
- 2 tablespoons mini chocolate chips stirred into the filling
- A thin layer of strawberry or raspberry jam on the base
- A drizzle of extra peanut butter on top of the chocolate shell
How to Make Peanut Butter Greek Yogurt Cups Step by Step
Step 1: Prepare Your Muffin Tin
Line a standard 6-cup muffin tin with silicone muffin liners or paper cupcake liners. Silicone liners work best here because the frozen cups pop out cleanly without tearing. Paper liners work too, but peel them carefully once the cups are frozen solid.
Set the lined tin aside on a flat, level surface in your freezer for 5 minutes to chill while you prepare the filling. Starting with a cold tin helps the filling set faster and more evenly when you add it.
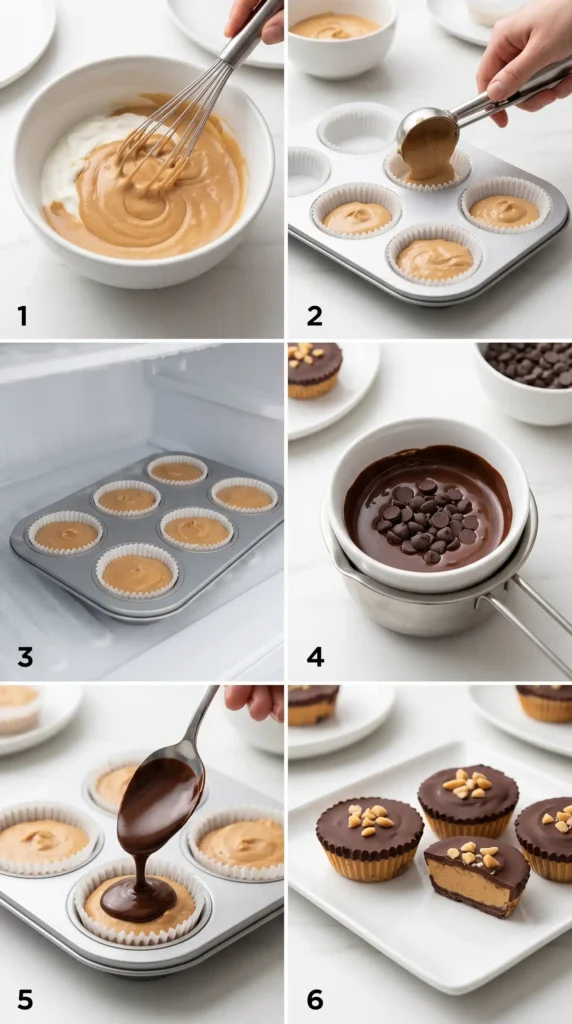
Step 2: Make the Peanut Butter Yogurt Filling
In a medium mixing bowl, add the Greek yogurt and peanut butter. Before you start mixing, make sure your peanut butter is at room temperature and well-stirred. Natural peanut butter separates in the jar, so stir it thoroughly from the bottom up before measuring.
Use a spatula or a whisk to combine the yogurt and peanut butter. Start slowly because Greek yogurt is thick and the peanut butter needs a moment to loosen and incorporate. Mix in circular motions, pressing any peanut butter clumps against the side of the bowl to break them up.
Once the peanut butter is fully mixed in and no streaks remain, add the honey or maple syrup, vanilla extract, and pinch of salt. Stir everything together until the filling looks uniform and creamy.
Taste the filling at this point and adjust as needed. Want more sweetness? Add another teaspoon of honey. Want more peanut butter flavor? Add an extra tablespoon. This is your recipe, and the filling should taste exactly the way you like it before it goes into the freezer.
If you are adding optional mix-ins like mini chocolate chips or crushed peanuts, fold them in now with a gentle hand so they distribute evenly throughout the filling without deflating the yogurt’s natural thickness.
Step 3: Fill the Cups
Take your chilled muffin tin out of the freezer. Spoon the peanut butter yogurt filling into each liner, dividing it as evenly as possible between all 6 cups. Each cup should be filled to about three-quarters full to leave room for the chocolate shell on top.
Use the back of a spoon or a small offset spatula to smooth the top of each filled cup. A flat, level surface on the filling makes the chocolate shell look clean and professional once it sets. A rough surface means the chocolate pools unevenly.
Tap the muffin tin gently on the counter a few times to settle the filling and remove any air pockets. Place the filled tin in the freezer for 45 minutes. You want the filling to firm up enough that it does not mix with the chocolate layer you add next.
Step 4: Make the Chocolate Shell
While the filling freezes, prepare the chocolate shell. Combine the chocolate chips and coconut oil in a microwave-safe bowl. The coconut oil is essential here — it thins the chocolate slightly and helps it set into a firm, snappy shell instead of a thick, chewy layer.
Microwave in 30-second intervals, stirring well between each interval. Never microwave chocolate for more than 30 seconds at a time because it scorches quickly and scorched chocolate cannot be saved. Two to three intervals of 30 seconds usually melt everything perfectly.
Stir the melted chocolate and coconut oil together until completely smooth and glossy. Let it cool for about 3 minutes so it is not piping hot when it hits the frozen filling. Pouring very hot chocolate onto cold filling can cause cracking or uneven setting.
Step 5: Top with Chocolate and Freeze
Take the partially frozen cups out of the freezer. Spoon the melted chocolate over the top of each cup, covering the filling completely. Use about 1 to 2 tablespoons of chocolate per cup. Tilt the tin slightly to help the chocolate flow to the edges.
Work quickly because the chocolate starts to set the moment it touches the cold filling. If you want to add toppings like flaky sea salt or crushed peanuts, sprinkle them on immediately before the chocolate solidifies. Once set, toppings will not stick.
Return the tin to the freezer for at least 1 hour, or until the chocolate shell is completely firm and the filling is frozen solid. FYI, leaving them overnight gives you the cleanest results and the best texture when you bite into them.
Step 6: Unmold and Serve
Once fully frozen, remove the cups from the muffin tin. If you used silicone liners, simply peel them off. If you used paper liners, let the cups sit at room temperature for 2 minutes before peeling to prevent tearing.
Serve the cups straight from the freezer for a firm, ice cream-like texture. If you prefer a softer, creamier bite, let them sit at room temperature for 5 to 8 minutes before eating. Both versions taste great — it really comes down to personal preference.
Easy Variations to Try
- Almond butter version: Swap peanut butter for natural almond butter and add a few drops of almond extract.
- Berry swirl: Stir 2 tablespoons of mashed fresh raspberries through the filling before freezing.
- Banana peanut butter: Mash half a ripe banana into the filling for natural sweetness and extra creaminess.
- Cookie crunch: Press a thin layer of crushed graham crackers into the bottom of each liner before adding filling.
- White chocolate shell: Use white chocolate chips instead of dark chocolate for a sweeter, milder topping.
Tips for the Best Peanut Butter Greek Yogurt Cups
- Use full-fat Greek yogurt for the creamiest, richest texture. Low-fat versions produce an icier result.
- Natural peanut butter with no added sugar or oil gives the cleanest flavor and best nutrition profile.
- Do not skip the partial freeze before adding chocolate. It prevents the layers from mixing together.
- Use good quality chocolate for the shell. Better chocolate means a better snap and a cleaner flavor.
- Store cups in a zip-lock bag after unmolding to prevent freezer burn if keeping longer than a week.
How to Store Peanut Butter Greek Yogurt Cups
Store finished cups in an airtight container or zip-lock bag in the freezer for up to 3 weeks. Keep them in a single layer or separate layers with parchment paper to prevent them from sticking together.
Do not store these in the refrigerator. The filling becomes too soft and the chocolate shell loses its snap. The freezer is the only place these cups work as intended. Take one out whenever you need a quick, satisfying snack.
Frequently Asked Questions
Can I use flavored Greek yogurt in Peanut Butter Greek Yogurt Cups?
Yes, but be aware that flavored yogurt usually contains added sugar, which makes the cups sweeter. Vanilla Greek yogurt works particularly well with peanut butter. If you use flavored yogurt, reduce or skip the honey in the filling so the cups do not become overly sweet.
Why did my chocolate shell crack when I bit into the cup?
A very thin chocolate layer cracks easily when frozen solid. Use enough chocolate to form a layer about 2mm thick. Also, letting the cup sit at room temperature for a few minutes before eating softens the shell slightly and gives you a cleaner bite without cracking.
Can I make these cups without coconut oil in the chocolate shell?
You can, but the shell will be thicker and harder to bite through. Coconut oil thins the chocolate and helps it set with a smoother texture. If you do not have coconut oil, try a teaspoon of neutral vegetable oil as a substitute for a similar result.
How much protein does each Peanut Butter Greek Yogurt Cup contain?
Each cup contains approximately 12 to 15 grams of protein depending on the Greek yogurt brand you use and how much peanut butter you add. Choosing a high-protein yogurt brand like Fage or Chobani maximizes the protein content of each cup.
Can I make these cups dairy-free?
Yes. Use a full-fat coconut milk yogurt or a thick dairy-free Greek-style yogurt as a substitute. Make sure it has a thick, strained consistency similar to Greek yogurt or the filling will be too runny. The flavor profile changes slightly but the recipe still works well.
Final Thoughts
Peanut Butter Greek Yogurt Cups are one of those recipes that genuinely earns a permanent spot in your weekly meal prep rotation. They taste like a treat, they fuel your body properly, and they take less than 20 minutes of actual hands-on work.
The combination of creamy Greek yogurt, rich peanut butter, and that satisfying chocolate snap is hard to improve on. Once you make your first batch and realize how easy the whole process is, you will wonder why you ever bought packaged protein snacks at all.
Grab your muffin tin and a jar of peanut butter and get started. Your future self, standing at the freezer looking for a snack at 3pm, will be very grateful

Peanut Butter Greek Yogurt Cups
Ingredients
Method
- Line a standard 6-cup muffin tin with silicone muffin liners or paper cupcake liners. Chill in the freezer for 5 minutes.
- In a medium mixing bowl, combine Greek yogurt and peanut butter until smooth, then add honey or maple syrup, vanilla extract, and salt. Adjust sweetness as desired.
- If using optional mix-ins, fold them into the mixture gently.
- Spoon the mixture into the lined muffin tin, filling each cup three-quarters full. Smooth the top and gently tap the tin to remove air pockets.
- Freeze for 45 minutes until the filling is firm.
- Combine chocolate chips and coconut oil in a microwave-safe bowl. Microwave in 30-second intervals, stirring until smooth.
- Let cool slightly, then pour over the frozen yogurt filling in each cup, making sure to cover completely.
- Sprinkle any desired toppings before the chocolate solidifies.
- Return to the freezer for at least 1 hour, or overnight for best results.
- Once fully frozen, unmold the cups from the tin. Serve straight from the freezer or let sit at room temperature for a few minutes for a softer texture.


