Prep Time: 20 minutes | Cook Time: 30 minutes | Chill Time: 4 hours (minimum) | Servings: 12-15 slices
Yes, the Name Is Absolutely Accurate
I know what you’re thinking. “Better Than Anything Cake? That’s a bold claim.” And I completely agree — it is bold. But here’s the thing: this cake earns it every single time.
The first time someone made this for a potluck I attended, I had two slices before I even sat down properly. It’s that kind of cake. The kind you keep thinking about on the drive home.
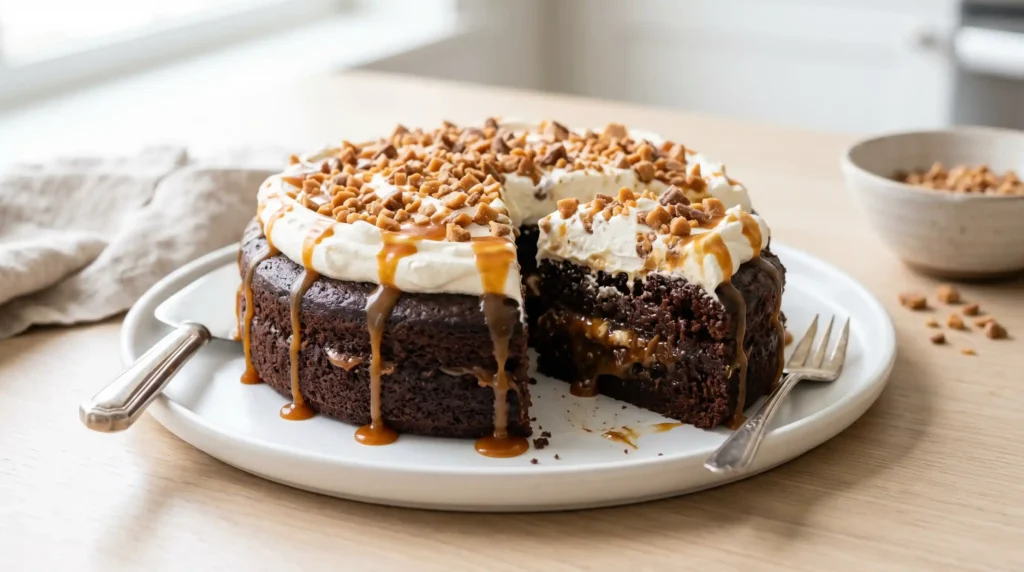
The Better Than Anything Cake is a chocolate cake soaked with sweetened condensed milk and caramel, topped with whipped cream and toffee bits. It’s outrageously good and surprisingly simple to pull together.
Ready to make something genuinely unforgettable? Let’s get into it.
What Makes This Cake So Ridiculously Good
The genius of this recipe is the soak. After the cake bakes, you poke it full of holes and pour sweetened condensed milk and caramel sauce right over the top. Those liquids seep deep into every layer.
What you end up with is a cake that stays incredibly moist for days — almost fudgy in the center, with a toffee-sweet flavor in every single bite. No dry crumbles. No sad, crumbly edges. Just rich, sticky, glorious cake.
Then the whipped cream topping keeps things light and creamy. The toffee bits on top add crunch. IMO, it hits every single texture and flavor note you could want in a dessert.
Can you think of another recipe this easy that delivers this much flavor? I honestly can’t.
What You Need: Complete Ingredient List
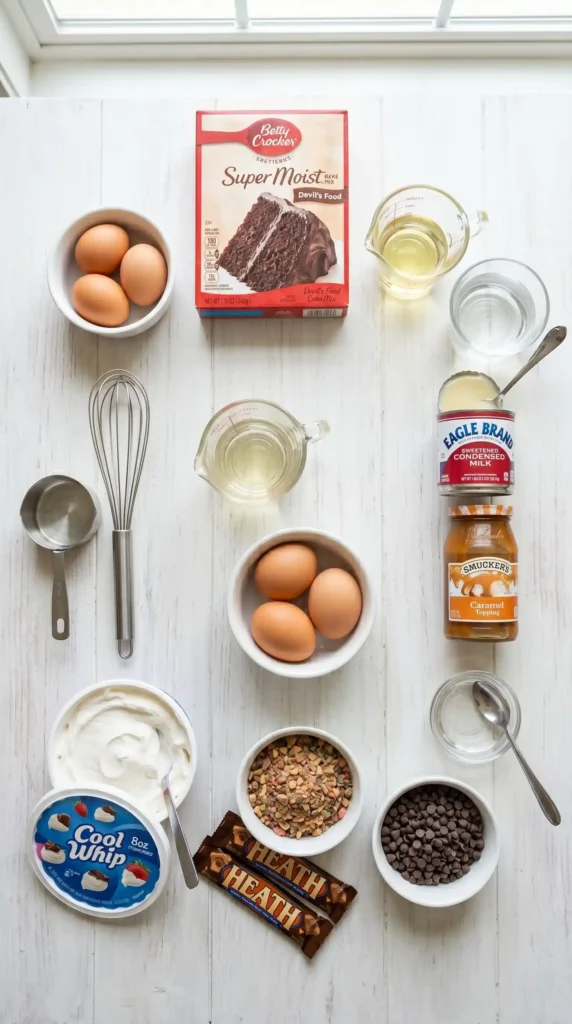
For the Chocolate Cake Base
You can use a homemade chocolate cake here, but honestly, a good-quality boxed mix works perfectly and saves a ton of time. Nobody will know — and if they ask, you don’t have to tell them.
- 1 box (15.25 oz) chocolate cake mix (plus eggs, oil, and water as directed on the box)
- 3 large eggs (or as directed on your cake mix box)
- 1/2 cup vegetable oil (or as directed)
- 1 cup water (or as directed)
For the Soak
This is where the magic happens. Don’t skip or reduce either of these — the full amount of soak is what makes this cake live up to its name.
- 1 can (14 oz) sweetened condensed milk
- 1 jar (12 oz) caramel sauce or caramel ice cream topping
For the Topping
The whipped topping needs to be cold and sturdy enough to hold its shape. If you’re making your own whipped cream, keep the bowl and beaters in the freezer for 15 minutes first.
- 1 container (8 oz) frozen whipped topping (Cool Whip), fully thawed
- 3 full-size (1.4 oz each) Heath or Skor toffee bars, crushed — or 1/2 cup pre-packaged toffee bits
- Optional: 2 tablespoons caramel sauce, for drizzling on top
How to Make Better Than Anything Cake: Step by Step

The process here is genuinely straightforward. The most important part is giving the soak enough time to do its job. Read through all the steps once before you start — you’ll thank yourself later.
Step 1: Bake the Chocolate Cake
Start by preheating your oven to the temperature listed on your cake mix box — usually 350 degrees Fahrenheit. Grease a 9×13-inch baking pan with non-stick spray or butter, then lightly dust it with flour.
In a large mixing bowl, combine your cake mix, eggs, oil, and water exactly as the box directs. Use a hand mixer or stand mixer on medium speed for about 2 minutes. The batter should look smooth with no dry lumps remaining.
Pour the batter into your prepared 9×13 pan and spread it into an even layer. Bake for 28 to 33 minutes, or until a toothpick inserted in the center comes out with just a few moist crumbs. Don’t overbake — a slightly underdone center is actually ideal here because it soaks up the liquid perfectly.
Remove the cake from the oven and set it on a wire rack. You’ll start the soak while the cake is still warm, so don’t walk too far away.
Step 2: Poke the Holes
This step sounds simple, but it matters a lot. While the cake is still warm (not hot, just warm — about 10 minutes out of the oven), use the handle of a wooden spoon to poke holes all over the surface.
Space your holes about 1 inch apart and press down firmly enough to go about halfway through the cake. You want the holes wide enough for the liquid to travel through, not just little pinpricks that close right back up.
Cover the entire surface of the cake with holes. The more evenly distributed they are, the more evenly the soak will spread through every part of the cake. This step directly affects how moist the final result is.
FYI — if you go a little heavy on the holes, that’s actually fine. More holes just means more soak reaches the center, which is never a bad thing with this recipe.
Step 3: Pour the Sweetened Condensed Milk
Open your 14 oz can of sweetened condensed milk and pour it slowly and evenly over the entire surface of the warm, poked cake. Start from one end and work your way across in a slow zigzag pattern.
The condensed milk will look thick at first. Give it a few minutes and you’ll watch it start to disappear into the holes. This is the moment where the cake transforms from good to extraordinary.
Let the condensed milk absorb for about 5 minutes before moving on to the caramel.
Step 4: Add the Caramel Sauce
Now pour your 12 oz jar of caramel sauce over the cake in the same slow, even zigzag motion. The caramel will be thicker than the condensed milk, so it may sit on the surface a little longer before soaking in — that’s completely normal.
Use a spatula or the back of a spoon to gently spread the caramel into any areas that look under-covered.
At this point, the cake should look pretty glossy and a little overwhelming. That’s exactly how it should look. You’re doing great.
Step 5: Refrigerate the Cake
Here’s the step that requires actual patience. Cover the cake loosely with plastic wrap and refrigerate it for a minimum of 4 hours. Overnight is even better.
During this time, the soak finishes moving through the cake and everything settles and firms up. The flavor deepens significantly as it chills. If you try to rush this step, the cake will taste good but not great. The full chill makes it legendary.
I’ve made this cake dozens of times and the overnight version is noticeably better than the 4-hour version. If you have the time, use it.
Step 6: Add the Whipped Topping
Once the cake has fully chilled and the soak has set, it’s time for the topping. Remove the cake from the fridge and take off the plastic wrap.
Spoon your fully thawed 8 oz of whipped topping onto the surface of the cake. Use a spatula or the back of a large spoon to spread it into a smooth, even layer that covers the cake from edge to edge. Take your time here — a neat layer looks great and makes slicing easier.
Don’t press down hard as you spread. Gentle strokes keep the whipped topping light and airy rather than dense and flat.
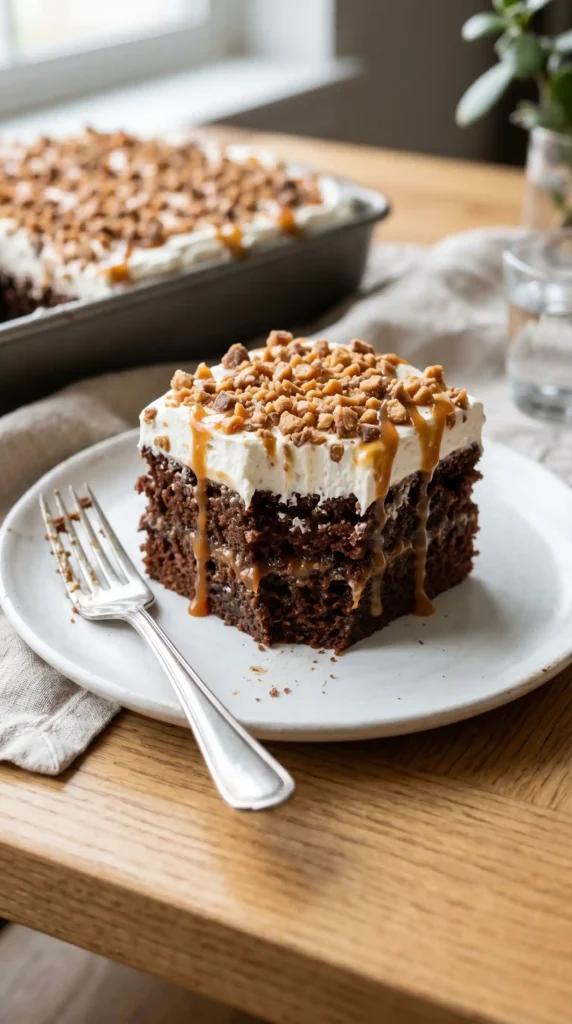
Step 7: Add the Toffee Topping and Serve
If you’re using full-sized toffee bars, place them in a zip-lock bag and crush them with a rolling pin or the bottom of a heavy pan. Aim for a mix of small chunks and fine crumbles — that variety of texture is part of what makes the topping so satisfying.
Scatter the crushed toffee generously across the entire surface of the whipped topping. If you want an extra-impressive presentation, drizzle a few tablespoons of caramel sauce over the toffee in thin lines.
Slice the cake into squares and serve directly from the pan. This cake does not need to be turned out — it lives happily in its 9×13 home from oven to table.
Tips That Actually Make a Difference
- Don’t skip the warm soak: Pouring the condensed milk and caramel onto a warm cake lets it absorb much faster and more deeply than a cold one.
- Overnight chilling is worth it: Four hours is the minimum, but 8 to 12 hours produces a noticeably richer, more unified flavor.
- Use good caramel: A quality jarred caramel sauce (like Smuckers or a store brand with simple ingredients) makes a real difference. Avoid anything too watery.
- Add toffee right before serving: If you add the toffee bits too early, they soften and lose their crunch. Scatter them on just before you bring the cake to the table.
- Store leftovers covered in the fridge: This cake keeps well for up to 4 days refrigerated. Cover it tightly so it doesn’t pick up fridge odors.
Frequently Asked Questions
Can I make Better Than Anything Cake from scratch instead of using a box mix?
Absolutely. Any moist, sturdy chocolate cake recipe works well here. Just make sure it bakes in a 9×13-inch pan. The key is using a cake that can hold up to the soak without falling apart — a denser crumb works better than a super airy one.
Can I make this cake a day ahead?
Yes, and you actually should. Making this cake the day before you plan to serve it gives the soak a full night to work through the cake, and the result is noticeably better. Just hold off on adding the whipped topping and toffee until a few hours before serving.
What can I use instead of Cool Whip?
You can use freshly whipped heavy cream sweetened with 2 tablespoons of powdered sugar and 1/2 teaspoon of vanilla. Whip it to stiff peaks and use it exactly like the store-bought version. It tastes even better, though it won’t hold as long in the fridge.
Does Better Than Anything Cake need to be refrigerated?
Yes. Because of the sweetened condensed milk soak and whipped topping, this cake needs to stay refrigerated. Do not leave it at room temperature for more than 2 hours. Always cover it before putting it back in the fridge.
Can I use a different flavor of cake mix?
The classic version uses chocolate, but yellow cake or devil’s food both work well too. Some people use a German chocolate mix for an even richer flavor. The caramel and toffee topping works with pretty much any base you choose 🙂
Can I freeze this cake?
The soak and cake layers freeze reasonably well, but the whipped topping does not. If you want to freeze it, do so before adding the whipped cream and toffee. Thaw overnight in the fridge, then add the topping fresh before serving.
Final Thoughts
The Better Than Anything Cake has earned its reputation for a reason. It’s the kind of dessert that clears out at every potluck, birthday party, and family dinner it shows up to. People always ask for the recipe.
And here’s the beautiful part: it’s genuinely one of the easier cakes you’ll ever make. Most of the work happens in the fridge while you’re doing other things. That’s a deal I’ll take every time.
So go ahead — bake the cake, pour on the soak, wait patiently, pile on the whipped topping and toffee, and watch it disappear faster than you thought possible. You’ll be making it again before the week is out :/
Happy baking. You’ve got this.

Better Than Anything Cake
Ingredients
Method
- Preheat your oven to the temperature listed on your cake mix box, usually 350°F.
- Grease a 9x13-inch baking pan with non-stick spray or butter, then lightly dust it with flour.
- In a large mixing bowl, combine the cake mix, eggs, oil, and water as directed on the box.
- Use a hand mixer or stand mixer on medium speed for about 2 minutes until smooth.
- Pour the batter into your prepared pan and spread it evenly.
- Bake for 28 to 33 minutes, until a toothpick inserted comes out with a few moist crumbs.
- Remove the cake from the oven and set it on a wire rack.
- While the cake is still warm, poke holes all over the surface with the handle of a wooden spoon, about 1 inch apart.
- Open the can of sweetened condensed milk and pour it evenly over the cake.
- Let it absorb for about 5 minutes before pouring the caramel sauce evenly on top.
- Cover the cake loosely with plastic wrap and refrigerate for a minimum of 4 hours.
- Spread the thawed whipped topping evenly over the surface of the chilled cake.
- Sprinkle the crushed toffee bars on top just before serving.


