
Servings: About 36 cookies | Prep Time: 20 minutes | Chill Time: 30 minutes | Bake Time: 10 to 12 minutes per batch | Total Time: ~1 hour 15 minutes
That Blue Tin Doesn’t Stand a Chance
You know the blue tin. Everyone knows the blue tin. It shows up every holiday season, gets pried open with great ceremony, and somehow half the cookies are gone before anyone admits to eating them. Danish butter cookies have that kind of power over people, and honestly, same.
Here’s the thing nobody tells you: those store-bought cookies, classic as they are, don’t even come close to what you can make at home. Homemade danish butter cookies taste richer, crumble more delicately, and carry a real butter flavor that the packaged version just can’t match.
The first time I piped these myself, I felt genuinely ridiculous for spending money on the tin version for years. These take about an hour, use six basic ingredients, and the results are legitimately beautiful. Ready to make the best danish butter cookies of your life? Let’s go.
Ingredients for Homemade Danish Butter Cookies
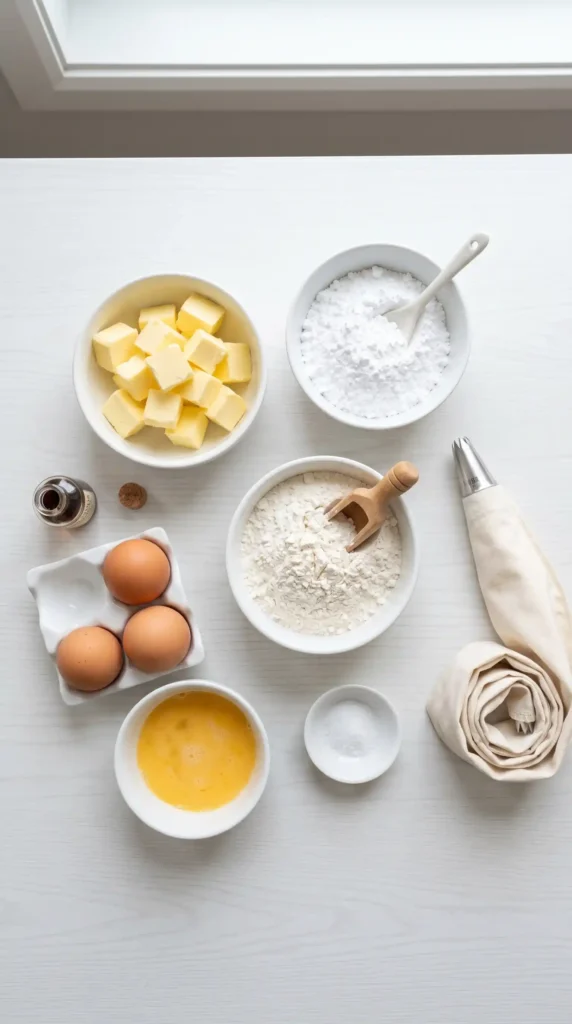
Six ingredients. That’s it. No long shopping list, no obscure items. The magic here isn’t complexity, it’s quality. FYI, the butter you choose genuinely matters more in this recipe than almost any other cookie you’ll ever bake. Use the good stuff.
The Core Six
- Unsalted European-style butter, softened — 1 cup (225g)
- Powdered sugar (icing sugar), sifted — 2/3 cup (80g)
- Egg white, large — 1 (about 30g)
- Vanilla extract — 1 teaspoon
- All-purpose flour — 2 cups (250g)
- Salt — 1/4 teaspoon
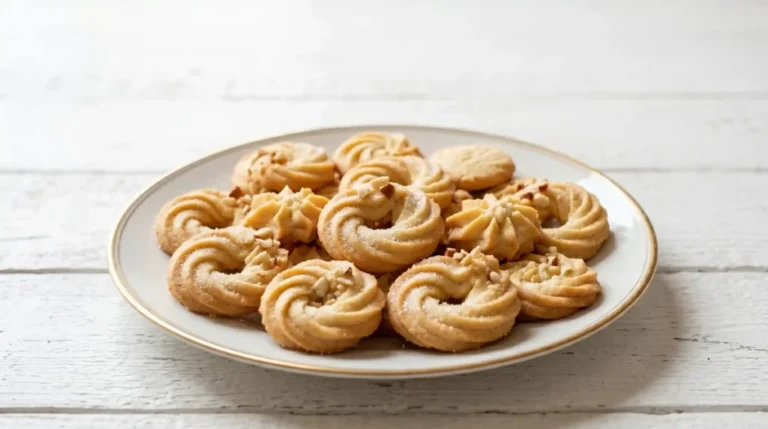
Optional Finishing Touches
- Granulated sugar for sprinkling — 2 tablespoons
- Colored nonpareils or sprinkles — 2 to 3 tablespoons
- Flaked almonds for topping — 1/4 cup (25g)
- Coarse sea salt for a sweet-salty finish — a small pinch per cookie
A quick note on the butter: European-style butter has a higher fat content than standard American butter, which is exactly why danish butter cookies taste so rich and tender. If you can find Kerrygold or a similar brand, grab it. The difference in taste is real.
How to Make Danish Butter Cookies: Full Step-by-Step
The process is straightforward, but a few steps require real attention to get right. Danish butter cookies are a piped cookie, which means the dough needs to be exactly the right consistency to push through a piping bag cleanly. Nail the dough and everything else falls into place.
Step 1: Start with Properly Softened Butter
Take your butter out of the refrigerator at least 45 minutes to 1 hour before you start. You want it truly softened, not melted and not still cold. Press your finger into it gently. It should leave a clean indent without the butter feeling greasy, slimy, or shiny.
This step matters more than it sounds. Cold butter won’t cream smoothly and creates a lumpy dough that’s impossible to pipe. Melted butter produces cookies that spread flat and lose their shape entirely. Room-temperature butter hits that sweet spot where everything works exactly as it should.
If you forgot to pull the butter out ahead of time, cut it into small cubes and spread them on a plate. Let it sit for 15 to 20 minutes. Don’t microwave it. Not even for a few seconds. Microwaved butter melts unevenly and will ruin the texture of the dough.
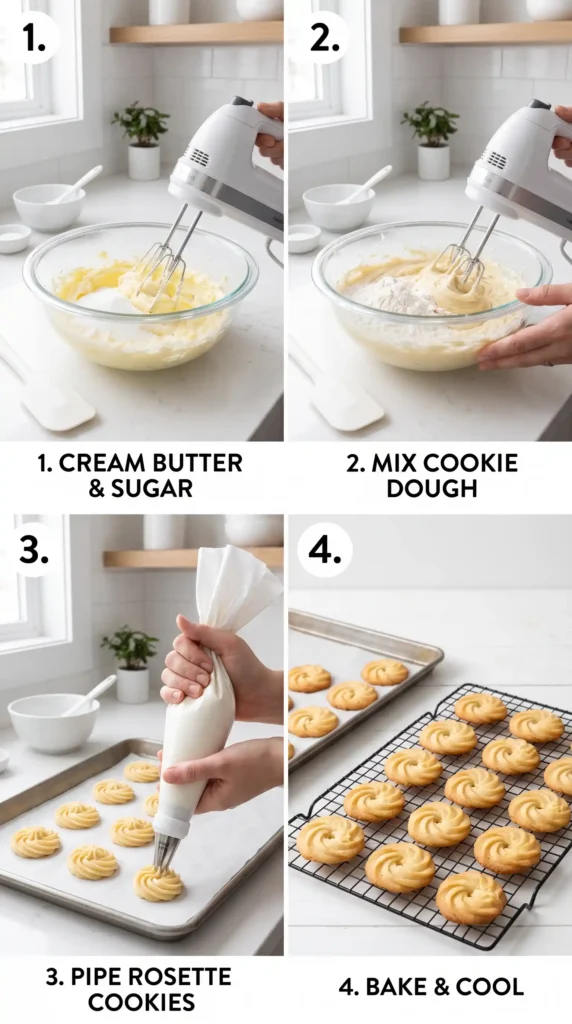
Step 2: Cream the Butter and Powdered Sugar
Place the softened butter in a large bowl and beat it alone on medium speed for about 2 minutes until it looks smooth and creamy. Then add the sifted powdered sugar all at once and continue beating on medium speed for another 3 full minutes.
The mixture should turn noticeably pale, almost white, and very fluffy. This extended creaming is what gives danish butter cookies their signature melt-in-your-mouth texture. The air you incorporate right now is the air that makes them light and delicate once baked, not dense or shortbread-heavy.
Scrape down the sides and bottom of the bowl at least once during this process. The butter and sugar pack into corners and don’t cream evenly without a good scrape. Use a flexible rubber spatula and make sure you reach all the way to the bottom of the bowl.
Step 3: Add the Egg White and Vanilla
Add the egg white and vanilla extract to the creamed butter mixture. Beat on medium speed for about 1 minute until fully incorporated and the mixture looks smooth and slightly glossy. The egg white adds structure and helps the cookies hold their piped shape cleanly during baking.
Notice that this recipe uses only the egg white and not the whole egg. The yolk adds fat and richness, which sounds good, but it also makes the dough heavier and harder to pipe. The egg white alone gives just enough binding without weighing the dough down. It’s a deliberate choice, not an oversight.
Step 4: Add the Flour and Salt
Sift the flour and salt together directly into the butter mixture. Fold them in with a rubber spatula using slow, gentle strokes. Switch to low speed on the mixer for the last 30 seconds if needed, but stop the moment no dry flour remains visible. Overmixing at this stage toughens the dough.
The finished dough will look soft, smooth, and slightly glossy. It should hold its shape when you press it but still feel pliable and easy to work with. If the dough feels too stiff to pipe, add one teaspoon of milk and mix briefly. If it feels too loose, refrigerate it for 10 minutes before piping.
Resist the urge to add more flour if the dough feels softer than expected. Danish butter cookie dough is supposed to feel soft. That softness is what makes them tender. A stiff dough produces hard, crumbly cookies that snap instead of melting. Trust the process here.
Step 5: Fill the Piping Bag
Fit a large piping bag with a large open star tip, ideally a 1M or 2D size. Fold the top of the bag down over your hand like a cuff, then use a spatula to fill the bag about two-thirds full with dough. Don’t overfill it or piping becomes difficult and messy.
Twist the open end of the bag tightly to push the dough forward and remove any air pockets. Squeeze gently from the top, not the middle, so you maintain consistent pressure throughout. Practice your first piped shape on a piece of parchment before starting on the actual baking tray.
The two classic shapes for danish butter cookies are the round rosette and the pretzel loop. For a rosette, hold the bag vertically above the tray, apply steady pressure, pipe a circular shape, then release pressure and pull straight up quickly. For a loop, pipe an elongated S-shape or oval with overlapping ends.
Step 6: Chill and Decorate
Once all the cookies are piped onto parchment-lined baking sheets, place the trays in the refrigerator for 30 minutes. This chilling step firms up the butter in the dough and helps the piped shapes hold crisp definition during baking. Skip it and your rosettes blur into unrecognizable blobs. Worth the wait.
Right before they go into the oven, press a flaked almond or two into the center of each cookie, or sprinkle with granulated sugar or colorful nonpareils. These decorations stick better when pressed into slightly firm, chilled dough than into soft room-temperature dough. They also toast beautifully during baking.
Step 7: Bake to Pale Golden Perfection
Preheat your oven to 350 degrees Fahrenheit (175 degrees Celsius). Bake one tray at a time on the center rack for 10 to 12 minutes. You want the cookies to look pale golden at the edges with centers that still appear almost cream-colored. They should not turn deep brown anywhere.
Every oven runs slightly differently, so check your first batch at the 10-minute mark. Danish butter cookies go from perfectly done to overbaked quickly. An overbaked cookie turns hard and loses that signature delicate crumble. Pull them out looking slightly underdone and let the residual heat finish the job.
Let the cookies cool on the baking tray for 5 full minutes before touching them. They firm up as they cool and are very fragile when hot. After 5 minutes, transfer them carefully to a wire rack and let them cool completely. They reach their best texture after about 20 minutes at room temperature.
Tips for Perfect Danish Butter Cookies Every Time
These cookies have a short ingredient list, which means every single ingredient and technique matters. Here’s what I’ve learned after making batch after batch:
- Use high-quality butter: European-style butter with 82% or higher fat content makes a dramatic difference in flavor and texture.
- Sift the powdered sugar: Lumps in the sugar create an uneven dough that clogs your piping tip at the worst possible moment.
- Don’t skip the chill: Chilling the piped cookies on the tray is the single biggest factor in keeping their shape during baking.
- Use a large star tip: A small tip forces you to push too hard and warms the dough in the bag, making piping messy.
- Bake pale, not golden: These cookies should look almost underdone when you pull them out. That’s the correct color.
- Cool completely before storing: Storing warm cookies creates steam that softens them and ruins their crispness.
How to Store Danish Butter Cookies
Store completely cooled danish butter cookies in an airtight tin or container at room temperature. They stay crisp and fresh for up to 10 days, which makes them ideal for gifting or holiday baking ahead of time. IMO, they actually taste slightly better on day two after the flavors settle.
Do not store them in plastic bags. Plastic traps moisture and turns crisp butter cookies soft within a day. A metal tin works best, which is probably why the classic blue tin became such an iconic container in the first place. There’s actual logic behind that tradition.
You can also freeze the raw piped dough on the baking tray until solid, then transfer to a freezer-safe container. Bake straight from frozen, adding 2 to 3 extra minutes to the bake time. This lets you have fresh danish butter cookies ready in under 15 minutes whenever the craving hits.
Frequently Asked Questions
Why do my Danish butter cookies lose their shape while baking?
The most common cause is skipping the refrigeration step after piping. Chilling firms up the butter and locks the piped shape in place. Also check that your butter wasn’t too warm when you started creaming. Warm, greasy butter produces soft dough that spreads and loses definition at high oven temperatures.
Can I make Danish butter cookies without a piping bag?
Yes. Use a sturdy zip-top bag with one corner snipped off as a substitute piping bag. The shapes won’t look as precise, but the taste stays identical. Alternatively, roll the dough into small balls and press them flat with a fork for a simple drop-cookie style version. Just as delicious, no piping required.
What makes Danish butter cookies different from shortbread?
Great question. Shortbread uses only butter, sugar, and flour with no eggs or leavening. Danish butter cookies add egg white, which provides a lighter structure and a slightly crispier snap. Shortbread tends to be thicker and denser. Danish butter cookies are thinner, more delicate, and melt faster on the tongue.
Can I add flavors like almond extract or lemon zest?
Absolutely. Almond extract pairs beautifully with the butter flavor. Use 1/2 teaspoon in place of or alongside the vanilla. Lemon or orange zest adds a bright citrus note that works really well in spring and summer batches. Add one teaspoon of finely grated zest along with the vanilla in step three.
Why does my piping bag feel too hard to squeeze?
The dough is probably too cold or slightly stiff. Knead the filled piping bag gently in your hands for 30 seconds to warm the dough slightly with your body heat. If it’s still resistant, transfer the dough back to a bowl and mix in one teaspoon of milk, then refill the bag and try again.
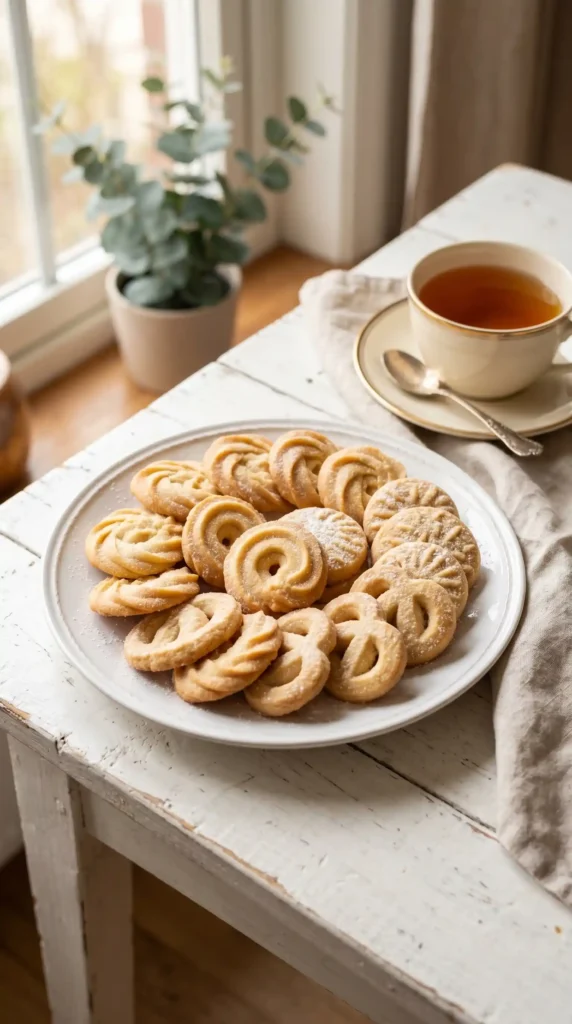
Final Thoughts
Homemade danish butter cookies deliver everything the classic tin promises and then some. The flavor is richer, the texture is more delicate, and the satisfaction of piping your own perfect rosettes is something no store-bought product can replicate. Six ingredients and one hour of your time. That’s the whole deal.
Remember the key points: use quality butter, cream it well, chill the piped dough, and bake pale. Those four things separate a great batch from a mediocre one. Get those right and everything else takes care of itself. So go on. Preheat that oven, pull out the piping bag, and make the batch that finally convinces your family to stop buying the tin. They’ll ask for the recipe. Just smile and say it’s a family secret.
Homemade Danish Butter Cookies
Ingredients
Method
- Take your butter out of the refrigerator at least 45 minutes to 1 hour before you start.
- Place softened butter in a large bowl and beat for about 2 minutes until smooth and creamy.
- Add sifted powdered sugar and beat for another 3 minutes until pale and fluffy.
- Add the egg white and vanilla; beat until fully incorporated and the mixture is smooth.
- Sift the flour and salt together and fold them into the butter mixture gently.
- Press the dough; if it's too stiff, add a teaspoon of milk, if too loose, chill for 10 minutes.
- Fit a piping bag with a large star tip, fill it with dough, and twist to remove air.
- Pipe shapes onto parchment-lined baking sheets, then chill in the refrigerator for 30 minutes.
- Preheat your oven to 350°F (175°C) and bake for 10 to 12 minutes until edges are pale golden.
- Cool on the tray for 5 minutes before transferring to a wire rack to cool completely.


