
Prep Time: 15 minutes | Cook Time: 12 minutes | Total Time: 27 minutes | Servings: 24 deviled egg halves (12 eggs)
Okay, let me be straight with you. Regular deviled eggs are fine. But Dill Pickle Deviled Eggs? They are on a whole different level. That tangy, briny punch of pickle juice mixed into creamy egg yolks is the kind of thing that makes people hover around the appetizer tray at every party.
I made these for a cookout last summer and, no joke, someone actually asked me for the recipe before they even finished chewing. That is the power of the pickle. If you have never tried this combination, today is your lucky day.
This recipe is quick, crowd-pleasing, and stupidly easy to pull off. Whether you are meal prepping for the week or bringing something to a gathering, these eggs deliver every single time. Let me walk you through it.
Ingredients You Will Need Dill Pickle Deviled Eggs
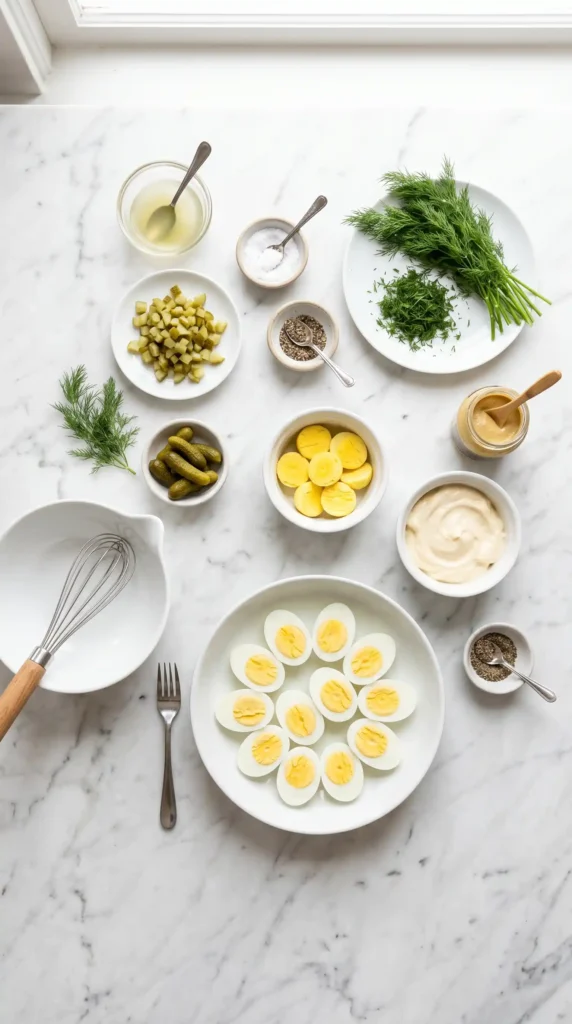
Here is everything you need to make these glorious little bites. Nothing fancy, nothing hard to find.
Main Ingredients
- 12 large eggs
- 1/2 cup mayonnaise
- 2 tsp Dijon mustard
- 2 Tbsp pickle juice (from your pickle jar — do not throw that liquid gold away)
- 2 oz kosher dill pickles, finely diced
- 1/2 Tbsp fresh dill weed, minced
- Salt, to taste
- Fresh cracked black pepper, to taste
Garnish
- Sliced kosher dill pickles
- Fresh dill weed sprigs
Quick tip: Always buy kosher dill pickles, not bread and butter or sweet pickles. The flavor difference is massive, and IMO, the kosher dill variety is what makes this recipe shine.
How to Make Perfect Dill Pickle Deviled Eggs
Here is the part most people mess up. Rubbery, greenish-grey yolks are a real tragedy. Follow these steps and you will get perfect hard boiled eggs every single time.
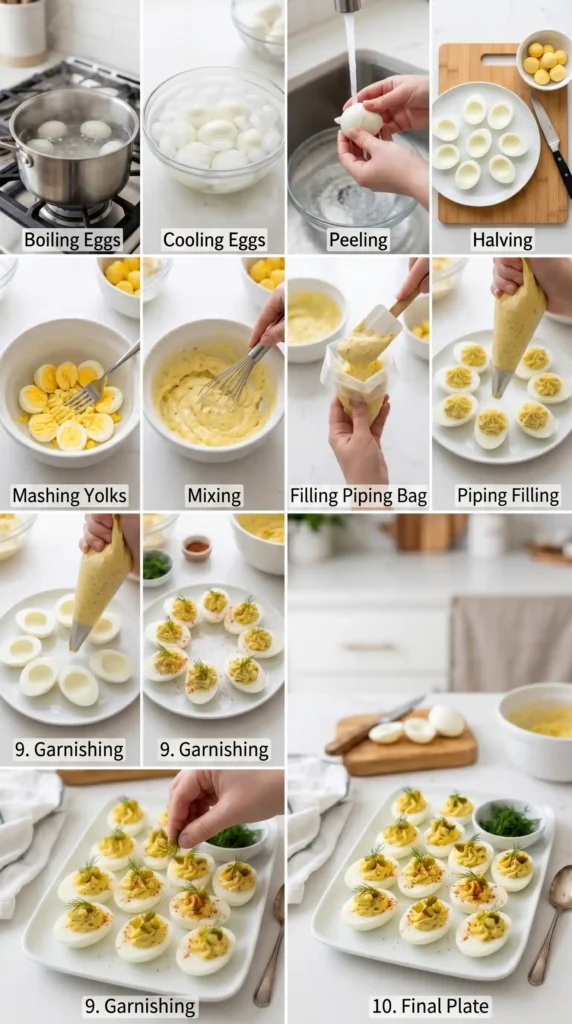
Step 1: Boil the Eggs
Grab your largest pot and fill it with water about 3 to 4 inches deep. Place the pot on the stove and bring it to a full, rolling boil over high heat. You want real bubbles here, not just a shimmer on the surface.
Once the water is boiling, use a slotted spoon to gently lower all 12 eggs down to the bottom of the pot, one at a time. Do not just drop them in or you will crack the shells before they even cook. The eggs should sit in a single, comfortable layer with enough room that they are not stacked on top of each other.
Lower the heat to just below medium so the water maintains a gentle, steady simmer rather than a wild boil. Place the lid on the pot, but leave it slightly cracked so steam can escape. Now set your timer for exactly 12 minutes and walk away.
Why 12 minutes? This sweet spot gives you fully cooked yolks that are bright yellow and creamy, not chalky or grey. Overcooking is what causes that unpleasant green ring around the yolk, and nobody wants that.
Step 2: Cool the Eggs Down Fast
When the timer goes off, immediately pour off all the hot water from the pot. Then run cold tap water directly over the eggs for a few solid minutes. You are trying to shock the eggs and stop the cooking process right away.
If you want to go the extra mile, fill the pot with cold water, let it sit for a minute, dump it, and refill again. Do this two or three times until the eggs feel genuinely cool to the touch. Cooled eggs also peel much more easily, so this step pulls double duty.
Step 3: Peel Without Losing Your Mind
Peeling eggs sounds simple, but it can get frustrating if you do not have a system. Here is one that actually works consistently. Start by gently tapping the egg on the cutting board at the very top and bottom to create two initial cracks.
Then tap lightly all the way around the entire surface of the egg. Now place your palm flat on top of the egg and roll it gently across the cutting board with light pressure. This motion creates a whole network of fine, connected cracks all over the shell and really loosens everything up underneath.
Here is the real trick most people do not know: when you start peeling, look for the thin, clear membrane that sits just beneath the shell. Grab both the shell and that membrane together and pull. The membrane acts like a grip tape, helping the shell slide off in larger, cleaner pieces instead of tiny frustrating fragments.
Work slowly at first, and peel under a thin stream of cold running water if you want extra help. The water gets underneath the shell and makes the whole process much smoother. Once peeled, set each egg aside on a clean plate or cutting board.
Preparing the Dill Pickle Deviled Egg Filling
This is where the magic happens. Have you ever tasted a deviled egg filling and thought it needed something more interesting? That is exactly what the pickle juice and diced pickles bring to the table here.
Step 4: Slice and Separate the Eggs
Take a sharp knife and slice each peeled egg cleanly in half lengthwise. A sharp knife makes a real difference here because it gives you clean, even cuts through both the white and the yolk without tearing. Try to cut them as evenly as possible so your egg white cups look nice and uniform.
Gently pop each yolk out of the egg white halves using a small spoon or just your thumb. Be careful not to crack or tear the egg white cups since those are your little serving vessels. Place all the yolks together into a medium mixing bowl and set your egg whites cut side up on your serving platter or a clean tray.
Step 5: Make the Filling
Using a fork, mash all the yolks together thoroughly until you have a fine, crumbly texture with no large lumps remaining. Take your time with this step because lumps will make it harder to pipe the filling smoothly later.
Pro tip: For an extra silky, restaurant-quality filling, press the mashed yolks through a fine-mesh sieve or use a potato ricer. This takes two extra minutes but produces the smoothest, most velvety texture you have ever tasted in a deviled egg. FYI, this one small step is genuinely worth the effort.
Now add the 1/2 cup of mayonnaise, 2 tsp of Dijon mustard, and 2 Tbsp of pickle juice to the bowl with the yolks. The pickle juice is the star ingredient here, so do not skip it or reduce it. It adds a tangy, savory depth that regular deviled eggs simply do not have.
Add the 2 oz of finely diced kosher dill pickles and the 1/2 Tbsp of minced fresh dill weed. Season everything generously with salt and fresh cracked black pepper. Now mix everything together until completely smooth and well combined.
Taste the filling at this point. Does it need more pickle juice for extra tang? Another pinch of salt? A little more Dijon for bite? Adjust until it tastes exactly the way you want it. Cooking is personal, and this step lets you make it your own.
Step 6: Fill and Garnish the Eggs
Spoon your finished filling into a piping bag fitted with a star tip, or just use a plastic zip-lock bag with a small corner snipped off. Both options work perfectly fine. Piping gives you that beautiful, professional swirl that looks great on a platter.
Pipe the filling generously into each egg white cup. Do not be shy here. You will have enough filling to load up every single one with a nice, tall mound that looks impressive and tastes even better. Underfilling is a missed opportunity.
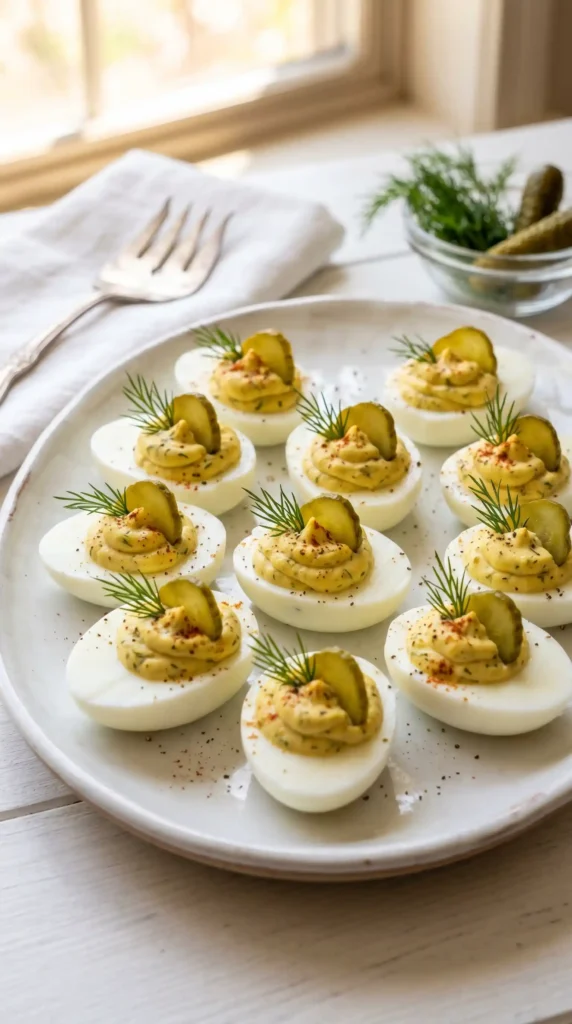
Top each filled egg with a thin round slice of kosher dill pickle and a small sprig of fresh dill weed for garnish. The pop of green looks beautiful against the pale yellow filling and signals exactly what flavor is coming. These little details take the presentation from good to great.
Tips for the Best Results
A few extra pointers to guarantee success with your Dill Pickle Deviled Eggs:
- Use older eggs: Eggs that are 7 to 10 days old peel much more easily than fresh eggs. If you bought eggs specifically for this recipe, try to grab them a few days ahead.
- Chill before serving: These taste better cold. Make them up to 24 hours ahead and cover them with plastic wrap in the fridge for a deeper, more developed flavor.
- Dice the pickles small: Bigger chunks make it hard to pipe the filling smoothly. Aim for very fine, uniform dice so the texture stays creamy.
- Fresh dill makes a difference: Dried dill works in a pinch, but fresh dill gives you a much brighter, more aromatic flavor that really elevates the whole dish.
- Do not skip the pickle juice: This is the non-negotiable ingredient. That briny liquid is what separates these from every other deviled egg recipe out there. Respect the brine
Nutrition Information (Per Serving — 1 Deviled Egg Half)
- Calories: 128 kcal
- Carbohydrates: 1g
- Protein: 6g
- Fat: 11g (Saturated: 2g | Polyunsaturated: 5g | Monounsaturated: 3g)
- Cholesterol: 168mg
- Sodium: 206mg
- Potassium: 69mg
- Fiber: 0.1g | Sugar: 0.3g
- Vitamin A: 254 IU | Calcium: 28mg | Iron: 1mg
These are low-carb, high-protein, and genuinely satisfying. Great for keto folks too.
Frequently Asked Questions
Can I make Dill Pickle Deviled Eggs ahead of time?
Yes, absolutely. You can make them up to 24 hours in advance. Store them covered in the refrigerator. For the best presentation, add the garnish of fresh dill and pickle slices right before serving so they stay crisp and vibrant.
What kind of pickles work best in this recipe?
Kosher dill pickles are the top choice. They have the right balance of tanginess, saltiness, and dill flavor without any sweetness. Avoid bread and butter or sweet pickles entirely since the sweetness clashes with the savory egg yolk base.
Can I substitute the mayonnaise for something else?
Yes. Greek yogurt or sour cream work as partial substitutes if you want a lighter version. The texture will be slightly different and a bit tangier, but it still tastes great. You can also do a half mayo, half Greek yogurt blend for a good middle ground.
How long do deviled eggs stay fresh in the fridge?
Deviled eggs keep well for up to 2 days in an airtight container in the refrigerator. After that, the egg whites start to weep moisture and the texture suffers. For the best quality, eat them within 24 hours.
Why do my hard boiled eggs have a grey ring around the yolk?
That grey-green ring forms when eggs are overcooked or cooled down too slowly. Sticking to 12 minutes of cooking time and then immediately shocking them in cold water prevents this completely. The yolks should come out bright, creamy yellow every time.
Can I add extra heat or spice to this recipe?
Definitely. A pinch of smoked paprika on top, a few dashes of hot sauce in the filling, or even a tiny bit of horseradish mixed into the yolks are all fantastic variations. The tangy pickle base pairs really well with spicy additions.
Final Thoughts
Dill Pickle Deviled Eggs are one of those recipes that sounds almost too simple to be this good. But they absolutely deliver. The combination of creamy yolks, tangy pickle juice, and fresh dill creates a flavor profile that keeps people coming back for one more.
Make them for your next party, potluck, or honestly just for yourself on a Tuesday. Once you try these, the plain version is going to feel a little sad by comparison. And hey, that is not your fault. Pickles just have that effect on people.
Now go make a batch. Your future self, and anyone lucky enough to be at your table, will thank you for it.

Dill Pickle Deviled Eggs
Ingredients
Method
- Boil the eggs in a pot of water at a rolling boil for 12 minutes.
- Cool the eggs immediately by running cold water over them until they are cool to the touch.
- Peel the eggs carefully, tapping them gently to create cracks, and then rolling them on a surface.
- Slice the eggs in half lengthwise and separate the yolks into a mixing bowl, placing the egg whites on a serving platter.
- Mash the yolks until crumbly and mix in mayonnaise, Dijon mustard, pickle juice, diced pickles, minced dill, salt, and pepper until smooth.
- Taste the filling and adjust seasoning if needed.
- Fill the egg whites with the yolk mixture using a piping bag or zip-lock bag.
- Garnish with pickle slices and dill sprigs before serving.


