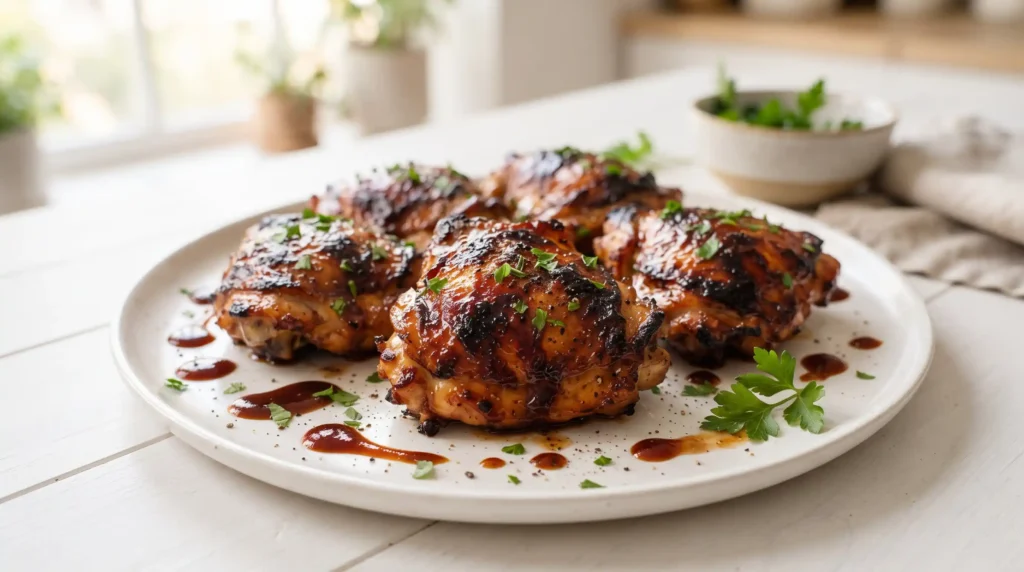
Sticky, caramelized BBQ glaze without firing up the grill? Oven Baked BBQ Chicken Thighs make that happen year-round, rain or shine, no charcoal required.
I started making these on nights when I wanted that backyard BBQ flavor but couldn’t be bothered with an actual grill. Now they’re in my regular rotation no matter the season.
Why You’ll Love This Oven Baked BBQ Chicken Thighs Recipe
This recipe delivers juicy, flavorful chicken with minimal hands-on effort. Tender chicken thighs, sweet smoky BBQ sauce, that caramelized glaze — that combo alone makes this dish worth repeating. There’s no grill maintenance or weather-watching involved.
It comes together in well under an hour of active time. IMO, that makes this one of the easiest ways to get real BBQ flavor on a random Tuesday night.
Servings and Timing
Here’s what you’re working with before you start cooking:
- Servings: 4 to 6 people
- Prep time: 15 minutes, plus optional marinating time
- Cook time: 25 to 30 minutes
- Total time: about 45 minutes active, longer if you marinate ahead
That optional marinating step genuinely helps the flavor, but it’s not mandatory. Short on time? Skip it and head straight to seasoning and baking — the results still come out great.
Ingredients for Oven Baked BBQ Chicken Thighs

Here’s everything you’ll need, with quantities that serve 4 to 6 people:
- Boneless, skinless chicken thighs — 2 pounds (about 8 thighs)
- Olive oil — 2 tablespoons
- Chicken seasoning — 1 tablespoon
- BBQ sauce — 1 cup, plus extra for serving
That’s the entire list. This recipe proves you don’t need a long ingredient roster to get real, crave-worthy flavor on your plate.
How to Make Oven Baked BBQ Chicken Thighs

Step 1: Prep and Season the Chicken
Pat the chicken thighs dry thoroughly with paper towels before doing anything else. This step matters more than it seems — dry chicken lets seasoning actually cling instead of sliding right off.
In a bowl or zip-top bag, combine the chicken thighs with olive oil and chicken seasoning. Toss or massage everything together until each piece is evenly coated, making sure no spot gets missed.
If you have time, let the chicken marinate for at least an hour in the fridge, or even overnight if you’re planning ahead. That extra time lets the seasoning really soak into the meat instead of just sitting on the surface.
Step 2: Preheat the Oven and Prep Your Pan
Preheat your oven to 400°F so it’s fully ready when the chicken goes in. While it heats up, line a baking sheet with foil for easier cleanup later.
Place a wire rack on top of the lined baking sheet. This setup lets hot air circulate fully around the chicken, which helps it brown evenly instead of steaming flat against the pan.
Step 3: Arrange the Chicken on the Rack
Place the seasoned thighs on the wire rack in a single, even layer. Give each piece a little space, since crowding them traps steam and prevents that nice caramelized exterior from forming.
This spacing step seems small, but it makes a real difference. Chicken packed too tightly together steams instead of bakes, and steamed chicken just doesn’t develop the same texture or color.
Step 4: Bake Until Fully Cooked
Slide the tray into your preheated oven and bake for 20 to 25 minutes. Use this time to clean up your prep area, since the actual cooking needs very little attention from you right now.
Check doneness with a meat thermometer inserted into the thickest part of a thigh. You’re looking for an internal temperature of 165°F — that’s your guarantee the chicken’s both safe and properly cooked through.
Step 5: Glaze and Broil
Once the chicken hits temperature, pull it from the oven and brush each thigh generously with BBQ sauce. Make sure to cover the entire surface, not just the top, for the best flavor in every bite.
Switch your oven to broil on high and return the tray for just a few minutes. Watch closely here, since broiling moves fast and can go from perfectly caramelized to burnt in a matter of seconds.
You’re looking for that glossy, slightly bubbly glaze that signals the sauce has properly caramelized onto the chicken. Pull it the moment it looks right, since broilers don’t give you much margin for error.
Step 6: Rest, Then Serve
Let the chicken rest for about 5 minutes before serving. This pause allows the juices to redistribute throughout the meat, which keeps every bite tender instead of letting moisture run out the second you cut into it.
Serve the thighs warm with extra BBQ sauce on the side for anyone who wants more. A sprinkle of fresh parsley on top adds a nice pop of color if you’re feeling fancy.
Tips for Success
A handful of small habits keep this dish consistently great:
- Pat the chicken completely dry before seasoning for better flavor absorption.
- Marinate overnight when you have the time; it deepens the overall flavor.
- Always use a meat thermometer to confirm that 165°F internal temperature.
- Watch the broiler closely, since glaze can burn in just a minute or two.
- Let the chicken rest before slicing to keep the juices locked in.
Easy Variations to Try
Once you’ve made the classic version, these tweaks are worth exploring:
- Add cayenne pepper or hot sauce to the BBQ sauce for extra heat.
- Mix honey and minced garlic into the sauce for a sweet-savory glaze.
- Stir fresh rosemary or thyme into the olive oil before marinating.
- Swap the chicken seasoning for tandoori spice for a different flavor direction.
- Use tempeh or seitan with the same sauce for a vegetarian version.
What to Serve With Oven Baked BBQ Chicken Thighs

A few sides round out this dish into a complete meal:
- Crunchy, tangy coleslaw pairs perfectly with the rich, sweet glaze.
- Roasted vegetables add color and a healthy contrast on the plate.
- Crispy potato wedges make for a comforting, classic side dish.
- Chilled lemonade balances out the smoky, sweet BBQ flavor nicely.
Storing and Reheating Leftovers
Leftovers keep well in an airtight container in the fridge for up to three days. Reheat gently in the oven rather than the microwave, since microwaving tends to dry the chicken out 🙂
If reheating in the oven, cover loosely with foil and warm at a low temperature until heated through. This keeps the chicken moist instead of overcooking it during reheating.
FAQs About Oven Baked BBQ Chicken Thighs
Can I use bone-in chicken thighs for this recipe? Yes. Bone-in thighs add extra flavor but typically need a few more minutes in the oven. Always check that the internal temperature reaches 165°F before serving.
What BBQ sauce works best for this recipe? Whatever you genuinely enjoy works fine here. Tangy, spicy, or sweeter sauces all caramelize nicely under the broiler, so pick the flavor profile your family loves most.
Can I make this recipe ahead of time? Yes. Marinate the chicken the night before, then bake it fresh when you’re ready to eat. This makes it a solid option for meal prep during busy weeks.
How do I store leftovers? Store leftovers in an airtight container in the fridge for up to three days. Reheat gently in the oven to avoid drying the chicken out.
Is this dish suitable for gluten-free diets? Yes, as long as the BBQ sauce you choose is labeled gluten-free. Always double-check the label, since some sauces include hidden gluten-containing ingredients.
Can I cook this dish without a wire rack? Yes, though the texture changes slightly. Place the chicken directly on the lined baking sheet instead — it’ll still cook through, just with a bit less browning underneath.
Final Thoughts
Oven Baked BBQ Chicken Thighs deliver real backyard BBQ flavor without needing an actual grill or a perfect weather forecast. Juicy chicken, sticky glaze, and minimal hands-on effort make this dish a genuine weeknight win.
Make a batch this week, and watch how fast it becomes a regular request at your table. Few dinners deliver this much flavor with this little fuss.
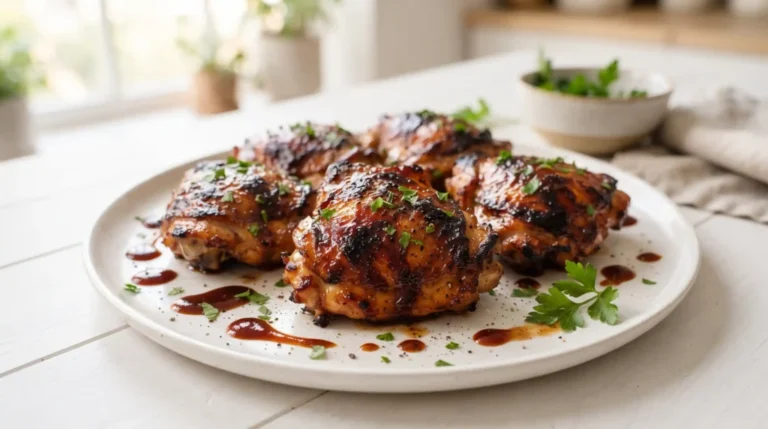
Oven Baked BBQ Chicken Thighs
Ingredients
Method
- Pat the chicken thighs dry thoroughly with paper towels.
- In a bowl or zip-top bag, combine the chicken thighs with olive oil and chicken seasoning. Toss until evenly coated.
- If time allows, marinate in the fridge for at least an hour or overnight.
- Preheat your oven to 400°F and line a baking sheet with foil.
- Place a wire rack on top of the lined baking sheet.
- Arrange the seasoned chicken thighs on the wire rack in a single layer with space between each piece.
- Bake for 20 to 25 minutes until the internal temperature reaches 165°F.
- Brush each thigh with BBQ sauce, covering the entire surface.
- Switch the oven to broil and return the tray, watching closely for 1 to 3 minutes until the glaze caramelizes.
- Let the chicken rest for about 5 minutes before serving.
- Serve warm with extra BBQ sauce and optional fresh parsley garnish.