Some nights you want fancy. Most nights you want fast. Apple Shallot Chicken somehow gives you both, and I still can’t quite believe how little effort it takes. I started making this on chaotic Tuesdays, and now it sneaks into my weekend rotation too.
Servings: 4 Prep time: 10 minutes Cook time: 35 minutes Total time: 45 minutes
Why This Apple Shallot Chicken Recipe Works So Well
Sweet caramelized apples, savory shallots, and juicy chicken thighs shouldn’t work together this easily, but here we are. Every bite balances rich, sweet, and tart in a way that feels way fancier than the effort actually required. Isn’t that the whole point of a good weeknight recipe?
This dish comes together in one skillet, which means minimal cleanup and maximum flavor payoff. IMO, one-pan dinners are the unsung heroes of home cooking. You get restaurant-level flavor without babysitting five different pots.
I’ve served this to guests who assumed I’d spent hours in the kitchen. I did not correct them immediately. Have you ever let a compliment ride a little longer than it deserved?
What You’ll Need: Ingredients for Apple Shallot Chicken
Nothing here requires a specialty store run. You’ll find everything at your regular grocery stop, most of it probably already in your kitchen. Here’s your full list:
- 4 boneless, skinless chicken thighs
- 1 teaspoon Italian seasoning
- 1/2 teaspoon paprika
- 1/4 teaspoon chili powder
- 1 teaspoon kosher salt
- 1/2 teaspoon freshly ground black pepper
- 2 tablespoons extra virgin olive oil
- 3 tablespoons unsalted butter
- 2 medium shallots, thinly sliced
- 2 tablespoons light brown sugar
- 2 tablespoons freshly squeezed lemon juice
- 2 Honeycrisp apples, cored and sliced
- Fresh thyme sprigs, for garnish
- Lemon slices, for garnish
Ten core ingredients plus a couple of garnishes. Simple, right? That’s exactly why this recipe earns a permanent spot on your dinner rotation.
A Quick Note on Chicken Choice
Chicken thighs stay juicier than breasts here, especially with a quick sear and simmer. If you’d rather use chicken breasts, go for it, just watch your cook time since they dry out faster. I’ve made both versions, and thighs win for me every time.
How to Make Apple Shallot Chicken (Step by Step)
This recipe moves through a few distinct stages, but none of them are complicated. I’m breaking each one down so you know exactly what to expect at every point. Grab your skillet, and let’s get started.
Step 1: Season the Chicken
Pat your chicken thighs dry with paper towels before doing anything else. This small step matters more than it seems; a dry surface sears better and browns more evenly. Skip it, and you’ll end up steaming your chicken instead of searing it.
Combine the Italian seasoning, paprika, chili powder, salt, and pepper in a small bowl. Sprinkle this mixture evenly over both sides of the chicken thighs, pressing gently so it sticks. Let the seasoned chicken sit for a few minutes while you heat your skillet.
Step 2: Sear the Chicken
Heat the olive oil in a large skillet over medium heat until it shimmers slightly. Add your seasoned chicken thighs in a single layer, giving each piece enough space to actually brown. Cook for 6 to 8 minutes per side, resisting the urge to move them around too much.
You’re looking for a deep golden crust and an internal temperature of 165°F. Use a meat thermometer if you have one; guessing rarely ends well with chicken. Once cooked through, transfer the thighs to a plate and tent loosely with foil to keep them warm.
Step 3: Caramelize the Shallots
Using the same skillet, melt the butter over medium heat, scraping up any browned bits left behind from the chicken. Add your thinly sliced shallots and stir them into the melted butter. Cook for 2 to 3 minutes, stirring occasionally so they soften without burning.
Watch as they turn translucent, then start picking up a light golden color around the edges. This step builds a serious flavor foundation for your sauce. Don’t rush it; a properly softened shallot makes a noticeable difference in the final dish.
Step 4: Build the Sauce
Sprinkle the brown sugar directly into the skillet with your softened shallots. Pour in the lemon juice and stir everything together with a wooden spoon, scraping up any remaining browned bits from the bottom of the pan. Those bits carry serious flavor, so don’t let them go to waste.
Let the mixture bubble gently for a minute or two until the sugar fully dissolves. The sauce should smell sweet and tangy at the same time, with a glossy texture starting to form. This balance is exactly what makes the finished dish so addictive.
Step 5: Cook the Apples
Add your sliced Honeycrisp apples directly into the bubbling sauce, spreading them out in an even layer. Cook for 5 to 6 minutes, flipping the slices about halfway through so both sides pick up the sauce. You want them softened but still holding their shape, not turned to mush.
Watch closely toward the end; apples can go from perfectly tender to overcooked fairly quickly. The sauce should coat each slice in a glossy, caramelized layer by the time you finish. This is genuinely one of the best-smelling stages of the entire recipe.
Step 6: Combine Everything and Serve
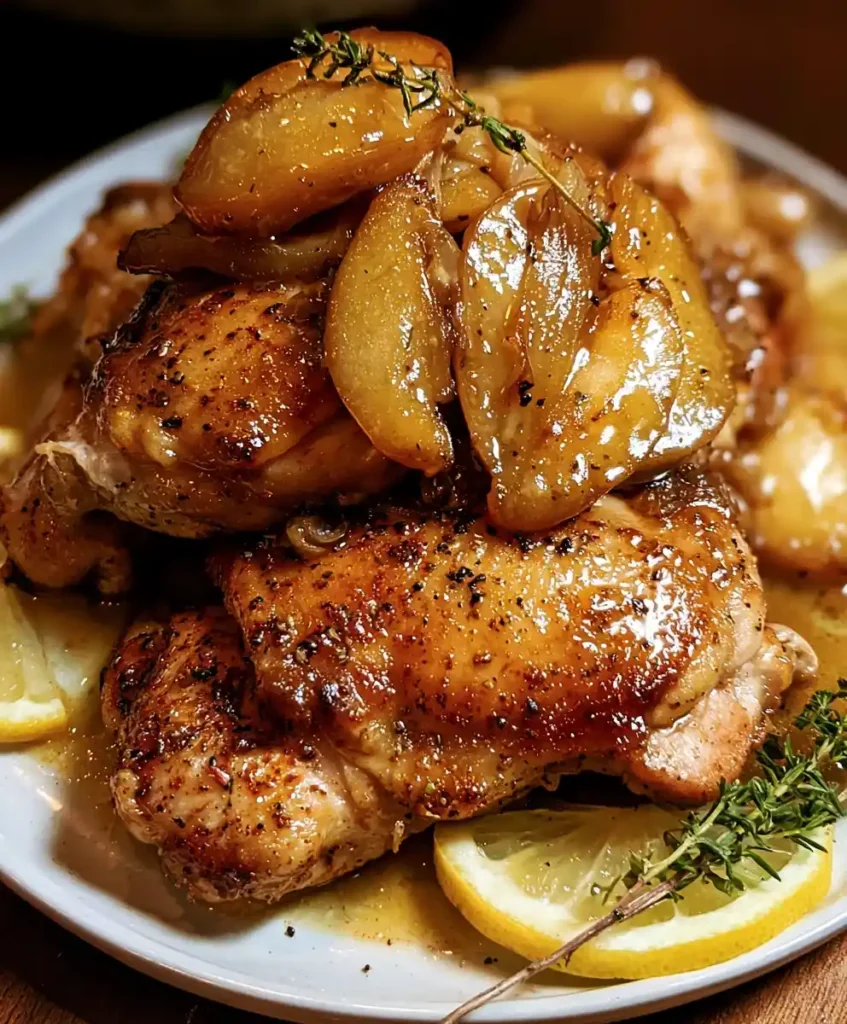
Return your seared chicken thighs to the skillet, nestling them among the apples and shallots. Spoon the sauce over the top so every piece gets coated in that sweet-savory glaze. Let everything simmer together for a minute or two, just enough to warm the chicken back through.
Plate it up and finish with a scattering of fresh thyme and a few lemon slices on top. The bright color and fresh herbs make this dish look far more impressive than the effort it took. Serve immediately while everything’s still warm and glossy.
Pro Tips for the Best Apple Shallot Chicken
A handful of small details separate good Apple Shallot Chicken from great Apple Shallot Chicken. These are the tricks I rely on every single time.
- Pat the chicken dry: A dry surface sears far better than a damp one.
- Taste as you cook: Adjust sweetness or acidity depending on your apples’ natural flavor.
- Don’t overcook the apples: Pull them while they still hold a slight bite.
- Use a meat thermometer: It removes all the guesswork around doneness.
- Try rotisserie chicken in a pinch: Skip the searing step and just warm it in the finished sauce.
Equipment You’ll Actually Use
Nothing fancy required here, just standard kitchen tools you likely already own. Here’s your shortlist:
- A large skillet, non-stick or cast iron
- A wooden spoon for stirring and scraping
- A meat thermometer for checking doneness
- A cutting board and knife for slicing shallots and apples
Fun Variations to Try
Once you’ve made this a couple times, feel free to play around with the formula. Small swaps can completely shift the flavor direction.
- Herb swap: Try fresh rosemary or sage instead of Italian seasoning for a different aromatic base.
- Apple swap: Granny Smith apples bring more tartness, while Fuji apples lean sweeter and crisper.
- Spicy kick: Add a pinch of cayenne to the seasoning blend for extra heat.
- Vegan version: Swap chicken for firm tofu, sautéed until golden, and follow the same sauce process.
FAQs About Apple Shallot Chicken
Can I use chicken breasts instead of thighs? Yes, though breasts cook faster and dry out more easily. Reduce your cook time slightly and check the internal temperature often.
What sides pair well with this dish? Fluffy rice, mashed potatoes, or a simple green salad all work beautifully. Each one soaks up that sweet-savory sauce nicely.
Can I prep this ahead of time? You can slice your shallots and apples in advance to save time. I still recommend cooking the dish fresh for the best texture.
Is Apple Shallot Chicken gluten-free? Yes, this recipe is naturally gluten-free as written. Just double-check that any sides you choose are gluten-free too.
Can I freeze leftovers? Absolutely. Cool it completely, then store in an airtight container in the freezer for up to three months. Thaw and reheat gently before serving.
Why did my sauce turn out too thin? Let it simmer a bit longer before adding the apples back with the chicken. The sugar and lemon juice need time to reduce and thicken properly.
Final Thoughts
Apple Shallot Chicken proves that a weeknight dinner doesn’t have to feel rushed or boring. Between the seared chicken, caramelized apples, and tangy sauce, every plate feels like a small win. Give it a shot this week, and see how fast it becomes a regular in your rotation.
Once your family tastes it, don’t be surprised if “what’s for dinner” turns into a very specific request. I’ve certainly stopped pretending it’s a spontaneous choice at this point.
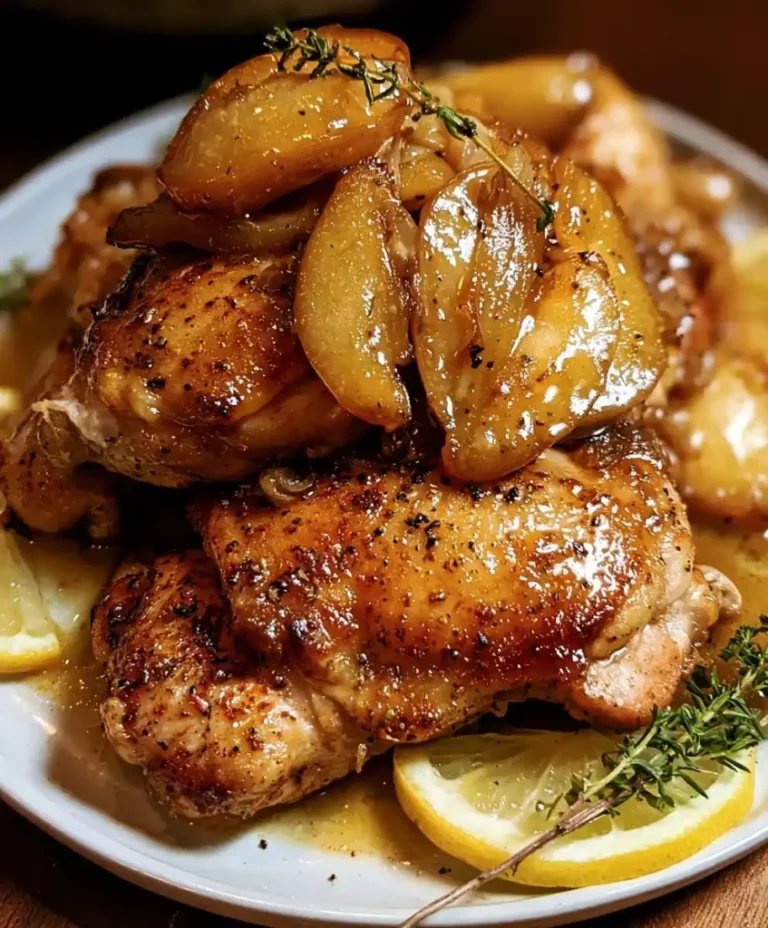
Apple Shallot Chicken
Ingredients
Method
- Pat your chicken thighs dry with paper towels. Combine the Italian seasoning, paprika, chili powder, salt, and pepper in a small bowl and sprinkle this mixture evenly over both sides of the chicken thighs.
- Heat the olive oil in a large skillet over medium heat. Add your seasoned chicken thighs in a single layer and cook for 6 to 8 minutes per side, until browned and cooked through. Transfer to a plate and tent with foil to keep warm.
- In the same skillet, melt the butter over medium heat. Add thinly sliced shallots and cook for 2 to 3 minutes until they soften and start to turn golden.
- Add the brown sugar and lemon juice to the shallots, stirring to combine. Let the mixture bubble gently for a minute or two until the sugar dissolves.
- Add sliced Honeycrisp apples to the skillet, cooking for 5 to 6 minutes, flipping halfway through until softened but not mushy.
- Return the seared chicken to the skillet, nestling among the apples and shallots. Spoon sauce over the chicken and let simmer for 1-2 minutes. Plate and garnish with fresh thyme and lemon slices.