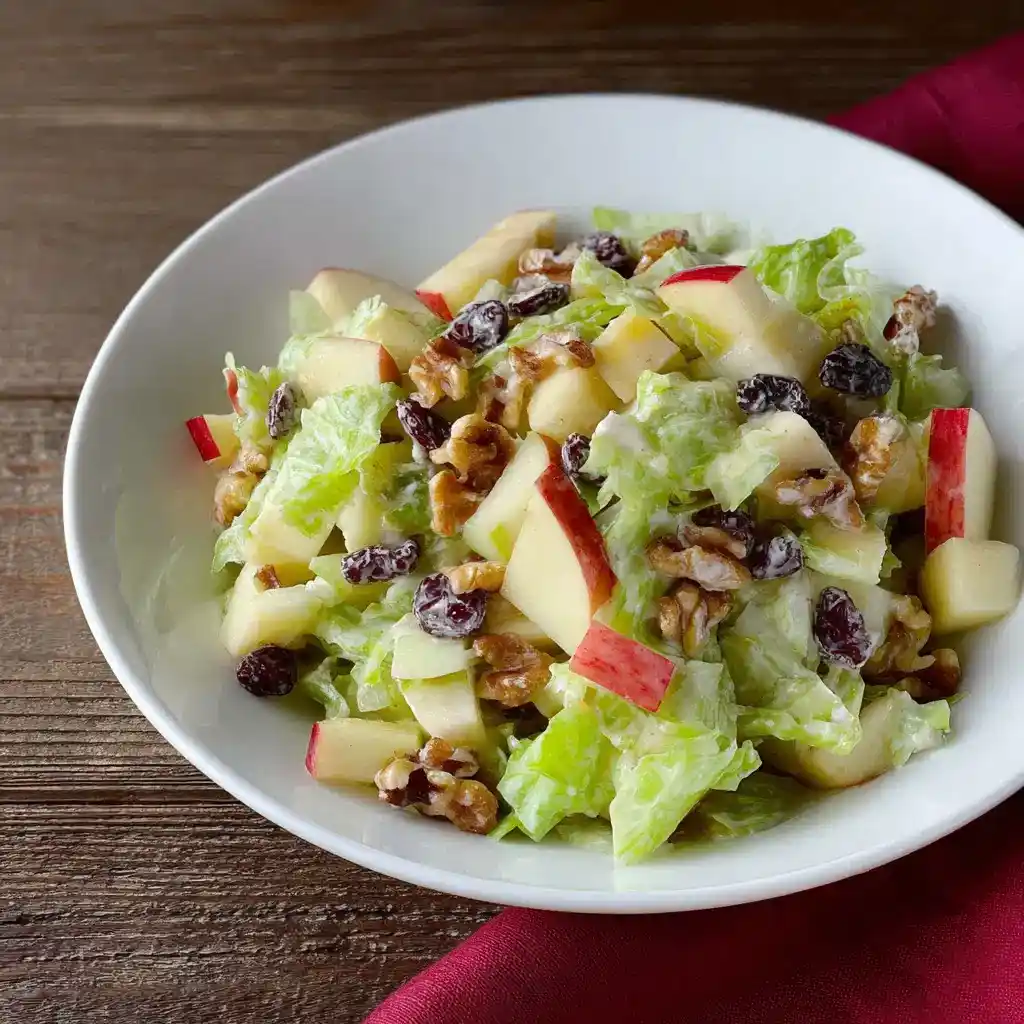
Creamy, crunchy, and sweet in all the right ways. If you’ve never tried an Apple Walnut Salad, you’re missing out on one of the easiest crowd-pleasers around.
My grandma made this every holiday, and I honestly thought it was just an old-fashioned side dish until I actually tried it. Turns out it’s basically dessert wearing a salad costume 🙂
Servings: 8 Prep time: 15 minutes Chill time: Optional, up to 2 hours Total time: 15 minutes, plus chilling if desired
Why This Salad Deserves a Spot at Every Gathering
Have you ever needed a dish that comes together in minutes but still looks impressive on the table? This salad checks that box perfectly. It combines crisp apples, juicy grapes, and crunchy walnuts in a creamy, tangy-sweet dressing that disappears fast at every party.
IMO, this is one of the most underrated potluck dishes out there. No oven required, no complicated technique, just a bowl and a few minutes of mixing before you’re done.
Who Should Make This Salad
This recipe works great for anyone hosting a holiday meal who needs a quick, no-bake dish to round out the table. It’s also perfect for potlucks, since it travels well and appeals to both kids and adults. Need a light dessert alternative? This has you covered.
What You’ll Need: Apple Walnut Salad Ingredients
Let’s talk ingredients, because this list is short and easy to shop for. Nothing fancy required, just fresh produce and a few pantry staples.
For the salad:
- 4 Gala apples, chopped
- 2 cups black or red grapes
- 1 cup chopped walnuts, plus extra for garnish
For the dressing:
- 8 ounces cream cheese, softened
- 1 cup plain Greek yogurt
- ⅓ cup light brown sugar, plus extra for garnish
- 2 tablespoons granulated sugar
- 2 teaspoons vanilla extract
Why Softened Cream Cheese Matters
Here’s a question worth asking: does cream cheese temperature actually change the outcome? Yes, significantly. Cold cream cheese leaves stubborn lumps in your dressing no matter how long you mix it.
Let your cream cheese sit at room temperature for at least 30 minutes before starting. This small step makes the difference between a smooth, silky dressing and a chunky, frustrating mess.
How to Make Apple Walnut Salad: Step by Step
Ready to actually put this together? Let’s walk through each stage slowly, because a few small details make the difference between an okay salad and a genuinely memorable one.
Step 1: Prep Your Apples First
Start by washing and chopping your Gala apples into bite-sized pieces, leaving the skin on for extra color and texture. Toss the chopped apples with a small splash of lemon juice right away.
This quick step prevents browning, keeping your apples looking fresh and appetizing even if you’re not serving the salad immediately. Skip it, and you’ll end up with sad, brown-edged fruit within the hour.
Step 2: Whip the Cream Cheese Base
In a large mixing bowl or stand mixer, add your softened cream cheese, Greek yogurt, brown sugar, granulated sugar, and vanilla extract. Beat everything together on medium speed until the mixture turns completely smooth and creamy.
Have you ever rushed this step and ended up with a lumpy dressing? I’ve been there, and it’s not a good look. Take the full two to three minutes needed to get things silky.
Step 3: Check the Dressing Consistency
Before moving forward, take a moment to check your dressing’s texture. It should look thick, smooth, and slightly fluffy, similar to a lightly whipped frosting rather than a runny sauce.
If it still looks slightly lumpy, keep beating for another minute or two. Getting this base perfectly smooth now saves you from uneven pockets of cream cheese later in the finished salad.
Step 4: Add the Apples, Grapes, and Walnuts
Add your chopped apples, whole or halved grapes, and chopped walnuts directly into the bowl with your prepared dressing. Use a large spatula or spoon to fold everything together gently rather than stirring aggressively.
FYI, gentle folding keeps your fruit pieces intact instead of turning mushy or bruised. Take your time here, working around the bowl until every piece looks evenly coated in that creamy dressing.
Step 5: Coat Everything Evenly
Continue folding until every apple chunk, grape, and walnut piece looks fully covered in the dressing. Check the bottom of the bowl for any dry spots where fruit might be hiding without coating.
This step matters more than people expect. Uneven coating means some bites taste rich and creamy while others taste plain and dry, which throws off the whole experience.
Step 6: Transfer and Garnish
Spoon your finished salad into a nice serving bowl, spreading it out attractively for presentation. Sprinkle extra chopped walnuts and a light dusting of brown sugar over the top for that final polished touch.
This garnish step takes seconds but makes a real visual difference. A few scattered walnuts on top signal to everyone at the table that this dish deserves a second look.
Step 7: Serve or Chill
You can serve this salad immediately if you’re short on time, and it still tastes fantastic. If you have a bit of time, refrigerate it for up to two hours before serving for a slightly firmer, chillier texture.
Either way works beautifully depending on your schedule. Just remember to add any extra walnut garnish right before serving to keep that crunch factor at its peak.
Tips for Nailing This Recipe Every Time
A handful of small adjustments can take this salad from good to genuinely crave-worthy. Here’s what experience has taught me after making this dish more times than I can count.
- Toss apples with lemon juice immediately after chopping to prevent browning
- Use softened cream cheese for the smoothest possible dressing texture
- Fold gently rather than stirring to keep fruit pieces intact
- Add extra walnuts just before serving to maintain maximum crunch
- Store leftovers in an airtight container in the fridge for up to 2 days
Fun Variations to Try
Once you’ve mastered the classic version, why stop there? This salad is a fantastic base for experimenting with different fruits and flavors.
- Cranberry Apple Version: Fold in dried cranberries for extra tartness and color
- Pineapple Twist: Add crushed pineapple for a tropical, juicy upgrade
- Caramel Drizzle: Top with caramel sauce right before serving for a dessert-style finish
- Cinnamon Spiced Version: Sprinkle cinnamon into the dressing for warm, cozy flavor
- Nut-Free Alternative: Swap walnuts for sunflower seeds or pumpkin seeds
Frequently Asked Questions
Can I make this Apple Walnut Salad ahead of time? Yes, prepare it up to two hours in advance and refrigerate. Add extra walnuts right before serving to keep that crunch intact.
Which type of apples work best in this recipe? Gala, Fuji, Honeycrisp, or Pink Lady all work beautifully here. They hold their crisp texture well against the creamy dressing.
Can I substitute regular yogurt for Greek yogurt? Yes, though Greek yogurt is thicker and helps the dressing hold together more firmly than regular yogurt would.
Is this Apple Walnut Salad gluten-free? Yes, every ingredient in this recipe is naturally gluten-free, making it safe for guests avoiding gluten.
Can I freeze leftover Apple Walnut Salad? No, freezing turns the apples mushy and ruins the texture. Keep any leftovers refrigerated instead.
How do I stop the apples from turning brown? Toss your chopped apples with a small amount of lemon juice immediately after cutting, before mixing them into the dressing.
Wrapping Things Up
This Apple Walnut Salad proves that a handful of simple ingredients can create something genuinely special. With crisp apples, juicy grapes, and a creamy vanilla dressing, it’s the kind of dish that disappears within minutes of hitting the table.
Have you ever brought a dish to a gathering that everyone asked about afterward? That’s exactly what happens with this one. Grab some apples and walnuts this week and watch it become your new go-to.