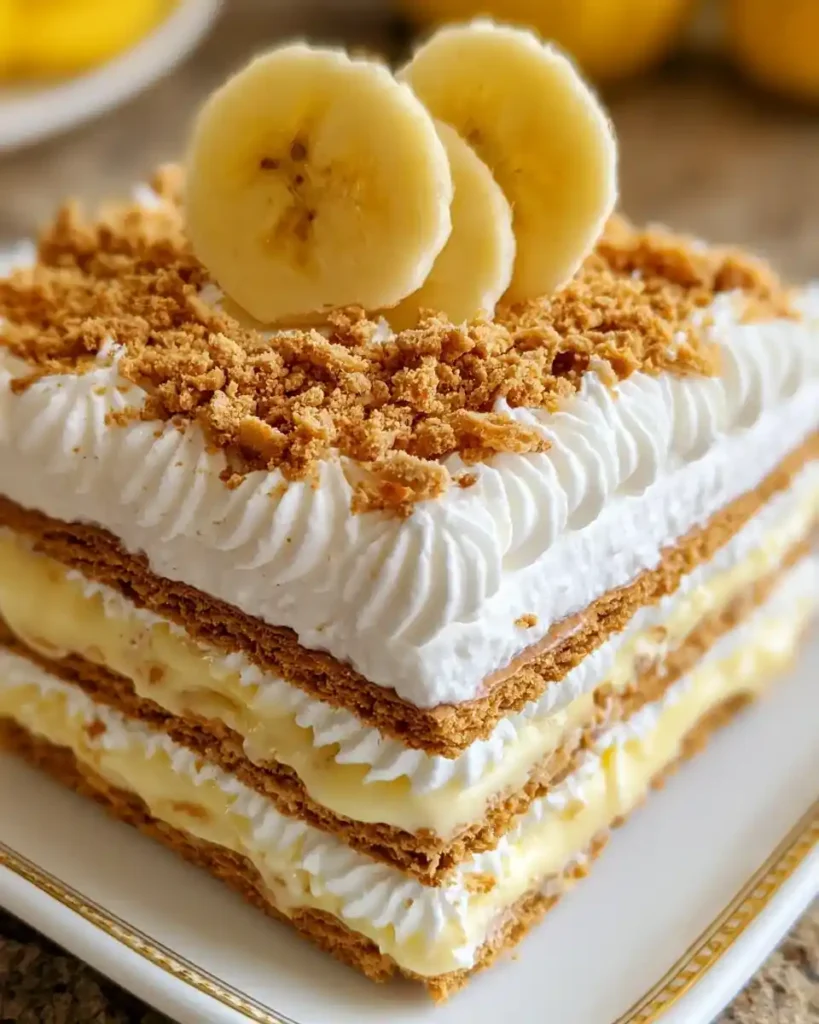
Craving something sweet without turning on the oven? This Banana Icebox Cake solves that problem in minutes. I first made it for a summer potluck when my AC couldn’t handle another baking session. It’s been in my rotation ever since.
Prep time: 20 minutes Chill time: 6 hours (overnight works best) Total time: 6 hours 20 minutes Servings: 12
Why This Banana Icebox Cake Deserves a Spot in Your Recipe Box
Have you ever wanted dessert without dirtying half your kitchen? This cake needs zero oven time and just one bowl for the filling. No baking means no waiting around for anything to cool down either.
I love how the graham crackers soften into a cake-like texture overnight. IMO, that transformation is the whole magic trick behind this dessert. It goes from crunchy layers to something closer to a creamy, sliceable cake.
This recipe also travels well for potlucks and parties. Toss it in a cooler, and it holds up just fine for a few hours. Simple, portable, and crowd-pleasing 🙂
What You’ll Need for This Banana Icebox Cake
Let’s run through the ingredients before we start layering. Nothing here is exotic; you’ve probably got most of it in your pantry already.
For the Filling
- Instant banana cream pudding mix
- Cold milk
- Whipped topping
For the Layers
- Graham crackers
- Fresh bananas, sliced
Exact measurements sit in the recipe summary near the bottom of this article. Save it, screenshot it, whatever keeps it handy.
How to Make Banana Icebox Cake, Step by Step
Ready to actually build this thing? Let’s break it down slowly, because rushing the layering step is where most people go wrong.
Step One: Whisk the Pudding Base
Grab a large mixing bowl and add your instant banana cream pudding mix. Pour in the cold milk right on top of it. Whisk continuously for about two minutes, until the mixture thickens and turns smooth.
Don’t stop whisking too early here. A lumpy pudding base means lumpy layers later, and nobody wants that texture surprise. Let the mixture sit for five minutes to firm up slightly before moving on.
Step Two: Fold in the Whipped Topping
Scoop your whipped topping into the bowl with the pudding mixture. Use a spatula and fold gently, turning the bowl as you go. This keeps the mixture light and airy instead of flat and dense.
Work slowly during this step. Aggressive stirring knocks all the air out, and that air is exactly what gives this dessert its fluffy, cloud-like texture. Fold just until no white streaks remain.
Step Three: Build the First Graham Cracker Layer
Take a 9×13-inch baking dish and lay your first layer of graham crackers flat across the bottom. Break a few crackers in half to fill any awkward gaps along the edges. This layer acts as the base that holds everything together once it chills.
Don’t stress over a perfect fit here. Small gaps close up naturally once the pudding mixture soaks in overnight. Consistency matters more than precision at this stage.
Step Four: Spread the First Pudding Layer
Spoon roughly one-third of your pudding mixture over the graham crackers. Spread it evenly using an offset spatula or the back of a spoon. Reach all the way into the corners so every cracker gets coated.
Repeat this pattern one more time: crackers, then pudding, then crackers again. Each layer should look roughly the same thickness as the one before it. Even layers make for a much better-looking slice later on.
Step Five: Finish with the Top Layer
After your final layer of graham crackers, spread the remaining pudding mixture across the entire top. Smooth it out until it fully covers every cracker underneath. This top layer protects everything as it chills and keeps the crackers from drying out.
Cover the dish tightly with plastic wrap, pressing it directly against the surface if you can. This prevents a weird film from forming on top overnight. Refrigerate for at least six hours, though overnight gives you the best texture.
Step Six: Add Fresh Bananas Before Serving
Right before you serve the cake, slice up your fresh bananas. Arrange the slices across the top in whatever pattern makes you happy. Adding them early causes browning, so timing really does matter here.
Slice the cake into squares once the bananas are on. Each piece should hold its shape while still looking soft and creamy inside. Serve it cold, straight from the fridge, for the best texture.
Tips That Actually Make a Difference
- Chill it overnight whenever possible; the extra time softens the crackers perfectly.
- Use whole milk for a richer, creamier pudding base.
- Slice bananas last to avoid browning before you serve.
- Press plastic wrap directly onto the surface to prevent a skin from forming.
- Double the recipe for a crowd; this cake disappears fast at gatherings.
Easy Variations to Try
Bored of the classic version? These swaps keep the core idea while changing up the flavor.
- Swap banana pudding for chocolate or vanilla pudding mix.
- Add crushed pecans or walnuts between the layers for crunch.
- Use coconut milk and dairy-free whipped topping for a dairy-free version.
- Layer in fresh strawberries or raspberries alongside the bananas.
- Swap regular graham crackers for cinnamon-flavored ones.
What to Serve Alongside This Cake
This Banana Icebox Cake works well on its own, but a few pairings take it up a notch. Try serving it with a scoop of vanilla ice cream melting on top.
A cold glass of iced tea balances out the sweetness nicely. Hosting something bigger? A drizzle of chocolate sauce over each slice makes it feel a little fancier.
Frequently Asked Questions
Can I make Banana Icebox Cake ahead of time? Yes, and honestly, you should. Making it a day ahead gives the graham crackers time to fully soften, which improves the texture significantly.
How long does this cake last in the fridge? Stored in an airtight container or tightly covered, it stays fresh for up to three days. The bananas on top may brown slightly after day one.
Can I use a different pudding flavor? Absolutely, chocolate, vanilla, and butterscotch pudding all work well here. Keep the layering process the same regardless of flavor.
Can I freeze Banana Icebox Cake? Freezing isn’t recommended since the texture changes once thawed. The whipped topping tends to separate, leaving a watery, less appealing result.
What if I don’t like bananas? Swap them out entirely. Sliced strawberries, peaches, or blueberries all work as a fresh, fruity substitute on top.
Why did my crackers stay crunchy instead of softening? This usually means the cake didn’t chill long enough. Give it the full six hours, or ideally overnight, for the crackers to fully soften.
Final Thoughts on This Banana Icebox Cake
This dessert turns a handful of pantry staples into something genuinely impressive. The creamy layers, soft crackers, and fresh banana slices come together with almost no effort. Have you ever made a dessert this easy that still gets rave reviews?
Give this recipe a try before your next gathering. Save it, share it, and let me know how it turns out. This one earns its spot in your regular rotation.
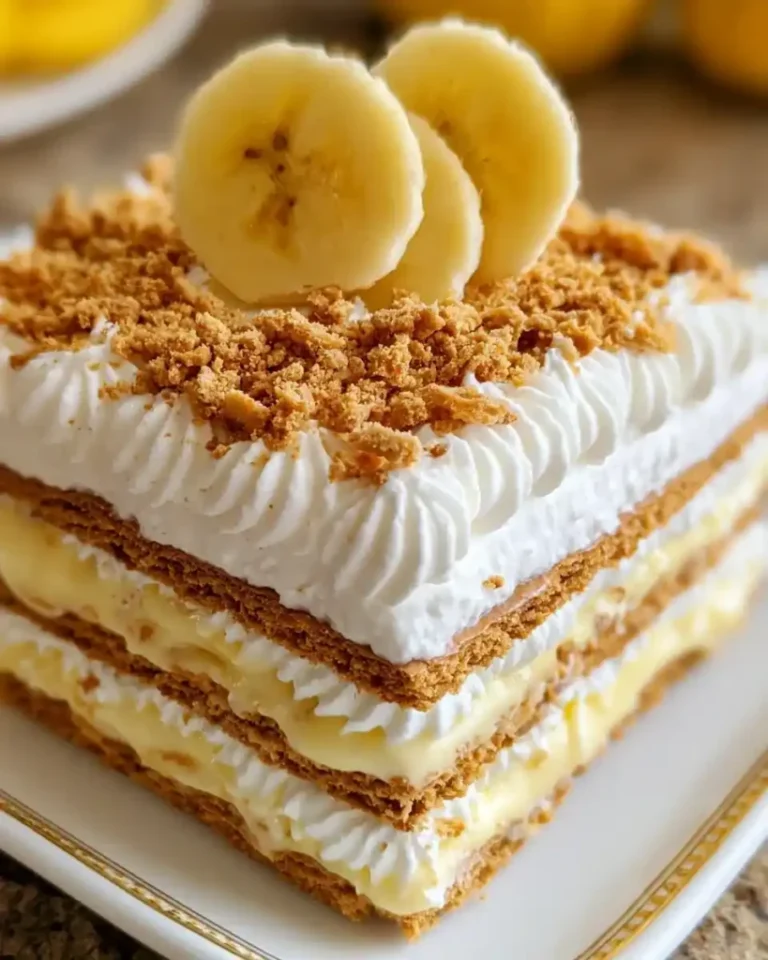
Banana Icebox Cake
Ingredients
Method
- Whisk the pudding mix and cold milk in a large bowl for about two minutes until smooth.
- Let the mixture sit for five minutes to firm up.
- Fold in the whipped topping gently until no white streaks remain.
- Lay a layer of graham crackers at the bottom of a 9×13-inch baking dish.
- Spread one-third of the pudding mixture over the graham crackers.
- Repeat the layers: graham crackers, pudding, and then graham crackers again.
- Cover the final layer of graham crackers with the remaining pudding mixture.
- Cover tightly with plastic wrap and refrigerate for at least six hours, preferably overnight.
- Slice fresh bananas and arrange them on top right before serving.
- Cut into squares and serve cold from the fridge.



