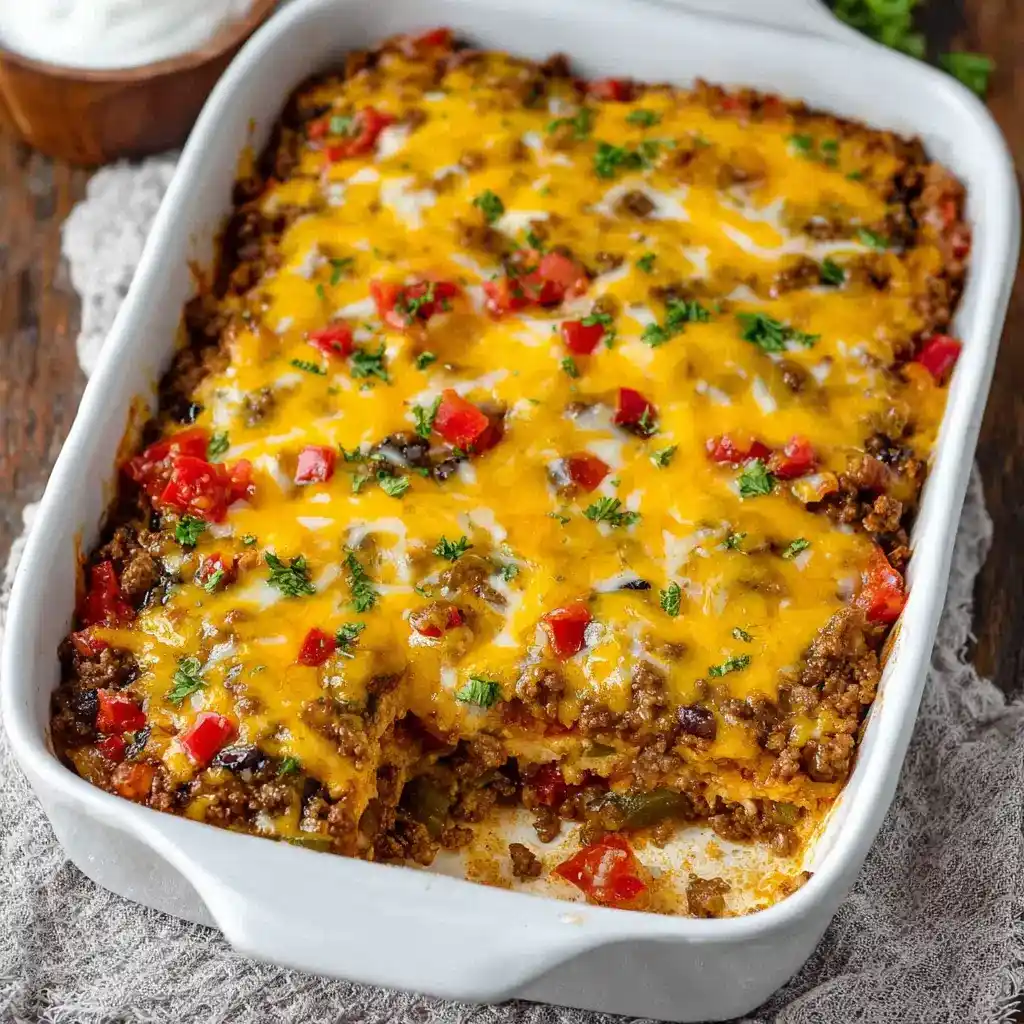
Craving burritos but not in the mood to roll a dozen of them by hand? Beef Burrito Casserole gives you all that Tex-Mex flavor layered into one easy dish instead. Have you ever wanted burrito night without the actual burrito assembly line? This recipe solves that completely.
I started making this on nights when I wanted burritos but had zero patience for folding tortillas one by one. IMO, layering everything into a casserole dish is honestly the smarter move.
Prep time: 20 minutes Cook time: 20 to 30 minutes Rest time: 5 to 10 minutes Total time: About 1 hour Servings: 8
What Exactly Is Beef Burrito Casserole?
This dish takes everything you love about a burrito, seasoned beef, refried beans, melty cheese, and soft tortillas, and layers it all into one baking dish. A creamy sour cream and soup mixture ties everything together into something even richer than a regular burrito.
Why choose layering over rolling? Layering skips the fuss entirely while still delivering every single flavor you’d expect from a loaded burrito.
Why This Recipe Deserves a Spot in Your Rotation
Some Tex-Mex recipes sound easy but turn into a kitchen disaster halfway through. This one doesn’t, and here’s exactly why Beef Burrito Casserole earns a permanent spot in your dinner lineup:
- Can be made ahead and baked whenever you’re ready
- Feeds a family of eight without much effort
- Freezes beautifully for future busy nights
- Works great for potlucks or casual get-togethers
- Endlessly customizable with different proteins and cheeses
Have you ever needed dinner sorted a day in advance because life got busy? This casserole makes that entirely possible.
Ingredients You’ll Need
Nothing complicated here, just simple ingredients that build serious Tex-Mex flavor. Here’s exactly what you need:
- 1 pound ground beef
- 1 cup onion, chopped
- 1 ounce taco seasoning (one packet or 2 tablespoons)
- 16 ounces refried beans (about 2 cups)
- 10.5 ounces condensed cream of chicken soup (undiluted)
- 3/4 cup sour cream
- 10 large flour tortillas, cut in half
- 2 cups mild cheddar cheese, shredded
- 1 cup pepper jack cheese, shredded
- 1/4 cup cilantro, chopped
- 1 lime
FYI, you can swap the cream of chicken soup for cream of mushroom or celery if that fits your taste better.
How to Make Beef Burrito Casserole (Step-by-Step)
This recipe breaks into a few manageable stages: cooking the beef, mixing the creamy layer, and building everything up before baking. None of it requires advanced skills.
Step 1: Cook the Beef and Onion
Add the ground beef and chopped onion into a heavy pan over medium heat. Cook everything together until the beef is fully browned and the onion turns soft and translucent.
Step 2: Add the Beans and Seasoning
Drain off any excess fat from the pan, then stir in the refried beans and taco seasoning. Mix thoroughly until everything combines into one thick, well-seasoned filling.
Step 3: Brighten It Up
Squeeze the fresh lime directly over the beef mixture and add the chopped cilantro. Stir everything together, then set the mixture aside while you prepare the creamy layer.
This citrus touch matters more than it seems. That splash of lime cuts through the richness and keeps every bite tasting bright instead of heavy.
Step 4: Prep Your Baking Dish
Spray a 13×9-inch baking dish generously with nonstick cooking spray. This keeps the bottom layer from sticking once everything bakes together.
Step 5: Mix the Creamy Sauce
In a large bowl, combine the cream of chicken soup and sour cream until fully smooth. This creamy mixture becomes the base layer that ties every part of the casserole together.
Step 6: Start Layering
Spoon a layer of the sour cream mixture into the bottom of your prepared dish. Add a layer of tortillas next, placing the flat sides along the edges and using halves to cover the middle, about three large tortillas total.
Step 7: Add Beef and Cheese
Spread a layer of the seasoned beef mixture directly over the tortillas. Sprinkle one cup of shredded cheese evenly across the top of that beef layer.
Step 8: Repeat the Layers
Repeat the entire layering process, starting again with the sour cream mixture, followed by tortillas, beef, and cheese. Finish everything off with one final generous layer of cheese on top.
Skipping the repeat here shortchanges the whole dish. Multiple layers are exactly what give this casserole that satisfying, hearty texture in every bite.
Step 9: Refrigerate If Making Ahead
Cover the assembled casserole and refrigerate it for up to 2 days if you’re prepping ahead of time. This makes it incredibly convenient for planning dinners in advance.
Step 10: Bake Until Hot
Preheat your oven to 350°F, then bake the casserole uncovered for 20 minutes if fresh, or 30 minutes if it’s been refrigerated. You’re looking for a bubbling, fully heated dish with melted, golden cheese on top.
Step 11: Let It Rest and Serve
Pull the casserole out of the oven once it’s fully heated through. Let it stand for 5 to 10 minutes before serving, since this helps everything set and makes slicing much easier.
Serving Suggestions That Actually Work
This casserole practically demands a few classic Tex-Mex toppings on the side. Try any of these options:
- Extra lime wedges for squeezing
- Fresh salsa
- Guacamole
- Sliced jalapeños
- A dollop of extra sour cream
Have you ever needed a dinner that feels like a full fiesta with almost zero extra effort? This casserole gets you there easily.
Storage and Reheating Tips
Leftovers hold up really well, making this casserole great for meal prep throughout the week. Keep these tips in mind:
- Store leftovers in an airtight container in the fridge for up to 4 days
- Reheat in the oven at 350°F until warmed through
- Freeze the assembled, unbaked casserole for future meals
- Bake straight from frozen at 350°F for 50 to 60 minutes
- Avoid microwaving large portions if you want to preserve the layered texture
Fun Variations to Try Next Time
Once you’ve nailed the classic version, this casserole welcomes plenty of creative twists. Here are a few directions worth trying:
- Chicken version: swap ground beef for cooked shredded chicken
- Vegetarian version: replace beef with black beans, corn, and bell peppers
- Spicy version: add diced jalapeños or hot sauce to the beef mixture
- Extra cheesy version: use equal parts cheddar and mozzarella
- Beef and rice version: stir cooked rice into the beef mixture for a heartier meal
Have you ever added rice to a casserole and instantly made it more filling without much extra work? That’s exactly what the rice version does here.
Frequently Asked Questions
Can I use corn tortillas instead of flour? Yes, just soften them slightly in the microwave first to prevent cracking during layering.
Can this casserole be made gluten-free? Absolutely, use gluten-free tortillas and confirm your soup and taco seasoning are also gluten-free.
Can I make this casserole ahead of time? Yes, assemble it and refrigerate for up to 2 days before baking whenever you’re ready.
Can I substitute ground turkey for beef? Yes, ground turkey works perfectly with the exact same seasonings and layering process.
Is this casserole freezer-friendly? Yes, assemble it fully, freeze it unbaked, then bake directly from frozen at 350°F for 50 to 60 minutes.
Final Thoughts
Beef Burrito Casserole proves that all your favorite burrito flavors don’t need to be rolled up individually to taste amazing. It’s hearty, cheesy, make-ahead friendly, and disappears fast at any dinner table.
Make this the next time burrito cravings hit but rolling tortillas sounds like too much work. Just don’t be surprised when this casserole becomes a permanent fixture in your weekly meal rotation.