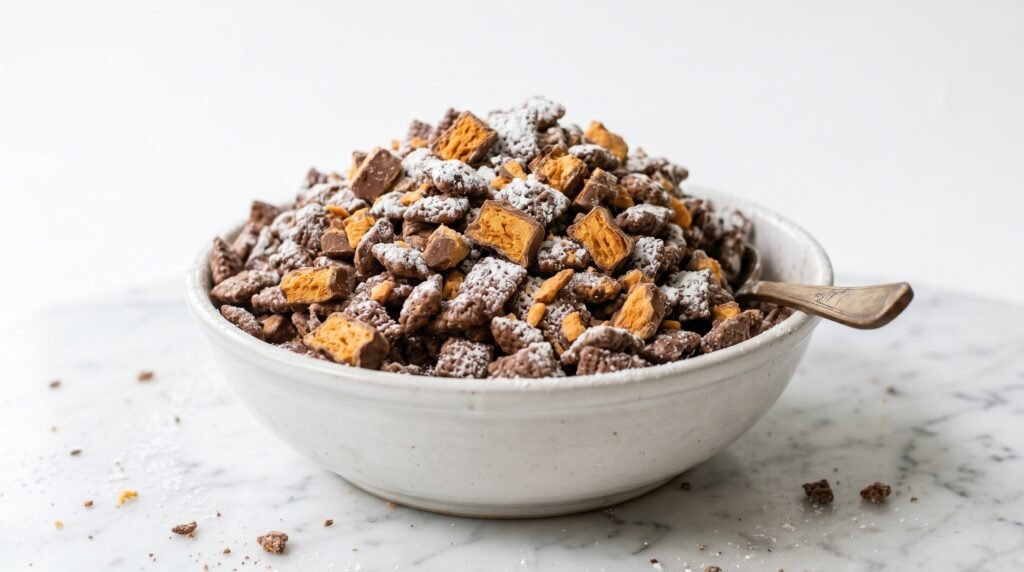
You know that snack that disappears from the bowl before you even set it down? That’s Butterfinger Puppy Chow. I made this for a movie night last fall and genuinely had to hide some in the back of the cabinet just to have leftovers.
It’s crispy Rice Chex coated in a glossy chocolate-peanut butter mix, then tossed with crushed Butterfinger bars and dusted in powdered sugar. No oven. No complicated technique. Just one bowl and about twenty minutes.
Whether you’re making a game-day snack, a holiday treat bag, or just looking for something dangerously snackable on a random Wednesday — this recipe delivers every single time.
Why Butterfinger Puppy Chow Actually Slaps
Have you ever had one of those snacks that hits every single craving at once? Crunchy, sweet, salty, chocolatey, and a little peanut-buttery all at the same time? That’s exactly what Butterfinger Puppy Chow does, and it does it without requiring any baking skill whatsoever.
The secret is in the layers. The Rice Chex gives you a super light, airy crunch as the base. The chocolate-peanut butter coating wraps around each piece and sets into a satisfying shell. Then the crushed Butterfinger bits add that signature crispy, toffee-like sweetness throughout.
IMO, the powdered sugar coating is the finishing touch that takes it from “good snack” to “I could eat this entire bowl” territory. It absorbs any excess stickiness and gives every piece that iconic muddy buddy finish.
What Makes This Recipe a Crowd Favorite
- Zero baking required: You only need a microwave, a big bowl, and about 20 minutes.
- No special skills needed: If you can stir and shake a bag, you can make this perfectly.
- Scales easily: Double the batch without changing anything about the process.
- Stores well: Stays fresh in an airtight container for up to 4–5 days — if it lasts that long.
- Highly customizable: Swap candies, change the chocolate, adjust sweetness to your preference.
Everything You’ll Need
Good news — every ingredient here is easy to find at any grocery store. No specialty items, no obscure pantry additions. Just the good stuff.
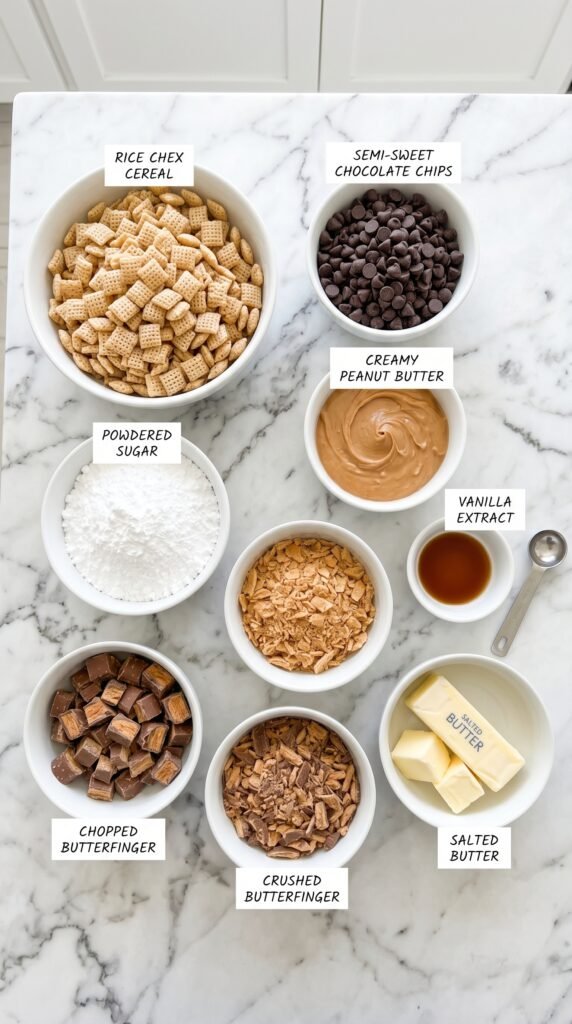
Ingredient List (Makes 10–12 Servings)
- 7 cups Rice Chex cereal
- 1 cup semi-sweet chocolate chips
- ½ cup creamy peanut butter
- ¼ cup salted butter
- 1 teaspoon pure vanilla extract
- 15 fun-size Butterfinger bars, crushed
- 3 full-size Butterfinger bars, roughly chopped
- 1½ cups powdered sugar, sifted
A quick note on the Butterfinger quantity: the 15 fun-size bars go into the mix, and the 3 full-size bars get scattered on top at the end. You want that contrast — fine crushed candy throughout, plus bigger visible chunks on the surface.
For the chocolate chips, semi-sweet is the sweet spot here (pun fully intended). Dark chocolate works too if you want a slightly more intense, less sweet result. Milk chocolate will make it noticeably sweeter, so adjust your powdered sugar if you go that route.
Equipment You’ll Need
Nothing fancy. Here’s the quick list:
- An extra-large mixing bowl (bigger than you think you need)
- A microwave-safe bowl for melting
- A rubber spatula or large spoon for folding
- A rimmed baking sheet lined with parchment
- A 2-gallon zip-lock bag (optional but makes the powdered sugar step a breeze)
How to Make Butterfinger Puppy Chow – Step by Step
Let’s walk through every step in detail. The process is genuinely simple, but a few small things make a big difference in the final result.
Step 1 :Set Up Your Cereal Base
Measure out 7 cups of Rice Chex cereal and pour them into your extra-large mixing bowl. Spread them out a little so they sit loosely rather than compacting into a tight pile. You need space in the bowl to fold the chocolate coating through later without crushing the pieces. A big bowl feels overkill right now — trust the process, you will absolutely need every inch of that space once the chocolate goes in.
Step 2 :Melt the Chocolate-Peanut Butter Mixture
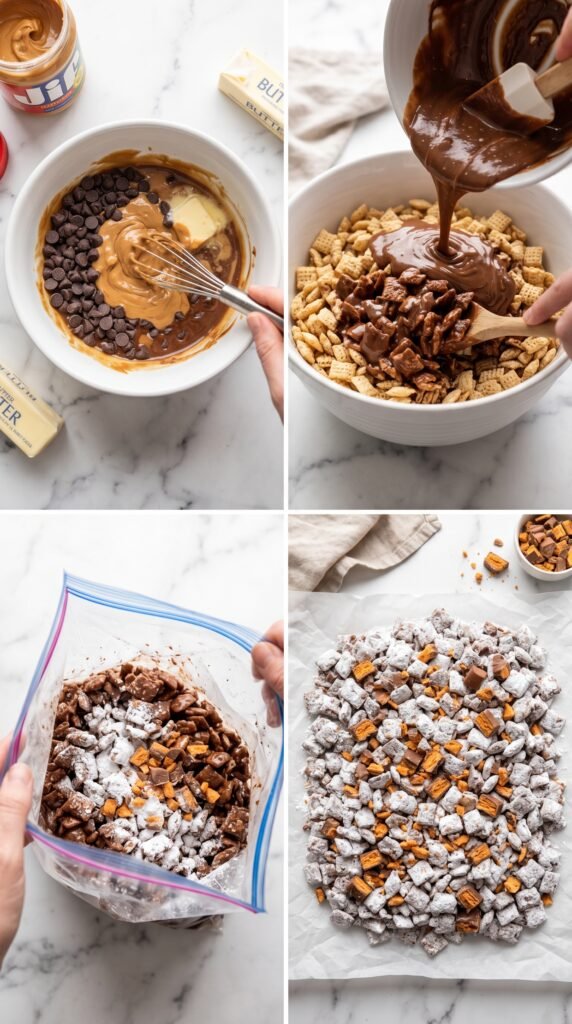
In a microwave-safe bowl, combine 1 cup of semi-sweet chocolate chips, ½ cup of creamy peanut butter, and ¼ cup of salted butter. Place the bowl in the microwave and heat on high for 60 seconds. Pull it out and stir everything together — even if it doesn’t look fully melted yet, the residual heat keeps working. If you still see unmelted chips after stirring, put it back in for 20-second bursts, stirring between each one. You want a completely smooth, glossy mixture with no lumps at all. Once it’s there, stir in 1 teaspoon of vanilla extract — this small addition makes the whole mixture smell incredible and adds real depth to the final flavor.
Step 3 : Coat the Cereal
Pour your melted chocolate mixture directly over the Rice Chex in the large bowl. Now comes the part that requires a gentle hand — use your spatula to fold the cereal into the chocolate rather than stirring aggressively. Work from the bottom up, rotating the bowl as you go. The goal is to get every single piece coated in that chocolate gloss without snapping the cereal into crumbs. Take your time here. Spend 2 to 3 minutes on this step and you will end up with beautifully coated, intact pieces rather than a bowl of chocolate gravel.
Step 4 :Add the Crushed Butterfinger
While the chocolate coating is still warm and sticky, scatter in your 15 crushed fun-size Butterfinger bars. Fold them through the mixture the same way you coated the cereal — gently, from the bottom, rotating as you go. The Butterfinger pieces cling right to the chocolate coating at this stage, which is exactly what you want. You’ll start to see the mix come together into something that looks genuinely fantastic at this point. The candy pieces nestle into every nook and the whole bowl starts smelling like a candy shop.
Step 5 :Coat with Powdered Sugar
This is the step that transforms everything. Sift your 1½ cups of powdered sugar to remove any lumps first — clumpy powdered sugar leads to uneven coating and nobody wants a mouthful of pure sugar in one spot. You have two options here: either sift the powdered sugar directly over the bowl and fold it through gently, or pour the coated cereal mix into a large 2-gallon zip-lock bag, add the powdered sugar, seal it, and shake. The bag method is genuinely more fun and gives a more even coat. Shake it for about 30 seconds, open the bag, check the coverage, and give it another shake if needed.
Step 6 :Spread and Let It Dry
Line a large rimmed baking sheet with parchment paper and spread the coated mix out in a single, even layer. This drying step is not optional — it lets the chocolate set properly and stops all the pieces from sticking together into one giant clump. While the mix is still a little tacky, scatter your 3 roughly chopped full-size Butterfinger bars over the top. Press them in very lightly so they stay put. Now leave everything alone for at least 30 minutes at room temperature. If your kitchen runs warm, slide the tray into the fridge for 15 minutes instead to speed up the process.
Step 7 :Break Apart and Serve
Once the chocolate has fully set and the pieces no longer feel tacky, use your hands or a spatula to break the mix into individual clusters. Transfer everything into a large serving bowl or portion it out into smaller cups or bags. At this point your Butterfinger Puppy Chow is ready to eat, gift, or hide strategically around the kitchen so you actually get some before everyone else arrives.
Tips for Perfect Results Every Time
- Use a really big bowl: You cannot fold chocolate through cereal in a bowl that’s too small. Bigger is always better here.
- Don’t overheat the chocolate: Short microwave bursts with stirring in between prevents the chocolate from seizing up and going grainy.
- Sift the powdered sugar: Lumps in the sugar mean uneven coating. Ten seconds of sifting saves the whole batch.
- Let it dry fully: Rushing the drying step leads to a sticky, clumpy mess. Give it the full 30 minutes.
- Crush Butterfinger bars while cold: Straight from the fridge or freezer, they shatter cleanly. At room temp they can get chewy and sticky.
- Store in an airtight container: Keeps fresh and crunchy for 4 to 5 days at room temperature.
Variations Worth Trying

Once you’ve made the original, the world is your chocolatey, peanut-buttery oyster. Here are a few directions to take it:
Mixed Candy Version
Toss in crushed Reese’s Pieces, Snickers bits, or M&Ms alongside the Butterfinger. Each candy brings its own texture and flavor note, and the result looks colorful and festive enough for any party table.
Dark Chocolate Version
Swap the semi-sweet chips for dark chocolate chips (at least 60% cocoa). The bitterness of the dark chocolate balances the super sweet Butterfinger really well and makes the whole thing taste a little more grown-up 🙂
Nut-Free Version
Replace the peanut butter with sunflower seed butter or cookie butter. Sunflower butter keeps things nut-free for school events. Cookie butter, on the other hand, turns this into something truly dangerous in terms of addictiveness.
White Chocolate Version
Use white chocolate chips instead of semi-sweet. The combination of white chocolate and Butterfinger is sweeter and more candy-forward. Add a pinch of sea salt to the powdered sugar coating to balance it out.
How to Serve Butterfinger Puppy Chow
Serving this stuff is honestly the easy part — pile it in a bowl and watch it vanish. But a few small presentation touches can make it feel extra special:
- Scoop into small paper cups or cellophane bags tied with ribbon for party favors or gift bags.
- Layer in a clear jar for a visually impressive holiday gift — the powdered sugar coating makes it look almost snowy.
- Serve alongside a bowl of popcorn during movie night for the ultimate salty-sweet snacking spread.
- Pair with a cold glass of milk to cut through the sweetness — honestly the classic combo.
- Use as an ice cream topping by crushing it further and sprinkling over vanilla soft serve. FYI, this is absolutely worth trying.
Frequently Asked Questions
How long does Butterfinger Puppy Chow stay fresh?
Stored in an airtight container at room temperature, Butterfinger Puppy Chow stays fresh and crunchy for 4 to 5 days. The powdered sugar coating helps seal in moisture and keeps the cereal from going stale. For longer storage, refrigerate it for up to a week, though the texture is best within the first few days.
Can I make Butterfinger Puppy Chow ahead of time?
Yes, and it’s actually a great make-ahead snack. You can prepare it up to two days before your event, store it in an airtight container, and it holds up perfectly. Just give it a gentle shake or stir before serving to separate any pieces that have stuck together during storage.
Can I use a different cereal?
Absolutely. Rice Chex is the classic choice because it’s light, airy, and holds the chocolate coating without getting soggy. Corn Chex and Wheat Chex both work well too. Avoid puffed or very dense cereals — they either absorb too much coating or don’t hold it evenly.
Why did my chocolate mixture turn grainy or lumpy?
This usually happens when the chocolate overheats in the microwave, a process called seizing. Always melt in short 20-second bursts after the first minute, stirring in between each burst. If it does seize, add half a teaspoon of vegetable oil and stir vigorously — this often brings it back to a smooth consistency.
Is there a vegan version of this recipe?
Yes. Swap the butter for coconut oil or a vegan butter alternative, and use dairy-free chocolate chips. Make sure your powdered sugar is vegan-certified (some brands use bone char in processing). Butterfinger bars contain milk ingredients, so substitute with a dairy-free toffee-style candy or just add extra dairy-free chocolate chips.
Can I double the recipe for a large crowd?
Definitely — this recipe scales up with no issues. Just make sure you have an extra-large bowl or work in two separate batches for the coating and folding stage. Trying to coat too much cereal at once means the pieces at the bottom never get properly coated. Split the batch evenly and you’ll get perfect results on both halves.
The Bottom Line
Let’s be real — Butterfinger Puppy Chow is not a complicated recipe. It’s not supposed to be. It’s the kind of snack you make when you want something genuinely delicious without spending an hour in the kitchen or dirtying half your cookware.
And yet, every time I set a bowl of this out at a gathering, people ask for the recipe like I’ve done something extraordinary. The combination of crunchy Chex, creamy chocolate, and that signature crispy Butterfinger flavor just works in a way that’s hard to explain until you’ve tried it.
Twenty minutes of your time. One pot, one bowl, one baking sheet. The payoff is completely disproportionate to the effort, and that’s exactly why this recipe deserves a permanent spot in your rotation.
Go make it. Right now. You can thank yourself later.

Butterfinger Puppy Chow
Ingredients
Method
- Measure out 7 cups of Rice Chex cereal and pour them into your extra-large mixing bowl.
- In a microwave-safe bowl, combine 1 cup of semi-sweet chocolate chips, ½ cup of creamy peanut butter, and ¼ cup of salted butter. Microwave for 60 seconds and stir until smooth.
- Pour the melted chocolate mixture over the Rice Chex and gently fold to coat.
- While the chocolate is still warm, fold in the crushed Butterfinger bars.
- Sift the powdered sugar to remove lumps and coat the mixture either by shaking in a zip-lock bag or by folding directly into the bowl.
- Spread the mixture onto a lined baking sheet and allow to dry for at least 30 minutes.
- Sprinkle the chopped Butterfinger bars on top and press lightly into the mixture.
- Once set, break apart and serve in a bowl, or portion into bags or cups.


