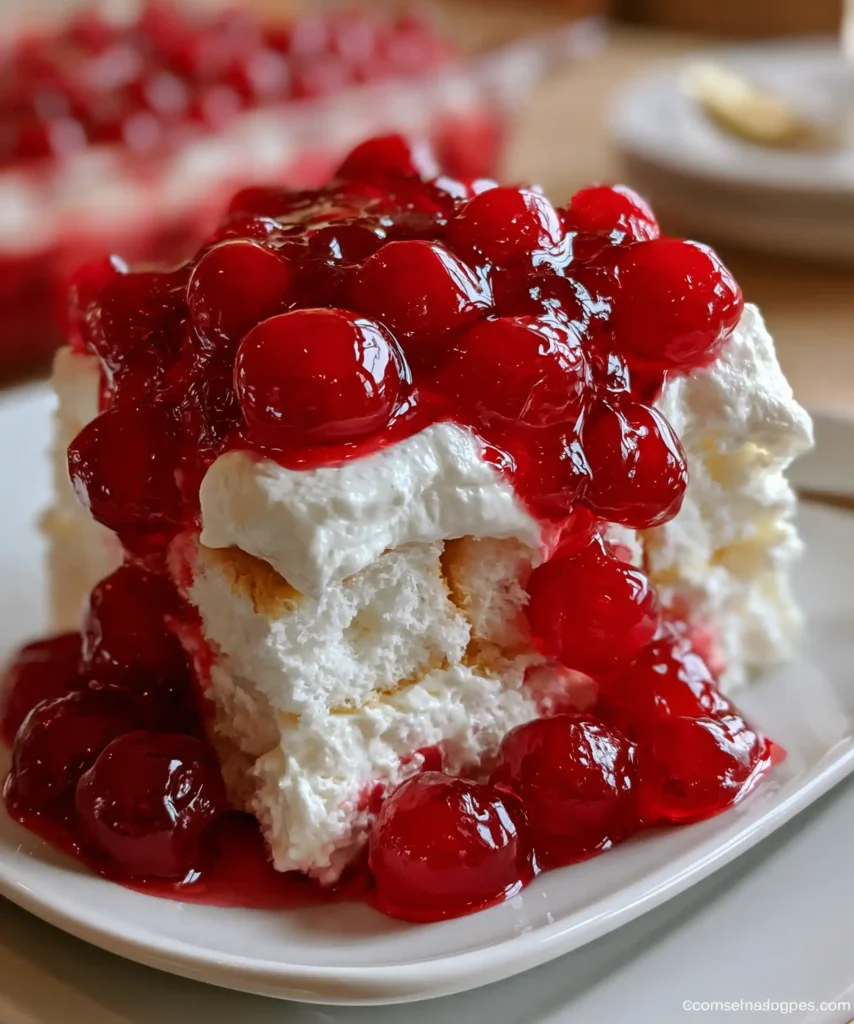
Some desserts need an oven, a candy thermometer, and half your Saturday. This Cherries in the Snow recipe needs none of that, just a bowl, a fridge, and about 20 minutes of your time.
I stumbled onto this dessert years ago at a potluck and immediately begged for the recipe. It’s been my emergency dessert ever since, the one I make when I need something impressive but have zero patience for baking. Ready to see why it works so well?
Prep Time: 20 minutes Chill Time: 30 minutes minimum, up to 2 hours Servings: 12
Why Cherries in the Snow Deserves a Spot in Your Dessert Rotation
Have you ever needed a show-stopping dessert with almost zero notice? That’s exactly what this recipe solves. No oven, no baking, just a creamy filling layered with cake and topped with bright, juicy cherries.
The contrast between the fluffy cream cheese layer and the airy angel food cake creates a texture that feels genuinely luxurious. IMO, that combination is what separates this dessert from your average fridge cake.
This recipe also scales beautifully for a crowd. One dish feeds twelve people, which makes it a reliable go-to for potlucks, holidays, or any gathering where dessert duty falls on you.
Ingredients for Cherries in the Snow
This recipe comes together with just a handful of ingredients, most of which you probably already have in your kitchen. Here’s exactly what you’ll need.
- Cream cheese, softened: 16 ounces
- Powdered sugar: 1 1/2 cups, sifted
- Whole milk: 1/4 cup
- Vanilla extract: 1 teaspoon
- Whipped topping, thawed: 8 ounces
- Angel food cake, torn into pieces: 1 whole cake (about 12 to 14 ounces)
- Cherry pie filling: 2 cans (21 ounces each)
Seven ingredients stand between you and a dessert that looks like it took real effort. That’s exactly the kind of math I like in the kitchen.
A Quick Note on Ingredients
Make sure your cream cheese sits out until it’s fully softened before mixing. Cold cream cheese refuses to blend smoothly and leaves you fighting little lumps the entire time.
Store-bought angel food cake works perfectly fine and saves a ton of time. If you’re feeling ambitious, homemade angel food cake brings a slightly fresher flavor, but nobody will complain either way.
How to Make Cherries in the Snow
This process breaks into eight simple steps, and none of them require any actual cooking. Let’s build this dessert layer by layer.
Step 1: Beat the Cream Cheese Until Smooth
Add your softened cream cheese to a large mixing bowl. Using an electric mixer on medium-high speed, beat it for one to two minutes until it turns completely smooth and fluffy with no lumps remaining.
This step matters more than it seems. Any lumps that survive here will show up in your final dessert, so take the extra minute to get it fully smooth before moving forward.
Step 2: Add the Powdered Sugar
Sift the powdered sugar directly into the bowl with your cream cheese. Beat everything together on medium speed until fully incorporated and the mixture looks light and even throughout.
Sifting the sugar first prevents little clumps from forming in your final filling. It’s a small extra step that makes a noticeable difference in the final texture.
Step 3: Mix in the Milk and Vanilla
Pour in the whole milk and vanilla extract, then beat the mixture again until it turns smooth and slightly loosened. This addition helps thin out the filling just enough to make folding in the next ingredients easier.
Your kitchen should start smelling like vanilla at this point, which honestly is one of the small joys of making this dessert. Take a moment to appreciate it.
Step 4: Fold in the Whipped Topping
Gently fold the thawed whipped topping into your cream cheese mixture using a rubber spatula. Work in slow, sweeping motions from the bottom of the bowl up and over to preserve as much air as possible.
Overmixing at this stage deflates the fluffiness you’re working to build. Stop folding as soon as no white streaks remain visible, and you’ll be left with a light, cloud-like base.
Step 5: Fold in the Angel Food Cake Pieces
Tear your angel food cake into bite-sized pieces and gently fold them into the creamy mixture. Work carefully here, since the cake is delicate and can turn mushy if you stir too roughly.
This is really where the dessert starts to take shape. The cake pieces soak up the creamy filling around them, creating little pockets of flavor throughout every bite.
Step 6: Transfer to a Baking Dish
Spread the entire mixture into a 9×13-inch baking dish, smoothing the top with a spatula so it forms an even layer. Don’t stress about making it perfectly flat, since a slightly rustic look actually adds to the charm.
Take a moment here to appreciate how far you’ve come with just a spatula and a mixing bowl. No oven required, and you’re already most of the way there.
Step 7: Top With Cherry Pie Filling
Spoon the cherry pie filling evenly over the top of the cream cheese layer. Spread it gently toward the edges so every future slice gets a fair share of those plump, juicy cherries.
The deep red color against the pale, fluffy base creates a genuinely striking presentation. This is the moment the dessert really starts to look like something special.
Step 8: Chill Before Serving
Cover the dish and refrigerate for at least 30 minutes, though up to two hours gives the flavors more time to meld together beautifully. Resist the urge to skip this step, even if you’re impatient.
This chilling period firms up the filling and lets everything settle into its final, sliceable texture. Patience really does pay off here, and it’s worth every minute of waiting.
Tips for Success
A few small habits separate a good batch from a truly memorable one. Keep these in mind every time you make this dessert.
- Always use room temperature cream cheese for the smoothest blend
- Fold gently when adding whipped topping and cake to keep the texture light
- Don’t skip the chilling step, since it firms up the layers properly
- Serve within a few days for the freshest taste and texture
- Consider a trifle dish for an extra impressive presentation
Fun Variations to Try
Once you’ve made the classic version, feel free to switch things up. This dessert adapts easily to different flavors and dietary needs.
- Chocolate Cherry Delight: Stir cocoa powder or mini chocolate chips into the cream cheese layer
- Berry Bliss: Swap the cherry pie filling for mixed berries like strawberries and blueberries
- Nutty Addition: Fold chopped walnuts or pecans into the filling for extra crunch
- Gluten-Free Version: Use a gluten-free angel food cake for the same fluffy texture
Serving Suggestions
This dessert pairs beautifully with a scoop of vanilla ice cream for extra indulgence. A dollop of fresh whipped cream on the side never hurts either.
For drinks, a light sparkling water or iced tea complements the sweetness nicely without competing with it. A few fresh mint leaves scattered on top add a lovely pop of color right before serving.
Frequently Asked Questions
Can I use fresh cherries instead of cherry pie filling?
Yes, pit and slice fresh cherries, then toss them with a bit of sugar to bring out their natural sweetness before spooning them over the cream cheese layer.
How long can I store Cherries in the Snow?
This dessert stays fresh in the refrigerator for two to three days when covered tightly. The flavors actually continue to develop the longer it sits.
Can I make this dessert ahead of time?
Absolutely. You can prepare it up to 24 hours in advance and keep it chilled until you’re ready to serve, which makes it a great option for entertaining.
Is this dessert suitable for a large gathering?
Definitely. This recipe serves twelve people comfortably, making it a solid choice for potlucks, holidays, or any gathering where you need dessert to stretch.
What can I substitute for cream cheese to make this lighter?
Greek yogurt works as a lighter substitute and still delivers a creamy texture that pairs well with the cherries while cutting down on richness.
Why did my filling turn out runny instead of fluffy?
This usually happens if the whipped topping gets overmixed or the cream cheese wasn’t fully softened before beating. Take your time with each step, and don’t rush the folding process.
Final Thoughts
Cherries in the Snow proves that a stunning dessert doesn’t need an oven, complicated techniques, or hours of your time. Creamy layers, airy cake, and bright cherries come together into something that looks far more impressive than the minimal effort it actually requires.
Make this one for your next gathering and watch how fast the dish empties. Just maybe make a second batch, because one pan never seems to last as long as you’d hope



