Servings: 8-10 chubbs | Prep Time: 15 minutes | Cook Time: 15-20 minutes | Total Time: ~35 minutes
Some recipes just belong in your life permanently. The Fluffy Milkman Chubbs recipe is one of them. Six ingredients, one bowl, and less than 40 minutes stand between you and the softest, most comforting little homemade treat you have had in a long time.
I stumbled onto Fluffy Milkman Chubbs when I needed something quick and homemade but had no time for anything fancy. What I got was a soft, subtly sweet dough treat that works for breakfast, afternoon tea, or an anytime snack. Spoiler: I made them three times that week.
The name alone makes you curious, right? But once you taste them, the name stops mattering and the texture takes over. Let’s get into it.
What Exactly Are Fluffy Milkman Chubbs?
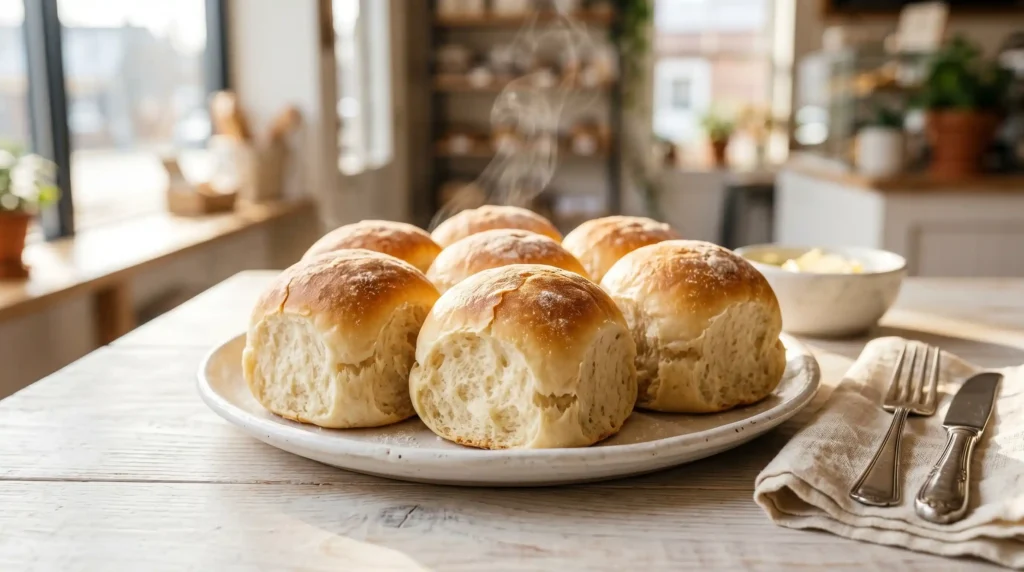
These are soft, round, slightly flattened dough treats made with condensed milk as the primary sweetener. The condensed milk gives them a gentle richness and a depth of flavor that plain sugar simply cannot match. They are not quite a pancake, not quite a biscuit — they sit happily somewhere in between.
The fluffy texture comes from baking powder working alongside the egg to create a light, tender crumb. Whether you bake them in the oven or cook them in a pan, the result is golden, soft, and completely satisfying.
They are the kind of thing you make once and immediately start thinking about what variation to try next. Chocolate chips? Cinnamon? Cheese? All fair game, and we will get to that.
Why You Will Love This Recipe
Before we get into the how, let’s talk about the why. Because honestly, the reasons are pretty convincing.
- Quick and easy — No complicated techniques, no special equipment, no fuss
- Budget-friendly — Everything you need costs almost nothing and lives in your pantry already
- Versatile cooking method — Bake them or pan-cook them, both work beautifully
- Soft and fluffy texture — The egg and baking powder combination delivers every time
- Naturally sweet — Condensed milk handles all the sweetness so you don’t need extra sugar
- Beginner-friendly — If you can stir a bowl, you can make these
Ingredients You Will Need
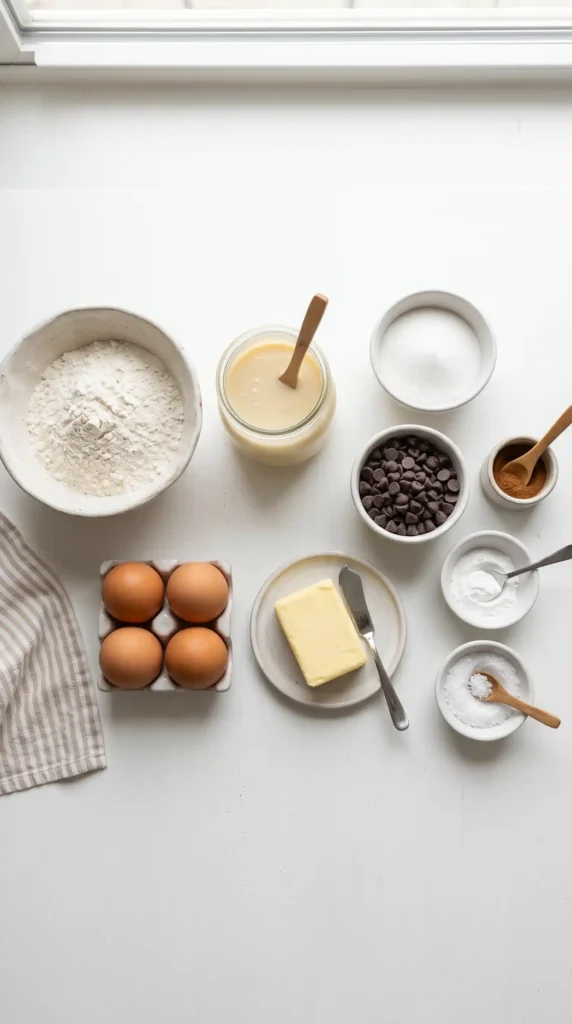
Here is the full list. Short, simple, and probably already sitting in your kitchen right now.
- 2 cups wheat flour
- 1/2 can (about 7 oz / 200g) sweetened condensed milk
- 1 large egg, at room temperature
- 1 teaspoon baking powder
- 1 tablespoon unsalted butter, melted
- A pinch of salt
Optional add-ins: a handful of chocolate chips, shredded coconut, a pinch of cinnamon, or a small amount of grated cheese for a savory version.
Equipment You Will Need
Even the equipment list is minimal. That is genuinely part of the appeal here.
- Two medium mixing bowls
- A whisk or fork
- A wooden spoon or rubber spatula
- A baking tray lined with parchment paper (for oven method)
- A non-stick skillet or frying pan (for pan-cook method)
- A wire cooling rack
How to Make Fluffy Milkman Chubbs: Full Step-by-Step
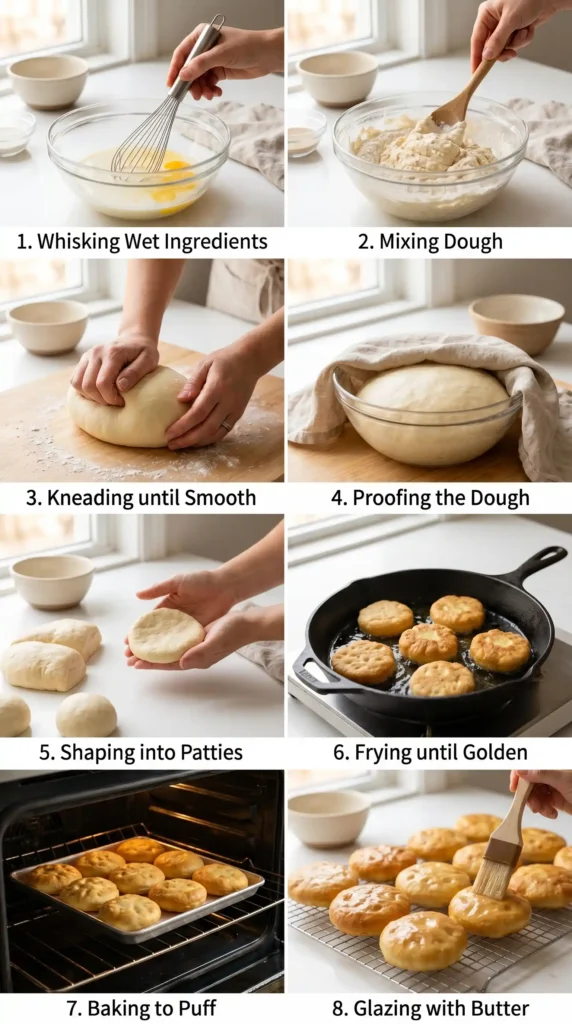
Alright, here is where we actually make these things. Follow each step carefully and you will have perfect, golden chubbs in under 40 minutes.
Step 1: Prepare Your Wet Ingredients
Crack your egg into a medium mixing bowl and whisk it lightly until the yolk and white combine. Then pour in the condensed milk and add the melted butter. Make sure the butter has cooled slightly before adding it — you don’t want hot butter scrambling your egg.
Use a whisk or fork to mix these three ingredients together until the mixture is smooth, creamy, and uniform in color. This should take about one minute of gentle whisking. The condensed milk gives the wet mix a thick, glossy consistency that coats the whisk beautifully.
This wet base is the flavor engine of the whole recipe. The condensed milk carries all the sweetness, the egg provides structure, and the butter adds richness. Getting this step right sets up everything that follows.
Step 2: Combine Your Dry Ingredients
In a separate bowl, measure out your 2 cups of wheat flour and add the baking powder and pinch of salt. Stir the dry ingredients together with a fork or whisk until the baking powder is evenly distributed throughout the flour.
This step matters more than it might seem. Unevenly distributed baking powder means some chubbs rise more than others, and you get inconsistent texture across the batch. One minute of thorough stirring at this stage saves you uneven results later.
FYI, always use fresh baking powder. If yours has been sitting open in the back of the cupboard for a year, it may have lost its potency. Test it by dropping a small amount into warm water — if it fizzes actively, it’s still good.
Step 3: Form the Dough
Now add the dry ingredients into the wet mixture gradually. Pour about one-third of the flour mix in at a time, stirring gently between each addition. This gradual approach prevents lumps and keeps the dough soft and manageable.
As the flour fully incorporates, switch from a whisk to a wooden spoon or your hands. The dough will start pulling away from the sides of the bowl and forming a cohesive mass. Stop mixing the moment it comes together — overmixing develops the gluten in the flour, which toughens the texture.
Check the consistency. The dough should feel soft, slightly elastic, and just barely sticky. If it clings to your hands uncomfortably, sprinkle in a small amount of extra flour, a tablespoon at a time, and work it in gently. If it feels dry or crumbly, add a tiny splash of milk and knead briefly.
You’re looking for a dough that holds its shape when you press it but doesn’t feel tough or stiff. Think soft bread dough, not cookie dough. That’s the sweet spot.
Step 4: Shape the Chubbs
Lightly flour a clean surface or work directly from the bowl. Divide the dough into 8 to 10 equal portions — you can eyeball this or use a kitchen scale if you want them perfectly uniform. Each portion should be roughly the size of a golf ball.
Roll each portion between your palms to form a smooth ball, then gently press it down into a round disc shape. How thick you make them is up to you. Thicker chubbs (about 1 inch) come out fluffier in the center. Thinner ones (about 1/2 inch) cook through more evenly and get slightly crispier edges.
I personally prefer them on the thicker side. There is something deeply satisfying about that soft, pillowy center when you pull one apart. But make a few of both and see what you prefer — this recipe is forgiving enough to experiment.
Step 5: Cook the Chubbs — Two Methods
Here is where you choose your own adventure. Both methods produce great results, but they give slightly different textures and finishes.
Option A: Baking in the Oven
Preheat your oven to 180 degrees Celsius (350 degrees Fahrenheit). Line a baking tray with parchment paper and arrange your shaped chubbs on it, leaving about an inch of space between each one. They don’t spread much, but air circulation helps them bake evenly.
Slide the tray into the center rack of your preheated oven and bake for 15 to 20 minutes. Check them at the 15-minute mark — they should look lightly golden on top and feel set when you press the surface gently. If they look pale, give them another 3 to 5 minutes.
Once done, transfer the chubbs to a wire rack and let them rest for 5 minutes before serving. The baking method produces a softer, lighter texture throughout — ideal if you plan to serve them with spreads or dips.
Option B: Pan Cooking on the Stovetop
Heat a non-stick skillet or frying pan over medium heat and add just a small amount of butter or neutral oil — enough to lightly coat the surface. You want a greased pan, not a swimming pool of fat.
Place your shaped chubbs into the pan without crowding them. Cook for 3 to 4 minutes on the first side without touching them. Resist the urge to press them down or move them around. Let the heat do the work — you will see the edges turn golden and the center start to look set.
Flip each chubb carefully using a flat spatula and cook for another 3 to 4 minutes on the second side. Both sides should be a deep, even golden brown. If they’re browning too fast, lower your heat. Medium heat is the sweet spot — too high and the outside burns before the center cooks through. :/
The pan method gives your chubbs a slightly crisp exterior with a soft, tender inside — almost like a pan-fried biscuit. IMO, this version is the winner for a quick weekday breakfast alongside your morning coffee.
Step 6: Rest and Serve
Whether you baked or pan-cooked them, let the chubbs rest for 3 to 5 minutes after cooking. This short rest allows the interior to finish setting so they don’t fall apart when you tear into them.
Serve them warm. Cold chubbs are fine the next day, but fresh and warm is the experience you really want on the first batch.
How to Serve Your Fluffy Milkman Chubbs
These are wonderfully versatile. You can dress them up or eat them plain right off the pan — both are completely valid choices.
- Drizzle with honey or maple syrup for a classic sweet finish
- Spread with butter or cream cheese while still warm
- Serve alongside a strong cup of tea or coffee
- Add jam, chocolate spread, or nut butter for extra indulgence
- Dust lightly with powdered sugar for a bakery-style presentation
Fun Variations Worth Trying
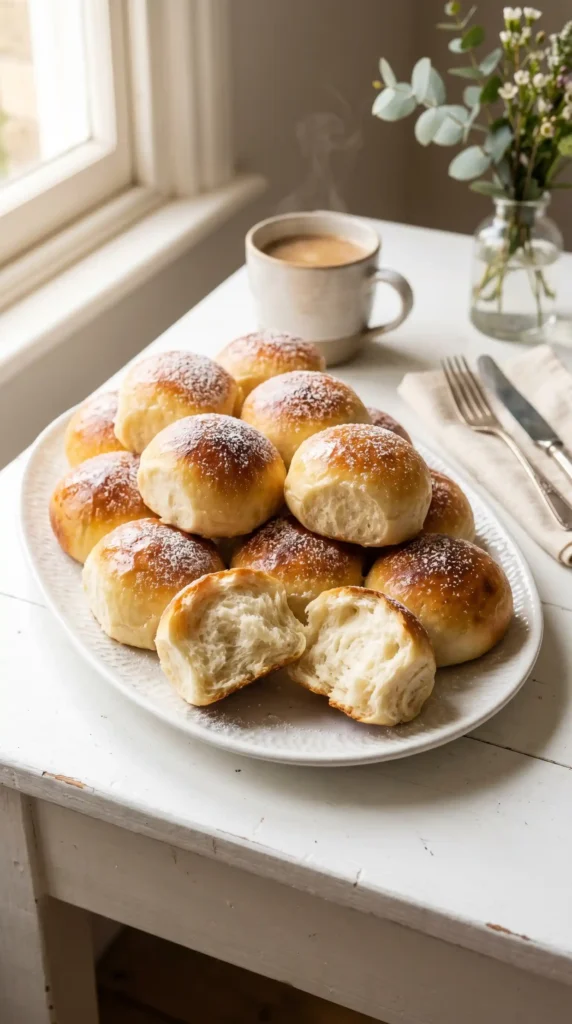
Once you have the base recipe down, experimenting is half the fun. Here are a few directions worth exploring.
Chocolate Chip Chubbs: Fold a handful of mini chocolate chips into the dough just before shaping. They melt slightly during cooking and create little pockets of chocolate throughout.
Coconut Chubbs: Mix in 3 tablespoons of shredded coconut for a tropical note. Toast the coconut first for an even more pronounced flavor.
Cinnamon Spice Chubbs: Add half a teaspoon of ground cinnamon to the dry ingredients. The warm spice pairs beautifully with the sweetness of the condensed milk.
Savory Cheese Chubbs: Reduce the condensed milk to one-third of a can and add 1/2 cup of grated sharp cheddar. These work brilliantly as a snack with soup or as a bread substitute at dinner.
Storage Tips
These store well, though they are honestly at their best on the day you make them.
- Room temperature: Store in an airtight container for up to 2 days
- Refrigerator: Keeps well for up to 4 days — reheat in a pan for 1 to 2 minutes per side or microwave for 20 seconds
- Freezer: Wrap individual chubbs in plastic wrap and freeze for up to 1 month. Thaw at room temperature or warm in a low oven at 150C for 10 minutes
Tips for Perfect Fluffy Milkman Chubbs Every Time
- Do not overmix the dough — stir only until everything just comes together to keep the texture tender
- Use fresh baking powder for the best rise — old baking powder gives flat, dense chubbs
- Room temperature egg mixes more evenly into the wet ingredients than a cold egg straight from the fridge
- Cook on medium heat if using a pan — high heat burns the outside before the center cooks through
- Let them rest after cooking — this lets the interior fully set for a clean tear
Frequently Asked Questions
Can I make Fluffy Milkman Chubbs without condensed milk?
You can substitute condensed milk with a mix of regular milk and honey or sugar, but the texture and flavor will shift noticeably. Condensed milk provides both sweetness and fat, which gives the chubbs their richness. It is the ingredient most worth keeping in this recipe.
Can I use all-purpose flour instead of wheat flour?
Yes, standard all-purpose flour works perfectly here. The recipe uses wheat flour, which is the same thing in most contexts. Wholemeal or whole wheat flour also works but produces a denser, slightly earthier chubb. For the fluffiest result, stick with plain all-purpose flour.
Why are my chubbs turning out flat instead of fluffy?
The most likely cause is old or inactive baking powder. Test yours by dropping a teaspoon into hot water — it should bubble immediately. Another reason is overmixing the dough, which overdevelops the gluten and prevents the chubbs from rising properly during cooking.
Can I make the dough ahead of time?
You can prepare the dough up to 24 hours ahead and store it covered in the refrigerator. Bring it back to room temperature for 15 minutes before shaping and cooking. Baking powder is most active when freshly mixed, so cooking sooner gives a better rise.
Which cooking method is better — baking or pan-cooking?
Both genuinely work well. Baking gives a softer, more uniform texture throughout the chubb. Pan-cooking creates a crisp golden exterior with a soft center. If you want a lighter, bread-roll style result, bake them. If you prefer something closer to a griddle cake, use the pan.
Can I double the recipe?
Absolutely. The recipe scales up easily. Just double every ingredient and work in batches if pan-cooking. If baking, use two trays and rotate them halfway through for even browning. The dough handles scaling well without any adjustments to technique.
Final Thoughts
The Fluffy Milkman Chubbs recipe is exactly the kind of thing your regular baking rotation needs. Simple ingredients, minimal cleanup, two cooking options, and a result that genuinely tastes like you put in more effort than you did.
Whether you serve them sweet with honey and butter or go savory with cheese, they adapt to whatever mood you’re in. That versatility is what makes them worth coming back to again and again. So go make a batch tonight. Eat them warm, share one or two if you feel generous, and then quietly make another batch the next day for yourself. You earned it.
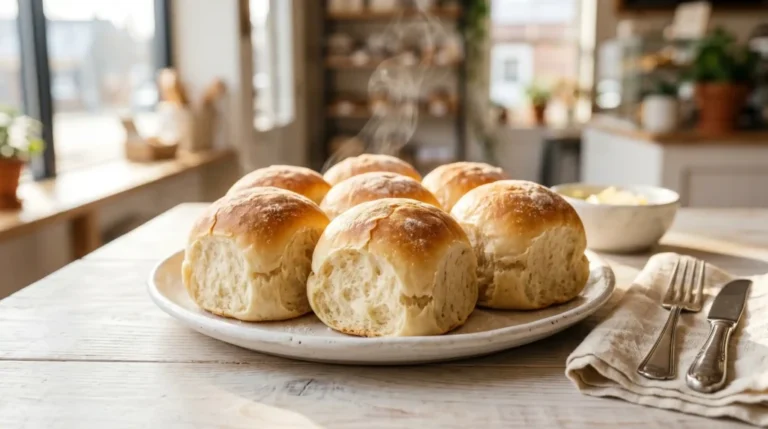
Fluffy Milkman Chubbs
Ingredients
Method
- Crack the egg into a medium mixing bowl and whisk lightly until combined. Add the condensed milk and melted butter, mixing until smooth.
- In a separate bowl, combine the wheat flour, baking powder, and salt. Stir until well mixed.
- Gradually add the dry ingredients to the wet mixture, stirring gently until combined. Avoid overmixing the dough.
- Divide the dough into 8 to 10 equal portions. Roll each into a smooth ball and press down slightly to form discs.
- For baking, preheat the oven to 180 degrees Celsius (350 degrees Fahrenheit). Line a baking tray with parchment paper and arrange the chubbs, leaving space between them. Bake for 15 to 20 minutes until golden.
- For pan-cooking, heat a non-stick skillet over medium heat and lightly grease it. Cook chubbs for 3 to 4 minutes on each side until golden brown.
- Let the chubbs rest for 3 to 5 minutes after cooking. Serve warm, optionally drizzled with honey or butter.