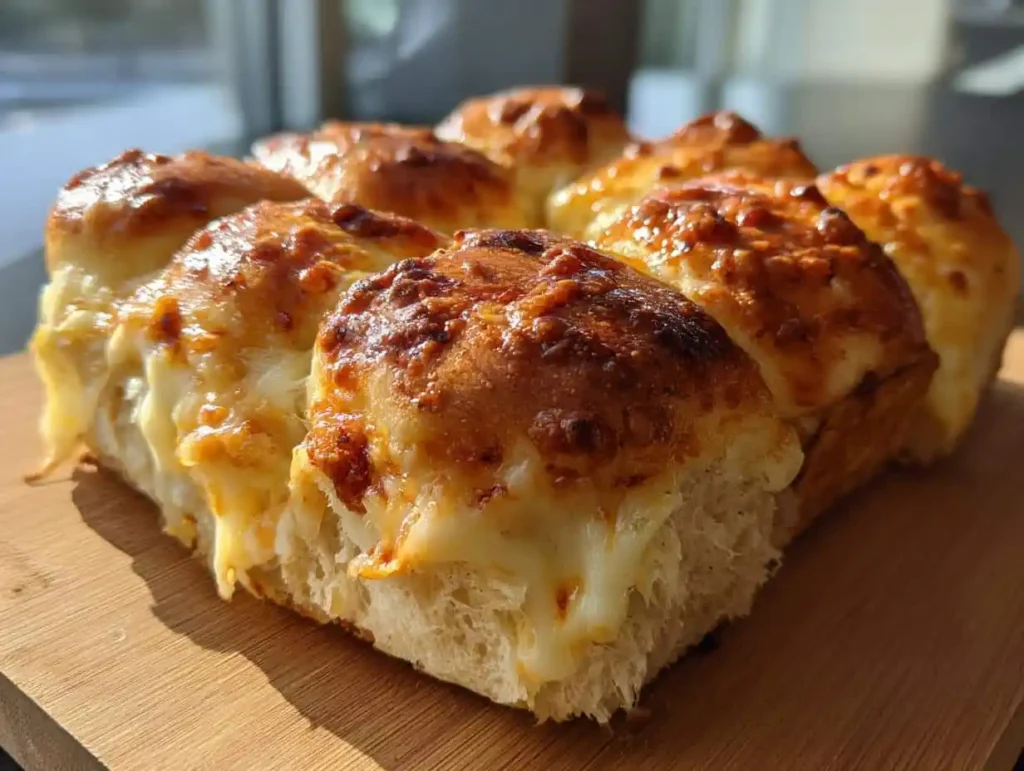
Picture warm rolls, stuffed with molten garlic-pizza cheese, pulling apart in long stretchy strands. That’s Garlic Pizza Dip Sliders, and they’re about to become your new party trick.
I first made these for a last-minute get-together when I had rolls, cheese, and one lonely head of garlic in the pantry. They vanished before I even sat down. That’s when I knew this recipe deserved a permanent spot in my rotation.
Servings: 12 sliders | Prep time: 20 minutes | Cook time: 55 minutes (includes roasting garlic) | Total time: 1 hour 15 minutes
Why Garlic Pizza Dip Sliders Work So Well
Have you ever wondered why roasted garlic tastes nothing like the raw stuff? Roasting mellows the sharp bite into something sweet, almost buttery. That transformation is exactly what makes these sliders taste so much richer than a basic cheese roll.
I’ve served these at tailgates, holiday parties, and one very casual Tuesday dinner because I simply wanted them. Every single time, someone asks how I got the filling so creamy and the tops so golden. That’s not an accident; it’s technique.
Here’s the honest truth: most slider recipes skip roasting the garlic and just toss in the raw stuff or a jar of pre-minced garlic. That shortcut costs you flavor. This recipe takes the extra thirty minutes because the payoff is genuinely worth it.
What You’ll Need for Garlic Pizza Dip Sliders
Gather these ingredients before you start roasting. Nothing here requires a specialty store trip, just solid pantry staples brought together with intention.
- 1 whole head garlic, top sliced off
- 2 tablespoons olive oil
- 8 ounces cream cheese, softened
- 1 1/4 cups shredded mozzarella cheese
- 1/2 cup grated parmesan cheese
- 1/3 cup marinara sauce
- 1 teaspoon Italian seasoning
- 1/4 teaspoon red pepper flakes (optional)
- 12 soft dinner rolls, connected in a tray
- 3 tablespoons unsalted butter, melted
IMO, the roasted garlic step separates a decent slider from a genuinely memorable one. Don’t skip it just to save time; that sweet, caramelized flavor can’t be faked with the jarred stuff.
How to Make Garlic Pizza Dip Sliders
This process breaks into four manageable stages. None of them are complicated, but the roasting step does need patience, so let’s walk through everything carefully.
Step 1: Roast the Garlic Until Sweet and Soft
Preheat your oven to 400°F. Slice about a quarter inch off the top of your garlic head, exposing the tops of the individual cloves. Drizzle olive oil generously over the cut surface, letting it seep down between the cloves.
Wrap the whole head tightly in aluminum foil and place it directly on the oven rack or a small baking sheet. Roast for about 35 to 40 minutes, until the cloves turn deeply golden and feel soft when pressed. Let it cool for ten minutes before handling, since fresh-roasted garlic holds heat longer than you’d expect.
Step 2: Build the Cheesy Garlic Filling
Once cooled, squeeze the roasted cloves directly out of their skins into a mixing bowl. Mash them with a fork until they turn into a smooth, spreadable paste. This step takes barely a minute but delivers massive flavor payoff.
Add the softened cream cheese, mozzarella, parmesan, marinara sauce, Italian seasoning, and red pepper flakes if you’re using them. Stir everything together until fully combined and creamy throughout. Taste it here and adjust the seasoning, since every batch of roasted garlic brings slightly different sweetness.
Step 3: Assemble the Sliders in the Tray
Lower your oven temperature to 375°F while you assemble. Keep the dinner rolls connected as one slab and slice them horizontally through the middle, creating a top half and a bottom half without fully separating individual rolls.
Spread the garlic cheese filling evenly across the bottom half, working it into every gap between rolls with a butter knife. Place the top half of the rolls back over the filling, pressing down gently so everything stays snug. Brush the tops generously with melted butter for that golden finish everyone fights over.
Step 4: Bake Until Golden and Bubbly
Slide the tray into your 375°F oven and bake for 18 to 20 minutes. You’re watching for a deep golden top and visible bubbling cheese peeking out from the sides of the rolls.
Pull the tray out once everything looks properly toasted and let it rest for two to three minutes. This short rest keeps the molten cheese from burning your fingers the second you reach in. Serve the sliders warm, straight from the tray, and watch how fast they disappear.
Tips for Perfect Garlic Pizza Dip Sliders
A few small adjustments separate a good batch from a legendary one. I picked these up through plenty of trial runs.
- Let the cream cheese soften fully before mixing; cold cream cheese leaves lumps that never quite smooth out.
- Use soft, connected rolls like Hawaiian or potato rolls, since they hold the filling better than crusty individual buns.
- Check at the fifteen-minute mark, because oven temperatures vary and overbaked tops turn hard instead of golden.
- Double the batch for bigger gatherings; these sliders disappear faster than most people expect.
Fun Variations Worth Trying
Once you’ve nailed the classic version, feel free to play around. This recipe handles substitutions well without losing its core appeal.
Fold in diced pepperoni for a classic pizza flavor that pairs beautifully with the roasted garlic base. Swap the marinara for pesto if you want a brighter, herby twist on the whole thing. Add cooked crumbled sausage for a heartier, more filling version perfect for game day.
Serving Suggestions
These sliders taste great solo, but a small bowl of warm marinara on the side turns them into an interactive dipping experience. A simple arugula salad with lemon and olive oil balances out the richness nicely. Honestly, though, they tend to disappear before anyone even thinks about sides.
Storing and Reheating Leftovers
Store leftover sliders wrapped tightly in foil in the fridge for up to three days. Reheat in a 350°F oven for 10 to 15 minutes until warmed through and gooey again. Skip the microwave if possible, since it leaves the tops soft instead of crisp.
Frequently Asked Questions
Can I skip roasting the garlic and use minced garlic instead? You can, but the flavor changes significantly. Raw or jarred minced garlic tastes sharper and lacks the sweet, caramelized depth that roasting brings, which is really the whole point of this recipe.
Can I make Garlic Pizza Dip Sliders ahead of time? Yes, partially. Roast the garlic and prepare the cheese filling up to a day ahead, storing them separately in the fridge. Assemble and bake the sliders fresh so they come out warm and properly gooey.
What type of rolls work best for this recipe? Soft, connected dinner rolls work best since they hold the filling and pull apart cleanly. Hawaiian rolls add a slight sweetness that pairs nicely with the savory garlic filling, though any soft roll variety works fine.
Can I add meat to these sliders? Absolutely. Diced pepperoni, cooked sausage, or crispy bacon bits all work well mixed directly into the cheese filling before assembly. Adjust the amount based on how hearty you want the final result.
Can I freeze leftover sliders? They’re best enjoyed fresh, but you can freeze fully cooled sliders wrapped tightly in foil for up to a month. Reheat directly from frozen in a 350°F oven until warmed through, though the texture softens slightly.
Final Thoughts on Garlic Pizza Dip Sliders
These sliders earn their spot at every gathering I host, and I think they’ll earn one at yours too. The combination of soft rolls, roasted garlic, and stretchy melted cheese creates something far better than any single ingredient could manage alone.
Give them a try this weekend, even if it’s just for yourself on a quiet night in. Trust me, you’ll be reaching for seconds and already planning your next batch before the tray even cools down.



